|
|
PBP Commentary |
Coming up we have a middleweight MMA rules bout between Kyros Mikos (ranked 0 p4p, 0 weight class) and Mark Lloyd (ranked 0 p4p, 0 weight class). Over to our ring announcer for the fighter introductions!
 |
|
 |
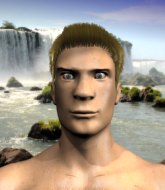
| 172 cm
22
187 lbs
0 - 0 - 0 |
|
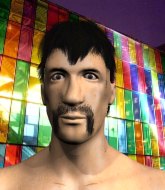
183 cm
21
185 lbs
1 - 0 - 0 |
BJJ Blue Belt
Brawler
Cuts easily |
|
Decent wrestler
Counter striker
Determined |
|
| |
|
Ladies and gentlemen. This fight is 3 rounds, in the middleweight division.
Introducing the fighter to my left, fighting out of the red corner.
With a record of
0 - 0 - 0, fighting out of Tokyo, Kyros Mikos!
And introducing the fighter to my right, fighting out of the blue corner.
With a record of
1 - 0 - 0, fighting out of Tokyo, Mark Lloyd!
The judges for this bout are Yukihiro Shimada, Hirohito Nitta and Yukihiro Yamamoto.

The bell rings for round one and we are underway!

Lloyd darts in and lands a nice takedown into half guard.
Lloyd is looking to advance position but Mikos won't allow it.
Mikos pushes Lloyd off looking to stand but Lloyd dives back in and keeps control.
Lloyd trying to mount his opponent but Mikos defends it.

It looks like we're going to have a standup here. Neither fighter is doing enough on the ground.
No luck for Lloyd with that takedown attempt.

Mikos gets to the clinch - let's see what his plan is here.
Mikos lands a hook that snaps the head of Lloyd backwards.
Mikos fails to land with a short punch on the inside.
Mikos doesn't land with the attempted body shot.

That's one minute gone in the round.
Lloyd jumps guard but his hands slip and he falls flat on his back. Well, he's made himself look a right mug there, as Mikos walks away with a smile on his face. Lloyd gets slowly back to his feet and shakes his head.
Lloyd scores with a nice takedown into half guard. Let's see what he's got on the ground.
Mikos makes his way to full guard. A much better position for Mikos.
Mikos has momentary wrist control but Lloyd slips an elbow through the middle.
Lloyd loading up with the ground and pound but he's missing more than he's landing in this flurry.
Mikos keeping moving, preventing Lloyd from controlling successfully.
Lloyd has the superior BJJ but he's also working some ground strikes into his gameplan.
Mikos is trying to stand up but he's not managed so far.
Mikos is breathing heavily.
Lloyd trying to control but Mikos is working from the bottom.
Mikos being controlled here, momentarily.
Mikos keeping moving, preventing Lloyd from controlling successfully.

That's two minutes gone in the round.
The referee has ruled that neither fighter is active enough on the ground and has stood them back up.
Lloyd shoots in for a takedown. "I don't think so" says Mikos as he avoids it easily.
Kyros Mikos has stuffed three takedown attempts in the round now. That's going to take a lot out of Mark Lloyd.
Mikos clinches up against the cage.
Mikos lands a hook to the body. It's hard to tell if that hurt Lloyd or not.
Mikos pushes Lloyd back against the cage and lands a hook to the side of the head.

Mikos breaks from the clinch.
Mikos is looking to take this fight into the clinch.
Mikos fails in his attempt to clinch.
Lloyd avoids the clinch attempt nicely.
Mikos moves in looking to clinch but Lloyd pushes him off.
Mikos could do with loosing a few pounds - he looks very soft around the mid section, to put it politely.
Mikos darts in and clinches Lloyd up against the cage.
Lloyd fails to pull the fight into his guard.

That's three minutes gone in the round.
Mikos escapes the clinch and we're back to striking.
Mikos tries to clinch up but Lloyd circles away and keeps his distance.
Lloyd slips a jab and a cross from Mikos.
Lloyd shoots in for a takedown and gets it. Oh and he's advanced to full mount straight away.
Mikos is desperately trying to get back to half guard.
Mikos is trying to get back to his feet but can't.
Lloyd cracks Mikos with a nasty head shot there - the crowd let out an audible gasp there, as the noise reverberated around the arena.

Lloyd has hold of Mikos's left arm, perhaps looking for a submission. The two fighters tussle over control of the isolated limb and Mikos manages to get his arm back to his side and away from danger.
The ref warns both fighters not to hold the cage as they work up against the meshing.
Mikos is trying to get to the cage to help him get back to his feet.
Mikos might be looking to lock onto one of his opponent's long limbs for a submission, whilst we're on the ground.
Mikos wants to hold on but Lloyd pushes him away.

That's four minutes gone in the round.
Lloyd working away from the top, dropping strikes.
Lloyd punching from mount but Mikos doing a good job of avoiding damage.
Lloyd tries to control but Mikos wriggling away.
Mikos tries to hold on but Lloyd postures up.
Mikos sneaks a leg back under and regains half guard and is working straight away to try and get back to guard. He hasn't managed just yet though.
Mikos wants to control the action here but instead Lloyd manages to pass to full mount!
Lloyd working Mikos over with strikes here.
Mikos tries to buck Lloyd off but he can't manage it.
Mikos defends a decent attempt at a guillotine from Lloyd.
The fighters are pressed up against the cage, both looking to find a bit of space to work.
Lloyd avoids the attempt from Mikos to control.
And thats the end of the round the fighters go back to their corners.
Mark Lloyd dominated that round.
The fighters get back to their feet, the hooter sounds and we're back to the action!

Mikos tries to clinch but Lloyd is having none of it.
Mikos fakes with an overhand right and moves in to clinch with Lloyd, pushing him back against the cage.
Mikos working on landing some head shots here - that one got through nicely.
A short right from Mikos.
Mikos misses with a hook from the clinch.
Mikos digs a right hand underneath Lloyd's ribcage. Lloyd let out a lung full of air as it connected.
Lloyd blocks a punch to the side of the head.
Mikos is pressed up against the cage. Lloyd has hold of a leg and is looking to drag Mikos down to the mat. Mikos avoids the attempt though and has circled away. We're back to striking at a distance.
Kyros Mikos seems to be the more aggressive standup fighter in this bout.
Mikos wants to clinch up but Lloyd keeps it at a distance.
A really sloppy takedown attempt there from Lloyd.
We've had a slow start to the round here - hopefully the action picks up.
Mikos will need to tighten up his combinations if he doesn't want to gas himself out, swinging at thin air.
Mikos tries to clinch up but Lloyd circles away and keeps his distance.
Both fighters are absolutely exhausted here.
Mikos tries to close the distance and clinch up against the cage but Lloyd paws at him with a jab and circles away.
That's one minute gone in the round.
Mikos tries to clinch but is not successful on this occasion.
Mikos moves in looking to clinch but Lloyd pushes him off.
Mikos tries to clinch but Lloyd moves out of range.
Mikos is looking to clinch but Lloyd is avoiding it.
Mikos is looking to clinch but Lloyd is avoiding it.
Mikos tries to clinch up but Lloyd circles away and keeps his distance.
Kyros Mikos is looking to throw some combinations by the looks of things.
Nice sprawl there from Mikos as Lloyd shoots in.
Kyros Mikos has stuffed three takedown attempts in the round now. That's going to take a lot out of Mark Lloyd.
Lloyd circles away from the clinch attempt.
Mikos tries to clinch up but Lloyd circles away and keeps his distance.
Mikos wants to clinch.
Mikos thuds a left hand into Lloyd's body.
Mikos tries to close the distance and clinch up against the cage but Lloyd paws at him with a jab and circles away.
That's two minutes gone in the round.
Mikos tries to clinch but is not successful on this occasion.
Kyros Mikos is looking to keep the fight on the feet at all costs.
Mikos wants to clinch.
Mikos tries to clinch up but Lloyd circles away and keeps his distance.
Lloyd misses with a takedown attempt - Mikos sprawls well and throws a nice strike on the way out which just misses.
Mikos closes the distance and presses his opponent up against the cage.
A short right from Mikos.
An uppercut to the body lands inside from Mikos.
Mikos scores with a nice hook to the head.
Mikos throws a head punch that misses.
Mikos makes some space for himself and lands an uppercut.
Mikos lands a hook to the side of the head.
Mikos lands a left hand that snaps the head of Lloyd backwards.
A quick uppercut on the inside from Mikos.
That's three minutes gone in the round.
Mikos lands a left hand.
Still in the clinch, Mikos scores with a nice short uppercut.
A short uppercut from Mikos.
Mikos breaks from the clinch.
Mikos throws a combination but comes up with nothing but fresh air.
Lloyd misses with a takedown attempt - Mikos sprawls well and throws a nice strike on the way out which just misses.
Mikos dips to his left and cracks Lloyd with an uppercut!
Lloyd keeps the fight on the outside.
Mikos tries to clinch up but Lloyd circles away and keeps his distance.
Lloyd avoids the clinch attempt nicely.
Mikos cracks Lloyd with a right hand to the side of the head.
Mikos wants to clinch up but Lloyd keeps it at a distance.
Mikos fails with an attempt to clinch.
Mikos looks to land a combination but Lloyd avoids it well.
That's four minutes gone in the round.
Lloyd changes levels and looks for a double leg takedown. Mikos tries to avoid it but Lloyd manages to keep hold of a leg and drag Mikos to the ground. Mikos escapes though and pops straight back up to his feet.
Mikos closes the distance and clinches.
Lloyd blocks a couple of punches on the inside.
Lloyd jumps guard but Mikos stands there with Lloyd around his waist. Lloyd gives up and drops back to his feet. We remain in the clinch.
Mikos lands on the inside with an uppercut.
Mikos throws a head punch that misses.
Mikos lands with a quick shot inside that doesn't really do much damage.
Lloyd is working for a takedown up against the cage. He can't get it on this occasion though.
Still in the clinch, Mikos scores with a nice short uppercut.
Mikos escapes the clinch and we're back to striking.
Lloyd avoids a punch combination nicely.
The crowd thankful this round is nearly over.
Mikos stuffs the takedown.
Mikos tries to clinch but Lloyd moves out of range.
And thats the end of the round the fighters go back to their corners.
Kyros Mikos dominated that second round.
The minute break is over - no more time for sponges and pep talks - back to the action! Let's get this one finished - here comes the final round!

Mikos fails with an attempt to clinch.
Mikos tries to close the distance and clinch up but Lloyd swats him away and circles back towards the center.
Lloyd feints and as Mikos raises his hands in defense, Lloyd changes levels and drives through with a takedown into guard.
Mikos wants to stand but Lloyd is controlling the position.
Mikos keeping full guard, as Lloyd tries to pass.
Mikos wants to stand and escape but Lloyd is having none of it.
Lloyd trying to control the position from guard on top but Mikos is wriggling around, looking for whatever he can.

Mikos wriggles free and stands up.
Mikos fails in his attempt to clinch.
Lloyd fails to land the takedown.
Both fighters are breathing heavily.
That's one minute gone in the round.
Mikos tries to clinch but Lloyd is having none of it.
Mikos tries to clinch there but Lloyd circles away.
Lloyd circles away from the clinch attempt.
Mikos throws a wild combination but nothing lands.
A combination from Mikos does no damage.
Lloyd shoots in for a takedown! He's got it and he's managed to land in full mount! That's better than Lloyd was expecting from the takedown attempt, I'm sure!
Mikos can't escape the position.
You get the feeling that Mikos really doesn't like being in this position too much.
Mikos is in all sorts of trouble here.
Mikos is not a happy chappy
he wants out of there.
Lloyd scoring with strikes but Mikos is staying in there.
Mikos is wriggling around trying to escape.
That's two minutes gone in the round.
Mikos sneaks a leg under to get to half guard.
Lloyd wants to work for an arm triangle but Mikos is really keeping half guard well and defending the submission attempt.
Mikos tries to kick Lloyd off but Lloyd keeps his base steady and stays in half guard.
Lloyd is trying a forearm choke
I don't think that's going to do much at this level of the game.
Lloyd takes advantage of the dominant position to land a couple of big hammer fists.
Lloyd is trying to work for a kimura. He's got his hands clasped together - this could be trouble! No, Mikos has managed to free his arm - good work.
Mikos kicks Lloyd off and gets back to his feet.
That's three minutes gone in the round.
Mikos throws a series of punches but Lloyd moves out of range.
Mikos is looking to clinch but Lloyd is avoiding it.
Mikos throws a right and a left that Lloyd avoids nicely.
Mikos fails in his attempt to clinch.
Lloyd decides to change it up a bit and drives through with a nice takedown into half guard.
Lloyd stops Mikos from getting back to his feet.
Lloyd wants to take a breather but Mikos is having none of it.
Mikos manages to escape and get back to his feet!
Mikos misses with a few strikes there.
Mikos throws a series of strikes that have Lloyd backpedaling.
That's four minutes gone in the round.
Mikos doesn't manage to clinch there - Lloyd circles away.
Lloyd shoots in for a takedown. "I don't think so" says Mikos as he avoids it easily.
Mikos tries to clinch there but Lloyd circles away.
Mikos lands a glancing blow to the side of Lloyd's head.
Mikos throws a monster uppercut resembling something out of street fighter but it doesn't land.
Mikos tries to clinch but Lloyd is having none of it.
Lloyd circles away from the clinch attempt.
Lloyd shoots in for a takedown and gets it. Oh and he's advanced to full mount straight away.
Lloyd with good strikes from the mount here!
Lloyd with a couple of short strikes.
Lloyd lands a big elbow.
Mikos working to try and regain half guard.
Lloyd looking for an armbar but decides to keep the dominant position instead.
And that's the end of the fight!
Mark Lloyd comfortably won the final round on my scorecard.
I think Lloyd has won this one but let's see whether the judges agree with me. Over to the ring announcer for the scorecards.
Ladies and gentlemen, after 3 rounds of action, we go to the scorecards for a decision.
Judge Yukihiro Shimada scores the fight 28:29
Judge Hirohito Nitta scores the fight 28:29
Judge Yukihiro Yamamoto scores the fight 28:29
In favor of your winner, by unanimous decision... Mark Lloyd!
|
|
|
|
|
|
|
|
|
|
|
|
|
|
|
|
|
|
|
|
|
|
|
| S |
C
A |
G |
S |
C
B |
G |
|
S |
C |
G |
|
energy
A | B |
|
hype
A | B |
|
pop
A | B |
|
mgr
A | B |
|
FIGHT
RATING
45% |
|
|
|
|
|
|
