|
|
PBP Commentary |
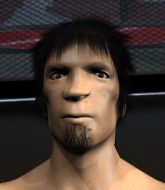
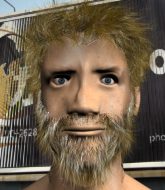
Coming up we have a heavyweight MMA rules bout between Leonard Burnside (ranked 0 p4p, 0 weight class) and Rod Bayer (ranked 0 p4p, 0 weight class). Rod Bayer has the power to score a knockout today if he connects clean with Leonard Burnside's chin.
 |
|
 |
| 190 cm
20
265 lbs
0 - 0 - 0 |
|
200 cm
22
266 lbs
0 - 1 - 0 |
BJJ White Belt
Basic striking
Prefers ground |
|
BJJ White Belt
Decent boxing
Solid chin |
|
| |
|
Ladies and gentlemen. This fight is 3 rounds, in the heavyweight division.
Introducing the fighter to my left, fighting out of the red corner.
With a record of
0 - 0 - 0, fighting out of London, Leonard Burnside!
And introducing the fighter to my right, fighting out of the blue corner.
With a record of
0 - 1 - 0, fighting out of London, Rod Bayer!
The judges for this bout are Andrew Berry, Daniel Bishop and James Ackerman.

The bell rings for round one and we are underway!
Burnside closes this distance looking for a takedown but Bayer circles away.

Bayer tries to keep at a distance but Burnside has taken the fight into the clinch.
A head punch on the inside from Burnside fails to land.

Bayer turns his back and goes for a hip toss. It's a bit messy but it gets the job done and Bayer manages to end up in side control.
Burnside tries to escape but Bayer is in control.
The fighters are pressed up against the cage, both looking to find a bit of space to work.
Burnside tries to buck Bayer off but Bayer is having none of it.
You can see the frustration on Burnside's face, being in this tough position on the bottom.
Burnside gets back to half guard.

Bayer decides to return to a standing position.
Bayer shoots in but Burnside avoids the takedown attempt easily.
Burnside shoots in for a takedown. "Ole!" shouts Bayer as he jumps to the side.
Burnside is looking to clinch.

That's one minute gone in the round.
Nice sprawl there from Bayer as Burnside shoots in.
That's three failed takedown attempts in the round for Leonard Burnside. That's going to take a lot out of him.
Bayer connects with a crisp jab.
Burnside forces Bayer back against the cage and clinches.
Burnside lands punches inside but they're not really causing much damage.
Burnside tries a shoulder strike but it doesn't do any damage.
Bayer blocks an uppercut.
Burnside tries a shoulder strike but it doesn't do any damage.
Burnside fails to land with a short punch on the inside.
Burnside jumps guard but Bayer stands there with Burnside around his waist. Burnside gives up and drops back to his feet. We remain in the clinch.
Burnside throws a punch but it's blocked by Bayer.
Bayer blocking some punches.
Burnside misses with the head strike.
Burnside wants to stall.
Burnside throws a head punch that misses.
Burnside misses with a hook from the clinch.
Burnside throws a head punch that misses.
Burnside trying to stall but Bayer improves his position.
Burnside throws a blind hook that connects with the side of Bayers head.
Burnside misses with some punches.
Bayer can't get the takedown.
Burnside fails to land with a short punch on the inside.

That's two minutes gone in the round.
Bayer is working for a takedown up against the cage. He can't get it on this occasion though.
Burnside gets double underhooks to prevent a takedown attempt from Bayer.
Burnside misses with the head strike.
Bayer blocks a punch to the side of the head.
Burnside throws a head punch that misses.
Bayer blocks a couple of punches on the inside.
Burnside fails to land with a short punch on the inside.
Burnside throws a punch but it's blocked by Bayer.
Burnside misses with a punch on the inside.
Burnside fails to land with a short punch on the inside.
Burnside tries to pull guard but Bayer won't allow it.
Bayer blocks an uppercut.
Burnside working aggressively here.
Bayer blocks a couple of punches on the inside.
Burnside lands an uppercut.
Bayer tries for a takedown. No joy.
Bayer tries to jump guard but he falls flat on his backside. Burnside smiles and moves away.
Burnside slips a jab and a cross from Bayer.
Burnside doesn't manage to clinch there - Bayer circles away.
Bayer looking for a takedown here - he's got it.

That's three minutes gone in the round.
Bayer stopping the sweep attempt from Burnside.
Burnside wants to control the position but Bayer says "no thanks buddy" and passes to half guard.
Burnside is trying to escape back to his feet but Bayer uses the scramble to pass into side control.
Burnside looks to move to half guard but instead Bayer has passed into mount! Damn!
Burnside really trying hard to get back to half guard here.
The fighters are starting to perspire pretty heavily.

That's four minutes gone in the round.
The crowd are starting to boo a lack of action.
Bayer looking to control but Burnside is working nicely, looking to advance position himself.
Bayer looks gassed!
Burnside is desperately trying to get back to half guard.
Burnside knows he needs to get back to his feet asap. He's simply no match for Bayer on the ground.
Burnside is working hard here to advance position.
And thats the end of the round the fighters go back to their corners.
Rod Bayer dominated that round.
Well, the break between rounds is over. Let's get back to the scrappin!

Burnside moves in looking to clinch but Bayer pushes him off.
Bayer closes this distance looking for a takedown but Burnside circles away.
Bayer keeps the fight standing with a nice sprawl.
Burnside with a lazy takedown attempt
and Bayer counters with a quick right hand to the jaw.
Bayer avoids the clinch attempt nicely.
Burnside moves out of range as Bayer strikes.
Burnside could do with loosing a few pounds - he looks very soft around the mid section, to put it politely.
Bayer lands with an uppercut that bounces Burnside off the cage and back into rage.

Burnside is rocked!
Burnside will have to do better than that with his takedown attempts.
Oh Burnside is still all over the place! His legs are completely gone! Will he be able to recover?!!
That's three failed takedown attempts in the round for Leonard Burnside. That's going to take a lot out of him.
Burnside shoots in and drives through. Bayer sprawls well.
Burnside seems to have got his legs back now.
Burnside with a poor takedown
and Bayer counters with a driving takedown into guard. Nice work there by Bayer.
Bayer is intent on slowing down the pace of the fight, simply looking to control.
Bayer content to strike from guard, landing some decent shots.
Bayer gets to his feet - Burnside follows without any prompting.
A really sloppy takedown attempt there from Bayer.
Burnside shoots in but doesn't get the takedown
and Bayer decides to take the opportunity to score a takedown. He's landed in Burnside's guard.
Both fighters are absolutely exhausted here.
That's one minute gone in the round.
Burnside scores with a nice shot.
Bayer decides he's had enough of playing guard and decides to stand. Come on Burnside, up you get!
Bayer closes the distance and clinches up, looking for a takedown. He shifts his weight and gets a nice trip into half guard.
Burnside throws a strike from the bottom that misses.
Burnside is trying to stand up here but Bayer is controlling him well.
Burnside on his back here. We all know that wrestlers don't like being on their back so let's see if Burnside tries to get out of the position.
Bayer looks over to his corner - he wants some instructions but his corner are not responding.
Burnside wants to get back to full guard.
Burnside trying to control from the bottom.
The referee walks around the fighters to get a better view of the action. Bayer lands a nice short elbow.
Burnside wants to control but Bayer is keeping busy and won't allow it.
That's two minutes gone in the round.
Bayer decides he's had enough of the ground and stands up.
Bayer misses with an uppercut.
Bayer keeps the fight standing with a nice sprawl.
Burnside keeps the fight on the outside.
Burnside fails with a rather predictable takedown attempt.
Burnside has his takedown stuffed
and Bayer counters with a shoot takedown into half guard.
Fantastic stuff here - a very entertaining period of action, which has drawn cheers from the crowd.
Burnside is trying to control but Bayer manages to pass to mount!
Burnside is desperately trying to get back to half guard.
Burnside tries to lock up and control but Bayer gives him a forearm to the face and pushes him away.
That's three minutes gone in the round.
Bayer can't quite control the action as he would like just now, as Burnside is looking to escape.
Bayer controlling the pace for now.
Burnside is looking to get to half guard.
You get the feeling that Burnside really doesn't like being in this position too much.
The ref warns both fighters not to hold the cage as they work up against the meshing.
Bayer can't quite control the action as he would like just now, as Burnside is looking to escape.
Burnside tries to get back to half guard but can't.
Rod Bayer has got the better of the ground game so far.
That's four minutes gone in the round.
The crowd are hurling abuse towards the fighters... You can hardly blame them though because there isn't a lot going on in the fight.
Burnside sneaks a leg under to get to half guard.
Burnside wants to control the action here but instead Bayer manages to pass to full mount!
Burnside is wriggling around trying to escape.
As the round comes to an end the crowd are showing their appreciation for a great round of action.
Burnside tries to hold on but Bayer postures up.
Bayer trying to control but Burnside is having none of it.
And thats the end of the round the fighters go back to their corners.
Rod Bayer showed his class in that round. I'd imagine he'll take it on all the scorecards.
The referee calls time. The cornermen exit stage left and we're back to business. This is the final round!

Burnside tries to clinch there but Bayer circles away.
Bayer shoots in for a takedown but Burnside shows good takedown defense.
Burnside will have to do better than that with his takedown attempts.
Burnside throws a looping left and ducks down for a takedown. He's got his arms around Bayer's waist but Bayer gets an underhook and avoids the takedown by throwing Burnside off to one side.
Burnside looks frusrated there after his takedown attempt is stuffed easily.
That's three failed takedown attempts in the round for Leonard Burnside. That's going to take a lot out of him.
Bayer keeps the fight on the outside.
Burnside fails with the takedown.
Burnside fakes with an overhand right and moves in to clinch with Bayer, pushing him back against the cage.
Burnside tries a shoulder strike but it doesn't do any damage.
Burnside misses with a short punch on the inside.
Bayer tries for a takedown. No joy.
Bayer drops down for a takedown but doesn't get it.
Burnside tries a shoulder strike but it doesn't do any damage.
Both fighters are breathing heavily.
Burnside throws a head punch that misses.
Bayer prevents the takedown attempt.
Bayer blocks an uppercut.
That's one minute gone in the round.
Burnside working aggressively here.
Burnside misses with some punches.
Burnside keeps control of Bayer as he tries to wriggle out of the double underhooks.
Bayer goes for a takedown attempt but Burnside pushes him away and we're back to fighting at a distance.
Burnside looks for a takedown here. Will he get it? Bayer is fending him off so far but Burnside persists. Nope, Bayer circles away and we're back to standing.
A really sloppy takedown attempt there from Burnside.
Burnside gets a clinch.
Burnside wants to stall.
Burnside fails to pull guard.
Burnside misses with some punches.
Burnside misses with a hook from the clinch.
Burnside has a body lock and is looking for a takedown. Bayer is bouncing around trying to prevent the takedown and somehow he has indeed managed to stay on his feet.
Bayer drops down looking for an ankle pick but Burnside pulls his leg out and moves away.
Burnside gets to the clinch - let's see what his plan is here.
Bayer blocks an uppercut.
Burnside lands a hook to the side of the head.
Burnside misses with the head strike.
That's two minutes gone in the round.
Still in the clinch, Burnside scores with a nice short uppercut.
An uppercut on the inside fails to land for Burnside.
Burnside misses with the head strike.
Burnside throws a head punch that misses.
Bayer blocks an uppercut.
Burnside has a couple of punches blocked by Bayer.
Burnside misses with the head strike.
Burnside swings away with an uppercut that misses.
A head punch blocked on the inside by Bayer.
Burnside misses with a hook from the clinch.
Bayer blocks an uppercut.
Burnside swings away with an uppercut that misses.
Burnside pulls guard successfully.
Bayer stopping the sweep attempt from Burnside.
Burnside is trying to hold Bayer in close to prevent damage but Bayer has managed to pass into half guard.
Bayer decides he's had enough of the ground and stands up.
That's three minutes gone in the round.
Burnside shoots in and drives through. Bayer sprawls well.
A jab from Bayer misses.
Burnside shoots in for a takedown. "Ole!" shouts Bayer as he jumps to the side.
Bayer works his jab well there, keeping his opponent at a distance.
Burnside slips a jab from Bayer.
Burnside has taken the fight to the clinch.
An uppercut on the inside fails to land for Burnside.
Burnside misses with a punch on the inside.
Burnside fails to land with a short punch on the inside.
Bayer wants the takedown. Burnside is fighting it off but Bayer persists and manages to bring the fight to the ground, ending up in Burnside's guard against the cage.
Burnside is trying to control the position but Bayer postures up.
Burnside tries to land a sweep but no joy.
Burnside controls Bayer momentarily but Bayer frees himself.
That's four minutes gone in the round.
Bayer stands up from Burnside's guard - Bayer perhaps looking for a knockout.
A choreographed right hand from Bayer misses the target.
Nice takedown defense from Bayer. No joy for Burnside on that attempt.
Burnside is looking to take this fight into the clinch.
Nice sprawl there from Bayer as Burnside shoots in.
Bayer swings wildly with a right hand that was never going to find it's target.
Bayer throws a right hand that Burnside ducks under and follows up with a left that Burnside also avoids with ease.
Burnside misses with a takedown
and Bayer counters with a nice double leg into half guard.
We've seen a great period of action over the last minute or so - credit to both fighters for leaving it all in the cage!
Bayer stands up and beckons Burnside to join him on the feet.
Burnside tries for a takedown but Bayer circles away easily
and Bayer counters with a nice shoot takedown that brings the fighters to the ground.
Leonard Burnside has stepped it up - he knows he needs a finish here!
The crowd applaud the fighters efforts here as the round comes to an end.
Burnside is looking to stand back up but Bayer counters by passing into half guard. Oops... bit sloppy there by Burnside.
And that's the end of the fight!
Rod Bayer comfortably won the final round on my scorecard.
I've got Bayer winning every round here. Surely the decision will go his way and he'll pick up a well deserved decision victory. Over to the ring announcer for the scorecards.
Ladies and gentlemen, after 3 rounds of action, we go to the scorecards for a decision.
Judge Andrew Berry scores the fight 27:30
Judge Daniel Bishop scores the fight 27:30
Judge James Ackerman scores the fight 27:30
In favor of your winner, by unanimous decision... Rod Bayer!
|
|
|
|
|
|
|
|
|
|
|
|
|
|
|
|
|
|
|
|
|
|
|
| S |
C
A |
G |
S |
C
B |
G |
|
S |
C |
G |
|
energy
A | B |
|
hype
A | B |
|
pop
A | B |
|
mgr
A | B |
|
FIGHT
RATING
89% |
|
|
|
|
|
|
