|
|
PBP Commentary |
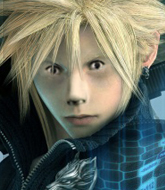
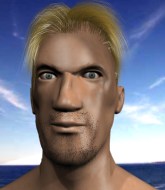
Coming up we have a heavyweight MMA rules bout between Cloud Strife (ranked 0 p4p, 0 weight class) and Francis Hooper (ranked 0 p4p, 0 weight class). I'm sure you'll be fascinated to know that I was talking to some pointless Z list celebrity before the fight and he thought that Francis Hooper was going to win. Let's see if he was right.
 |
|
 |
| 195 cm
25
255 lbs
8 - 1 - 0 |
|
195 cm
25
273 lbs
4 - 2 - 0 |
Decent wrestler
Solid boxing
Very strong |
|
BJJ White Belt
Excellent MT
Granite chin |
|
| |
|
Ladies and gentlemen. This fight is 5 rounds, for the heavyweight championship of the world!
Introducing the champion to my left, fighting out of the red corner.
With a record of
8 - 1 - 0, fighting out of The Island, Cloud Strife!
And introducing the challenger to my right, fighting out of the blue corner.
With a record of
4 - 2 - 0, fighting out of The Island, Francis Hooper!
The judges for this bout are Bart Greer, Peter Branson and Winston Alpacca.

The bell rings for round one and we are underway!
Hooper lands a body shot.
Hooper swings and misses with a hook to the body.
Hooper misses the body punch
letting Strife counter with a right hand.
Hooper swings for the body but Strife moves out of range.
Strife is looking to counter with a shot to the body.
Hooper throws the left hand but Strife avoids the punch easily.
Nice shot lands for Hooper.
Hooper takes a swing at Strife's ribcage but misses.
Hooper lands a body shot.
Strife bobs and weaves and unloads with a good uppercut.
Francis Hooper seems to be the more aggressive standup fighter in this bout.
Strife throws out a powerful jab.
Strife dodges the punch combination from Hooper.
Hooper takes one to the side of the head.
Wooooo! Give it up for these two warriors! They are putting on a show!
Strife connects with a looping left hand that seems like it dazed Hooper momentarily.
Strife connects with a single shot there.
Hooper lands a right hook to the body.
Strife throws a jab but it's blocked by Hooper.

That's one minute gone in the round.
Hooper throws a shot from downtown. Strife moves away and avoids it.
Hooper is throwing a lot of body shots here, looking to wear down Strife rather than just go for the knockout.
Hooper lunges at Strife with a hook that half lands and is half blocked by Strife's hand.
Strife seems to be moving with more speed, compared to his last bout. He must have been working on that in the gym.
Hooper goes to the watering hole and comes back with a big thumbs up from the judges as he scores a three punch combo.
Hooper has been spending a lot of time sparring his boxing in the run up to the fight, trying to sharpen up those hands and look for a knockout.
Strife lands an overhand right.

Strife closes the distance and pushes Hooper back into the cage.
Hooper misses with some punches.
Hooper blocks an uppercut.
Hooper scores with a shoulder strike.

Hooper manages to break the clinch.
Jab from Strife.
Hooper pushes forward with a 1-2 combination that forces Strife back to the cage. Hooper follows up with a solid lead hook to the liver.
This has been an exciting period of action!
Hooper throws out a loose jab but Strife uses good head movement to avoid it.
Decent striking displayed by Strife there.
Hooper takes a swing at Strife's ribcage but misses.
Strife is looking to counter with a shot to the body.
Strife scores with a nice strike.
Strife misses with a two punch combination.

That's two minutes gone in the round.
Strife displays some good footwork, moving neatly out of range as Hooper throws out the jab.
Hooper misses the shot to the body.
Strife is really head hunting here, hardly looking to strike to the body at all.
Hooper just misses with a punch to the body.
Hooper throws a right hand that Strife ducks under and follows up with a left that Strife also avoids with ease.
Hooper swings and misses with a hook to the body.
Hooper swings for the body but Strife moves out of range.
Hooper lands a nice shot that snaps Strife's head back.
Strife scores with a nice right hand.
Strife misses with a few strikes there.
Hooper takes a body punch but keeps moving.
Hooper looks winded!
Strife dips down and scores with a jab to the body.
Strife scores with a reasonable looking shot to the body. Hooper doesn't seem bothered though.
Hooper has his head snapped back a nice jab. A little nod from Hooper there as he acknowledges the shot.
Hooper takes a shot right to the liver - Bas would have been proud of that punch.
Strife darts in and out, connecting with a jab.

That's three minutes gone in the round.
Hooper thows a left - swing and a miss!
Strife swung with a counter punch to the body but it didn't connect.
Strife drives through and clinches with Hooper against the cage.
Strife throws a blind hook that connects with the side of Hoopers head.
Strife lands a shoulder strike that jolts his opponent's head backwards.
A short right hand to the side of the head by Strife.
Strife tried to land a shot to the body but connects with Hooper's elbow.
Hooper goes for a body shot but it's blocked.
A short right from Strife.
Strife presses Hooper against the cage and delivers a mid-strength body shot.
A shot in the inside from Strife.
Strife lands a hook to the body. It's hard to tell if that hurt Hooper or not.
Strife goes for a body shot but it's blocked.
Strife makes some space for himself and lands an uppercut.
A short right hand to the side of the head by Strife.
Wooooo! Give it up for these two warriors! They are putting on a show!
Strife lands a body shot.
Strife lands with a right to the head.
A shot in the inside from Strife.
A head punch blocked on the inside by Hooper.

That's four minutes gone in the round.
Strife lands with a short punch from the clinch.
Strife lands punches inside but they're not really causing much damage.
Strife digs a right hand underneath Hooper's ribcage. Hooper let out a lung full of air as it connected.
Strife throws a punch but it's blocked by Hooper.
With the fighters clinched against the cage, Strife creates a bit of distance for himself and scores with a nice uppercut.
A nice right hand lands inside from Strife.

Hooper is rocked!
A left hand lands to the body for Strife.
Hooper is still on wobbly legs! Can Strife finish him?
Strife cracks Hooper with a nice body shot.
Hooper seems to have recovered his senses.
Strife lands with a short shot to the head.
Strife throws a hook to the body. More of an arm punch but it's all scoring with the judges.
Strife lands with a left to the head.
Strife lands a body shot in the clinch.
Strife lands with a left to the head.
Hooper prevents a body shot from Strife.
Strife lands a hook that snaps the head of Hooper backwards.
As the round comes to an end the crowd are showing their appreciation for a great round of action.
Strife cracks Hooper with a nice body shot.
A hook to the body from Strife.
A body shot lands from Strife.
Strife digs a right hand underneath Hooper's ribcage. Hooper let out a lung full of air as it connected.
And thats the end of the round the fighters go back to their corners.
Cloud Strife dominated that round.
That's time! Strife's corner gives him a slap on the ass as he gets ready to fight.

Hooper walks right into a perfectly timed right hook and goes down hard! He's out cold! The ref cradles Hooper limp body while Strife jumps on to the cage and waves to the roaring crowd. Wow that was just a brutal knockout!
Ladies and gentlemen, after 0:05 of round 2, we have a winner by way of KO (Punch). Cloud Strife!
Cloud Strife retains his heavyweight title!
|
|
|
|
|
|
|
|
|
|
|
|
|
|
|
|
|
|
|
|
|
|
|
| S |
C
A |
G |
S |
C
B |
G |
|
S |
C |
G |
|
energy
A | B |
|
hype
A | B |
|
pop
A | B |
|
mgr
A | B |
|
FIGHT
RATING
66% |
|
|
|
|
|
|

