|
|
PBP Commentary |
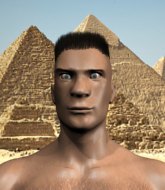
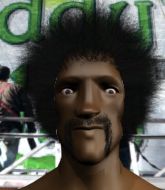
Coming up we have a light heavyweight MMA rules bout between Dominick Halo (ranked 0 p4p, 0 weight class) and Thorn Eat Death (ranked 0 p4p, 0 weight class). Over to our ring announcer for the fighter introductions!
 |
|
 |
| 189 cm
25
215 lbs
2 - 2 - 0 |
|
194 cm
25
220 lbs
1 - 0 - 0 |
Decent wrestler
Brawler
Intelligent |
|
Good wrestler
Counter fighter
Solid chin |
|
| |
|
Ladies and gentlemen. This fight is 3 rounds, in the light heavyweight division.
Introducing the fighter to my left, fighting out of the red corner.
With a record of
2 - 2 - 0, fighting out of The Island, Dominick Halo!
And introducing the fighter to my right, fighting out of the blue corner.
With a record of
1 - 0 - 0, fighting out of The Island, Thorn Eat Death!
The judges for this bout are Sandra Marshall, Daniel Franklin and David Hoff.

The bell rings for round one and we are underway!

Halo decides to change it up a bit and drives through with a nice takedown into half guard.
Halo sitting in half guard, looking to land shots. Eat Death defending well though.
Halo trying to control the pace.
Eat Death wants to get back to his feet.
Halo lands a big shot. The thud that echoes around the arena is like music to the fans' ears.
We get told so often about how wrestlers don't like to be on their backs. Let's see if Eat Death can do anything to dispel that myth.
Eat Death looks like he's trying to stand up.
The referee walks around the fighters to get a better view of the action. Halo lands a nice short elbow.
We've had a slow start to the round here - hopefully the action picks up.
Halo keeping composed on the top, looking to control the action.
Halo seems to have a rather negative gameplan on the ground. He seems keen to just score the takedown and hold down Eat Death for as long as he can get away with.
Halo sitting in half guard, looking to land shots. Eat Death defending well though.

That's one minute gone in the round.
Eat Death is trying to stand up here but Halo is controlling him well.
Halo scores with a couple of good hammerfists.
Halo throwing shots but they're hitting the canvas more than the man.
Halo tries to pass to full mount but Eat Death defends it.
Halo prevents Eat Death from standing back up.
Eat Death really doesn't want to stay on the ground with Halo. If he can't get it back to his feet, it's only a matter of time before he'll be tapping out.
Halo slips a nice elbow through Eat Death's hands, connecting with Eat Death's forehead.
Halo takes advantage of the dominant position to land a couple of big hammer fists.
Eat Death looks like he's trying to stand up.

That's two minutes gone in the round.
Halo is trying to control. Eat Death wants to improve his position but can't escape this time.

The referee has stepped in and called for a break in the action. We'll restart on the feet.
Halo shoots in for a double leg but Eat Death sprawls well. That's going to sap some energy.
Eat Death tries to clinch there but Halo circles away.
Eat Death scores with a one two! Halo had his feet all tangled up there and couldn't avoid the strikes.
Halo misses with a body shot. Nice footwork from Eat Death.
Eat Death misses with a straight left.
Eat Death tries to land with a swinging hook to the body but Halo was well out of range. Poor timing from Eat Death.
A slow jab from Halo misses its intended target.
Thorn Eat Death is looking to keep the fight on the feet at all costs.
Halo throws a hook to the body but it doesn't connect.
Halo takes a really solid shot there but just smiles back and shrugs his shoulders.

That's three minutes gone in the round.
Halo digs a good body shot into Eat Death's ribs.
Halo fails with a takedown attempt from distance.
Eat Death scores with a three punch combo!
Halo throws a hard body shot but it just misses.
We've been informed that Eat Death has been working hard on his conditioning in the buildup to the fight.
Halo shoots in looking for a takedown. Eat Death tries to sprawl out of it but Halo keeps driving through. The fighters are pinned against the cage. Eat Death manages to get underhooks and after a bit of a struggle, circles away and we're back to standing.
That's three failed takedown attempts in the round for Dominick Halo. That's going to take a lot out of him.

Eat Death forces Halo back against the cage and clinches.
Eat Death tries a body shot but Halo blocks it.
Halo doesn't land with the attempted body shot.

That's four minutes gone in the round.
Eat Death swings away with an uppercut that misses.
Halo is looking for a takedown up against the cage. Eat Death gets underhooks though and prevents the takedown attempt.
Halo blocks an uppercut.
Eat Death lands a shoulder strike that jolts his opponent's head backwards.
Eat Death scores with a shot to the side of Halo's head.
Halo tries to work over Eat Death's body with a swooping hook but it only glances the target.
Halo swings away with an uppercut that misses.
Halo has a couple of punches blocked by Eat Death.
Fantastic stuff here - a very entertaining period of action, which has drawn cheers from the crowd.
Halo tries to work over Eat Death's body with a swooping hook but it only glances the target.
Eat Death misses with a short punch on the inside.
Eat Death misses with some punches.
Halo lands a nice uppercut.
Eat Death misses with some punches.
Halo tries to throw a body punch but Eat Death avoids it by throwing Halo back against the cage.
Halo is looking to take this one to the mat.
Halo has a couple of punches blocked by Eat Death.
Eat Death misses with a shot to the kidneys.
Eat Death works for underhooks and lands a body shot in the process.
Halo is breathing heavily.
Eat Death holding his opponent close, against the cage.
And thats the end of the round the fighters go back to their corners.
A close round but Thorn Eat Death will probably get the nod.
That's time! Back to the action!

Halo swings and misses with a hook to the body.
Eat Death throws a body shot but no joy.
Eat Death dodges the punch combination from Halo.

Eat Death lands a jab followed by a vicious hook that sends Halo sprawling to the canvas. Eat Death follows him down, looking for the kill. Can Halo hang on?

It looks like Dominick Halo has been cut.
Eat Death seems to have lost interest with the ground game and is thinking about standing back up.
Halo is looking to improve his position.
Halo manages to get to full guard.
That's one minute gone in the round.
Eat Death is looking to stand up but Halo won't let him.
Halo is working the butterfly guard. He manages to land a nice scissor sweep and is now in half guard on the top. Nice move.

Halo thows a wild elbow that connects with the canvas.
Halo scoring with strikes to the body and head.
Halo lands with a punch from half guard.
Eat Death pushes Halo off looking to stand but Halo dives back in and keeps control.
That's two minutes gone in the round.
Halo slips a nice elbow through Eat Death's hands, connecting with Eat Death's forehead.
Eat Death looks like he's trying to stand up.
Halo throwing shots but Eat Death is blocking nicely.

Halo is trying to work for a kimura. This could be trouble! No, Eat Death has managed to free his arm - good work.
Halo drops an elbow to the side of Eat Death's head.
Eat Death is trying to stand.
Halo is keen to just control but Eat Death is a slippery customer.
Halo looks towards his corner to check for any instructions. The corner give him nothing to work with, so he cracks Eat Death with a short hammerfist. I guess that's as good as any advice he could get in this position.
Halo throwing punches and elbows but they're not doing any damage.
Dominick Halo overall seems to be getting the better of the ground position in the fight so far.
That's three minutes gone in the round.
Halo drops an elbow to the side of Eat Death's head.
Halo slips a nice elbow through Eat Death's hands, connecting with Eat Death's forehead.
Neither fighter is being very active at the moment, with Halo in particular looking to stall.
Eat Death is trying to stand back up but Halo is controlling him
Halo working over Eat Death with some ground and pound. Eat Death looks like he wants out of this position, which is understandable.
Halo trying to control from half guard but Eat Death is working away.
Eat Death wants to get back to his feet.
The ref stands the fighters back up due to a lack of activity.
Eat Death misses with a few strikes there.
That's four minutes gone in the round.
Halo throws a hook to the body but it doesn't connect.
Halo throws a hook but Eat Death blocks it.
Eat Death drops Halo with a right and a left! Eat Death comes rushing in but Halo regains his composure and manages to keep Eat Death in guard.
This has been an exciting period of action!
Halo looking to control.
Eat Death would like to get this fight back to the feet but can't get free from the closed guard.
Halo looking for a sweep. Not yet Halo, not yet.
Eat Death is looking to stand up but Halo won't let him.
Halo is trying to control the position from the bottom.
And thats the end of the round the fighters go back to their corners.
Thorn Eat Death showed his class in that round. I'd imagine he'll take it on all the scorecards.
The cut man is working on Dominick Halo's cut.
The referee calls time. The cornermen exit stage left and we're back to business. Ladies and gentlemen, this is the final round!

Halo slips a straight right by Eat Death.
Eat Death leaves Halo with his face pressed against the mat as he sprawls beautifully, defending against a solid takedown attempt.
Eat Death takes a swing at Halo's ribcage but misses.
Eat Death walks into a straight right hand from Halo.
Eat Death throws a body shot but no joy.
Halo connects with a lovely right hand, straight down the pipe.
A jab lands there for Halo.
We've had a slow start to the round here - hopefully the action picks up.
Eat Death slips under a jab from Halo.
Eat Death lands a pitter patter jab to the forehead of his opponent.
Eat Death throws a right and a left that Halo avoids nicely.
Halo fakes a head punch and goes low to the body. Nicely done.
That's one minute gone in the round.
Eat Death waving his hands out in front of him, looking to distract Halo.
Eat Death slips under a jab.
Eat Death tries to counter by closing the distance.
Halo decides to change it up a bit and drives through with a nice takedown into half guard.
The fighters are pressed up against the cage, both looking to find a bit of space to work.
Eat Death tries to kick Halo off but Halo keeps his base steady and stays in half guard.
Halo is scoring with some nice ground and pound from the dominant position.
Eat Death is trying to stand up here but Halo is controlling him well.
Halo working some ground and pound from close in. He's looking to maintain this position and strike for a while by the looks of things... although he'll probably advance to full mount in a minute now I've said that.
Eat Death is trying to stand up here but Halo is controlling him well.
Eat Death has hold of Halo's hands but Halo slips his arm to the side and lands an elbow.
Halo trying to control the pace.
Halo not throwing his punches with enough precision this time.
Dominick Halo has stepped it up - he knows he needs a finish here!
Thorn Eat Death is fighting for a decision - hopefully he's judged it right and he's actually winning the fight.
That's two minutes gone in the round.
Halo stops Eat Death from getting back to his feet.
Halo thumps the canvas. Not on purpose obviously - he just missed Eat Death's head.
Halo lands with a punch from half guard.
Eat Death is trying to stand.
If this pace continues, the referee will definitely step in and force a standup.
Halo sitting in half guard, looking to land shots. Eat Death defending well though.
The referee decides to stand the fighters back up.
Eat Death misses with a jab, cross combination.
Eat Death throws a combination but comes up with nothing but fresh air.
A punch combination from Halo misses.
That's three minutes gone in the round.
Eat Death throws an uppercut from half a mile away. Halo sees it coming and avoids it easily.
Eat Death scores with a jab to the body.
Eat Death digs a good body shot into Halo's ribs.
Eat Death throws an uppercut from half a mile away. Halo sees it coming and avoids it easily.
Thorn Eat Death is looking to throw some combinations by the looks of things.
Eat Death moves away from the strike by Halo.
Halo connects with a nice looking jab.
Eat Death throws a shot to the body.
Halo shoots in for a takedown. He's persisting with it as Eat Death sprawls well. Eat Death wins this battle and keeps the fight standing. Halo gets slowly back to his feet.
Eat Death wants to counter the offense by Halo and move into the clinch position.
Both fighters are breathing heavily.
Eat Death fakes with an overhand right and moves in to clinch with Halo, pushing him back against the cage.
That's four minutes gone in the round.
A nice left hand lands by Eat Death.
Halo letting Eat Death take a breather here.
Halo wants to take the fight to the mat but Eat Death manages to get underhooks and keep the fight in the clinch.
That's three failed takedown attempts in the round for Dominick Halo. That's going to take a lot out of him.
Halo tries to throw a body punch but Eat Death avoids it by throwing Halo back against the cage.
Halo tries to work over Eat Death's body with a swooping hook but it only glances the target.
Eat Death blocks a body shot from Halo.
Halo misses with a hook from the clinch.
Eat Death blocks a couple of punches on the inside.
Eat Death gets underhooks to prevent Halo's takedown attempt.
And that's the end of the fight!
That was a close round. You could make an argument for either fighter but I would give it to Dominick Halo.
I think Eat Death has won this one but let's see whether the judges agree with me. Over to the ring announcer for the scorecards.
Ladies and gentlemen, after 3 rounds of action, we go to the scorecards for a decision.
Judge Sandra Marshall scores the fight 28:29
Judge Daniel Franklin scores the fight 28:29
Judge David Hoff scores the fight 28:30
In favor of your winner, by unanimous decision... Thorn Eat Death!
Thorn Eat Death seemed lost for words in his post fight interview but he remembered to thank his fans and directed everyone to his website.
|
|
|
|
|
|
|
|
|
|
|
|
|
|
|
|
|
|
|
|
|
|
|
| S |
C
A |
G |
S |
C
B |
G |
|
S |
C |
G |
|
energy
A | B |
|
hype
A | B |
|
pop
A | B |
|
mgr
A | B |
|
FIGHT
RATING
42% |
|
|
|
|
|
|
