|
|
PBP Commentary |
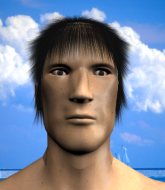
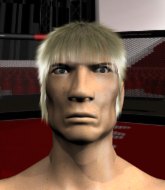
Coming up we have a middleweight MMA rules bout between I Hard (ranked 0 p4p, 0 weight class) and Fujimoto Hatsuharu (ranked 0 p4p, 0 weight class). Hatsuharu has chosen Ohh Ahh as his entrance music. I Hard has the better chin. Will he look to stand and bang today?
 |
|
 |
| 182 cm
21
199 lbs
3 - 2 - 0 |
|
180 cm
22
195 lbs
1 - 1 - 0 |
BJJ Blue Belt
Solid boxing
Cuts easily |
|
BJJ Blue Belt
Good low kicks
Powerful |
|
| |
|
Ladies and gentlemen. This fight is 3 rounds, in the middleweight division.
Introducing the fighter to my left, fighting out of the red corner.
With a record of
3 - 2 - 0, fighting out of Tokyo, I Hard!
And introducing the fighter to my right, fighting out of the blue corner.
With a record of
1 - 1 - 0, fighting out of Tokyo, Fujimoto Hatsuharu !
The judges for this bout are Shigeki Sano, Yukihiro Shimada and Yukihiro Yamamoto.

The bell rings for round one and we are underway!
Nice defenses there by Hard.
Hatsuharu misses with a wild combination.
Hatsuharu throws a head kick that misses and slips in the process. He scrambles back to his feet and the fighters circle.
Hatsuharu thows a left - swing and a miss!
Hard scores with a nice head shot.
Hatsuharu fails to land with the punch combination there - jab, cross, hook, miss, miss, miss.

Hatsuharu lands a high kick to the side of Hard's head that stuns him and send him tumbling down to the canvas! Hatsuharu dives into guard, looking to finish.

Hard is rocked!

It looks like I Hard has been cut.
Both fighters really going for it on the ground here!
Hard wants to sweep but no luck.
Oh Hard is still in real trouble! Will he be able to recover?!!
Hard keeping full guard, as Hatsuharu tries to pass.
Hard seems to have got his legs back now.
Hard throwing some rather feeble looking strikes off his back.
Hatsuharu trying to pass the guard but can't manage it just yet.

Hard escapes his hips to the side and looks to be working for an armbar. Hatsuharu gives him a little smile and shakes his head. No chance.
We've seen a great period of action over the last minute or so - credit to both fighters for going all out!
Hard throws some sloppy strikes off his back.
Hard lands a decent shot there.
Hatsuharu tries to stand but Hard is controlling from the bottom.
Hatsuharu preventing the sweep.

That's one minute gone in the round.
Hatsuharu pressing down on his opponent's thigh, looking to pass guard. Hard is keeping the position for now.
Hatsuharu wants to stand but Hard is controlling his posture from full guard.
Hatsuharu looks gassed!
Hard lands a beautiful switch and he's in full mount! That could spell trouble for Hatsuharu !
Hatsuharu is looking to get back to his feet - it's going to be hard from this position.
Hatsuharu is in all sorts of trouble here.
Hard pausing momentarily but resumes with a couple of decent strikes that do a bit of damage.
Hatsuharu is bucking up trying to escape but Hard cracks him with another couple of good strikes.
Hard scores with a couple of good head shots there.
Hard landing shots from mount.
Hard is in the full mount, landing strikes.
Hard landing strikes, looking to finish!
Hard punishing his opponent with strikes.
Hatsuharu is rocked!
The fighters are pressed up against the cage, both looking to find a bit of space to work.
The fans in attendance giving it up for the two fighters, who have really let it all hang out in the last minute or so!
Hard postures up and cracks his opponent a couple of times before moving back into close ground control. Hatsuharu looks a forlorn figure.
Hatsuharu is still in real trouble! Can Hard finish him?

That's two minutes gone in the round.
Hard postures up and cracks his opponent a couple of times before moving back into close ground control. Hatsuharu looks a forlorn figure.
Hard landing punches.
Hatsuharu seems to have recovered his senses.
Hatsuharu is trying desperately to improve position.
Hard working Hatsuharu over with strikes here.
Hard lands with some vicious ground and pound - can Hatsuharu hang on?
Hard landing strikes from the mount and Hatsuharu is in trouble!
BOOM! Hard connects with a massive shot to the dome!
Hard working the ground and pound effectively.
Hard working the ground and pound effectively.
Hard pausing momentarily but resumes with a couple of decent strikes that do a bit of damage.
Hard raining down shots from the mount!
Hard looking to ground and pound his opponent to a finish here.

That's three minutes gone in the round.
Hard lands with some vicious ground and pound - can Hatsuharu hang on?
Hard scores with a couple of good head shots there.
Hard has been looking to land a fair amount of strikes on the ground. He might be looking to soften his opponent up in order to work for a submission.
Hard lands a shot to the body, followed up by a shot to the exposed head of his trapped opponent.
A nice elbow there by Hard.
Hard with a couple of short strikes.
Hard cracks Hatsuharu with a nasty head shot there - the crowd let out an audible gasp there, as the noise reverberated around the arena.
Hard lands a couple of nice shots there from mount.
Hatsuharu is looking to improve his position but Hard isn't that keen on the idea.
Hatsuharu is writhing around trying to get back to his feet.
BOOM! Hard connects with a massive shot to the dome!
Hatsuharu is desperately trying to improve his position but Hard has a good base and remains in mount.
Hard landing strikes from the mount.
Hard putting on the heat here with some good ground and pound!
Hatsuharu is trying desperately to improve position.
Hard lands a shot to the body, followed up by a shot to the exposed head of his trapped opponent.

That's four minutes gone in the round.
Hatsuharu tries to buck Hard off but he can't manage it.
Hard dominating with strikes here.
Hard lands with some vicious ground and pound - can Hatsuharu hang on?
Hard takes a little breather and maintains the position. The referee will be looking for him to stay active from such a dominant position though.
Hatsuharu in a bad spot here, taking shots to the head.
Hard putting on the heat here with some good ground and pound!
Hard with shots to the head and body - Hatsuharu looks very uncomfortable down there.
Hatsuharu is working to get back to half guard.
The ref warns both fighters not to hold the cage as they work up against the meshing.
As the round comes to an end the crowd are showing their appreciation for a great round of action.
Hatsuharu is not a happy chappy
he wants out of there.
Hard scoring with some good ground and pound from mount here. Will he manage to finish Hatsuharu ?
And thats the end of the round the fighters go back to their corners.
I Hard dominated that round.
The cut man is working on I Hard's cut.
That's time! Hard's corner gives him a slap on the ass as he gets ready to fight.

Hard lands a jab to the head.
Hard digs a good hook to Hatsuharu 's body.
A lazy left from Hard finds it's target.
Hatsuharu throws a head kick that misses and slips in the process. He scrambles back to his feet and the fighters circle.

Hard clinches up with Hatsuharu and pushes him back against the cage.

Hard escapes the clinch and we're back to striking.
Hard has Hatsuharu up against the cage in a clinch.
Hard breaks the clinch.
Hard clinches.
Hard breaks the clinch.
Hatsuharu throws a head kick that misses and slips in the process. He scrambles back to his feet and the fighters circle.

Excellent takedown into side control there by Hard.
Hard passes to full mount! That's big trouble for Hatsuharu !
Hard has his opponent pinned against the cage, landing some nasty ground and pound that is really making a bit of a mess out of Hatsuharu 's face.
I Hard overall seems to be getting the better of the ground position in the fight so far.
Both fighters are absolutely exhausted here.
The referee warns Hatsuharu that he has to improve his position here as he takes two more clean shots to the head.
Hatsuharu is desperately trying to improve his position but Hard has a good base and remains in mount.
That's one minute gone in the round.
Hard scoring with strikes but Hatsuharu is staying in there.
Hard looking to finish Hatsuharu with some ground and pound. This is bad for Hatsuharu !
Hard putting on the heat here with some good ground and pound!
Hard unloading with bombs!
Hatsuharu is desperately trying to improve his position but Hard has a good base and remains in mount.
Hard working Hatsuharu over with strikes here.
Hatsuharu is squirming around, avoiding Hard's attempts to control the action.
Hatsuharu is looking to get to half guard.
Hard unloading with bombs!
Hatsuharu manages to regain half guard. Good work.
Hatsuharu is working for an escape here. He's hooked one of Hard's legs and he's managed to sneak out and take Hard's back!
Hard defends a rear naked choke attempt by controlling one of Hatsuharu 's arms.
Hatsuharu is trying to stick to Hard's back but Hard is turning into Hatsuharu . He's managed to reverse the position - now he's in Hatsuharu 's guard. Polite applause from the crowd in appreciation of some nice Jiu Jitsu by Hard.
That's two minutes gone in the round.
Hammerfist, elbow! yells Hard's corner. There ya go! There ya go!
Hard scores with a decent looking elbow strike.
Hard makes a bit of distance and scores with some ground and pound, still in guard.
Hard scoring with some ground and pound.
Hatsuharu working for a triangle but Hard defends it easily.
Hatsuharu working from the bottom, still in full guard. He's managed to get a loose triangle. Hard doesn't seem to be doing much to defend here, obviously he feels comfortable in the position. Hard manages to throw the legs off his shoulder and he's back into guard - no problem.

The referee has ruled that neither fighter is active enough on the ground and has stood them back up.
Hatsuharu throws a head kick that half lands.
Hatsuharu misses with a double jab.
That's three minutes gone in the round.
Hard works his jab well there, keeping his opponent at a distance.
Hard throws a couple of head shots and lands with the final one - a decent hook, which struck Hatsuharu on the side of the head.
Hard uses good footwork to get in and out and land a nice right hand before Hatsuharu has time to react.
Hatsuharu misses with a half-hearted attempt at a head kick.
Hard punishes Hatsuharu 's body with a nice straight punch.
Hard lands a straight punch to the body, keeping Hatsuharu at a distance.
Hard scores with a jab to the jaw.
Hatsuharu tries to bum rush Hard with a series of wild strikes but Hard uses good footwork to avoid the assault.
Hard scores with a punch to the gut of his opponent.
Hard fakes an overhand right and shoots for a takedown. Hatsuharu sprawls well initially but Hard persists and gets the takedown into half guard.
Hard working Hatsuharu over with strikes.
Hard wants to control but Hatsuharu is keeping him busy.
Hatsuharu looking for submissions from an awkward position here.
Hard works his way into full mount!
Hard dominating with strikes here.
That's four minutes gone in the round.
Hatsuharu is not a happy chappy
he wants out of there.
Hatsuharu is in a horrible position here. Hard smacks him with another shot as he tries to escape the position.
A nice elbow there by Hard.
Hard won't let Hatsuharu get back to his feet... He wants to keep the fight where it is for now.
Hard lands a couple of nice shots there from mount.
Hard lands a heavy elbow.
Hatsuharu tries to lock up and control but Hard gives him a forearm to the face and pushes him away.
Hatsuharu is trying to escape the mount.
Hard fakes a shot to the body and cracks his opponent in the head. Nice ground and pound there!
Hard can't quite control the action as he would like just now, as Hatsuharu is looking to escape.
Hard lands a nice shot to the head.
And thats the end of the round the fighters go back to their corners.
I Hard dominated that second round.
The cut man is working on I Hard's cut.
That's time! Hard's corner gives him a slap on the ass as he gets ready to fight. This is the final round!

Hatsuharu misses with a two punch combination.
Hard getting the better of the striking in that exchange.
Fujimoto Hatsuharu seems to be the more aggressive standup fighter in this bout.
Hard lands a lovely overhand right.
Hatsuharu throws a right and a left that both miss.
Hard moves into the clinch.
Hard escapes the clinch and we're back to striking.
Hard scores a trip takedown into side control. Nice.
Hard trying to control the position but Hatsuharu is working away.
Hatsuharu is looking to regain half guard here but Hard keeps moving and retains side control.
Hatsuharu takes a couple of big shots there - the referee warns him that he has to defend himself better.
Hatsuharu takes a nasty elbow to the side of the head.
Hard is working Hatsuharu over with some ground and pound from side control.
Both fighters are breathing heavily.
Hatsuharu pushes Hard away and creates a bit of space to escape. He's almost out here... but no, Hard gets a good hold of his legs and remains firmly in side control.
Hard trying to control the action but Hatsuharu is working from the bottom.
Hard working the head and body with strikes.
That's one minute gone in the round.
Neither fighter is doing enough for the referee's liking and he's decided to stand them back up.
Hatsuharu misses with a hook.
Hard connects with a good right hand that stumbles Hatsuharu . Hatsuharu circles away out of range and recomposes himself.
Hard stooping low to avoid any incoming strikes and then lunges in with an uppercut come cross that lands flush.
Hatsuharu throws a hook but Hard blocks it.
Hard lands a jab to the head.
Hard forces Hatsuharu back against the cage and clinches.
Hatsuharu wants to break free but Hard has control.
Hard's corner calls for him to break the clinch, which he does.
Hard lands a jab. Then a cross. Then finally a nice hook to the body. Good work there by Hard.
Hatsuharu tries a switch kick but it misses it's target.
Hatsuharu throws a combination that misses
and Hard holds on and brings the fighters into a clinch.
Hatsuharu is trying to work out of this bad position, with his back against the cage.
Hard's corner calls for him to break the clinch, which he does.
Hatsuharu misses with an uppercut.
That's two minutes gone in the round.
Hatsuharu throws a hook but Hard blocks it.
Fujimoto Hatsuharu is looking to throw some combinations by the looks of things.
Jab, cross, leg kick. Nice combination by Hard!
Hard misses with a double jab.
Hatsuharu pulls out of a head kick attempt.
Hard gets a clinch.
Hatsuharu wants to strike at distance but he can't break free of the clinch.
A bit of stalling here from Hard.
Hatsuharu wants to push off and get back to the center of the mat but Hard has him pressed against the cage.
Hard escapes the clinch and we're back to striking.
Hard closes the distance and clinches.
Hatsuharu can't break the clinch.
Still in the clinch, Hard scores with a nice short uppercut.
Hard escapes the clinch and we're back to striking.
Hatsuharu throws a head kick that misses
and Hard counters by clinching up.
Hatsuharu tries to break the clinch but Hard is controlling the position.
Hatsuharu wants to break free. God knows he wants to breaaaak freeee.
Hatsuharu wants to break the clinch but can't.
Hatsuharu wants to break free but Hard has control.
That's three minutes gone in the round.
Hatsuharu takes an elbow to the forehead.
Hard manages to break the clinch.
Hard looking for a takedown here - he's got it.
Hard advances to half guard.
Hatsuharu looking for submissions from an awkward position here.
The two fighters exchange a few words. I couldn't hear what they were saying but maybe it's more fun if you make it up yourself. Hard connects with a nice short shot to Hatsuharu 's temple.
Hatsuharu is trying to defend against the ground and pound but Hard scores with a couple of nice shots.
Hard wants to lay and pray for a moment but Hatsuharu keeps working.
Hard missing with the ground and pound from half guard.
Hatsuharu is looking to improve his position.
Hard is figuring out what he wants to do next.
Hatsuharu is trying to escape back to his feet but Hard uses the scramble to pass into side control.
That's four minutes gone in the round.
Hatsuharu looking for a sweep but Hard has passed into full mount! Oh no!
Hatsuharu is looking to improve his position but Hard isn't that keen on the idea.
Hard lands an elbow that was bordering on illegal but the referee lets it go with a warning.
Hard pausing momentarily but resumes with a couple of decent strikes that do a bit of damage.
Hard lands with some vicious ground and pound - can Hatsuharu hang on?
Hard is still in mount, landing shots to his trapped opponent. Hatsuharu can't stay in a position like this for much longer.
Hatsuharu keeping his composure momentarily, calmly looking to get back to half guard.
A nice elbow there by Hard.
Hatsuharu is desperately trying to improve his position but Hard has a good base and remains in mount.
Fujimoto Hatsuharu has stepped it up - he knows he needs a finish here!
I Hard is fighting for a decision here - he's started to take the cautious approach.
Hard in mount throwing good strikes here, bouncing his opponent's head off the canvas.
And that's the end of the fight!
I Hard showed his dominance in that final round.
Well Hard has outscored his opponent in every aspect of the fight today. Only a scarily incompetent judge or two will keep him from a well deserved win... Over to the ring announcer for the scorecards.
Ladies and gentlemen, after 3 rounds of action, we go to the scorecards for a decision.
Judge Shigeki Sano scores the fight 30:27
Judge Yukihiro Shimada scores the fight 30:27
Judge Yukihiro Yamamoto scores the fight 30:26
In favor of your winner, by unanimous decision... I Hard!
|
|
|
|
|
|
|
|
|
|
|
|
|
|
|
|
|
|
|
|
|
|
|
| S |
C
A |
G |
S |
C
B |
G |
|
S |
C |
G |
|
energy
A | B |
|
hype
A | B |
|
pop
A | B |
|
mgr
A | B |
|
FIGHT
RATING
94% |
|
|
|
|
|
|

