|
|
PBP Commentary |
Coming up we have a lightweight MMA rules bout between Duncan By (ranked 0 p4p, 0 weight class) and Simon Walker (ranked 0 p4p, 0 weight class). By comes to the cage accompanied by Big Pun - Off with his head. We have two fighters making their debuts here, so let's see who comes out of this one with their first professional victory.
 |
|
 |
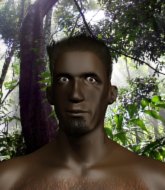
| 173 cm
22
166 lbs
0 - 0 - 0 |
|
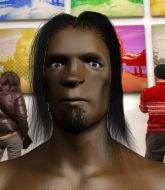
172 cm
19
165 lbs
0 - 0 - 0 |
BJJ Blue Belt
Solid Muay Thai
KO power |
|
BJJ White Belt
Decent boxing
Tends to cut |
|
| |
|
Ladies and gentlemen. This fight is 3 rounds, in the lightweight division.
Introducing the fighter to my left, fighting out of the red corner.
With a record of
0 - 0 - 0, fighting out of London, Duncan By!
And introducing the fighter to my right, fighting out of the blue corner.
With a record of
0 - 0 - 0, fighting out of London, Simon Walker!
The judges for this bout are James Glass, Sam Margolis and Andrew Berry.

The bell rings for round one and we are underway!
By looks frustrated there after his takedown attempt is stuffed easily.

By decides to change it up a bit and drives through with a nice takedown into half guard.
Walker looks like he's trying to stand up.
The fighters are pressed up against the cage, both looking to find a bit of space to work.
By works his way into full mount!
By can't quite control the action as he would like just now, as Walker is looking to escape.
Walker really doesn't want to stay on the ground with By. If he can't get it back to his feet, it's only a matter of time before he'll be tapping out.
Walker is looking to get back to his feet - it's going to be hard from this position.

That's one minute gone in the round.
By landing strikes from the mount and Walker is in trouble!
A nice elbow there by By.
The ref warns both fighters not to hold the cage as they work up against the meshing.

By is working for a guillotine from mount but Walker frees his head quite easily.
By wants to control the pace but Walker is squirming around nicely.
By throwing shots from mount but they're not landing.
By has been looking to land a fair amount of strikes on the ground. He might be looking to soften his opponent up in order to work for a submission.
Walker trying desperately to get to his feet.
By trying to control but Walker is having none of it.
By won't let Walker get back to his feet... He wants to keep the fight where it is for now.
Walker looks gassed!

That's two minutes gone in the round.
Walker defends a decent attempt at a guillotine from By.
By wants to control the pace but Walker is squirming around nicely.
The crowd growing excited in anticipation of a finish here! Right on cue, By cracks his opponent with a massive right hand that draws loud cheers!
Walker tries to buck By off but By takes his back!

That's three minutes gone in the round.
I would not like to be Walker right now.
By looking for the RNC.
By throwing sloppy strikes.
By wants to control the position but Walker frees himself and scrambles - By manages to regain control in side control.
By wants to lay and pray for a moment but Walker keeps working.
Walker wants to escape from the position here - easier said than done!

That's four minutes gone in the round.
A lull in the action here being met with boos from the crowd.
By trying to control the action but Walker is working from the bottom.
Walker is putting a lot of effort into getting back to his feet here.
By trying to control the position but Walker is working away.

Neither fighter is doing enough for the referee's liking and he's decided to stand them back up.

By closes the distance and presses his opponent up against the cage.
The crowd thankful this round is nearly over.

By breaks from the clinch.
A really sloppy takedown attempt there from By.
By looks frustrated there after his takedown attempt is stuffed easily.
And thats the end of the round the fighters go back to their corners.
Duncan By dominated that round.
The fighters get back to their feet, the hooter sounds and we're back to the action!

By shoots in for a takedown - he's clinched up with Walker but Walker pushes him off and we're back to square one.
By changes levels and looks for a double leg takedown. Walker tries to avoid it but By manages to keep hold of a leg and drag Walker to the ground. Walker escapes though and pops straight back up to his feet.
Walker misses with a wild combination.
Walker darts in and clinches By up against the cage.
By takes a shot to the head.
By fails to pull the fight into his guard.
That's three failed takedown attempts in the round for Duncan By. That's going to take a lot out of him.
Walker lands a right hand that snaps the head of By backwards.
Walker lands with a quick shot inside that doesn't really do much damage.
Walker is looking to break free of the clinch but By has double underhooks.
Walker breaks the clinch and we return to the middle of the mat.
By looks frustrated there after his takedown attempt is stuffed easily.
The fight moves into the clinch position.
Both fighters are absolutely exhausted here.
Walker slowing the pace effectively.
Walker lands with a short shot to the head.
By missing with knees to the body.
A nice right hand lands inside from Walker.
A nice glancing elbow lands by Walker.
Both guys are working to get underhooks.
That's one minute gone in the round.
Walker lands a nice uppercut.
Walker is trying to break free.
Walker pushes off and circles away, back to the middle of the mat.
Walker has By up against the cage in a clinch.
Walker pushes off and circles away, back to the middle of the mat.
Walker lunges at By with a hook that half lands and is half blocked by By's hand.
By misses with a takedown attempt. He shot from a bit too far out.
Walker lands a really nice looking cross but By seems unphased.
By closes this distance looking for a takedown but Walker circles away.
Walker scores with a nice looking left hook and follows it up with an uppercut!
Walker swinging wilding here.
Walker lands a jab-cross combination.
By misses with a takedown attempt. He shot from a bit too far out.
Walker misses with a few strikes there.
Walker has taken the fight to the clinch.
Walker misses with a hook from the clinch.
That's two minutes gone in the round.
Walker is trying to work out of this bad position, with his back against the cage.
By scores a nice knee to the body.
By is trying to stall.
Walker is trying to break free.
Walker is trying to break free.
A head punch on the inside from Walker fails to land.
By misses with a knee to the head.
Walker is looking to break free of the clinch but By has double underhooks.
Walker wants to push off and get back to the center of the mat but By has him pressed against the cage.
Both guys are working to get underhooks.
Walker wants to strike at distance but he can't break free of the clinch.
By prevents Walker from breaking the clinch.
Walker wants to strike at distance but he can't break free of the clinch.
By jumps guard.
By looking for submissions off his back, moving his hips, looking for an opening.
Walker wants to stand and escape but instead By has hit a sweep and he's now on top in guard.
By passes Walker's right leg, so he's now in half guard.
That's three minutes gone in the round.

Walker kicks off By and gets to his feet.
Walker throws a series of strikes that have By backpedaling.
By shoots in but Walker avoids the takedown attempt easily.
By looks to land a combination but Walker avoids it well.
Walker moves into range and clinches up with By.
Walker is trying to break free.
Walker prevents the takedown attempt.
Both fighters working to control the clinch.
Walker wants to break the clinch but can't.
Walker lands with a short shot to the head.
By trying to control the position but instead, Walker has worked for underhooks and has pushed By into the cage.
Walker managing to block the knees to the body from By.
Walker breaks from the clinch.
By shoots in looking for a takedown. Walker tries to sprawl out of it but By keeps driving through. The fighters are pinned against the cage. Walker manages to get underhooks and after a bit of a struggle, circles away and we're back to standing.
By shoots in and bounces Walker off the cage to secure the takedown into guard.
That's four minutes gone in the round.
By stands up and looks to throw the legs aside to pass to side control. Walker swivels though and keeps the full guard.
By thows a big elbow that misses.
By stops Walker from standing up.
Walker manages to escape and get back to his feet.
By throws a nice looking combination but Walker bobs and weaves to avoid any damage.
Duncan By is looking to throw some combinations by the looks of things.
Walker circles away from the clinch attempt.
Walker lands a nice shot to the body.
And thats the end of the round the fighters go back to their corners.
Simon Walker showed his class in that round. I'd imagine he'll take it on all the scorecards.
The referee calls time. The cornermen exit stage left and we're back to business. So, we enter the final round. Let's see if either fighter can bring us a finish, or whether we're going to the judges scorecards.

By keeps the fight on the outside.
Walker closes the distance and lands a one-two.
No luck for By with that takedown attempt.
Horrible takedown by By or perhaps it was just good defense by Walker which made him look bad.
Walker lunges in with swinging rights and lefts but By circles away quickly and effectively.
Walker lands a jab-cross combination.
Walker's corner calls for a 1,2 combination and Walker duly obliges.
By tries to clinch up but Walker circles away and keeps his distance.
Walker throws a combination. By tries to block but a couple of punches get through.
Walker lands a jab, followed by a cross and another cross, as By backs up against the cage.
By fails with an attempt to clinch.
By shoots in but Walker avoids the takedown attempt easily.
That's three failed takedown attempts in the round for Duncan By. That's going to take a lot out of him.
Walker lands a nice shot to the body.
Both fighters are breathing heavily.
Walker misses with a double jab
and By counters with a takedown into side control.
That's one minute gone in the round.
Walker is working hard to escape and get back to his feet. After a battle for position, By asserts his dominance and retains side control.
Walker throws his opponent off and manages to get back to his feet! Nicely done!
By is looking to clinch.
Walker lunges in with swinging rights and lefts but By circles away quickly and effectively.
By shoots for a double leg takedown but Walker sprawls well. He's pushed By's face into the mat and manages to get back to his feet relatively easily.
Walker closes the distance and clinches.
Walker wants to break free. God knows he wants to breaaaak freeee.
By fails to pull the fight into his guard.
Walker is pressed up against the cage. By has hold of a leg and is looking to drag Walker down to the mat. Walker avoids the attempt though and has circled away. We're back to striking at a distance.
Walker bobs and weaves and throws out a fast jab that snaps By's head backwards.
Walker keeps the fight on the outside.
Walker throws a combination but comes up with nothing but fresh air.
By tries to close the distance and clinch up but Walker swats him away and circles back towards the center.
That's two minutes gone in the round.
Walker throws a wild combination but nothing lands.
By shoots for a takedown but Walker saw that one coming a mile off and avoided it easily.
Walker is looking to take this fight into the clinch.
By looks for a takedown here. Will he get it? Walker is fending him off so far but By persists. Nope, Walker circles away and we're back to standing.
By fails with an attempt to clinch.
By shoots for a takedown but Walker saw that one coming a mile off and avoided it easily.
Walker fakes a head shot and lands one to the body.
By closes the distance and takes a jab right on the nose as he does so.
Left hook, right uppercut from By.
Walker throws a series of punches but By avoids them all with ease.
Walker misses with a jab and misses with a cross straight after too.
Walker tries to clinch up but By circles away and keeps his distance.
Wow, both these guys are really going for it!
By fails in his attempt to clinch.
By tries to clinch but Walker moves away
and Walker holds on and brings the fighters into a clinch.
By jumps guard and drags Walker to the mat. He's obviously going to be looking for submissions off his back.
By is trying to control the position but Walker postures up.
That's three minutes gone in the round.
Walker gets to his feet. By looking to butt scoot but the ref puts an end to that. On your feet son!
By throws a looping left and ducks down for a takedown. He's got his arms around Walker's waist but Walker gets an underhook and avoids the takedown by throwing By off to one side.
By shoots in but Walker avoids the takedown attempt easily.
Walker stuffs the takedown.
By closes this distance looking for a takedown but Walker circles away.
By tries to clinch but fails miserably
and Walker counters with a right hand to the body.
Simon Walker seems to be the more aggressive standup fighter in this bout.
By is looking to take this fight into the clinch.
Walker wings a very wild body shot but it does the job and lands to the midsection.
By doesn't manage to clinch there - Walker circles away.
By takes an uppercut right on the jaw but it doesn't phase him.
Walker stuffs the takedown attempt from By. By gets slowly back to his feet.
Walker looks to land a combination but By avoids it well.
Walker keeps the fight on the outside.
Some wild striking there from Walker.
That's four minutes gone in the round.
By shoots in with a takedown attempt and he has Walker pinned against the cage. Walker gets the underhooks and manages to circle away.
Simon Walker is looking to keep the fight on the feet at all costs.
By with a poor takedown
and Walker counters by clinching up.
Walker breaks the clinch and we're back to striking at distance.
By tries to clinch up but Walker circles away and keeps his distance.
Walker throws a left and a right that both miss
and By counters with a takedown into full mount! That could mean trouble for Walker!
By is standing up out of mount! Strange tactic there - he must really want this one on the feet!
The fans in attendance giving it up for the two fighters, who have really let it all hang out in the last minute or so!
By tries to clinch but Walker moves out of range.
Walker looks to score with a combo but nothing lands.
Walker throws a series of punches but By moves out of range.
By fails with a takedown attempt from distance.
Walker lands with a two punch combination before moving back out of range.
The crowd applaud the fighters efforts here as the round comes to an end.
By misses with a takedown attempt. He shot from a bit too far out.
Walker throws a jab, cross combination which is slipped
and By counters with a nice jab to the body that keeps Walker thinking.
By avoids a punch combination nicely.
Walker doesn't manage to clinch there - By circles away.
And that's the end of the fight!
I would just about give that final round to Simon Walker.
I think Walker has won this one but let's see whether the judges agree with me. Over to the ring announcer for the scorecards.
Ladies and gentlemen, after 3 rounds of action, we go to the scorecards for a decision.
Judge James Glass scores the fight 28:29
Judge Sam Margolis scores the fight 29:28
Judge Andrew Berry scores the fight 28:29
In favor of your winner, by split decision... Simon Walker!
|
|
|
|
|
|
|
|
|
|
|
|
|
|
|
|
|
|
|
|
|
|
|
| S |
C
A |
G |
S |
C
B |
G |
|
S |
C |
G |
|
energy
A | B |
|
hype
A | B |
|
pop
A | B |
|
mgr
A | B |
|
FIGHT
RATING
63% |
|
|
|
|
|
|
