|
|
PBP Commentary |
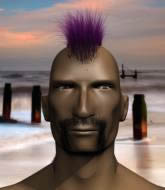
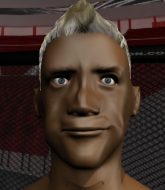
Coming up we have a middleweight MMA rules bout between Simon Ward (ranked 0 p4p, 0 weight class) and Tom Birch (ranked 0 p4p, 0 weight class). The key to victory for Simon Ward has got to be keeping the fight on the feet.
 |
|
 |
| 174 cm
23
145 lbs
1 - 0 - 0 |
|
171 cm
24
193 lbs
1 - 0 - 0 |
BJJ Blue Belt
Brawler
Cuts easily |
|
Good takedowns
Basic striking
Solid chin |
|
| |
|
Ladies and gentlemen. This fight is 3 rounds, in the middleweight division.
Introducing the fighter to my left, fighting out of the red corner.
With a record of
1 - 0 - 0, fighting out of London, Simon Ward!
And introducing the fighter to my right, fighting out of the blue corner.
With a record of
1 - 0 - 0, fighting out of London, Tom Birch!
The judges for this bout are Colin Fotheringham, Andrew Berry and Paul Tew.

The bell rings for round one and we are underway!
Birch throws a body punch but Ward moves out of range.

Ward gets to the clinch - let's see what his plan is here.
Birch tries for a takedown but Ward manages to get underhooks.
Birch is trying to pull guard but being pressed up against the cage enables Ward to keep the fight standing.
Birch is trying to pull guard but being pressed up against the cage enables Ward to keep the fight standing.
Simon Ward has stuffed three takedown attempts in the round now. That's going to take a lot out of Tom Birch.
Birch is trying to pull guard but Ward has him pressed against the cage.
Ward leaning his opponent against the cage.
Birch tries to pull guard but Ward holds him up against the cage and eventually Birch drops back down to his feet.

Ward drags the fight down to the ground.
We've had a slow start to the round here - hopefully the action picks up.
Birch in full guard, throwing the ground and pound. No damage this time.
Ward looking to control the pace of the fight rather than finish it.
Birch lands a couple of digs.

That's one minute gone in the round.
Birch with a flurry of punches that miss.
Birch keeps in close for a moment and lands a decent shot to the side of Ward's head.
Birch is looking to work some ground and pound but Ward has wrist control.
Birch wants to control from the top but Ward keeps moving.
Ward wants to stand up but Birch is controlling him.
Ward will have to put a bit more behind his punches if he's going to do any damage from this position.
Birch slows down the pace of the fight, as he sits in guard.
Ward not looking particularly offensive just at the moment.

That's two minutes gone in the round.
The crowd are getting on the fighters' backs, as the pace has dropped off in the last minute or so.
Birch controls the pace of the fight for a moment.
The referee is pacing around the two fighters - he looks like he's thinking about a standup.
Birch is looking to work some ground and pound but Ward has wrist control.

The referee decides to stand the fighters back up.
No luck for Ward with that takedown attempt.
Birch tries a counter takedown but it's more of a dummy move, and he uses it to push himself away.
Tom Birch seems to be the more aggressive standup fighter in this bout.
Ward tries to drive through with a takedown attempt but Birch defends well and Ward ends up having to push Birch into the cage where they will battle it out in the clinch.
A really sloppy takedown attempt there from Birch.
Birch misses with a takedown attempt. He shot from a bit too far out.
Birch shoots in and drives through. Ward sprawls well.

Birch looks for a takedown. He's got it. We're now in half guard.

Ward looking for submissions from an awkward position here.

That's three minutes gone in the round.

Birch is working for submissions here but there's nothing on.
Birch is working for submissions here but there's nothing on.
The fighters are going at a pretty good pace and they're both starting to sweat now.
Ward is trying to get back to full guard.
Birch is keeping good posture, landing some ground and pound.
Birch wants to free his trapped foot but Ward is holding on for dear life with his legs.
Ward wants to control but Birch is keeping busy and won't allow it.
Ward is defending against the submission attempts here by Birch.

That's four minutes gone in the round.
Ward is trying to control but can't.
Birch maintaining the dominant position here and is working for a kimura. He's locked it up! Ward could be in real trouble here! He's trying to wriggle out but Birch has cracked it and Ward is screaming in pain - he's tapped out! Great finish by Birch!
Ladies and gentlemen, after 4:44 of round 1, we have a winner by way of Submission (Kimura). Tom Birch!
|
|
|
|
|
|
|
|
|
|
|
|
|
|
|
|
|
|
|
|
|
|
|
| S |
C
A |
G |
S |
C
B |
G |
|
S |
C |
G |
|
energy
A | B |
|
hype
A | B |
|
pop
A | B |
|
mgr
A | B |
|
FIGHT
RATING
28% |
|
|
|
|
|
|
