|
|
PBP Commentary |
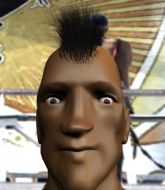
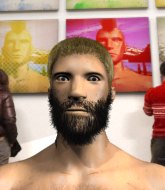
Coming up we have a light heavyweight MMA rules bout between Felix Aguinaga (ranked 0 p4p, 0 weight class) and John Bonham (ranked 0 p4p, 0 weight class). Felix Aguinaga has a significant reach advantage - let's see if he can make it count.
 |
|
 |
| 200 cm
22
209 lbs
5 - 5 - 0 |
|
185 cm
24
210 lbs
4 - 5 - 0 |
BJJ Blue Belt
Brawler
KO power |
|
BJJ Blue Belt
Good kicks
Knockout power |
|
| |
|
Ladies and gentlemen. This fight is 2 rounds, in the light heavyweight division.
Introducing the fighter to my left, fighting out of the red corner.
With a record of
5 - 5 - 0, fighting out of London, Felix Aguinaga!
And introducing the fighter to my right, fighting out of the blue corner.
With a record of
4 - 5 - 0, fighting out of London, John Bonham!
The judges for this bout are Sam Margolis, Chris Edwards and Andrew Berry.

The bell rings for round one and we are underway!
Aguinaga avoids the clinch attempt nicely.
Bonham tries to clinch there but Aguinaga circles away.
Aguinaga shoots in for a takedown but Bonham shows good takedown defense.
Bonham fails with an attempt to clinch.
Aguinaga has a takedown stuffed.
Bonham tries to clinch up.
Aguinaga shoots in and drives through. Bonham sprawls well.
That's three failed takedown attempts in the round for Felix Aguinaga. That's going to take a lot out of him.
Nice sprawl there from Bonham as Aguinaga shoots in.
Aguinaga pushing out the jab but it's not landing.
Bonham tries to close the distance and clinch up but Aguinaga swats him away and circles back towards the center.
Bonham moves in looking to clinch but Aguinaga pushes him off.
Aguinaga has a takedown stuffed.

Bonham feints and then dives in with a takedown. That was a long way out but the feint bought him enough time to close the distance and complete the takedown. Now we'll play guard for a bit and see who can get the better of that position.

Bonham stands and steps away. Aguinaga gets to his feet too and we're back to the striking game.
A jab from Aguinaga misses.
Aguinaga feints and as Bonham raises his hands in defense, Aguinaga changes levels and drives through with a takedown into guard.
Bonham not looking particularly offensive just at the moment.

Bonham is looking for a triangle but Aguinaga pushes his legs off easily.
Aguinaga tries to free his leg and advance position but Bonham is retaining full guard.

That's one minute gone in the round.
Bonham bucks up whilst keeping hold of a body lock, managing to reverse the position. Now he's in top in Aguinaga's guard.
Aguinaga has a loose triangle. He'll be looking to tighten that up but Bonham can see exactly what he's planning and manages to posture up and free himself.
Aguinaga is breathing heavily.
Bonham trying to control but Aguinaga is working from the bottom.
Bonham drops back for a leg! It's a sloppy attempt though and Bonham jumps back into guard quickly, to retain the dominant position.
Bonham trying to control the position from guard on top but Aguinaga is wriggling around, looking for whatever he can.
Aguinaga trying to control the position.
Aguinaga is doing well to control the posture of his opponent and prevent any damage.
Aguinaga looking for a guillotine here but Bonham defends easily.

That's two minutes gone in the round.
Well. There's a bit of a lull in the action here and the crowd are starting to get restless.
Aguinaga has a closed guard, preventing Bonham from standing up.
Aguinaga is working an open guard here, looking to improve his position. No doubt that will leave him open to counters but at least he's being more offensive.

Neither fighter is doing enough for the referee's liking and he's decided to stand them back up.
Bonham tries a head kick but it misses.
Aguinaga scores a takedown into full mount!
The fighters are starting to get a bit slippery now, which will make submissions a bit more difficult.
Aguinaga is in the full mount, landing strikes.
Aguinaga trying to control but Bonham is having none of it.
Aguinaga lands a couple of nice shots there from mount.

That's three minutes gone in the round.
Aguinaga has his opponent pinned against the ropes, landing some nasty ground and pound that is really making a bit of a mess out of Bonham's face.
Bonham taking shots to the head.
Bonham sneaks a leg under to get to half guard.
Aguinaga prevents Bonham from standing back up.
Aguinaga is controlling the pace.
Bonham wants to improve his position but Aguinaga is controlling well.
Aguinaga with a momentary lay and pray from half guard.
Aguinaga is trying to work for a kimura but Bonham is defending well.

That's four minutes gone in the round.
Aguinaga missing with some ground and pound from the half guard.
Aguinaga seems very keen to just sit and control from half guard but Bonham does not like that idea so much and is remaining active off his back.
The referee decides to stand the fighters back up.
Bonham takes a big uppercut there. He seems a bit wobbly but no, he's OK.
Bonham is looking to clinch but Aguinaga is avoiding it.
Bonham tries to clinch up.
Aguinaga fails to land with the punch combination there - jab, cross, hook, miss, miss, miss.
John Bonham seems to be the more aggressive standup fighter in this bout.
No luck for Aguinaga with that takedown attempt.
Bonham closes the distance and looks for a trip takedown... aaaand he's got it - Bonham lands in his opponent's guard.
Aguinaga is working an open guard here, looking to improve his position. No doubt that will leave him open to counters but at least he's being more offensive.

That's five minutes gone in the round.
Bonham sneaks a leg through and gets to half guard. That was like a knife through butter how easily he passed Aguinaga's guard.
Aguinaga is not content to let Bonham control the position.
Aguinaga regains full guard. Nicely done.
Aguinaga is working an open guard here, looking to improve his position. No doubt that will leave him open to counters but at least he's being more offensive.
Bonham wants to control from the top but Aguinaga keeps moving.
Bonham won't allow Aguinaga to sweep him here.
Aguinaga manages to land a sweep and now he's in mount on top!
Bonham can't escape the position.

That's six minutes gone in the round.
Aguinaga breaks from Bonham's wrist control and lands an elbow.
Bonham in a bad spot here, taking shots to the head.
Aguinaga prevents Bonham from getting the reversal.
Aguinaga lands an elbow that was bordering on illegal but the referee lets it go with a warning.
Aguinaga scoring with some good ground and pound from mount here. Will he manage to finish Bonham?
Aguinaga with shots to the head and body - Bonham looks very uncomfortable down there.
Aguinaga landing strikes from the mount.
Aguinaga with a couple of short strikes.
Aguinaga tucks in and makes sure he doesn't lose the dominant position.
Aguinaga punishing his opponent with strikes.

That's seven minutes gone in the round.
BOOM! Aguinaga connects with a massive shot to the dome!
Aguinaga dominating with strikes here.
The referee warns Bonham that he has to improve his position here as he takes two more clean shots to the head.
Bonham is trying to escape the mount.
Bonham gets back to half guard.
Aguinaga throwing punches and elbows but they're not doing any damage.
Aguinaga lands with an elbow from half guard - that looked like it hurt.
Bonham is looking to improve his position.
Aguinaga looks towards his corner to check for any instructions. The corner give him nothing to work with, so he cracks Bonham with a short hammerfist. I guess that's as good as any advice he could get in this position.
Aguinaga is nestled in close to Bonham, controlling him well. He's worked in a nice elbow to the side of the head as well, for good measure.

That's eight minutes gone in the round.
The referee calls for the fighters to work.
The referee walks around the fighters to get a better view of the action. Aguinaga lands a nice short elbow.
Aguinaga is keen to just control but Bonham is a slippery customer.
Bonham looking to work for a kimura from the bottom.
Bonham is looking for a sweep. Aguinaga is wise to his cunning plan and keeps the top position.
Aguinaga is taking a breather. Bonham says something to him but it's hard to make out. Perhaps he's telling him to get on with it and actually do something.
Aguinaga landing with strikes to the body and head, softening up his opponent.
Aguinaga seems to be taking a bit of a break to think of his next move. He lands a short punch in the meantime.
Aguinaga working over Bonham with some ground and pound. Bonham looks like he wants out of this position, which is understandable.
Bonham won't allow Aguinaga to pass to mount.
Bonham is refusing to be controlled, as Aguinaga sits in half guard.

That's nine minutes gone in the round.
Aguinaga controlling the action here.
Bonham wants to control but Aguinaga is keeping busy.
Aguinaga is working for a submission of some sort.
Bonham works his way to full guard. Good work.
Bonham looks to be working for a triangle here. Oh, it looks like he might have it! Aguinaga has picked Bonham up and slammed him! Bonham can't keep hold of the triangle and Aguinaga manages to pass to side control!
Aguinaga wants to work for a kimura but he's foiled early by Bonham, who protects the arm well.
Bonham is looking for a sweep.
And thats the end of the round the fighters go back to their corners.
Felix Aguinaga dominated that round.
Well, the break between rounds is over. Let's get back to the scrappin! This is the final round!

Aguinaga shoots in for a takedown! He's got it and he's managed to land in full mount! That's better than Aguinaga was expecting from the takedown attempt, I'm sure!
Bonham is writhing around trying to get back to his feet.
Aguinaga putting on the heat here with some good ground and pound!
Felix Aguinaga overall seems to be getting the better of the ground position in the fight so far.
Bonham regains half guard.
Bonham wants to get back to full guard.
Aguinaga passes the guard and advances to mount!
Bonham in a bad spot here, taking shots to the head.
Aguinaga trying to control but Bonham is having none of it.
The fighters are tangled up in the ropes here. We might need a restart if the fighters can't break free themselves.
Aguinaga working the ground and pound effectively.
Both fighters are absolutely exhausted here.
That's one minute gone in the round.
Aguinaga landing punches.
Aguinaga working Bonham over with strikes here.
A nice elbow there by Aguinaga.
Bonham can't escape the position.
Aguinaga looking to control and managing it successfully.
Aguinaga with good strikes from the mount here!
Aguinaga punishing his opponent with strikes.
Aguinaga controlling from the full mount.
Aguinaga scoring with strikes but Bonham is staying in there.
That's two minutes gone in the round.
Aguinaga scores with a couple of good head shots there.
Aguinaga landing strikes from the mount.
Aguinaga lands a big shot there that rocks Bonham but he's holding on and managing to survive for now.
Bonham is writhing around trying to get back to his feet.
Aguinaga working Bonham over with strikes here.
Aguinaga trying to control but he's not successful this time.
Bonham is working to get back to half guard.
Aguinaga tucks in and makes sure he doesn't lose the dominant position.
Aguinaga is working on an americana here. Ooh, that looks pretty nasty! Nope, Bonham has managed to escape the submission attempt.
The fans in attendance giving it up for the two fighters, who have really let it all hang out in the last minute or so!
Bonham working to try and regain half guard.
That's three minutes gone in the round.
Bonham is persisting with the attempt to improve his position.
The referee warns Bonham that he has to improve his position here as he takes two more clean shots to the head.
Aguinaga landing punches.
Aguinaga will need to keep those long limbs tucked in whilst he's on the ground, to prevent any submissions.
Bonham squirming around on the bottom, looking to escape.
Bonham is squirming around, avoiding Aguinaga's attempts to control the action.
Bonham throwing hammer fists to the chest of Aguinaga. What's that going to do exactly?
Aguinaga has been looking to land a fair amount of strikes on the ground. He might be looking to soften his opponent up in order to work for a submission.
That's four minutes gone in the round.
Well. There's a bit of a lull in the action here and the crowd are starting to get restless.
Aguinaga working for a submission but Bonham is keeping him at bay.
Aguinaga scoring with strikes but Bonham is staying in there.
Aguinaga cracks Bonham with a nasty head shot there - the crowd let out an audible gasp there, as the noise reverberated around the arena.
Bonham keeping his composure momentarily, calmly looking to get back to half guard.
Aguinaga scores with a couple of good head shots there.
Aguinaga with good strikes from the mount here!
The referee warns Bonham that he has to improve his position here as he takes two more clean shots to the head.
Aguinaga putting on the heat here with some good ground and pound!
That's five minutes gone in the round.
A nice elbow there by Aguinaga.
The crowd growing excited in anticipation of a finish here! Right on cue, Aguinaga cracks his opponent with a massive right hand that draws loud cheers!
A nice elbow there by Aguinaga.
Aguinaga punishing his opponent with strikes.
Aguinaga tries to control but Bonham wriggling away.
Bonham is desperately trying to improve his position but Aguinaga has a good base and remains in mount.
Bonham is bucking up trying to escape but Aguinaga cracks him with another couple of good strikes.
Bonham in a bad spot here, taking shots to the head.
Aguinaga lands a heavy elbow.
Aguinaga has his opponent pinned against the ropes, landing some nasty ground and pound that is really making a bit of a mess out of Bonham's face.
Aguinaga scoring with strikes but Bonham is staying in there.
That's six minutes gone in the round.
Aguinaga lands a couple of nice shots there from mount.
Aguinaga pausing momentarily but resumes with a couple of decent strikes that do a bit of damage.
Bonham wants to control but Aguinaga is having none of it.
Bonham is bucking up trying to escape but Aguinaga cracks him with another couple of good strikes.
Aguinaga in mount throwing good strikes here, bouncing his opponent's head off the canvas.
Aguinaga swings around for an armbar but it's a sloppy attempt and Bonham is now in Aguinaga's guard. A big mistake from Aguinaga there, giving up the dominant position!
Aguinaga bucks up whilst keeping hold of a body lock, managing to reverse the position. Now he's in top in Bonham's guard.
Aguinaga wants to control from the top but Bonham keeps moving.
Bonham trying to control the position.
That's seven minutes gone in the round.
Aguinaga postures up and lands some nice ground and pound.
Aguinaga keeps in close for a moment and lands a decent shot to the side of Bonham's head.
Bonham tries to land a sweep but no joy.
Aguinaga looking to pass the guard.
Aguinaga trying to control but Bonham is working from the bottom.
Aguinaga works over Bonham with some ground and pound from guard.
The referee decides to stand the fighters back up.
Bonham pivots as if he's going to throw a leg kick but stops half way.
Aguinaga changes levels and drives through with a really nice takedown into side control. Bonham looks really pissed at himself for not defending that better.
A lull in the action here.
Bonham is not in a great position here, taking some shots.
That's eight minutes gone in the round.
Aguinaga looking for an arm triangle but it's way too loose to do anything.
Bonham tries to get back to half guard but can't.
Felix Aguinaga is fighting for a decision here - he's started to take the cautious approach.
Aguinaga controlling from side mount.
Bonham struggling a bit here.
Bonham is looking to regain half guard here but Aguinaga keeps moving and retains side control.
Aguinaga tries to move into full mount but can't pass Bonham's legs.
John Bonham has stepped it up - he knows he needs a finish here!
That's nine minutes gone in the round.
Aguinaga takes a little break here. Bonham wants to take advantage but he is being controlled well.
Aguinaga wants to control but Bonham is keeping him busy.
Bonham is not in a great position here, taking some shots.
Neither fighter is doing enough for the referee's liking and he's decided to stand them back up.
Aguinaga shoots in but Bonham avoids the takedown attempt easily.
Bonham tries to close the distance and clinch up against the ropes but Aguinaga paws at him with a jab and circles away.
Bonham tries to clinch up but Aguinaga circles away and keeps his distance.
Bonham has a takedown stuffed.
Aguinaga lands a jab, followed by a cross and another cross, as Bonham backs up against the ropes.
Wow, both these guys are really going for it!
Aguinaga bobs and weaves into range and then changes levels and scores with a nice takedown into side control.
And that's the end of the fight!
Felix Aguinaga showed his dominance in that final round.
Well Aguinaga has outscored his opponent in every aspect of the fight today. Only a scarily incompetent judge or two will keep him from a well deserved win... Over to the ring announcer for the scorecards.
Ladies and gentlemen, after 2 rounds of action, we go to the scorecards for a decision.
Judge Sam Margolis scores the fight for Felix Aguinaga!
Judge Chris Edwards scores the fight for Felix Aguinaga!
Judge Andrew Berry scores the fight for Felix Aguinaga!
Felix Aguinaga wins by unanimous decision!
|
|
|
|
|
|
|
|
|
|
|
|
|
|
|
|
|
|
|
|
|
|
|
| S |
C
A |
G |
S |
C
B |
G |
|
S |
C |
G |
|
energy
A | B |
|
hype
A | B |
|
pop
A | B |
|
mgr
A | B |
|
FIGHT
RATING
26% |
|
|
|
|
|
|

