|
|
PBP Commentary |
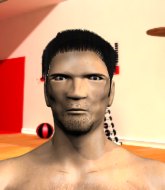
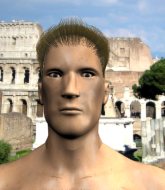
Coming up we have a featherweight MMA rules bout between Minoru Yamamoto (ranked 0 p4p, 0 weight class) and Crack Head (ranked 0 p4p, 0 weight class). Crack Head is the more experienced fighter, so let's see if that makes a difference tonight.
 |
|
 |
| 163 cm
21
150 lbs
2 - 0 - 0 |
|
170 cm
18
153 lbs
3 - 1 - 0 |
BJJ White Belt
Solid boxing
Granite chin |
|
BJJ Blue Belt
Basic striking
Likes musicals |
|
| |
|
Ladies and gentlemen. This fight is 3 rounds, in the featherweight division.
Introducing the fighter to my left, fighting out of the red corner.
With a record of
2 - 0 - 0, fighting out of Tokyo, Minoru Yamamoto!
And introducing the fighter to my right, fighting out of the blue corner.
With a record of
3 - 1 - 0, fighting out of Sydney, Crack Head!
The judges for this bout are Russell Pearce, Columbo Gatti and Steve Montenegro.

The bell rings for round one and we are underway!
The fight stays on the outside here - Yamamoto looks like he's thinking about clinching though.

Yamamoto clinches.
Head is trying to work for a single leg takedown but Yamamoto pulls him back up using the underhooks.
With the fighters up against the cage, Head throws an elbow but misses.
Head working on landing some head shots here - that one got through nicely.
Yamamoto gets underhooks to prevent Head's takedown attempt.
Head prevents Yamamoto from breaking the clinch.

Yamamoto's corner calls for him to break the clinch, which he does.
Head goes for a high kick. It partially lands.
Head throws a looping left and ducks down for a takedown. He's got his arms around Yamamoto's waist but Yamamoto gets an underhook and avoids the takedown by throwing Head off to one side.
Minoru Yamamoto has stuffed three takedown attempts in the round now. That's going to take a lot out of Crack Head.
Head wants to clinch.
We've had a slow start to the round here - hopefully the action picks up.
Yamamoto throws a sloppy head kick and Head moves out of range easily.
Yamamoto leaves Head with his face pressed against the mat as he sprawls beautifully, defending against a solid takedown attempt.

That's one minute gone in the round.
Head looks frustrated there after his takedown attempt is stuffed easily.
Yamamoto doesn't manage to clinch there - Head circles away.
Head shoots in for a takedown but doesn't get it.
Head looks frustrated there after his takedown attempt is stuffed easily.
Head throws a looping left and ducks down for a takedown. He's got his arms around Yamamoto's waist but Yamamoto gets an underhook and avoids the takedown by throwing Head off to one side.
Yamamoto misses with a jab, cross combination.
Head fails with a takedown attempt from distance.
Head walks straight into an uppercut. Luckily it didn't land flush.
Head shoots in but no luck this time.
Head keeps the fight on the outside.
Nice sprawl there from Yamamoto as Head shoots in.
Minoru Yamamoto is looking to keep the fight on the feet at all costs.
Yamamoto throws a right and a left that Head avoids nicely.
Head takes a shot right to the liver - Bas would have been proud of that punch.
Yamamoto misses with a jab and misses with a cross straight after too.
Sloppy strikes from Yamamoto. Those never looked like landing.

That's two minutes gone in the round.
Yamamoto moves in looking to clinch but Head pushes him off.
Yamamoto is looking light on his feet compared to last time was saw him fight.
Yamamoto lands three nice shots there - that looked like it hurt!
The fans in attendance giving it up for the two fighters, who have really let it all hang out in the last minute or so!
Yamamoto throws a jab to the body, straight down the pipe. Boom. That sent Head stumbling backwards but he manages to regain his composure quickly.
Head throws a looping left and ducks down for a takedown. He's got his arms around Yamamoto's waist but Yamamoto gets an underhook and avoids the takedown by throwing Head off to one side.
Yamamoto throws a head kick but Head moves out of range.
Yamamoto is breathing heavily.
Head fails to land the takedown.
Yamamoto throws a jab to the body, straight down the pipe. Boom. That sent Head stumbling backwards but he manages to regain his composure quickly.
Head shakes his hands off, looking to compose himself, but takes a jab to the jaw whilst he does it.
Yamamoto wants to clinch up but Head keeps it at a distance.
Head throws a head kick that misses and slips in the process. He scrambles back to his feet and the fighters circle.
Head shoots in but doesn't get the takedown
enabling Yamamoto to counter with a crisp jab.
Head is looking to take this fight into the clinch.

That's three minutes gone in the round.
Head circles away from the clinch attempt.
Yamamoto tries to bum rush Head with a series of wild strikes but Head uses good footwork to avoid the assault.
Head tries a counter takedown but it's more of a dummy move, and he uses it to push himself away.

Head drives through with a takedown into Yamamoto's guard. Let's see what he can do from the top position.
Head missing there with some ground and pound from the guard.
Yamamoto wants to get back to his feet but Head is in a dominant position and won't allow it.
Head cracks Yamamoto with a solid left hand.
Head trying to pass the guard but can't manage it just yet.
Head is in close to Yamamoto's body, working some short punches and elbows.
Yamamoto is looking to get back to his feet but can't, whilst Head is controlling him.

That's four minutes gone in the round.
Head throwing strikes but missing.
Head is working Yamamoto over from the guard. He should look to pass the guard and do a little more damage with these strikes.
Yamamoto wants to get back to his feet but he's too absorbed in his own little project and Head manages to pass to side control.
Head missing with some ground and pound from the half guard.
Head missing with some ground and pound from the half guard.
Head working Yamamoto over with strikes.
And thats the end of the round the fighters go back to their corners.
Minoru Yamamoto dominated that round.
Well, the break between rounds is over. Let's get back to the scrappin!

Yamamoto keeps the fight standing with a nice sprawl.
Yamamoto stuffs the takedown.
Yamamoto quickly followed up with a counter body kick but doesn't connect.
Minoru Yamamoto is winning the standup battle so far.
Nice takedown defense from Yamamoto. No joy for Head on that attempt.
Minoru Yamamoto has stuffed three takedown attempts in the round now. That's going to take a lot out of Crack Head.
Yamamoto throws a solid leg kick but Head takes the impact on his shin and smiles at Yamamoto.
Yamamoto throws a series of punches but Head moves out of range.
Yamamoto thows a body kick. Head tries to catch it but that hurt him.
Head shoots in with a takedown attempt and he has Yamamoto pinned against the cage. Yamamoto gets the underhooks and manages to circle away.
Yamamoto jinks towards his opponent looking like he wants to counter with a mid kick but doesn't commit.
Yamamoto's corner calls for a 1, 2 combination and Yamamoto duly obliges.
We've had a slow start to the round here - hopefully the action picks up.
Nice takedown defense from Yamamoto. No joy for Head on that attempt.
Head fails with a rather predictable takedown attempt.
It looked like Yamamoto was looking amped, ready to throw a big counter but didn't commit.
That's one minute gone in the round.
Yamamoto throws a right hand that Head ducks under and follows up with a left that Head also avoids with ease.
Yamamoto throws a right hand that Head ducks under and follows up with a left that Head also avoids with ease.
Head tries a counter takedown but it's more of a dummy move, and he uses it to push himself away.
Both fighters are absolutely exhausted here.
Head dives in and grabs Yamamoto's left leg, looking for a takedown. Yamamoto pushes down on Head's head and hops out.
Yamamoto keeps the fight standing with a nice sprawl.
Head shoots in for a takedown - he's clinched up with Yamamoto but Yamamoto pushes him off and we're back to square one.
Yamamoto slaps away a takedown attempt from Head, before circling back to the center of the mat.
It looked like Yamamoto was looking amped, ready to throw a big counter but didn't commit.
Good work by Head as he checks the leg kick.
Yamamoto will need to tighten up his combinations if he doesn't want to gas himself out, swinging at thin air.
No luck with that takedown attempt from Head.
Head tries to bum rush Yamamoto with a series of wild strikes but Yamamoto uses good footwork to avoid the assault.
That's two minutes gone in the round.
Head gets his takedown attempt stuffed easily
and Yamamoto counters with a one-two to the body.
Head fails with a takedown attempt from distance.
We've been informed that Head has been working hard on his conditioning in the buildup to the fight.
Head gets his head snapped back by a nice shot there.
Yamamoto is really dominating this fight. Is there anything that Head can do to turn this around?
Yamamoto misses with an attempted mid kick.
Head fails with a rather predictable takedown attempt.
We've seen a great period of action over the last minute or so - credit to both fighters for going all out!
Yamamoto fails to land with the punch combination there - jab, cross, hook, miss, miss, miss.
Yamamoto moves in looking to clinch but Head pushes him off.
Head shoots in for a takedown. "I don't think so" says Yamamoto as he avoids it easily.
Yamamoto does a little shimmy and throws a leg kick. The leg kick missed by a considerable margin though, making him look a little bit silly for doing the shimmy.
Yamamoto forces Head back against the cage and clinches.
Head has Yamamoto pressed up against the cage and is working for takedown. Yamamoto manages to improve position though and keeps the fight standing.
Head has Yamamoto pressed up against the cage and is working for takedown. Yamamoto manages to improve position though and keeps the fight standing.
That's three minutes gone in the round.
Yamamoto wants to push off and get back to the center of the mat but Head has him pressed against the cage.
Yamamoto is trying to force a seperation but Head has the dominant position.
Head has Yamamoto pressed against the cage, preventing Yamamoto from circling away and getting back to striking at range.
Head is looking for a takedown.
Yamamoto can't break the clinch.
Yamamoto misses with a shot to the kidneys.
Head is looking for a takedown.
Head has moved round to his opponent's back and is looking for a suplex! Oh snap! He's tossed Yamamoto clear over his head and slammed him to the mat!
Head throwing wild punches that miss their target.

Head looking for the choke but no joy.
Yamamoto covering up well and avoiding damage.
That's four minutes gone in the round.
Yamamoto is trying to get back to his feet but he's not managed it yet.
Head has his opponent's back and is working for the choke.
Head throwing wild punches that miss their target.
Oooh a big shot gets through from Head. Many more shots like that and the referee will have to think about stepping in!
And thats the end of the round the fighters go back to their corners.
Minoru Yamamoto dominated that second round.
That's time! Yamamoto's corner gives him a slap on the ass as he gets ready to fight. And we move into the final round!

Head fails with a takedown attempt from distance.
Yamamoto throws a series of punches but Head moves out of range.
Head looks for a takedown here. Will he get it? Yamamoto is fending him off so far but Head persists. Nope, Yamamoto circles away and we're back to standing.
Head shoots in but no luck this time.
Minoru Yamamoto has stuffed three takedown attempts in the round now. That's going to take a lot out of Crack Head.
Head fails with a takedown attempt.
As Head looks to move away, Yamamoto throws a big counter combo but Head just gets out of the way.
Yamamoto lets the fists fly and connects with a left straight followed by a right hook.
Head throws a head kick that Yamamoto semi-blocks.
Yamamoto keeps the fight standing with a nice sprawl.
We've had a slow start to the round here - hopefully the action picks up.
A really sloppy takedown attempt there from Head.
Yamamoto darts in and out, connecting with a jab.
Head takes a big intake of breath there - he's definitely tired.
That's one minute gone in the round.
Yamamoto doesn't manage to clinch there - Head circles away.
Head takes a solid shot to the body. That one hurt him but he's trying not to show it.
Head walks into a straight right hand from Yamamoto.
Yamamoto will need to tighten up his combinations if he doesn't want to gas himself out, swinging at thin air.
Yamamoto explodes with a nice body kick and back out of range. Nice work.
Head keeping a good distance there, avoiding the body shot.
Head drops down looking to force a counter takedown but Yamamoto defends it well.
Yamamoto throws a right hand that Head ducks under and follows up with a left that Head also avoids with ease.
Head feints the counter takedown.
Yamamoto stalks Head and leaps in with a furious combination of punches. Uppercuts and crosses smash into Head's face. Head staggers backwards, shaken.
Head fails with the takedown.
Yamamoto misses with a double jab.
Yamamoto swinging wildly here.
That's two minutes gone in the round.
Head shoots for a double leg takedown but Yamamoto sprawls well. He's pushed Head's face into the mat and manages to get back to his feet relatively easily.
A really sloppy takedown attempt there from Head.
Yamamoto is looking for a counter combo.
The fans in attendance giving it up for the two fighters, who have really let it all hang out in the last minute or so!
Head dives in for a single leg takedown but Yamamoto sprawls and the fighters end up clinched against the cage.

Head fakes with an overhand right and moves in to clinch with Yamamoto, pushing him back against the cage.
Head is trying to pull guard but being pressed up against the cage enables Yamamoto to keep the fight standing.
Yamamoto manages to break the clinch.
Yamamoto closes the distance and lands a one-two.
Head shoots in and scores a nice double leg takedown into half guard.
Head prevents Yamamoto from standing back up.
That's three minutes gone in the round.
The ref warns both fighters not to hold the cage as they work up against the meshing.
Head wants to take a breather but Yamamoto is having none of it.
Head seems to be taking a bit of a break to think of his next move. He lands a short punch in the meantime.
Crack Head has got the better of the ground game so far.
Yamamoto is looking to get back to is feet but Head passes into side control.
Yamamoto wants to get back to his feet but Head is dominant here and he's now got Yamamoto's back!
Yamamoto covering up well under a barage of strikes.
Head is working for the choke. It looks like he might have got it... has he...? Yes! Yamamoto is tapping out! This one is all over!
Ladies and gentlemen, after 4:59 of round 3, we have a winner by way of Submission (RNC). Crack Head!
Crack Head took to the mic after the fight and begged the organizational hierarchy for a shot at the title.
|
|
|
|
|
|
|
|
|
|
|
|
|
|
|
|
|
|
|
|
|
|
|
| S |
C
A |
G |
S |
C
B |
G |
|
S |
C |
G |
|
energy
A | B |
|
hype
A | B |
|
pop
A | B |
|
mgr
A | B |
|
FIGHT
RATING
64% |
|
|
|
|
|
|
