|
|
PBP Commentary |
Coming up we have a heavyweight MMA rules bout between Lomax Hayden (ranked 0 p4p, 0 weight class) and Hakeem Babangida (ranked 0 p4p, 0 weight class). Both these guys have solid standup skills and neither is particularly fantastic on the ground, so let's hope for a nice standup war!
 |
|
 |
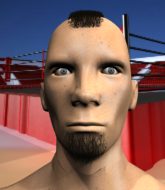
| 190 cm
25
265 lbs
1 - 0 - 0 |
|
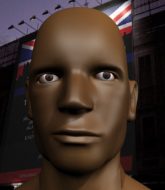
196 cm
25
265 lbs
0 - 1 - 0 |
BJJ White Belt
Excellent MT
Big heart |
|
BJJ White Belt
Excellent MT
Determined |
|
| |
|
Ladies and gentlemen. This fight is 3 rounds, in the heavyweight division.
Introducing the fighter to my left, fighting out of the red corner.
With a record of
1 - 0 - 0, fighting out of Los Angeles, Lomax Hayden!
And introducing the fighter to my right, fighting out of the blue corner.
With a record of
0 - 1 - 0, fighting out of Los Angeles, Hakeem Babangida!
The judges for this bout are Don Winkell, Timothy Bukovac and Jack Bonds.

The bell rings for round one and we are underway!
Hayden throws a body shot but no joy.
Babangida looks to land a right hand but Hayden moved out of range.
Hayden throws a body shot but no joy.

Hayden drives through and clinches with Babangida against the cage.
Hayden lands a right hand.
Babangida looks more muscular than last time we saw him. He must have been on the weights.
Babangida blocks a couple of punches on the inside.
Babangida tries to throw a body punch but Hayden avoids it by throwing Babangida back against the cage.
Babangida lands a body punch in the clinch.
Babangida goes for a takedown in the clinch but Hayden prevents it.
Hayden throws a head punch that misses.
A head punch on the inside from Babangida fails to land.
We've had a slow start to the round here - hopefully the action picks up.
A short uppercut from Babangida.
Babangida misses with a body punch.
Babangida works on Hayden's body with a couple of short punches.
Babangida lands with a left to the head.
Hayden misses with a body punch.
Babangida lands with a good tight uppercut to the head.

That's one minute gone in the round.
Hayden misses with some punches.
Babangida lands with a light punch inside.
Babangida blocks a couple of punches on the inside.
Babangida makes some space for himself and lands an uppercut.
A nice left hand lands by Babangida.
Babangida prevents Hayden from breaking the clinch.
Hayden struggles to land a body shot inside as Babangida controls his hands.
Babangida lands a right hand that snaps the head of Hayden backwards.
An uppercut on the inside fails to land for Hayden.
Hayden is looking to control Babangida's arms but Babangida gets an underhook and turns him. Now Hayden has his back to the cage.
Babangida goes for a body shot but it's blocked.
Babangida misses with a short punch on the inside.

Hayden breaks the clinch and we return to the middle of the mat.
Babangida tries to keep at a distance but Hayden has taken the fight into the clinch.
A nice left hand lands by Babangida.
Babangida gets through Hayden's defenses to land a nice punch to the side of the head.
Babangida has a body lock and is looking for a takedown. Hayden is bouncing around trying to prevent the takedown and somehow he has indeed managed to stay on his feet.
We've seen a great period of action over the last minute or so - credit to both fighters for going all out!
Babangida throws a punch but it's blocked by Hayden.

That's two minutes gone in the round.
Babangida tries to work over Hayden's body with a swooping hook but it only glances the target.
Babangida throws a punch but it's blocked by Hayden.
Hayden is trying to work out of this bad position, with his back against the cage.
Babangida working on landing some head shots here - that one got through nicely.
Hayden misses with a punch on the inside.
Nice body punch from Babangida - that landed with a thud.
Hayden is breathing heavily.
Babangida blocks a body shot from Hayden.
Babangida lands a short shot on the inside that snaps the head of Hayden backwards.
Babangida lands with a light punch inside.
Hayden misses with some punches.
Hayden misses with some punches.
Babangida lands a shoulder strike.
Hayden wants to stall.
Babangida scores with a nice hook to the head.
Hayden stalling against the cage.
Hayden swings away with an uppercut that misses.
Both fighters working to control the clinch.

That's three minutes gone in the round.
Babangida lands a right uppercut that snaps the head of Hayden backwards.
Babangida tried to land a shot to the body but connects with Hayden's elbow.
Babangida lands a body punch - he's looking to wear down Hayden.
A left hand lands to the body for Babangida.
Good body shot from Babangida.
Still in the clinch, Babangida scores with a nice short uppercut.
Babangida makes some space for himself and lands an uppercut.
A shot in the inside from Babangida.
Babangida lands with a left to the head.
Hayden tries to land a shot to the body but it's blocked.
Babangida lands with a short shot to the head.
Babangida works on Hayden's body with a couple of short punches.
Babangida lands a right hand.
We've seen a great period of action over the last minute or so - credit to both fighters for going all out!
Babangida is looking for a takedown up against the cage. Hayden gets underhooks though and prevents the takedown attempt.
Lomax Hayden has stuffed three takedown attempts in the round now. That's going to take a lot out of Hakeem Babangida.
Babangida scores with a hook to the body.
Babangida lands a body punch.
Babangida lands an uppercut.
Babangida pushes Hayden back against the cage and lands a hook to the side of the head.

Hayden is rocked!
Babangida lands a hook to the side of the head.
Oh Hayden is still all over the place! His legs are completely gone! Will he be able to recover?!!

That's four minutes gone in the round.
Babangida lands with a light punch inside.
Hayden blocking some punches.
Hayden seems to have got his legs back now.
Hayden doesn't land with the attempted body shot.
Nice body punch from Babangida - that landed with a thud.
Babangida lands with a quick shot inside that doesn't really do much damage.
A body shot lands from Babangida.
A nice left hand lands by Babangida.
Babangida makes some space for himself and lands an uppercut.
Babangida lands a hook to the body. It's hard to tell if that hurt Hayden or not.
Babangida lands a body punch in the clinch.
Babangida scores with a shot to the side of Hayden's head.
Hayden prevents a body shot from Babangida.
Babangida digs a right hand into Hayden's ribs. Those have got to be taking their toll on Hayden's gas tank.
The crowd applaud the fighters' efforts here as the round comes to an end.
Babangida cracks Hayden with a nice body shot.
A right handed body shot lands from Babangida.
Babangida lands a hook to the body. It's hard to tell if that hurt Hayden or not.
Babangida scores with an uppercut up the middle.
Hayden takes a shot to the head.
And thats the end of the round the fighters go back to their corners.
Hakeem Babangida dominated that round.
Well, the break between rounds is over. Let's get back to the scrappin!


Babangida has managed to clinch.
Babangida doesn't land with the attempted body shot.
Hayden is trying to maintain a safe position but Babangida gets an underhook and turns Hayden into the cage.
Hakeem Babangida seems to be working more effectively in the clinch in the fight so far.
Babangida gets through Hayden's defenses to land a nice punch to the side of the head.
Babangida lands a right hand.
Babangida lands punches inside but they're not really causing much damage.
Babangida blocks a body shot from Hayden.
Babangida swings away with an uppercut that misses.
Hayden tried to land a shot to the body but connects with Babangida's elbow.
Hayden is working hard here but doesn't seem to be able to control effectively, up against the cage.
Babangida lands with a left to the head.
With the fighters clinched against the cage, Babangida creates a bit of distance for himself and scores with a nice uppercut.
We've had a slow start to the round here - hopefully the action picks up.
A short left from Hayden.
Hayden is trying to stall.
Babangida lands a hook to the body. It's hard to tell if that hurt Hayden or not.
Both fighters are absolutely exhausted here.
Babangida lands a shoulder strike that jolts his opponent's head backwards.
Babangida has been the more effective fighter overall so far.
Babangida lands with a quick shot inside that doesn't really do much damage.
That's one minute gone in the round.
Babangida cracks Hayden with a nice body shot.
Babangida presses Hayden against the cage and delivers a mid-strength body shot.
Babangida presses Hayden against the cage and delivers a mid-strength body shot.
Babangida lands punches inside but they're not really causing much damage.
A short body shot lands from Babangida as the two fighters clinch.
Babangida lands a shot to the body.
Babangida lands a body punch - he's looking to wear down Hayden.
Still in the clinch, Babangida scores with a nice short uppercut.

Babangida drops Hayden onto one knee with a big uppercut from the clinch! Hayden is propped up by the cage and works his way back to his feet!
This is a great period of action - very entertaining stuff!
Babangida lands a body punch.
Babangida creates some distance for himself and unleashes a massive uppercut that sends Hayden's eyes rolling into the back of his head! Hayden drops to his knees and Babangida pours it on with more strikes until the referee steps in to end the bout!
Ladies and gentlemen, after 1:42 of round 2, we have a winner by way of TKO (Strikes). Hakeem Babangida!
|
|
|
|
|
|
|
|
|
|
|
|
|
|
|
|
|
|
|
|
|
|
|
| S |
C
A |
G |
S |
C
B |
G |
|
S |
C |
G |
|
energy
A | B |
|
hype
A | B |
|
pop
A | B |
|
mgr
A | B |
|
FIGHT
RATING
70% |
|
|
|
|
|
|

