|
|
PBP Commentary |
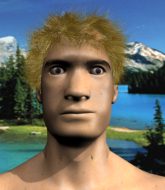
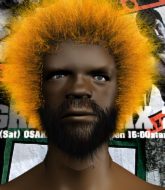
Coming up we have a heavyweight MMA rules bout between Matt Claremont (ranked 0 p4p, 0 weight class) and Aaron Acton (ranked 0 p4p, 0 weight class). I don't know about you partner, but I'm pumped for this one!
 |
|
 |
| 195 cm
24
265 lbs
6 - 3 - 0 |
|
200 cm
20
240 lbs
4 - 2 - 0 |
BJJ Blue Belt
Counter striker
Granite chin |
|
BJJ Blue Belt
Brawler
Granite chin |
|
| |
|
Ladies and gentlemen. This fight is 3 rounds, in the heavyweight division.
Introducing the fighter to my left, fighting out of the red corner.
With a record of
6 - 3 - 0, fighting out of Las Vegas, Matt Claremont!
And introducing the fighter to my right, fighting out of the blue corner.
With a record of
4 - 2 - 0, fighting out of Las Vegas, Aaron Acton!
The judges for this bout are George Francis, Frank Dennis and Alan Glass.

The bell rings for round one and we are underway!
Acton lunges in with swinging rights and lefts but Claremont circles away quickly and effectively.
Acton tries to clinch there but Claremont circles away.
Claremont fails with a takedown attempt from distance.
Aaron Acton seems to be the more aggressive standup fighter in this bout.
Claremont slips a straight right by Acton.

Claremont shoots in for a takedown and gets it. Let's see what he's got on the mat.
Acton wants to stand but Claremont is controlling the position.
Claremont wants to get up but he can't break Acton's closed guard. He needs to be careful trying to break the legs open, as he's open to submissions here.
The fighters are pressed up against the cage, both looking to find a bit of space to work.
Claremont is stalling in the full guard.
Acton wants to stand and escape but Claremont is having none of it.
Claremont in full guard, throwing the ground and pound. No damage this time.
The ref warns both fighters not to hold the cage as they work up against the meshing.
Claremont is pushing down on Acton's leg trying to pass to half guard. Acton is fighting to maintain full guard but Claremont has managed to sneak the leg through.
Acton wants to get back to his feet.

That's one minute gone in the round.
Claremont trying to control the action but Acton is working from the bottom.
Claremont moves nicely into side control.
Claremont wants to control but Acton is keeping him busy.
Claremont is staying tight to Acton's torso, preventing him from escaping.

That's two minutes gone in the round.
The crowd are getting on the fighters' backs, as the pace has dropped off in the last minute or so.
Acton is putting a lot of effort into getting back to his feet here.
Claremont is looking to take a break and control but Acton is keeping him honest, looking to work from the bottom.
A bit of a lull in the action. I'm sure it will pick up again soon... even if the ref has to physically pick them up and put them back on their feet.
Claremont trying to control the action but Acton is working from the bottom.

The referee stands the fighters back up. Matt Claremont just wasn't active enough from the dominant position.
Claremont dodges the punch combination from Acton.

That's three minutes gone in the round.
Claremont is looking to clinch but Acton is avoiding it.
Claremont throws a head kick but Acton moves out of range.
Claremont takes a shot to the body in his stride.
Acton tries to clinch there but Claremont circles away.
Acton throws an overhand right that lands on Claremont's shoulder, as Claremont tries to avoid the shot.

Claremont gets to the clinch - let's see what his plan is here.
Claremont is pressed up against the cage. Acton has hold of a leg and is looking to drag Claremont down to the mat. Claremont avoids the attempt though and has circled away. We're back to striking at a distance.
Claremont feints and then dives in with a takedown. That was a long way out but the feint bought him enough time to close the distance and complete the takedown. Now we'll play guard for a bit and see who can get the better of that position.
Claremont trying to control the position from guard on top but Acton is wriggling around, looking for whatever he can.

Acton scrambles and gets back to his feet.
Acton looks gassed!
Claremont swats away the attempt to clinch by Acton.

That's four minutes gone in the round.
Claremont looks to score with a jab to the body but Acton is just out of range.
Claremont shoots in for a takedown - he's clinched up with Acton but Acton pushes him off and we're back to square one.
Like a baseball bat into the meat of his leg there - nice leg kick by Claremont.
Claremont misses with a takedown attempt. He shot from a bit too far out.
That's three failed takedown attempts in the round for Matt Claremont. That's going to take a lot out of him.
Claremont throws a wild combination but nothing lands.
Claremont avoids the clinch attempt nicely.
Claremont tries to bum rush Acton with a series of wild strikes but Acton uses good footwork to avoid the assault.
Acton rushes Claremont and presses him up against the cage.
Acton can't break the clinch.
Acton lands with a short head shot on the inside.
Acton misses with a short punch on the inside.

Acton breaks from the clinch.
Acton waving his hands out infront of him, looking to distract Claremont.
And thats the end of the round the fighters go back to their corners.
Matt Claremont dominated that round.
Well, the break between rounds is over. Let's get back to the scrappin!

No joy there for Claremont, who threw a few shots but didn't land.
Acton thows a body shot but no joy.
Claremont drives through and clinches with Acton against the cage.
Acton tries for a takedown. No joy.
Claremont jumps guard.
Claremont is trying to control the position from the bottom.
Claremont is controlling Acton's posture.
Claremont wants to control but Acton passes easily into half guard.
Claremont is controlling Acton's trapped leg to prevent Acton from advancing to side control.
Claremont trying to control here.
That's one minute gone in the round.
Claremont is looking for a sweep. Acton is wise to his cunning plan and keeps the top position.
Acton wants to get back to his feet.
Acton is thwarting Claremont's attempts to control the position.
Claremont tries to roll over but Acton keeps him under control.
Claremont regains full guard. Nicely done.
Claremont on his back here. We all know that wrestlers don't like being on their back so let's see if Claremont tries to get out of the position.
That's two minutes gone in the round.
A lull in the action here being met with boos from the crowd.
Claremont trying to keep a closed guard but Acton is proving a slippery customer.
It looks like we're going to have a standup here. Neither fighter is doing enough on the ground.
Acton throws out a loose jab but Claremont uses good head movement to avoid it.
Crunch! Claremont slams his shin into Acton's torso.
Acton is breathing heavily.
Claremont thuds his right hand into Acton's forehead from close range. That could be painful for both fighters.
A thudding body kick lands there by Claremont!
Claremont lands a slapping body shot.
No joy there for Claremont, who threw a few shots but didn't land.
Claremont throws a right high kick that is partially blocked by Acton.
Claremont drives through and clinches with Acton against the cage.
Claremont gets a trip takedown into half guard.
That's three minutes gone in the round.
Claremont seems very keen to just sit and control from half guard but Acton does not like that idea so much and is remaining active off his back.

Claremont is looking for a kimura here.
Claremont wants to control but Acton is keeping him busy.
That's four minutes gone in the round.
The crowd are showing their displeasure at the lack of action as loud boos ring out around the arena.
Acton pushes Claremont off looking to stand but Claremont dives back in and keeps control.
Claremont is looking for a kimura. It's going to be difficult to finish that from half guard though and Acton defends it well.
The referee has ruled that neither fighter is active enough on the ground and has stood them back up.
Acton throws a lazy right hand but Claremont sees it coming a mile off and sidesteps it easily.
Claremont avoids a punch combination nicely.
Acton looks to clinch
and Claremont counters with a shoot takedown into half guard.
Claremont wants to take a breather but Acton is having none of it.
As the round comes to an end the crowd are showing their appreciation for a great round of action.
Claremont is trying a forearm choke
I don't think that's going to do much at this level of the game.
Claremont trying to mount his opponent but Acton defends it.
And thats the end of the round the fighters go back to their corners.
Matt Claremont dominated that second round.
The fighters get back to their feet, the hooter sounds and we're back to the action! Let's hear some noise people - this is the final round!

Acton swinging wilding here.
Claremont shoots in and drives through. Acton sprawls well.
Acton misses with a wild combination.
Acton throws a right and a left that Claremont avoids nicely.
Donk. Acton catches Claremont right on the button with a cross.
Claremont throws the kick towards the body but Acton avoids it.
Acton loads up on a big right hand but Claremont slips the punch.
We've had a slow start to the round here - hopefully the action picks up.
Acton stuffs the takedown.
Claremont misses with a half-hearted attempt at a head kick.
Claremont shoots in for a takedown! He's got it and he's managed to land in full mount! That's better than Claremont was expecting from the takedown attempt, I'm sure!
Both fighters are breathing heavily.
Claremont trying to control but he's not successful this time.
That's one minute gone in the round.
Claremont controlling from mount.
Acton trying desperately to get to his feet.
Claremont tries to control but Acton wriggling away.
Claremont controlling the pace for now.
That's two minutes gone in the round.
The crowd are getting on the fighters' backs, as the pace has dropped off in the last minute or so.
Claremont cracks Acton with a nasty head shot there - the crowd let out an audible gasp there, as the noise reverberated around the arena.
Acton is trying to get to the cage to help him get back to his feet.
Claremont tucks in and makes sure he doesn't lose the dominant position.
Claremont knows he needs to get back to his feet asap. He's simply no match for Acton on the ground.
Claremont has controlled the position for a good 20 seconds, which will no doubt be starting to frustrate his opponent.
Claremont scores with a couple of good head shots there.
That's three minutes gone in the round.
Claremont takes a little breather and maintains the position. The referee will be looking for him to stay active from such a dominant position though.
The referee stands the fighters back up. Matt Claremont just wasn't active enough from the dominant position.
Claremont misses with a body shot.
Matt Claremont is looking to throw some combinations by the looks of things.
Claremont misses the shot to the body.
Acton swings away but doesn't land with a series of punches.
Acton's corner calls for a 1-2. Acton obliges with the 1 part as he scores the single shot and moves back out of range.
Claremont looks to score with a combo but nothing lands.
Acton throws a combination that misses
and Claremont counters with a nice single leg takedown and he's in Acton's guard now.
Aaron Acton has stepped it up - he knows he needs a finish here!
That's four minutes gone in the round.
Claremont controlling from the guard. I say controlling but really, he's stalling.
Claremont gets to his feet - Acton follows without any prompting.
Matt Claremont is fighting for a decision here - he's started to take the cautious approach.
Claremont misses with a few strikes there.
The fight stays on the outside here - Acton looks like he's thinking about clinching though.
Acton throws a combination but comes up with nothing but fresh air.
Claremont throws a right and a left that both miss.
Acton throws a combination that misses
and Claremont connects with a straight left hand counter down the middle.
Claremont lands with a two punch combination before moving back out of range.
Claremont gets to the clinch - let's see what his plan is here.
The fans in attendance giving it up for the two fighters, who have really let it all hang out in the last minute or so!
Some stalling of biblical proportions here from Claremont.
And that's the end of the fight!
Matt Claremont showed his dominance in that final round.
Well Claremont has outscored his opponent in every aspect of the fight today. Only a scarily incompetent judge or two will keep him from a well deserved win... Over to the ring announcer for the scorecards.
Ladies and gentlemen, after 3 rounds of action, we go to the scorecards for a decision.
Judge George Francis scores the fight 30:26
Judge Frank Dennis scores the fight 30:26
Judge Alan Glass scores the fight 30:26
In favor of your winner, by unanimous decision... Matt Claremont!
|
|
|
|
|
|
|
|
|
|
|
|
|
|
|
|
|
|
|
|
|
|
|
| S |
C
A |
G |
S |
C
B |
G |
|
S |
C |
G |
|
energy
A | B |
|
hype
A | B |
|
pop
A | B |
|
mgr
A | B |
|
FIGHT
RATING
56% |
|
|
|
|
|
|
