|
|
PBP Commentary |
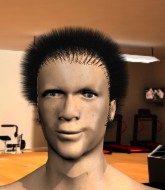
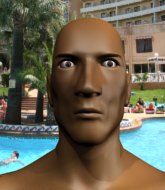
Coming up we have a featherweight MMA rules bout between Kantaro Hoshino (ranked 147 p4p, 19 weight class) and Kotetsu Yamamoto (ranked 220 p4p, 25 weight class). Fingers crossed for an exciting fight - I'm sure both fighters are looking for a nice under the table bonus!
 |
|
 |
| 165 cm
38
145 lbs
39 - 11 - 3 |
|
168 cm
26
149 lbs
18 - 5 - 1 |
Abu Dhabi Champ
World class boxer
Cardio machine |
|
Olympic wrestler
World class boxer
Good gas tank |
|
| |
|
Ladies and gentlemen. This fight is 3 rounds, in the featherweight division.
Introducing the fighter to my left, fighting out of the red corner.
With a record of
39 - 11 - 3, fighting out of Montreal, Kantaro Hoshino!
And introducing the fighter to my right, fighting out of the blue corner.
With a record of
18 - 5 - 1, fighting out of St Petersburg, Kotetsu Yamamoto!
The judges for this bout are Gregory Folan, Alec Ball and Dillan Fox.

The bell rings for round one and we are underway!
Yamamoto blocks a jab.
Yamamoto fails with a rather predictable takedown attempt.
Hoshino was looking to counter that last move with a shot to the body but he didn't commit.
Yamamoto takes a punch right to his stomach. That took the wind out of him momentarily.
Yamamoto scores with a shot to the body.
Yamamoto lands with a cross to side of his opponent's head.
Hoshino definitely looks more muscular than last time we saw him fight.
Yamamoto uses good head movement to avoid the hook from Hoshino.
Yamamoto lands a head shot.
Yamamoto keeping a good distance there, avoiding the body shot.
Hoshino fakes and then throws a beautiful body shot. Yamamoto looks a bit winded and takes a step backwards to take a breath.
Yamamoto thuds a left hand into Hoshino's body.
Yamamoto ducks low and lands a nice hook to the body of his opponent.
Yamamoto takes a swing at Hoshino's ribcage but misses.
Donk. Yamamoto catches Hoshino right on the button with a cross.
This is a great period of action - very entertaining stuff!
Hoshino uses some good footwork to avoid the body shot by Yamamoto.
We can't be sure of the tactics at this early stage but we have heard that Yamamoto has been working on his takedowns a lot in the buildup to the fight and we can only assume he's going to look to take this to the mat.
Hoshino misses with a straight right.
Hoshino ducks down and throws a hook to the body but Yamamoto moves away.
Yamamoto drops down looking to force a counter takedown but Hoshino defends it well.
Hoshino misses with an uppercut. Yamamoto saw that one coming.
Hoshino ducks down and throws a hook to the body but Yamamoto moves away.
Yamamoto thuds a left hand into Hoshino's body.

That's one minute gone in the round.
Yamamoto fakes high and swings low for a body shot but Hoshino manages to avoid it.
Yamamoto misses with a body shot.
Hoshino was looking to counter that move with a punch but didn't quite pull the trigger.
Hoshino throws out a loose jab but Yamamoto uses good head movement to avoid it.
Yamamoto tries a counter takedown but it's more of a dummy move, and he uses it to push himself away.
Hoshino keeping a good distance there, avoiding the body shot.
Yamamoto scores with a shot to the body.
Yamamoto throws a hard body shot but it just misses.
Hoshino scores with a big left there. The judges will like that one.
Wow, both these guys are really going for it!
Hoshino closes the distance and takes a jab right on the nose as he does so.
Hoshino waving his hands out in front of him, looking to distract Yamamoto.
Hoshino jabbing away but nothing is landing.
Yamamoto waving his hands out in front of him, looking to distract Hoshino.
Yamamoto uses decent footwork to sidestep a right hand from Hoshino.
Hoshino misses with a straight right.
A jab from Hoshino misses.
Yamamoto misses with a body shot. Nice footwork from Hoshino.
A looping hook to the body misses from Hoshino. Yamamoto does a little dance to reset his feet.
Yamamoto throws a shot from downtown. Hoshino moves away and avoids it.
Hoshino misses with a body shot. Nice footwork from Yamamoto.
Hoshino uses some good footwork to avoid the body shot by Yamamoto.

That's two minutes gone in the round.
Yamamoto tries to move into range but Hoshino moves to the side and lands with a nice right hand.
We've seen a great period of action over the last minute or so - credit to both fighters for going all out!
A shot to the liver by Hoshino. Beautiful body shot.
Yamamoto avoids the body shot from Hoshino.
Hoshino throws a body shot but no joy.
Yamamoto tries a counter takedown but it's more of a dummy move, and he uses it to push himself away.
Hoshino connects with a slap. Keep your fist closed son.
Yamamoto uses decent footwork to sidestep a right hand from Hoshino.
Yamamoto swings and misses with a hook to the body.
Hoshino takes a shot to the body in his stride.
Yamamoto connects nicely with a jab. Noted by the judges no doubt.
Yamamoto throws a jab when Hoshino was well out of range.
Yamamoto uses decent footwork to sidestep a right hand from Hoshino.
Hoshino throws a hook but Yamamoto blocks it.
Yamamoto uses some good footwork to avoid the body shot by Hoshino.
Yamamoto moving in and out of range nicely, whilst landing the scoring shot.
Hoshino throws a body punch but Yamamoto moves out of range.
Hoshino slips under a jab from Yamamoto.
Nice uppercut lands for Yamamoto. That snapped Hoshino's head back.
Yamamoto ducks right into an uppercut from Hoshino.
Yamamoto is throwing a lot of body shots here, looking to wear down Hoshino rather than just go for the knockout.
Yamamoto lands a really nice looking cross but Hoshino seems unphased.
Hoshino throws the left hand but Yamamoto avoids the punch easily.

That's three minutes gone in the round.
Hoshino throws the left hand but Yamamoto avoids the punch easily.
Yamamoto throws an uppercut from half a mile away. Hoshino sees it coming and avoids it easily.
Nice jab there from Hoshino.
Hoshino throws a good cross that connects.
Hoshino ducks down and throws a hook to the body but Yamamoto moves away.
Hoshino misses with a hook.
Yamamoto cracks Hoshino with an open hand slap.

Yamamoto closes the distance and gets a double leg, slamming Hoshino to the mat! Hoshino manages to get full guard.
Hoshino pulls Yamamoto in close to prevent any damage.
Yamamoto engaging in some classic timewasting tactics.
Hoshino pulls Yamamoto in close to prevent any damage.

That's four minutes gone in the round.
Hoshino bucks up whilst keeping hold of a body lock, managing to reverse the position. Now he's in top in Yamamoto's guard.

Yamamoto looking to hit a scissor sweep but Hoshino is one step ahead there.
The crowd cheering loudly, showing their appreciation for the quality fight we're seeing here.
Hoshino pushes down on Yamamoto's leg and manages to get into half guard.
The fighters are going at a pretty good pace and they're both starting to sweat now.
Yamamoto is looking to improve his position.
Yamamoto is still trying to improve position.
And thats the end of the round the fighters go back to their corners.
A close round but Kotetsu Yamamoto will probably get the nod.
That's the end of the interval. I'm sure that seemed a lot quicker than a minute for our two fighters! Back to the action.

Hoshino keeping a good distance there, avoiding the body shot.
Hoshino misses with a straight right.
Yamamoto just misses with a punch to the body.
Yamamoto throws the left hand but Hoshino avoids the punch easily.
Hoshino fakes high and swings low for a body shot but Yamamoto manages to avoid it.
Yamamoto misses with a straight left.
Yamamoto ducks under a wild hook from Hoshino.
Yamamoto misses with a body shot.
The fighters circling - Hoshino throws out the jab but it was never going to land.
Hoshino ducks down and throws a hook to the body but Yamamoto moves away.
Hoshino throws a monster uppercut resembling something out of street fighter but it doesn't land.
Hoshino misses with a wild body shot.
Yamamoto now looks to counter with a shot at the body.
Hoshino misses with a body shot.
Hoshino throws a body punch but Yamamoto moves out of range.
We've had a slow start to the round here - hopefully the action picks up.
Yamamoto swings for the body but Hoshino moves out of range.
Yamamoto uses decent footwork to sidestep a right hand from Hoshino.
Yamamoto thows a left - swing and a miss!
Hoshino lands with an overhand left.
Yamamoto throws a body punch but Hoshino moves out of range.
Yamamoto throws a hook but Hoshino avoids it easily.
That's one minute gone in the round.
Yamamoto ducks down and throws a hook to the body.
Yamamoto jabs. That one connects to the head of his opponent.
Yamamoto pushing out the jab but it's not landing.
Hoshino ducks down and throws a hook to the body but Yamamoto moves away.
Yamamoto misses with a body punch
and Hoshino counters with a left to the body.
Nice shot by Yamamoto.
Yamamoto avoids the body shot from Hoshino.
Yamamoto ducks low and lands a nice hook to the body of his opponent.
Yamamoto walks into a left hand.
Hoshino throws a hard body shot but it just misses.
Yamamoto jabs Hoshino to the body, keeping him at a distance.
Kantaro Hoshino is looking to keep the fight on the feet at all costs.
Hoshino moves out of range as Yamamoto strikes.
Yamamoto misses with a wild body shot.
Hoshino misses with a body shot.
Hoshino takes a body punch but keeps moving.
The crowd are loving this. Great action here.
Hoshino leaves Yamamoto with his face pressed against the mat as he sprawls beautifully, defending against a solid takedown attempt.
Yamamoto misses with a wild body shot.
Hoshino misses the jab.
That's two minutes gone in the round.
Hoshino takes a swing at Yamamoto's ribcage but misses.
Yamamoto misses with a body shot.
Hoshino lunges at Yamamoto with a hook that half lands and is half blocked by Yamamoto's hand.
Hoshino throws a looping overhand right but Yamamoto ducks down to avoid it.
Hoshino swings for the body but Yamamoto moves out of range.
Hoshino throws a lazy right hand but Yamamoto sees it coming a mile off and sidesteps it easily.
Hoshino ducks down and throws a hook to the body but Yamamoto moves away.
Yamamoto staying out of range there.
Yamamoto swings and misses with a hook to the body.
Nice shot lands for Hoshino.
Yamamoto moves out of range of the strikes.
Yamamoto just misses with a punch to the body.
Yamamoto throws a body shot but no joy.
Yamamoto lands a vicious shot with the stealth of a sniper and the strength of a viper. Are vipers that strong? I can think of lots of things that are stronger than a viper - not many rhyme with sniper though.
Hoshino throws a jab but it's blocked by Yamamoto.
Kotetsu Yamamoto seems to be getting the better of the standup.
Hoshino misses with an uppercut.
Hoshino lands a body shot.
Hoshino uses some good footwork to avoid the body shot by Yamamoto.
That's three minutes gone in the round.
Yamamoto slips a straight right by Hoshino.
Yamamoto steps to the side to avoid the strikes from Hoshino.
Hoshino smiles there as he lands a nice right hand right on the button.
Hoshino looks to score with a jab to the body but Yamamoto is just out of range.
Yamamoto feints the counter takedown.
Hoshino connects with a nice looking jab.
Yamamoto pushing out the jab but it's not landing.
Yamamoto looks to land a left hand but Hoshino moved out of range nicely.
Hoshino misses with a looping left.
Yamamoto uses good footwork to avoid the strikes from Hoshino.
Yamamoto walks into a jab.
Yamamoto misses with a looping left.
Hoshino fakes high and swings low for a body shot but Yamamoto manages to avoid it.
Yamamoto keeping a good distance there, avoiding the body shot.
Yamamoto feints the counter takedown.
Hoshino misses with a series of wild punches.
Yamamoto with a hook.
Nice uppercut lands for Yamamoto. That snapped Hoshino's head back.
Yamamoto misses with a body shot.
That's four minutes gone in the round.
Fantastic stuff here - a very entertaining period of action, which has drawn cheers from the crowd.
Yamamoto misses the shot to the body.
Yamamoto looks to land a right hand but Hoshino moved out of range.
Yamamoto ducks down and throws a hook to the body but Hoshino moves away.
Yamamoto throws an overhand right that lands on Hoshino's shoulder, as Hoshino tries to avoid the shot.
Yamamoto throws a hook to the body but it doesn't connect.
Yamamoto misses with a wild body shot.
Hoshino throws a series of punches but Yamamoto avoids them all with ease.
Hoshino ducks under an overhand right and circles away with a smile on his face.
Yamamoto misses with a straight right.
Yamamoto on the wrong end of a nice hook.
Yamamoto throws an overhand right that lands on Hoshino's shoulder, as Hoshino tries to avoid the shot.
Yamamoto ducks under a wild hook from Hoshino.
Yamamoto feints the counter takedown.
Yamamoto swings for the body but Hoshino moves out of range.
Nice uppercut lands for Yamamoto. That snapped Hoshino's head back.
Hoshino throws out a token jab with nothing on it.
Hoshino misses the jab.
Yamamoto looks to score with a jab to the body but Hoshino is just out of range.
Yamamoto uses some good footwork to avoid the body shot by Hoshino.
And thats the end of the round the fighters go back to their corners.
That was a close second round but I would say that Kantaro Hoshino will probably get the nod.
The fighters' corners scream their final instructions, as the referee calls time. Here we go, back to the action! This is the final round!

Yamamoto is pinned up against the cage taking some big shots here. The referee is looking closely deciding whether he should stop the fight.
Hoshino misses with a straight left.
A looping hook to the body misses from Hoshino. Yamamoto does a little dance to reset his feet.
Hoshino misses with an uppercut. Yamamoto saw that one coming.
Yamamoto missing with a left hand there. Hoshino was out of range so wasted energy throwing that one.
Yamamoto throws a good cross that connects.
Yamamoto shoots in for a takedown from distance. He catches Hoshino napping and manages to drive through into side control!
Yamamoto is trying to ground and pound but Hoshino uses the momentary lack of control by Yamamoto to regain half guard.
Yamamoto lands with an elbow from half guard - that looked like it hurt.
Yamamoto seems content to maintain position for now, rather than mounting any offense.
That's one minute gone in the round.
Yamamoto looks to land a strike but Hoshino avoids it nicely and regains full guard.
Yamamoto engaging in some classic timewasting tactics.
Yamamoto throwing strikes from guard but Hoshino blocks nicely.
Yamamoto looking to pass the guard.
That's two minutes gone in the round.
A lull in the action here being met with boos from the crowd.
A big thud reverberates around the arena there as Yamamoto accidentally thumps the mat. Hopefully he's not broken his hand.
Yamamoto distracts Hoshino with his right hand and drops a big elbow with his other arm.
Yamamoto trying to control but Hoshino is working from the bottom.
Kotetsu Yamamoto has got the better of the ground game so far.
Yamamoto postures up to throw the ground and pound strikes but they don't connect.
Hoshino can't do much from the bottom at the moment, as Yamamoto controls the pace.
Hoshino can't keep his opponent in guard - Yamamoto advances to half guard, no doubt looking to mount.
Yamamoto misses with a head shot. Hoshino uses the momentum to regain guard.
Yamamoto postures up.
Yamamoto has the superior BJJ but he's also working some ground strikes into his gameplan.
That's three minutes gone in the round.
Hoshino tries to land a sweep but no joy.
The ref warns both fighters not to hold the cage as they work up against the meshing.
Yamamoto throws a big elbow that misses.
Yamamoto throws a big elbow that misses.
Yamamoto is sitting in guard, working some ground and pound.
Yamamoto lands a nice shot whilst sitting in his opponent's guard.
Hoshino preventing the ground and pound from doing any damage.
Yamamoto wants to control from the top but Hoshino keeps moving.
Yamamoto postures up in Hoshino's guard and throws a big left but Hoshino blocks it.
That's four minutes gone in the round.
Yamamoto sitting in guard, not really doing much.
Yamamoto with a flurry of punches that miss.
Yamamoto is sitting in guard, working some ground and pound.
Yamamoto working some ground and pound from guard but it's not doing any damage.
Hoshino wants to sweep but no luck.
A big thud reverberates around the arena there as Yamamoto accidentally thumps the mat. Hopefully he's not broken his hand.
Boooooooooooooooooooo!!! God, this has been a terrible round. Come on you two, sort yourselves out!
Yamamoto stopping the sweep attempt from Hoshino.

The referee has stepped in and called for a break in the action. We'll restart on the feet.
Hoshino misses with a body shot.
Hoshino ducks down and throws a hook to the body but Yamamoto moves away.
And that's the end of the fight!
Kotetsu Yamamoto comfortably won the final round on my scorecard.
I think Yamamoto has won this one but let's see whether the judges agree with me. Over to the ring announcer for the scorecards.
Ladies and gentlemen, after 3 rounds of action, we go to the scorecards for a decision.
Judge Gregory Folan scores the fight 28:30
Judge Alec Ball scores the fight 28:29
Judge Dillan Fox scores the fight 28:29
In favor of your winner, by unanimous decision... Kotetsu Yamamoto!
In his post fight interview, Kotetsu Yamamoto gave a big smile as he said 'We are NJPW!!!'.
|
|
|
|
|
|
|
|
|
|
|
|
|
|
|
|
|
|
|
|
|
|
|
| S |
C
A |
G |
S |
C
B |
G |
|
S |
C |
G |
|
energy
A | B |
|
hype
A | B |
|
pop
A | B |
|
mgr
A | B |
|
FIGHT
RATING
56% |
|
|
|
|
|
|
