|
|
PBP Commentary |
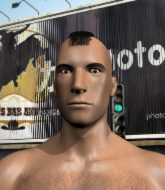
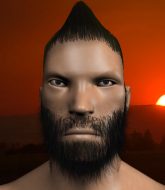
Coming up we have a bantamweight MMA rules bout between Tyrone Harrison (ranked 8197 p4p, 0 weight class) and Never TryTo (ranked 6245 p4p, 463 weight class). Both fighters look fresh as a daisy as they make their way towards the cage.
 |
|
 |
| 161 cm
18
140 lbs
1 - 1 - 0 |
|
180 cm
18
140 lbs
1 - 0 - 0 |
BJJ Blue Belt
Counter fighter
Cuts easily |
|
BJJ Blue Belt
Counter fighter
Enjoys gardening |
|
| |
|
Ladies and gentlemen. This fight is 3 rounds, in the bantamweight division.
Introducing the fighter to my left, fighting out of the red corner.
With a record of
1 - 1 - 0, fighting out of Tokyo, Tyrone Harrison!
And introducing the fighter to my right, fighting out of the blue corner.
With a record of
1 - 0 - 0, fighting out of Tokyo, Never TryTo!
The judges for this bout are Yukihiro Yamamoto, Hirohito Nitta and Shigeki Fujiwara.

The bell rings for round one and we are underway!
Harrison misses with the body kick

so TryTo counters with a double leg into guard. Good agility.
TryTo throwing strikes but missing.
TryTo postures up and lands a big shot to Harrison's brow.

TryTo postures up as if he's going to throw some strikes but drops back for an ankle! Harrison is in big trouble! He looks ready to tap! But no, he's escaped and dives on top of TryTo, into his guard.

TryTo working a defensive guard here.
We've had a slow start to the round here - hopefully the action picks up.
Harrison postures up in TryTo's guard and throws a big left but TryTo blocks it.
The ref warns both fighters not to hold the cage as they work up against the meshing.
Harrison throwing strikes but missing.
Harrison with a couple of shots to the head there. Not particularly brutal.

That's one minute gone in the round.
Harrison preventing the sweep.

Harrison is holding a leg here, probably looking for an ankle lock - he drops back and goes for it! TryTo is in trouble! Is it all over??? No! TryTo has escaped and now he's on top!

Harrison keeping moving, preventing TryTo from controlling successfully.
TryTo won't allow Harrison to sweep him here.
TryTo wants to control from the top but Harrison keeps moving.
Harrison controls TryTo momentarily but TryTo frees himself.
TryTo stands up over Harrison, holding his feet. He dives back in and lands a decent shot to the head.

That's two minutes gone in the round.
TryTo is intent on slowing down the pace of the fight, simply looking to control.
TryTo trying to control but Harrison is working from the bottom.
Harrison throwing some rather feeble looking strikes off his back.
TryTo is fighting to break Harrison's control of his arms but Harrison is doing a good job of controlling the position at the moment.
TryTo is holding a leg here, probably looking for an ankle lock - he drops back and goes for it! Harrison is in trouble! Is it all over??? No! Harrison has escaped and now he's on top!
Harrison chips away with some ground and pound.
The fighters are pressed up against the cage, both looking to find a bit of space to work.

That's three minutes gone in the round.
Harrison tries to stand but TryTo is controlling from the bottom.

Harrison gets to his feet - TryTo follows without any prompting.
Harrison thows a leg kick but TryTo checks it
and TryTo decides to take the opportunity to score a takedown. He's landed in Harrison's guard.
TryTo postures up to throw the ground and pound strikes but they don't connect.
TryTo trying to stand up but can't free himself from Harrison's guard.
TryTo sneaks a leg through and gets to half guard. That was like a knife through butter how easily he passed Harrison's guard.
TryTo is actively looking for submissions here but good counter grappling here from Harrison as he works his way to full guard.
Harrison had isolated an arm as going for a kimura. TryTo defends it easily.

That's four minutes gone in the round.
Harrison lands a beautiful sweep and he's now moved into his opponent's guard.
TryTo controls Harrison momentarily but Harrison frees himself.
Harrison might be looking to lock onto one of his opponent's long limbs for a submission, whilst we're on the ground.
Harrison trying to land body shots but he keeps hitting the mat.
Harrison keeps in close for a moment and lands a decent shot to the side of TryTo's head.
TryTo looks winded!
The crowd thankful this round is nearly over.
Harrison throws an elbow that misses. TryTo uses the momentum to reverse the position. He's now in Harrison's guard. Nice move by TryTo!
TryTo is holding a leg here, probably looking for an ankle lock - he drops back and goes for it! Harrison is in trouble! Is it all over??? No! Harrison has escaped and now he's on top!
And thats the end of the round the fighters go back to their corners.
A close round but Never TryTo will probably get the nod.
Well, the break between rounds is over. Let's get back to the scrappin!

TryTo takes a shot right to the bread basket.
Harrison throws a sloppy head kick and TryTo moves out of range easily.
We've had a slow start to the round here - hopefully the action picks up.
Harrison goes for a spinning back kick but it misses.
Harrison throws a body kick that misses.
And TryTo tries to counter it with a takedown but Harrison pushes his down on his head and steps out.
That's one minute gone in the round.
Harrison throws a body kick that misses.
And TryTo tries to counter it with a takedown but Harrison pushes his down on his head and steps out.
Jab, cross, leg kick. Nice combination by Harrison!
Tyrone Harrison seems to be the more aggressive standup fighter in this bout.

Harrison clinches with his opponent.
TryTo is pressed up against the cage. Harrison has hold of a leg and is looking to drag TryTo down to the mat. TryTo avoids the attempt though and has circled away. We're back to striking at a distance.
Tyrone Harrison is looking to keep the fight on the feet at all costs.
Harrison pulls out of a head kick attempt.
TryTo tries a counter takedown but it's more of a dummy move, and he uses it to push himself away.
Harrison is looking to take this fight into the clinch.
TryTo with the counter takedown but Harrison avoids it easily.
That's two minutes gone in the round.
Harrison is looking to take this fight into the clinch.
Harrison throws a half hearted mid kick.
And TryTo tries to counter it with a takedown but Harrison pushes his down on his head and steps out.
Harrison throws a hard body shot but it just misses.
Harrison looks for the body kick but TryTo saw that one coming.
TryTo is definitely looking for the counter takedowns here.
Never TryTo is looking to throw some combinations by the looks of things.
Harrison ducks down and throws a hook to the body but TryTo moves away.
TryTo drops down looking to force a counter takedown but Harrison defends it well.
Harrison takes a swing at TryTo's ribcage but misses.
That's three minutes gone in the round.
Harrison throws a body punch but TryTo moves out of range.
TryTo changes levels for a counter takedown but doesn't follow through with his attempt.
Harrison misses with a body kick.
Harrison throws a body kick that misses.
TryTo drops down looking to force a counter takedown but Harrison defends it well.
A head kick misses from Harrison.
TryTo with the counter takedown but Harrison avoids it easily.
Both fighters are absolutely exhausted here.
Harrison throws a head kick that misses and slips in the process. He scrambles back to his feet and the fighters circle.
Harrison misses with a jab, cross combination.
Harrison throws a half hearted mid kick.
That's four minutes gone in the round.
Harrison throws a sloppy head kick and TryTo moves out of range easily.
TryTo changes levels for a counter takedown but doesn't follow through with his attempt.
Harrison misses with a body kick.
Harrison tries to clinch but is not successful on this occasion.
Harrison throws a body kick despite being completely out of range
and TryTo counters with a single leg into guard. Harrison didn't expect that.
Harrison looking for submissions off his back, moving his hips, looking for an opening.
Harrison keeping moving, preventing TryTo from controlling successfully.
Boooooooooooooooooooo!!! God, this has been a terrible round. Come on you two, sort yourselves out!
Harrison can't keep his opponent in guard - TryTo advances to half guard, no doubt looking to mount.
And thats the end of the round the fighters go back to their corners.
Tyrone Harrison dominated that second round.
That's the end of the round. The referee orders the cornermen out of the cage so we can get back down to business. This is the final round!

Harrison looks to throw a body kick
and TryTo counters with a nice shoot takedown that brings the fighters to the ground.
TryTo trying to pass the guard but can't manage it just yet.
TryTo lands a couple of decent looking shots.
Harrison lands a beautiful sweep and he's now moved into his opponent's guard.
TryTo utilising some decent striking defenses from the guard, preventing the ground and pound.
Never TryTo has got the better of the ground game so far.
Harrison decides to stand up and beckons his opponent to follow.
Harrison misses with a half-hearted attempt at a head kick.
And TryTo tries to counter it with a takedown but Harrison pushes his down on his head and steps out.
We've had a slow start to the round here - hopefully the action picks up.
Harrison connects with a high kick.
Both fighters are breathing heavily.
Harrison pivots as if he's going to throw a leg kick but stops half way.
That's one minute gone in the round.
Harrison throws a head kick but TryTo moves out of range.
Harrison misses with a body kick.
TryTo with the counter takedown but Harrison avoids it easily.
TryTo avoids the head kick by Harrison.
Harrison misses with a half-hearted attempt at a head kick.
TryTo keeping a good distance there, avoiding the body shot.
TryTo moves out of range as Harrison throws a body kick.
Harrison misses with a head kick.
TryTo drops down looking to force a counter takedown but Harrison defends it well.
That's two minutes gone in the round.
Harrison throws a body kick that misses
and TryTo counters with a shoot takedown into half guard.
TryTo seems to be taking a bit of a break to think of his next move. He lands a short punch in the meantime.
TryTo is trying a forearm choke
I don't think that's going to do much at this level of the game.
TryTo working over Harrison with some ground and pound. Harrison looks like he wants out of this position, which is understandable.
TryTo tries to pass to full mount but Harrison defends it.
TryTo wants to take a breather but Harrison is having none of it.
TryTo has hold of the far side arm. He's working for the Kimura, can Harrison defend it? TryTo steps over the head and cranks it - Harrison is tapping out! That was textbook stuff right there - nice submission victory for TryTo!
Ladies and gentlemen, after 3:05 of round 3, we have a winner by way of Submission (Kimura). Never TryTo!
|
|
|
|
|
|
|
|
|
|
|
|
|
|
|
|
|
|
|
|
|
|
|
| S |
C
A |
G |
S |
C
B |
G |
|
S |
C |
G |
|
energy
A | B |
|
hype
A | B |
|
pop
A | B |
|
mgr
A | B |
|
FIGHT
RATING
41% |
|
|
|
|
|
|
