|
|
PBP Commentary |
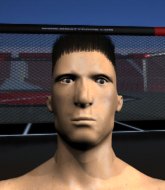
Coming up we have a lightweight MMA rules bout between Frank Hackleton (ranked 6376 p4p, 569 weight class) and Tyronne Spong (ranked 4777 p4p, 478 weight class). Frank Hackleton has the better chin. Will he look to stand and bang today?
 |
|
 |
| 170 cm
25
164 lbs
0 - 0 - 0 |
|
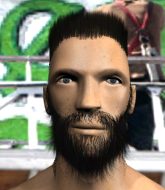
175 cm
25
155 lbs
1 - 0 - 0 |
Good wrestling
Counter fighter
Very quick |
|
Good takedowns
Basic striking
Can Moonwalk |
|
| |
|
Ladies and gentlemen. This fight is 3 rounds, in the lightweight division.
Introducing the fighter to my left, fighting out of the red corner.
With a record of
0 - 0 - 0, fighting out of The Island, Frank Hackleton!
And introducing the fighter to my right, fighting out of the blue corner.
With a record of
1 - 0 - 0, fighting out of The Island, Tyronne Spong!
The judges for this bout are Michael Johnstone, Sandra Marshall and Peter Branson.

The bell rings for round one and we are underway!

Spong darts in and lands a nice takedown into half guard.

Hackleton looking for submissions from an awkward position here.
Hackleton looking for submissions off his back.
Spong is trying to control. Hackleton wants to improve his position but can't escape this time.
Hackleton wants to improve his position but Spong is controlling well.
We've had a slow start to the round here - hopefully the action picks up.
Spong content to sit in half guard and control for a moment.
Hackleton is not content to let Spong control the position.

That's one minute gone in the round.
Hackleton trying to control from the bottom.
Spong stalling away here and it's allowed Hackleton to slip out his trapped foot and regain full guard.
Hackleton working from the bottom, still in full guard. He's managed to get a loose triangle. Spong doesn't seem to be doing much to defend here, obviously he feels comfortable in the position. Spong manages to throw the legs off his shoulder and he's back into guard - no problem.
The ref warns both fighters not to hold the cage as they work up against the meshing.
Spong looking to pass the guard.

Spong drops back looking for a heel hook - he quickly realises he's not going to get it but Hackleton manages to dive on top of him before he can escape and now Spong has Hackleton in his guard.


That's two minutes gone in the round.
Hackleton stopping the sweep attempt from Spong.
Hackleton slows down the pace of the fight, as he sits in guard.
Hackleton wants to control from the top but Spong keeps moving.
Hackleton looking to sit in guard and control but Spong gets the butterfly guard and sweeps. He's now in the guard on the top.

The fighters are starting to perspire pretty heavily.
Spong trying to control but Hackleton is working from the bottom.
Spong is working the ground and pound from guard. He might want to try advancing position though to get more of an impact.

That's three minutes gone in the round.
Hackleton is throwing his legs up, looking for submissions. Spong is aware though and is defending well.
Spong wants to control from the top but Hackleton keeps moving.
Hackleton has an active guard here but Spong has managed to pass into half guard.
Hackleton controlling the position well.
Hackleton is not content to let Spong control the position.

That's four minutes gone in the round.
My god... these two guys really need to pick up the pace or everyone will leave to go get a beer.
Spong works his way into full mount!
Hackleton tries to hold on but Spong postures up.
Spong can't quite control the action as he would like just now, as Hackleton is looking to escape.
Boooooooooooooooooooo!!! God, this has been a terrible round. Come on you two, sort yourselves out!
Spong goes for an armbar but Hackleton turns quickly into his guard - lovely anticipation from Hackleton.
And thats the end of the round the fighters go back to their corners.
Tyronne Spong dominated that round.
The minute break is over - no more time for sponges and pep talks - back to the action!


Hackleton fakes an overhand right and shoots for a takedown. Spong sprawls well initially but Hackleton persists and gets the takedown into half guard.
The fighters are pressed up against the cage, both looking to find a bit of space to work.
Spong is doing well to avoid being mounted. He's controlling the position at the moment.
Hackleton wants to work for an arm triangle but Spong is really keeping half guard well and defending the submission attempt.
Spong wants to control but Hackleton is keeping busy and won't allow it.
We've had a slow start to the round here - hopefully the action picks up.
Hackleton is working for a kimura but Spong is defending it quite comfortably.
Hackleton content to control rather than advance.
That's one minute gone in the round.
Hackleton is trying to control. Spong wants to improve his position but can't escape this time.
Hackleton not doing much here.
Hackleton wants to pass the guard but Spong is defending well.
Hackleton trying to control from half guard but Spong is working away.
Spong trying to hold on to Hackleton's head to control him but Hackleton postures up.
Hackleton is trying a forearm choke
I don't think that's going to do much at this level of the game.
Frank Hackleton has stepped it up - he knows he needs a finish here!
That's two minutes gone in the round.
A few boos can be heard. I'm sure they will multiply if the fighters don't pick up the pace.
Spong wants to control but Hackleton is keeping busy.

The referee decides to stand the fighters back up.
Spong changes levels and looks for a double leg takedown. Hackleton tries to avoid it but Spong manages to keep hold of a leg and drag Hackleton to the ground. Hackleton escapes though and pops straight back up to his feet.
A jab from Hackleton does it's job there.
Spong closes this distance looking for a takedown but Hackleton circles away.
Spong shoots in for a takedown but Hackleton shows good takedown defense.
Hackleton half commits to a counter takedown before pushing away, out of range.
Frank Hackleton has stuffed three takedown attempts in the round now. That's going to take a lot out of Tyronne Spong.
Spong shoots for a takedown but Hackleton saw that one coming a mile off and avoided it easily.
Hackleton leaves Spong with his face pressed against the mat as he sprawls beautifully, defending against a solid takedown attempt.
Hackleton swung with a counter right hand that didn't connect.
That's three minutes gone in the round.
Spong shoots in for a takedown. "I don't think so" says Hackleton as he avoids it easily.
Horrible takedown attempt by Spong or perhaps it was just good defense by Hackleton, which made it look bad.
Hackleton tries to sprawl but Spong drives through with a takedown into half guard.
Hackleton tries to roll over but Spong keeps him under control.
Hackleton is doing well to avoid being mounted. He's controlling the position at the moment.
Hackleton wants to control but Spong is keeping busy.
That's four minutes gone in the round.
Hackleton regains full guard. Nicely done.
Hackleton throwing his legs up looking for a triangle.
Spong wants to control from the top but Hackleton keeps moving.
Hackleton is working an open guard here, looking to improve his position. No doubt that will leave him open to counters but at least he's being more offensive.
Boooooooooooooooooooo!!! God, this has been a terrible round. Come on you two, sort yourselves out!
Hackleton looking for submissions from the bottom here. Moving his hips around, possibly looking for an armbar.
Hackleton looking to control.
And thats the end of the round the fighters go back to their corners.
Frank Hackleton dominated that second round.
OK. That's time! The bell goes and we're back to the action. Let's get this one finished - here comes the final round!

Spong tries to shoot in for a takedown. He's got hold of a leg but Hackleton swivels and escapes.
Hackleton is looking to counter punch.
Spong tries for a takedown but Hackleton sees it coming a mile off and avoids it easily.
Spong shoots in and drives through. Hackleton sprawls well.
Frank Hackleton has stuffed three takedown attempts in the round now. That's going to take a lot out of Tyronne Spong.
Spong gets caught flat footed, as Hackleton shoots in with a quick takedown into guard.
Hackleton preventing the sweep.
Spong working a defensive guard here.
Spong throwing his legs up looking for a triangle.
We've had a slow start to the round here - hopefully the action picks up.
Hackleton drops back looking for a heel hook - he quickly realises he's not going to get it but Spong manages to dive on top of him before he can escape and now Hackleton has Spong in his guard.
Spong trying to pass the guard but can't manage it just yet.
That's one minute gone in the round.
Hackleton is trying to control the position but Spong postures up.
Hackleton looking for a sweep. Not yet Hackleton, not yet.
Spong stands and throws Hackleton's legs to the side, diving into side control.
Hackleton tries to bench press Spong off him but Spong keeps the position.
Spong tries for an arm triangle. That looks pretty tight to me. Is this one over!?! Possibly, maybe, no Spong has let go of the choke. Obviously it wasn't as tight as we thought!
That's two minutes gone in the round.
Spong misses with the ground and pound.
Spong is working for what looks like an arm triangle here. Hackleton is trying to escape and Spong transitions quickly into an armbar! He's slapped it on tight and Hackleton is forced to tap! Nice work there by Spong! Very nice indeed!
Ladies and gentlemen, after 2:41 of round 3, we have a winner by way of Submission (Armbar). Tyronne Spong!
|
|
|
|
|
|
|
|
|
|
|
|
|
|
|
|
|
|
|
|
|
|
|
| S |
C
A |
G |
S |
C
B |
G |
|
S |
C |
G |
|
energy
A | B |
|
hype
A | B |
|
pop
A | B |
|
mgr
A | B |
|
FIGHT
RATING
32% |
|
|
|
|
|
|
