|
|
PBP Commentary |
Coming up we have a middleweight MMA rules bout between Jack Jamison (ranked 9522 p4p, 733 weight class) and Vihaan Lal (ranked 22155 p4p, 766 weight class). Over to our ring announcer for the fighter introductions!
 |
|
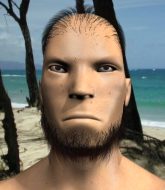 |
| 200 cm
27
185 lbs
4 - 3 - 1 |
|
200 cm
25
190 lbs
0 - 7 - 0 |
BJJ Blue Belt
Solid boxing
Experienced |
|
BJJ Blue Belt
Brawler
Solid chin |
|
| |
|
Ladies and gentlemen. This fight is 3 rounds, in the middleweight division.
Introducing the fighter to my left, fighting out of the red corner.
With a record of
4 - 3 - 1, fighting out of Las Vegas, Jack Jamison!
And introducing the fighter to my right, fighting out of the blue corner.
With a record of
0 - 7 - 0, fighting out of Helsinki, Vihaan Lal!
The judges for this bout are Bruno Hogan, Hugh Johnson and Ron Honeybunn.

The bell rings for round one and we are underway!
Lal throws a nice looking combination but Jamison bobs and weaves to avoid any damage.
As Lal tries to get set, Jamison tries to push him back and clinch up but Lal manages to avoid the attempt.
Lal misses with a takedown attempt. He shot from a bit too far out.
Jamison shoots in for a takedown - he's clinched up with Lal but Lal pushes him off and we're back to square one.

Jamison clinches.
Jamison really does look like a pencil wearing a pair of gloves. Let's hope he has a gameplan to suit that ridiculous body shape.
Lal tries to score a body lock takedown but Jamison shows good agility there to stay on his feet.
Lal wants to push off and get back to the center of the mat but Jamison has him pressed against the cage.
We've had a slow start to the round here - hopefully the action picks up.
Lal stops a takedown attempt from Jamison.

Lal manages to break the clinch.
Lal fails with a takedown attempt.
Jack Jamison has stuffed three takedown attempts in the round now. That's going to take a lot out of Vihaan Lal.

That's one minute gone in the round.
Lal has a takedown stuffed.
Lal throws a head kick but Jamison moves out of range.
Jamison jabs at Lal's body.

Jamison closes the distance and after a bit of a stuggle, scores a takedown into Lal's guard.
Lal looks winded!
Jamison postures up.
Jamison content to stall in guard here.
Jamison sneaks a leg through and gets to half guard. That was like a knife through butter how easily he passed Lal's guard.

That's two minutes gone in the round.
Jamison controlling the action here.
Jamison thumps the canvas. Not on purpose obviously - he just missed Lal's head.
Lal blocking the ground and pound attempt from Jamison.
Lal has no desire to be mounted, so is trying to control. Jamison is working away from the top position though.
Jamison trying to control the pace.
The referee is asking the fighters to pick up the pace.
Jamison is thwarting Lal's attempts to control the position.

The referee has motioned to the fighters to stand back up. He just wasn't happy with the level of activity.

That's three minutes gone in the round.
Jamison goes for a double leg but Lal avoids the attempt and the two fighters end up clinched against the cage as Lal continues to drive forward.
The fighters circling - Lal throws out the jab but it was never going to land.
Lal stuffs a takedown. It's all about dictating where the fight takes place and Lal wants it to stay on the feet.
Lal throws a head kick that misses and slips in the process. He scrambles back to his feet and the fighters circle.
Jamison thuds his right hand into Lal's forehead from close range. That could be painful for both fighters.
Lal avoids a low kick by using good footwork.
Lal feints the counter takedown.
No luck with that takedown attempt from Jamison.
Lal dives in for a single leg takedown but Jamison sprawls and the fighters end up clinched against the cage.

That's four minutes gone in the round.
Lal scores with a kick to the body.
Lal throws a looping left and ducks down for a takedown. He's got his arms around Jamison's waist but Jamison gets an underhook and avoids the takedown by throwing Lal off to one side.
Jamison tries to drive through with a takedown attempt but Lal defends well and Jamison ends up having to push Lal into the cage where they will battle it out in the clinch.
Jamison moves into the clinch.
Lal is trying to pull guard but Jamison has him pressed against the cage.
Jamison tries to jump guard but he falls flat on his backside. Lal smiles and moves away.
Jamison uses good footwork to get in and out, landing a nice hook.
The crowd thankful this round is nearly over.
Jamison shoots for a takedown but Lal saw that one coming a mile off and avoided it easily.
Lal wants to clinch up but Jamison keeps it at a distance.
Lal looks for a takedown here. Will he get it? Jamison is fending him off so far but Lal persists. Nope, Jamison circles away and we're back to standing.
Jamison appears to be looking for a big counter.
And thats the end of the round the fighters go back to their corners.
Jack Jamison dominated that round.
The minute break is over - no more time for sponges and pep talks - back to the action!

Jamison circles away from the clinch attempt.
Jamison dives in for a single leg takedown but Lal sprawls and the fighters end up clinched against the cage.
Lal shoots in for a takedown. "I don't think so" says Jamison as he avoids it easily.
Lal ducks low and lands a nice hook to the body of his opponent.
Jamison throws a right and a left that Lal avoids nicely.
Jamison blocks a head kick by Lal.
Jamison misses with a head kick.
Jamison displays good takedown defense there as he swats away a double leg from Lal.
Jack Jamison is winning the standup battle so far.
Both fighters are absolutely exhausted here.
We've had a slow start to the round here - hopefully the action picks up.
Jamison shoots in looking for a takedown. Lal tries to sprawl out of it but Jamison keeps driving through. The fighters are pinned against the cage. Lal manages to get underhooks and after a bit of a struggle, circles away and we're back to standing.
That's one minute gone in the round.
Lal shoots in but doesn't get the takedown
and Jamison moves into the clinch.
Jack Jamison has stuffed three takedown attempts in the round now. That's going to take a lot out of Vihaan Lal.
Lal has Jamison pressed against the cage, preventing Jamison from circling away and getting back to striking at range.
Jamison wants a takedown but no success here.
A frustrated look appears on Jamison's face as he tries to break the clinch.
Jamison gets control of Lal's arms and successfully pulls guard. Jamison will no doubt be looking for submissions off his back.
Lal seems content to control from guard here. He's going to have to remain active though if he doesn't want to get stood back up.
Jamison wants to stand but Lal is controlling the position.
That's two minutes gone in the round.
Lal trying to control but Jamison is working from the bottom.
Jamison pulls Lal in close to prevent any damage.
Lal seems content to control from guard here. He's going to have to remain active though if he doesn't want to get stood back up.

Jamison throwing his legs up looking for a triangle.
That's three minutes gone in the round.

Lal is holding a leg here, probably looking for an ankle lock - he drops back and goes for it! Jamison is in trouble! Is it all over??? No! Jamison has escaped and now he's on top!

Lal working a defensive guard but Jamison passes into half guard.
The referee calls for the fighters to work.
Lal regains full guard. Nicely done.
That's four minutes gone in the round.
Lal being controlled here, momentarily.
Lal bucks up whilst keeping hold of a body lock, managing to reverse the position. Now he's in top in Jamison's guard.

Jamison managing to control the position.
Lal is looking to work some ground and pound but Jamison has wrist control.
Boooooooooooooooooooo!!! God, this has been a terrible round. Come on you two, sort yourselves out!
Jamison keeping moving, preventing Lal from controlling successfully.
And thats the end of the round the fighters go back to their corners.
Jack Jamison dominated that second round.
OK. That's time! The bell goes and we're back to the action. This is the final round!

Jamison takes a head kick and keeps coming.
Jamison fakes with an overhand right and moves in to clinch with Lal, pushing him back against the cage.
Jamison fails to pull guard.
Lal is looking to break free of the clinch but Jamison has double underhooks.
Lal pushes off and circles away, back to the middle of the mat.
Lal stuffs a takedown. It's all about dictating where the fight takes place and Lal wants it to stay on the feet.
Lal shoots in but no luck this time.
Jamison tries to counter by moving into the clinch but Lal manages to circle out of the way.
Lal takes a big intake of breath there - he's definitely tired.
We've had a slow start to the round here - hopefully the action picks up.
Lal closes this distance looking for a takedown but Jamison circles away.
Jamison thinks about countering with a head kick.
No luck for Jamison with that takedown attempt.
That's three failed takedown attempts in the round for Jack Jamison. That's going to take a lot out of him.

Lal bobs and weaves into range and then changes levels and scores with a nice takedown into side control.
That's one minute gone in the round.
Jamison has one of Lal's arms on lockdown, trying to prevent him from doing any damage.
Jamison tries to buck Lal off but Lal is having none of it.
Lal goes for an armbar here - this could be all over! But no, Jamison has escaped beautifully and is now on top in side control! Oh, that's unlucky for Lal but great work by Jamison.
Jamison controls the position.
That's two minutes gone in the round.
Jamison avoids the strikes from the bottom by Lal.
Lal wants to control but Jamison postures up.
Jamison tries to move to mount but Lal blocks the move with his legs.
That's three minutes gone in the round.
Jamison working away.
Jamison controls the position.
You can see the frustration on Lal's face, being in this tough position on the bottom.
Lal tries to work a leg under to get back to half guard but Jamison wriggles his own leg back out and remains in side control.
Lal is trying to control Jamison's posture but Jamison avoids it.
The referee has motioned to the fighters to stand back up. He just wasn't happy with the level of activity.
Lal fails in his attempt to clinch.
Jamison shoots in for a takedown. "I don't think so" says Lal as he avoids it easily.
That's four minutes gone in the round.
The crowd are starting to boo a lack of action.

Lal clinches.
Lal is looking to break free of the clinch but Jamison has double underhooks.
Jamison scores with a shot to the side of Lal's head.
A left hand lands to the body for Jamison.
Jamison scores with an uppercut up the middle.
Jamison successfully pulls guard.
Lal won't allow Jamison to sweep him here.
Lal wants to control from the top but Jamison keeps moving.
The crowd thankful this round is nearly over.
Jamison has a closed guard, preventing Lal from standing up.
And that's the end of the fight!
Jack Jamison showed his dominance in that final round.
Well I reckon that's a shut out for Jamison, winning every round. Will the judges agree? They are the ones who matter, even if they are often depressingly incompetent. Over to the ring announcer for the scorecards.
Ladies and gentlemen, after 3 rounds of action, we go to the scorecards for a decision.
Judge Bruno Hogan scores the fight 30:27
Judge Hugh Johnson scores the fight 30:27
Judge Ron Honeybunn scores the fight 30:27
In favor of your winner, by unanimous decision... Jack Jamison!
|
|
|
|
|
|
|
|
|
|
|
|
|
|
|
|
|
|
|
|
|
|
|
| S |
C
A |
G |
S |
C
B |
G |
|
S |
C |
G |
|
energy
A | B |
|
hype
A | B |
|
pop
A | B |
|
mgr
A | B |
|
FIGHT
RATING
27% |
|
|
|
|
|
|
