|
|
PBP Commentary |
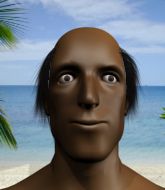
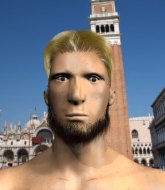
Coming up we have a bantamweight MMA rules bout between Adolph Talley (ranked 25505 p4p, 0 weight class) and Zachary Porter (ranked 6189 p4p, 0 weight class). Adolph Talley has a significant reach advantage - let's see if he can make it count.
 |
|
 |
| 224 cm
18
140 lbs
2 - 4 - 0 |
|
165 cm
18
130 lbs
0 - 0 - 0 |
BJJ Blue Belt
Counter fighter
Experienced |
|
BJJ Blue Belt
Brawler
Tends to cut |
|
| |
|
Ladies and gentlemen. This fight is 3 rounds, in the bantamweight division.
Introducing the fighter to my left, fighting out of the red corner.
With a record of
2 - 4 - 0, fighting out of London, Adolph Talley!
And introducing the fighter to my right, fighting out of the blue corner.
With a record of
0 - 0 - 0, fighting out of London, Zachary Porter!
The judges for this bout are James Ackerman, Donald Grub and Sam Margolis.

The bell rings for round one and we are underway!
Talley tries for a takedown but Porter sees it coming a mile off and avoids it easily.
A shot to the body from Porter misses

and Talley holds on and brings the fighters into a clinch.
Porter scores with an uppercut up the middle.

Talley breaks the clinch and we return to the middle of the mat.

Porter closes the distance and clinches.
Talley really does look like a pencil wearing a pair of gloves. Let's hope he has a gameplan to suit that ridiculous body shape.
Talley manages to break the clinch.
Porter has taken the fight to the clinch.

Porter breaks the clinch.

Porter closes the distance and gets a trip takedown into side control. Talley quickly recovers to half guard.
Talley gets full guard.
This is a great period of action - very entertaining stuff!
Talley wants to sweep here but Porter controlling him for the moment.
Porter trying to pass the guard but can't manage it just yet.

That's one minute gone in the round.

Porter stands up from Talley's guard - Porter perhaps looking for a knockout.
Talley gets caught napping as Porter dives in and scores a takedown. Talley manages to retain guard.
Porter tries to free his leg and advance position but Talley is retaining full guard.
Talley controls Porter momentarily but Porter frees himself.
The fighters are pressed up against the cage, both looking to find a bit of space to work.
Porter looking to pass the guard.
Talley is working an open guard so Porter takes the opportunity to get back to his feet.
Porter moves into the clinch successfully.

That's two minutes gone in the round.
Porter's corner calls for him to break the clinch, which he does.
Porter has managed to clinch.
Talley goes for a takedown in the clinch but Porter prevents it.
Porter taking a breather.
Porter managing to block the knees to the body from Talley.
Porter lands a right hand that snaps the head of Talley backwards.
Porter keeps control of Talley as he tries to wriggle out of the double underhooks.
Talley has dropped down and is looking to force the takedown but it's defended by Porter after a bit of a struggle.
That's three failed takedown attempts in the round for Adolph Talley. That's going to take a lot out of him.
Talley pushes off and circles away, back to the middle of the mat.
Talley avoids the head kick by Porter.
As Porter looks to move away, Talley throws a big counter combo but Porter just gets out of the way.
Porter drives through with a takedown into Talley's guard. Let's see what he can do from the top position.

That's three minutes gone in the round.
Talley doesn't do any damage with a couple of strikes from the bottom.
Porter passes Talley's right leg, so he's now in half guard.
Porter wants to lay and pray for a moment but Talley keeps working.
Porter prevents Talley from improving his position.
Porter missing with the ground and pound from half guard.
Porter looks towards his corner to check for any instructions. The corner give him nothing to work with, so he cracks Talley with a short hammerfist. I guess that's as good as any advice he could get in this position.
Porter is trying to control the action in half guard but Talley is working away on the bottom, looking perhaps to get back to full guard.

That's four minutes gone in the round.
Well. There's a bit of a lull in the action here and the crowd are starting to get restless.
Porter is in a good position here but he's just trying to control... And he's not even managing to do that successfully.
Talley wants to get back to full guard.
Porter wants to take a breather but Talley is having none of it.
Talley keeping control of the position.
The referee wants the fighters to be more active or he's going to reset them on the feet.
Porter stalling away here and it's allowed Talley to slip out his trapped foot and regain full guard.
Porter with a couple of shots to the head there. Not particularly brutal.
And thats the end of the round the fighters go back to their corners.
Zachary Porter dominated that round.
That's the end of the interval. I'm sure that seemed a lot quicker than a minute for our two fighters! Back to the action.

Porter rushes Talley and presses him up against the cage.
Talley breaks from the clinch.
Porter gets the takedown into side control.

Talley is rocked!
Talley is being controlled here.
Oh Talley is still in real trouble! Will he be able to recover?!!
Zachary Porter has got the better of the ground game so far.
Porter moves into full mount!
Porter controlling the position easily from mount.
Talley is writhing around trying to get back to his feet.
Porter is in the full mount, landing strikes.

Porter has control of Talley's right arm, working for a kimura. It's a bit of a token attempt though and Talley regains control of the situation pretty easily.
Porter looking for an armbar but decides to keep the dominant position instead.
Porter has his opponent pinned against the cage, landing some nasty ground and pound that is really making a bit of a mess out of Talley's face.
We've seen a great period of action over the last minute or so - credit to both fighters for going all out!
Talley tries to hold on but Porter pushes him away.
The ref warns both fighters not to hold the cage as they work up against the meshing.
Porter looking to secure an arm triangle but Talley defends it well.
Porter lands a couple of good shots and Talley has given up his back, trying to escape the position!
Talley is trying to break free.
Porter is working the ground and pound here and the referee is taking a close look at Talley. He must escape soon or this one will be stopped.
Porter struggling to keep hold of the position.
Porter is looking for the choke from the back position but Talley is controlling his hands well.
Porter is breathing heavily.
Porter working for the choke.
Talley is trying to break free.
Porter trying to control.
Porter really doesn't want to stay on the ground with Talley. If he can't get it back to his feet, it's only a matter of time before he'll be tapping out.
Talley preventing the rear naked choke attempt from Porter.
That's one minute gone in the round.
Talley is displaying good submission defense - not really looking in danger of submitting to the rear naked choke at the moment. That could change in an instant of course if Porter gets his way!
Porter patiently working for the choke. Which fighter will keep their nerve here?
Talley trying to control the hands but Porter won't let him.
Porter is hanging on to Talley's back as he tries to escape.
Porter misses with punches from the back.
Talley preventing the rear naked choke attempt from Porter.
Porter throwing wild punches that miss their target.
Talley tries to roll but Porter sticks to his back.
Talley has his hands over his head blocking the strikes from Porter.
Porter has the hooks in. Talley is trying to push off one leg but he has to do so cautiously to avoid being submitted.
Talley staying busy and making it hard for Porter to control.
Porter loading up with punches from the back mount - how long can Talley hold on?
Talley staying busy and making it hard for Porter to control.
Porter struggling to land strikes to the head as Talley covers up.
A bit of a pause in the action here. Porter controlling the positon.
Porter misses with an elbow to the head.
The referee is taking a good look at Talley as he is on the wrong end of some big shots from Porter!
Talley covering up well under a series of strikes from Porter.
Talley tries to roll but Porter sticks to his back.
I would not like to be Talley right now.
Porter is punishing Talley with some ground and pound.
Talley trying to control the action but Porter just sinks the hooks in.
That's two minutes gone in the round.
The crowd cheering loudly, showing their appreciation for the quality fight we're seeing here.
Porter is remaining active here, looking for the choke. The more discerning members of the crowd will appreciate his efforts.
Porter is working for the rear naked choke. He has one arm under the chin but Talley has hold of the other arm. A bit of a stalemate here.
Porter is staying calm and holding on to the back position, whilst working on a rear naked choke. Talley is defending well though. Porter let's go of the attempt for now.
Porter scores with punches and elbows.
Porter lands a shot to the head.
Porter really has the hooks in deep now - there seems like no escape for Talley.
Talley takes a big shot to the side of the head.
Talley rolls, trying to escape but Porter keeps control of the position.
Porter is throwing strikes from the back here. Oh that last one was to the back of the head. Porter gets a warning from the referee. He throws another strike to the back of the head straight away though and the referee has seen enough. He breaks up the two fighters and stands them back up. Porter gets a real talking to here and is lucky not to get a point deducted. Porter apologises and we restart here on the feet.
Porter drives through with a takedown into guard.
Porter stands up and waves to Talley to follow him.
Talley walks forward, straight into a front kick from Porter.
Adolph Talley is looking to throw some combinations by the looks of things.
Porter shoots in with a lovely double leg takedown. Talley manages to land in full guard to minimise the damage.
Porter sitting in guard here, content to control.
Talley seems to have got his legs back now.
Porter has been the more effective fighter overall so far.
Talley is pulling down on Porter's head to control his posture.
That's three minutes gone in the round.
Porter is intent on slowing down the pace of the fight, simply looking to control.
Porter trying to control but Talley is working from the bottom.
Talley wants to control here, rather than go for any submissions from the bottom. At least for now.
Talley keeping moving, preventing Porter from controlling successfully.
That's four minutes gone in the round.
There's not a lot going on here and the crowd are letting the fighters know they're not willing to tolerate a lack of action.

Porter has a momentary lapse of concentration, allowing Talley to throw up a leg and lock on what appears to be a pretty tight triangle! Porter is fighting it off but it's all too little too late - Talley pulls down on the head and he's put Porter to sleep! This one is all over!
Ladies and gentlemen, after 4:19 of round 2, we have a winner by way of Submission (Triangle). Adolph Talley!
|
|
|
|
|
|
|
|
|
|
|
|
|
|
|
|
|
|
|
|
|
|
|
| S |
C
A |
G |
S |
C
B |
G |
|
S |
C |
G |
|
energy
A | B |
|
hype
A | B |
|
pop
A | B |
|
mgr
A | B |
|
FIGHT
RATING
52% |
|
|
|
|
|
|
