|
|
PBP Commentary |
Coming up we have a light heavyweight MMA rules bout between Tev Clark Ii (ranked 8863 p4p, 740 weight class) and Quinn Helix (ranked 3795 p4p, 479 weight class). The fight MMA fans around the world have waited their entire lives for!
 |
|
 |
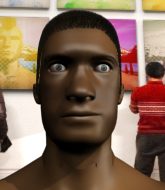
| 195 cm
18
215 lbs
0 - 1 - 0 |
|
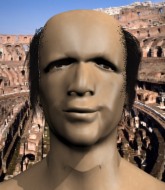
194 cm
27
213 lbs
4 - 3 - 0 |
Decent wrestler
Solid boxing
Very strong |
|
BJJ White Belt
Excellent MT
Powerful |
|
| |
|
Ladies and gentlemen. This fight is 3 rounds, in the light heavyweight division.
Introducing the fighter to my left, fighting out of the red corner.
With a record of
0 - 1 - 0, fighting out of Las Vegas, Tev Clark Ii!
And introducing the fighter to my right, fighting out of the blue corner.
With a record of
4 - 3 - 0, fighting out of London, Quinn Helix!
The judges for this bout are Jonathan Paton, John Kavanagh and Eddie Farnsworth.

The bell rings for round one and we are underway!
Helix swings away but doesn't land with a series of punches.

Helix instigates a clinch.
Clark Ii has hold of a leg and is looking for a trip takedown. Helix avoids it nicely though and we remain in the clinch.
Helix blocks a body shot from Clark Ii.
Clark Ii has hold of a leg and is looking for a trip takedown. Helix avoids it nicely though and we remain in the clinch.
Clark Ii wants a takedown.
That's three failed takedown attempts in the round for Tev Clark Ii. That's going to take a lot out of him.
Clark Ii is looking to take this one to the mat.
Clark Ii controlling the action here for a moment.
We've had a slow start to the round here - hopefully the action picks up.
Helix is defending well against a takedown attempt.
Clark Ii has Helix pressed against the cage.

That's one minute gone in the round.
The referee is keeping an eye on Helix - much more stalling and he will separate the fighters.
Clark Ii is working for a takedown up against the cage. He can't get it on this occasion though.
Helix misses with a body punch.
Helix misses with a body punch.
Clark Ii has hold of a leg and is looking for a trip takedown. Helix avoids it nicely though and we remain in the clinch.
Clark Ii wants to take the fight to the mat but Helix manages to get underhooks and keep the fight in the clinch.
Clark Ii tries to score a body lock takedown but Helix shows good agility there to stay on his feet.
Helix is stalling here.
Clark Ii tries for a takedown but Helix manages to get underhooks.
Clark Ii has hold of a leg and is looking for a trip takedown. Helix avoids it nicely though and we remain in the clinch.

That's two minutes gone in the round.
The crowd are getting on the fighters' backs, as the pace has dropped off in the last minute or so.
Clark Ii fails to pull guard.
Clark Ii goes for a takedown in the clinch but Helix prevents it.

Clark Ii pulls guard.
Helix engaging in some classic timewasting tactics.
Clark Ii wants to sweep here but Helix controlling him for the moment.
Clark Ii keeping moving, preventing Helix from controlling successfully.
Helix must be cautious of submissions here, given that his opponent has the superior Jiu Jitsu.

That's three minutes gone in the round.
Clark Ii bucks up whilst keeping hold of a body lock, managing to reverse the position. Now he's in top in Helix's guard.

Clark Ii content to stall in guard here.
Helix wants to improve his position but instead Clark Ii has moved into half guard.
Clark Ii controlling the action here.

That's four minutes gone in the round.
Helix wants to control but Clark Ii is keeping busy and won't allow it.
Boooooooooooooooooooo!!! God, this has been a terrible round. Come on you two, sort yourselves out!
Clark Ii is controlling the pace.
And thats the end of the round the fighters go back to their corners.
A close round but Quinn Helix will probably get the nod.
That's the end of the interval. I'm sure that seemed a lot quicker than a minute for our two fighters! Back to the action.

Helix swings wildly with a couple of big hooks
and Clark Ii counters with a nice jab to the body that keeps Helix thinking.
Nice body punch from Clark Ii.
Clark Ii connects with the punch.
A swing and a miss from Clark Ii.
Helix closes the distance and presses his opponent up against the cage.
Helix misses with a hook to the ribs.
We've had a slow start to the round here - hopefully the action picks up.
Helix stops a takedown attempt from Clark Ii.
Clark Ii drags the fight down to the ground.
Clark Ii wants to control here, rather than go for any submissions from the bottom. At least for now.
Clark Ii keeping moving, preventing Helix from controlling successfully.
That's one minute gone in the round.
Clark Ii is working the butterfly guard. He manages to land a nice scissor sweep and is now in half guard on the top. Nice move.
Clark Ii controlling the action here.
That's two minutes gone in the round.
My god... these two guys really need to pick up the pace or everyone will leave to go get a beer.
Helix has found himself in a tricky position here. He's been working his transitions in training so let's see if he can work his way out of it.
Clark Ii is really dominating this fight. Is there anything that Helix can do to turn this around?
That's three minutes gone in the round.
The ref warns both fighters not to hold the cage as they work up against the meshing.
Helix is trying to maintain the position but Clark Ii is very close to passing his half guard.

The ref stands the fighters back up due to a lack of activity.
Clark Ii misses with a half-hearted attempt at a head kick.
Helix rushes forward with a series of wild hooks but Clark Ii moves out of range and avoids them all easily.
Clark Ii tried to counter with a leg kick but Helix avoided it.
Clark Ii throws a leg kick
enabling Helix to counter with a crisp jab.
That's four minutes gone in the round.
Clark Ii moving in and out of range nicely, whilst landing the scoring shot.
Helix throws a combination but comes up with nothing but fresh air.
The fighters are starting to perspire pretty heavily.
Helix displaying good standup as he scores with a three punch combination.
Clark Ii tries to land with a swinging hook to the body but Helix was well out of range. Poor timing from Clark Ii.
Clark Ii misses with a hook.
A countering left hand to the body from Helix misses.
A punch combination from Helix misses.
Boooooooooooooooooooo!!! God, this has been a terrible round. Come on you two, sort yourselves out!
Helix misses with a body shot. Nice footwork from Clark Ii.
Clark Ii throwing a counter right hand but Helix manages to avoid it.
Clark Ii misses with a straight left.
Helix throws a counter combo.
And thats the end of the round the fighters go back to their corners.
Tev Clark Ii dominated that second round.
The fighters get back to their feet, the hooter sounds and we're back to the action! This is the final round!

A big left from Clark Ii misses.
Jab, jab by Clark Ii - just one landing.
Helix misses with a wild body shot.
Tev Clark Ii seems to be the more aggressive standup fighter in this bout.
Clark Ii lunges in with an uppercut that skims his opponent's chin.
Helix avoids the body shot from Clark Ii.
Helix lets it all go there with a big combo counter but none of the punches connected.
Helix displays some good footwork, moving neatly out of range as Clark Ii throws out the jab.
We've had a slow start to the round here - hopefully the action picks up.
Helix misses with a series of wild punches.
That's one minute gone in the round.
Helix on the wrong end of a nice low kick. He's acting like it's no big deal but he doesn't want to take many more of those.
Tev Clark Ii is winning the standup battle so far.
Clark Ii fakes high and swings low for a body shot but Helix manages to avoid it.
Helix let fly with a counter punch to the body but it didn't land.
Clark Ii tries to score with an inside leg kick but telegraphs it and Helix is able to avoid easily.
Clark Ii avoids the body shot from Helix.
Helix looks to land a right hand but Clark Ii moved out of range.
Clark Ii fires out a quick counter leg kick but Helix just manages to avoid it.
Helix staying out of range there.
Helix doesn't fully commit to the body shot counter.
Clark Ii scores with a punch to the head.
That's two minutes gone in the round.
Clark Ii misses the jab.
Helix scores to the head and body with a nice combination!
Helix misses the shot to the body.
Quinn Helix is looking to keep the fight on the feet at all costs.
Clark Ii takes a punch to the jaw and another one to the bread basket.
Clark Ii connects with a lovely right hand, straight down the pipe.
The fans in attendance giving it up for the two fighters, who have really let it all hang out in the last minute or so!
Clark Ii connects with a leg kick. He turned his hip over nicely there.
Helix defending well as Clark Ii loads up on a big left hand.
Clark Ii throws a shot to the body.
That's three minutes gone in the round.
Clark Ii throws a head kick that misses
and Helix counters with a straight punch to the midsection.
Helix clinches with his opponent.
Clark Ii drops down looking for an ankle pick but Helix pulls his leg out and moves away.
Helix looks to clinch
enabling Clark Ii to counter with a crisp jab.
Helix throws a right hand that Clark Ii ducks under and follows up with a left that Clark Ii also avoids with ease.
Helix swings for the body but Clark Ii moves out of range.
Clark Ii jabbing away but nothing is landing.
Helix now looks to counter with a shot at the body.
Clark Ii throws a lazy body kick
and Helix counters with a series of strikes. Clark Ii will be more careful next time no doubt.
That's four minutes gone in the round.
Clark Ii wants to slow Helix down by chopping away at his legs.
Clark Ii shoots in but no luck this time.
Despite the aggression on Helix's face he doesn't fully commit to the counter.
Helix gets cracked there but stands up to it.
Helix tries to clinch up against the cage, rushing in to close the distance. Clark Ii manages to break the clinch and circles back to the middle of the mat.
Clark Ii throws an off balance right hand
and Helix counters with a left to the body.
Quinn Helix is looking to throw some combinations by the looks of things.
The crowd are loving this. Great action here.
A shot to the liver by Clark Ii. Beautiful body shot.
Helix lunges in with swinging rights and lefts but Clark Ii circles away quickly and effectively.
Helix lands a nice hook to Clark Ii's body. Clark Ii takes it in his stride and looks to land his own strikes.
And that's the end of the fight!
I would just about give that final round to Quinn Helix.
I think Helix has won this one but let's see whether the judges agree with me. Over to the ring announcer for the scorecards.
Ladies and gentlemen, after 3 rounds of action, we go to the scorecards for a decision.
Judge Jonathan Paton scores the fight 28:29
Judge John Kavanagh scores the fight 28:29
Judge Eddie Farnsworth scores the fight 28:29
In favor of your winner, by unanimous decision... Quinn Helix!
Quinn Helix seemed lost for words in his post fight interview but he remembered to thank his fans and directed everyone to his website.
|
|
|
|
|
|
|
|
|
|
|
|
|
|
|
|
|
|
|
|
|
|
|
| S |
C
A |
G |
S |
C
B |
G |
|
S |
C |
G |
|
energy
A | B |
|
hype
A | B |
|
pop
A | B |
|
mgr
A | B |
|
FIGHT
RATING
29% |
|
|
|
|
|
|

