|
|
PBP Commentary |
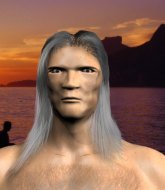
Coming up we have a welterweight MMA rules bout between Yamato Take (ranked 107 p4p, 17 weight class) and Ryu Musashi (ranked 691 p4p, 85 weight class). Rumors backstage are that the fighters have been paid to keep it standing but we know that would never happen in MMA!
 |
|
 |
| 179 cm
35
181 lbs
17 - 1 - 0 |
|
179 cm
36
172 lbs
29 - 18 - 1 |
Great wrestler
World class boxer
Insanely flexible |
|
Good wrestler
World class MT
Good gas tank |
|
| |
|
Ladies and gentlemen. This fight is 5 rounds, for the welterweight championship of the world!
Introducing the champion to my left, fighting out of the red corner.
With a record of
17 - 1 - 0, fighting out of Las Vegas, Yamato Take!
And introducing the challenger to my right, fighting out of the blue corner.
With a record of
29 - 18 - 1, fighting out of Las Vegas, Ryu Musashi!
The judges for this bout are , Timothy Bukovac and Don Winkell.

The bell rings for round one and we are underway!
Musashi connects with a leg kick. He turned his hip over nicely there.
Take keeping his hands up high there, blocking the jab from Musashi.
Musashi throws a push kick but Take slaps the foot to one side.
Musashi scores with a nice head shot.
Musashi lands with a thumping leg kick.
Take on the wrong end of a kick to the body.
Musashi swings for the body but Take moves out of range.
Musashi lands the left hand.
Musashi wants to slow Take down by chopping away at his legs.
Musashi lands with a nice body kick.
Take takes a body kick right on the floating rib. Ouchie.
Musashi connects with a leg kick. He turned his hip over nicely there.
We've seen a great period of action over the last minute or so - credit to both fighters for going all out!
Take walks into a stiff left hand from Musashi.
Musashi shoots in looking for a takedown. Take tries to sprawl out of it but Musashi keeps driving through. The fighters are pinned against the cage. Take manages to get underhooks and after a bit of a struggle, circles away and we're back to standing.

That's one minute gone in the round.
Musashi gets off balance looking for a body kick
and Take counters with a stiff right hand.
Like a baseball bat into the meat of his leg there - nice leg kick by Musashi.
Take throws a body kick but he was well out of range there.
Musashi throws out a counter right but Take avoids it with no problem.
Take looks to land a body kick but Musashi moved away.
Musashi swings for the body but Take moves out of range.
Musashi keeping at a good range here, avoiding a leg kick.
Take throws a half hearted mid kick.
Take uses some good footwork to avoid the body shot by Musashi.
Take jinks towards his opponent looking like he wants to counter with a mid kick but doesn't commit.
Musashi lands with a cross to side of his opponent's head.
Take avoids the body shot from Musashi.
Take seem to be loading up, looking for a big counter.
Take looks to have improved his striking defense since last time we saw him fight.
Musashi tries to move into range but Take moves to the side and lands with a nice right hand.
Take misses with a straight left.

That's two minutes gone in the round.

Take has Musashi up against the cage in a clinch.
Musashi misses with a shot to the kidneys.
Musashi misses with a punch to the body.
Take swings away with an uppercut that misses.
Musashi misses with a hook from the clinch.
This is a great period of action - very entertaining stuff!
Musashi swings away with an uppercut that misses.
Take misses with some punches.
Take misses with a short punch on the inside.
Take stays in close to his opponent and throws a right hand to the body.
An uppercut on the inside fails to land for Take.
Musashi misses with a body punch.
Musashi working aggressively here.
Take misses with a short punch on the inside.
A head punch blocked on the inside by Take.
Musashi is working Take over against the cage.
Take has a couple of punches blocked by Musashi.
Take misses with a short punch on the inside.
Musashi blocks a couple of punches on the inside.
Musashi blocking some punches.
A head punch blocked on the inside by Musashi.
Musashi blocks a punch to the side of the head.

That's three minutes gone in the round.
Musashi is trying to pull guard but Take turns him against the cage and we stay in the clinch.
A quick uppercut on the inside from Musashi.
A hook to the body from Take.
Musashi working aggressively here.
Musashi gets through Take's defenses to land a nice punch to the side of the head.

Musashi drags the fight down to the ground.
Take seems content to control from guard here. He's going to have to remain active though if he doesn't want to get stood back up.

Musashi had isolated an arm as going for a kimura. Take defends it easily.
Take is intent on slowing down the pace of the fight, simply looking to control.
Take has controlled the position for a good 20 seconds, which will no doubt be starting to frustrate his opponent.

That's four minutes gone in the round.
Musashi had isolated an arm as going for a kimura. Take defends it easily.
The ref warns both fighters not to hold the cage as they work up against the meshing.
Take showing good wrestling skills to control the position.
This is a sustained period of stalling by Take.

The referee decides to stand the fighters back up.
And thats the end of the round the fighters go back to their corners.
Ryu Musashi dominated that round.
Well, the break between rounds is over. Let's get back to the scrappin!

Take throws a body kick, spinning off balance
and Musashi counters with a nice uppercut.
Musashi uses some good footwork to avoid the body shot by Take.
Musashi thinks about the counter body kick.
Musashi scores with a nice strike.
Musashi throws a low kick but Take avoids it.
Musashi throws a hook to the body but it doesn't connect.
Take appears to be looking for a counter punch to the body.
Musashi bobbing and weaving, closes the distance and lands a hook to the side of Take's head.
Ryu Musashi seems to be the more aggressive standup fighter in this bout.
Musashi lands a powerful looking uppercut that connected with his opponent's jaw.
Musashi lands a vicious shot with the stealth of a sniper and the strength of a viper. Are vipers that strong? I can think of lots of things that are stronger than a viper - not many rhyme with sniper though.
Take throws a leg kick but Musashi moved away.
We've had a slow start to the round here - hopefully the action picks up.
Take scores with a straight right hand, right through his opponent's guard.
Take takes a shot to the nose. Hopefully that hasn't broken it.
This is a great period of action - very entertaining stuff!
Musashi lands with a nice low kick. That'll leave a bruise.
Musashi bobs and weaves and then throws a good body kick.
That's one minute gone in the round.
A nice inside leg kick there by Musashi. That's going to slow Take down.
Musashi cracks Take with an open hand slap.
Take swings for the body but Musashi moves out of range.
A looping hook to the body misses from Take. Musashi does a little dance to reset his feet.
Take displays some good footwork, moving neatly out of range as Musashi throws out the jab.
An inside leg kick from Take misses.
Musashi fakes a jab and scores with a low kick.
Musashi pivots as if he's going to throw a leg kick but stops half way.
Take lands with a nice low kick. That'll leave a bruise.
Musashi throws the left hand but Take avoids the punch easily.
Take lands a jab to Musashi's midsection.
Take takes one on the button.
A good leg kick by Musashi.
That's two minutes gone in the round.
Take scores with a nice head shot.
Musashi has been the more effective fighter overall so far.
Fantastic stuff here - a very entertaining period of action, which has drawn cheers from the crowd.
Musashi thows a body kick. Take tries to catch it but that hurt him.
Ryu Musashi seems to be getting the better of the standup.
Take looks to land a right hand but Musashi moved out of range.
Musashi throws a shot to the body.
A looping hook to the body misses from Take. Musashi does a little dance to reset his feet.
Musashi lands a nice shot that snaps Take's head back.
That's a knee to de groin and it's over and out! Take crumples to the ground after an illegal strike from Musashi - the referee stops the clock and Take gets 5 minutes to recover from that one. "I'm sorry" says Musashi. Take manages to get back to his feet and the fight resumes.
Musashi checks a low kick. Bone on bone - not my idea of a good time.
Musashi throws a looping overhand right but Take ducks down to avoid it.
A quick step to the side and Take tries to counter with a shot to the body but it doesn't connect.
Musashi uses good footwork to avoid the strikes from Take.
Musashi throws a sloppy head kick and Take moves out of range easily.
Yamato Take is looking to keep the fight on the feet at all costs.
Take ducks down and throws a hook to the body but Musashi moves away.
That's three minutes gone in the round.
Musashi throws a right hand that misses
and Take counters with a nice low kick that buckles Musashi's knee momentarily.
Musashi throws a looping overhand right but Take ducks down to avoid it.
It looked like Take was trying to counter with a body shot coming off that last attack from Musashi.
Musashi lands with an uppercut that bounces Take off the cage and back into range.
Musashi tries to shoot in for a takedown. He's got hold of a leg but Take swivels and escapes.
Musashi lands an overhand left. A wild punch that just about connected.
Take moves out of range as Musashi strikes.
Musashi throws a jab when Take was well out of range.
Take ducks down and throws a hook to the body but Musashi moves away.
Take slips a jab from Musashi.
It appears Take was looking to counter with a kick there.
Musashi throws a jab to the body, straight down the pipe. Boom. That sent Take stumbling backwards but he manages to regain his composure quickly.
Musashi's corner calls for a 1-2. Musashi obliges with the 1 part as he scores the single shot and moves back out of range.
Take swings and misses with a hook to the body.
That's four minutes gone in the round.
Take connects with a crisp jab.
Musashi tests Take's chin there with a solid looking shot.
This has been an exciting period of action!
Musashi lands with a cross to side of his opponent's head.
Take takes a jab right on the kisser.
Take throws out a leg kick but Musashi moves out of range and Take only half commits.
Musashi throws a lazy right hand but Take sees it coming a mile off and sidesteps it easily.
Take staying out of range there.
Take wants to slow Musashi down by chopping away at his legs.
Take has his front leg slapped to the side - a nice low kick landing there from Musashi.
Musashi throws the left hand but Take avoids the punch easily.
Take swings away with a leg kick that misses.
Take takes a kick to the body and keeps moving.
And thats the end of the round the fighters go back to their corners.
Ryu Musashi showed his class in that round. I'd imagine he'll take it on all the scorecards.
The referee calls time. The cornermen exit stage left and we're back to business.

Musashi cracks Take with a nice right hand that draws applause from the crowd.
Take is looking to wear down Musashi with body shots, infact he's throwing more body shots than head shots at the moment.
Musashi fakes high and swings low for a body shot but Take manages to avoid it.
Musashi scores with a reasonable looking shot to the body. Take doesn't seem bothered though.
A looping hook to the body misses from Take. Musashi does a little dance to reset his feet.
Musashi closes the distance, clinches up and gets a nice trip takedown into side control. Very smooth.
Musashi tries for a kimura. Not really close to a finish though.
Musashi trying to control the action but Take is working from the bottom.
We've had a slow start to the round here - hopefully the action picks up.
Take is looking for a sweep.
That's one minute gone in the round.
Musashi working away.
Musashi cracks Take with a big right hand but Take just smiles back at him and invites him to have another go.
Take wants to control but Musashi postures up.
Take is positioning himself to get back to half guard.
Musashi tries to advance to mount but Take instead regains half guard.
Take works his way to full guard. Good work.
Musashi trying to control the position from guard on top but Take is wriggling around, looking for whatever he can.
Musashi is trying to work a guillotine from the top, or something like that? Don't know how he thinks he's going to get a finish from there.
Musashi stands and throws Take's legs to the side, diving into side control.
That's two minutes gone in the round.
Take struggling a bit here.
Take is looking to regain half guard here but Musashi keeps moving and retains side control.
Musashi working hard here to secure a kimura but he's not really in the right position for it.
A lull in the action here.
That's three minutes gone in the round.
Take wants to control but Musashi postures up.
Take parries the strikes from Musashi easily there. Musashi is wary of posturing up too much because it might enable Take to escape.
Take wants to control but Musashi postures up.
Take is trying to improve his position.
Musashi wants to lay and pray for a moment but Take keeps working.
That's four minutes gone in the round.
A lull in the action here being met with boos from the crowd.
Take can't do much from the bottom here.
Take tries to work a leg under to get back to half guard but Musashi wriggles his own leg back out and remains in side control.
Musashi working hard here to secure a kimura but he's not really in the right position for it.
Musashi tries to cartwheel into mount but he doesn't manage it.
Musashi wants to lay and pray for a moment but Take keeps working.
Boooooooooooooooooooo!!! God, this has been a terrible round. Come on you two, sort yourselves out!
The referee has stepped in and called for a break in the action. We'll restart on the feet.
And thats the end of the round the fighters go back to their corners.
Ryu Musashi really dominated that round.
That's time! Take's corner gives him a slap on the ass as he gets ready to fight.

Take digs a good hook to Musashi's body.
Musashi swings away with a body shot that misses
and Take counters with a good right hand that lands right on the jaw.
Decent striking displayed by Musashi there.
A slow jab from Musashi misses its intended target.
Take lands a leg kick. The shin dug right into the meat of the thigh.
Take avoids the body shot from Musashi.
Musashi misses with a hook. Take ducked under it nicely.
Take thinks about countering with a head kick.
We've had a slow start to the round here - hopefully the action picks up.
Take looks to land a body kick but Musashi moved away.
Musashi fakes high and swings low for a body shot but Take manages to avoid it.
A low kick from Take is predictable there
enabling Musashi to counter with a crisp jab.
Take slips under a jab.
That's one minute gone in the round.
Take jabs Musashi right on the nose. Musashi blinks but takes it well.
A solid body kick from Musashi.
Take has his head snapped back a nice jab. A little nod from Take there as he acknowledges the shot.
Take is hobbling a little on that front leg after taking quite a few leg kicks so far in this fight.
Take clinches up with Musashi and pushes him back against the cage.
A head punch blocked on the inside by Musashi.
Take working aggressively here.
Take lands a hook to the side of the head.
Take prevents a body shot from Musashi.
Take misses with a body punch.
Musashi throws a punch but it's blocked by Take.
Musashi lands a shoulder strike.
Take swings away with an uppercut that misses.
Take misses with the head strike.
Yamato Take has scored more points in the clinch so far.

Musashi pushes off and circles away, back to the middle of the mat.
Musashi lands with a straight right. Take didn't see that one coming.
The fans in attendance giving it up for the two fighters, who have really let it all hang out in the last minute or so!
Take throws a hard body shot but it just misses.
That's two minutes gone in the round.
Musashi with a hook.
Musashi swings and misses with a hook to the body.
Musashi steps to the side to avoid the strikes from Take.
Musashi is looking to slow Take down with leg kicks.
Take blocks a leg kick.
Take ducks under an overhand right and circles away with a smile on his face.
Musashi getting the better of the striking in that exchange.
Musashi misses with a takedown attempt. He shot from a bit too far out.
Take throws a big shot that misses.
Musashi has his hands up protecting his head but a hook from Take finds it's way round the side to connect with Musashi's head.
Musashi fakes a jab and then connects with a hook.
That's three minutes gone in the round.
Musashi misses with a telegraphed body shot
and Take counters with a right hand to the body.
Take keeping a good distance there, avoiding the body shot.
Take was looking to counter that move with a punch but didn't quite pull the trigger.
Musashi lands a nice hook to Take's body. Take takes it in his stride and looks to land his own strikes.
Take avoids the body shot from Musashi.
Musashi stuns Take with a nice body shot, before stepping back out of range.
Take misses with a hook
and Musashi counters with a nice uppercut.
Take uses some good footwork to avoid the body shot by Musashi.
Musashi pushing out the jab but it's not landing.
As Musashi backs away, Take returns fire with a leg kick that just misses.
Take checks the leg kick.
Take throws the left hand but Musashi avoids the punch easily.
Take moves out of range of the strikes.
That's four minutes gone in the round.
Take throws a two punch combo that lands nicely.

Musashi is rocked!
Musashi walks straight into a right hand from Take - that's dropped him! Take jumps into mount and starts pounding away - can he finish?! More strikes go undefended and the referee has to dive in to save Musashi from any more punishment! Musashi complains about the stoppage but falls over as he tries to stand back up, so it was clearly a good stoppage.
Ladies and gentlemen, after 4:11 of round 4, we have a winner by way of TKO (Punches). Yamato Take!
Yamato Take retains his welterweight title!
|
|
|
|
|
|
|
|
|
|
|
|
|
|
|
|
|
|
|
|
|
|
|
| S |
C
A |
G |
S |
C
B |
G |
|
S |
C |
G |
|
energy
A | B |
|
hype
A | B |
|
pop
A | B |
|
mgr
A | B |
|
FIGHT
RATING
58% |
|
|
|
|
|
|

