|
|
PBP Commentary |
Coming up we have a welterweight MMA rules bout between Hayden Strong (ranked 7624 p4p, 0 weight class) and Leron Hawkins (ranked 7996 p4p, 0 weight class). I'm sure you'll be fascinated to know that I was talking to some pointless Z list celebrity before the fight and he thought that Leron Hawkins was going to win. Let's see if he was right.
 |
|
 |
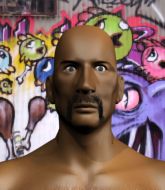
| 196 cm
24
178 lbs
2 - 1 - 0 |
|
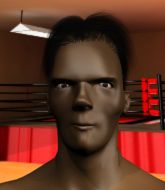
180 cm
22
170 lbs
0 - 1 - 0 |
BJJ Blue Belt
Counter fighter
Cuts easily |
|
BJJ Blue Belt
Brawler
Likes musicals |
|
| |
|
Ladies and gentlemen. This fight is 3 rounds, in the welterweight division.
Introducing the fighter to my left, fighting out of the red corner.
With a record of
2 - 1 - 0, fighting out of Las Vegas, Hayden Strong!
And introducing the fighter to my right, fighting out of the blue corner.
With a record of
0 - 1 - 0, fighting out of Las Vegas, Leron Hawkins!
The judges for this bout are Robert Twigg, George Francis and Daniel Franklin.

The bell rings for round one and we are underway!
A head kick misses from Hawkins.

Hawkins darts in and clinches Strong up against the cage.
Hawkins keeps the fight in the clinch, despite Strong's efforts to push away.
Hawkins stalling in the clinch but Strong improves position.
Hawkins looking to slow down the pace here.
Strong has had enough of the clinch but Hawkins keeps him there for the moment.
Strong looks like he'd prefer to be striking at range right now.

Hawkins works for the underhooks and manages to get a trip takedown into guard.

Strong looking for submissions off his back, moving his hips, looking for an opening.
There's a bit of a scramble here and now Strong is on top in guard.

Strong really does look like a pencil wearing a pair of gloves. Let's hope he has a gameplan to suit that ridiculous body shape.
We've had a slow start to the round here - hopefully the action picks up.

Strong decides to stand up and beckons his opponent to follow.
Hawkins closes the distance and after a bit of a stuggle, scores a takedown into Strong's guard.

The fighters are working up against the cage. Strong manages to wriggle his way back to his feet, so the fighters are now clinched against the cage.

That's one minute gone in the round.

Strong breaks from the clinch.
Strong shoots in for a takedown. He's persisting with it as Hawkins sprawls well. Hawkins wins this battle and keeps the fight standing. Strong gets slowly back to his feet.
Strong pulls out of a head kick attempt.
Hawkins shoots in for a takedown and gets it. Let's see what he's got on the mat.
Strong is working actively off his back, looking to secure an arm or perhaps work for a triangle.
Strong will need to keep those long limbs tucked in whilst he's on the ground, to prevent any submissions.
Hawkins stands up and looks to throw the legs aside to pass to side control. Strong swivels though and keeps the full guard.
Strong wants to get back to his feet but he's too absorbed in his own little project and Hawkins manages to pass to side control.
Hawkins stops Strong from getting back to his feet.

That's two minutes gone in the round.
Strong wants to improve his position but Hawkins is controlling well.

Hawkins is working for a kimura but Strong is defending it quite comfortably.
Strong won't allow Hawkins to pass to mount.
Strong is looking to improve his position.
Strong holds on for dear life, maintaining half guard for now.
Hawkins drops an elbow to the side of Strong's head.
Strong has hold of Hawkins's hands but Hawkins slips his arm to the side and lands an elbow.
The ref warns both fighters not to hold the cage as they work up against the meshing.
Strong manages to get to full guard.

That's three minutes gone in the round.
Hawkins trying to control the position from guard on top but Strong is wriggling around, looking for whatever he can.
Strong had isolated an arm as going for a kimura. Hawkins defends it easily.
Strong tries to land a sweep but no joy.
Hawkins throwing shots from guard but he's hitting more mat than opponent.
Hawkins controlling from the top position.
Strong working for a triangle but Hawkins defends it easily.
Strong looking for submissions from the bottom here. Moving his hips around, possibly looking for an armbar.
Strong is breathing heavily.

That's four minutes gone in the round.
The crowd are getting on the fighters' backs, as the pace has dropped off in the last minute or so.
Hawkins lands a couple of digs.
The fighters are pressed up against the cage, both looking to find a bit of space to work.
Strong looking for a sweep. Not yet Strong, not yet.
Hawkins stays in close to Strong's body and controls the position.
Hawkins makes a bit of distance and scores with some ground and pound, still in guard.
Strong is throwing his legs up, looking for submissions. Hawkins is aware though and is defending well.
Hawkins sitting in guard, not really doing much.
Strong is looking for a guillotine. You can't force these things though and Hawkins defends well.
Strong keeping moving, preventing Hawkins from controlling successfully.
And thats the end of the round the fighters go back to their corners.
A close round but Leron Hawkins will probably get the nod.
OK. That's time! The bell goes and we're back to the action.

Strong looks for a takedown here. Will he get it? Hawkins is fending him off so far but Strong persists. Nope, Hawkins circles away and we're back to standing.
Hawkins is trying to avoid his opponent's strikes and get into the clinch.
Hawkins drives through with a takedown into guard.
Strong is looking to get back to his feet but can't, whilst Hawkins is controlling him.
Hawkins trying to pass the guard but can't manage it just yet.
Hawkins wants to control from the top but Strong keeps moving.
Hawkins sitting in guard here, content to control.
Hawkins trying to control the position from guard on top but Strong is wriggling around, looking for whatever he can.
We've had a slow start to the round here - hopefully the action picks up.
Strong striking off his back but it's not causing Hawkins any problems.
Strong not looking particularly offensive just at the moment.
That's one minute gone in the round.
Strong working for a triangle but Hawkins defends it easily.
Hawkins trying to control but Strong is working from the bottom.
Strong trying to control the position.
Hawkins tries to free his leg and advance position but Strong is retaining full guard.
Strong looking for a guillotine here but Hawkins defends easily.
Strong is working from a closed guard but he's struggling to control his opponent.

Strong is working an open guard so Hawkins takes the opportunity to get back to his feet.
That's two minutes gone in the round.
A lull in the action here being met with boos from the crowd.
Strong shoots in for a takedown. He's persisting with it as Hawkins sprawls well. Hawkins wins this battle and keeps the fight standing. Strong gets slowly back to his feet.
Both fighters are absolutely exhausted here.
Hawkins darts in and lands a nice takedown into half guard.
Strong kicks off Hawkins and gets to his feet.

Strong looking to shoot here. He's gone for it and he's landed a takedown into side control! Oh, that's bad for Hawkins!
Strong has had enough of the ground for now and decides to stand.
That's three minutes gone in the round.
Hawkins gets to the clinch - let's see what his plan is here.
Both fighters working to control the clinch.
Strong wants to push off and get back to the center of the mat but Hawkins has him pressed against the cage.
Hawkins pushes Strong back against the cage and lands a hook to the side of the head.
Hawkins is working hard here but doesn't seem to be able to control effectively, up against the cage.
Come on Hawkins - let's have some action - none of this stalling nonsense.
Strong slowing the pace effectively.

Hawkins manages to break the clinch.
Hawkins decides to change it up a bit and drives through with a nice takedown into half guard.
Hawkins is keeping good posture, landing some ground and pound.
That's four minutes gone in the round.
Hawkins is trying to control. Strong wants to improve his position but can't escape this time.
Hawkins tries to pass the half guard into mount. Strong knows what he's doing though and prevents the attempt.
Strong is working for an escape here. He's hooked one of Hawkins's legs and he's managed to sneak out and take Hawkins's back!
Strong has the hooks in. Hawkins is trying to push off one leg but he has to do so cautiously to avoid being submitted.
Strong is looking to finish the fight by rear naked choke. Hawkins knows exactly what he's got planned though, so he's defending well. Maybe a few strikes would soften Hawkins for a finish.
The crowd are loving this. Great action here.
Strong patiently working for the choke. Which fighter will keep their nerve here?
Strong patiently working for the choke. Which fighter will keep their nerve here?
And thats the end of the round the fighters go back to their corners.
That was a close second round but I would say that Hayden Strong will probably get the nod.
That's time! Back to the action! Let's get this one finished - here comes the final round!

Strong throws a loose over hand right and dives in with a double leg takedown. Hawkins tries to sprawl but it's too late and the fighters hit the mat. Strong is in Hawkins's guard.
Hawkins wants to stand but Strong is controlling the position.
Hawkins tries to land a sweep but no joy.
Strong stands up from Hawkins's guard - Strong perhaps looking for a knockout.
Hawkins dives in and scores a takedown into Strong's guard.
We've had a slow start to the round here - hopefully the action picks up.
Strong had isolated an arm as going for a kimura. Hawkins defends it easily.
Strong wants to control the position but Hawkins says "no thanks buddy" and passes to half guard.
Both fighters are breathing heavily.
That's one minute gone in the round.
Strong trying to control from the bottom.
Strong tries to strike from the bottom but it doesn't land.
Strong is looking to improve his position.
Strong is refusing to be controlled, as Hawkins sits in half guard.
Hawkins slows the pace down in half guard.
Strong is looking for a sweep. Hawkins is wise to his cunning plan and keeps the top position.
Hawkins is looking to take a break and control but Strong is keeping him honest, looking to work from the bottom.
Hawkins is looking to pass the guard... He's managed it - he's now in full mount!
That's two minutes gone in the round.
Strong regains half guard.
Hayden Strong overall seems to be getting the better of the ground position in the fight so far.
The fighters are battling for position here. Strong manages to regain full guard. Nice work.
Strong wants to sweep but no luck.
Strong had isolated an arm as going for a kimura. Hawkins defends it easily.
Hawkins stands and steps away. Strong gets to his feet too and we're back to the striking game.
Hawkins throws a nice inside leg kick.
Leron Hawkins seems to be the more aggressive standup fighter in this bout.
Hawkins scores a trip takedown into side control. Nice.
That's three minutes gone in the round.
Strong is not in a great position here, taking some shots.
Hawkins decides to stand back up. Hawkins steps back and let's Strong get back to his feet.
Hawkins drives through and clinches with Strong against the cage.
Strong manages to break the clinch.
A punch lands to the side of Strong 's head but he takes it in his stride.
Hawkins shoots in and gets a takedown into Strong's guard.
Strong is edging up against the cage. He's using the cage to get back to his feet. Nice work there - the fighters are clinched.
Hawkins decides to pull guard.
This has been an exciting period of action!
Strong got a little sloppy there for a moment and Hawkins has worked his way into a loose triangle - can he finish it?! No, Strong has managed to get both his arms back between Hawkins's legs - danger averted.
Strong stands up and waves to Hawkins to follow him.
That's four minutes gone in the round.
Hawkins moves into range and clinches up with Strong.
Strong manages to break the clinch.
Hawkins throws a leg kick but Strong sees it coming and moves out of range.
No luck with that takedown attempt from Strong.
Hawkins unleashes a big counter combination but Strong bobs and weaves and avoids any damage.
Hawkins shoots in with a lovely double leg takedown. Strong manages to land in full guard to minimise the damage.
Strong is scooting his butt against the cage and has managed to get back to his feet. Hawkins presses him back against the cage, presumably looking to take the fight back to the mat.
And that's the end of the fight!
Hayden Strong showed his dominance in that final round.
I have no idea who won that fight. Let's wait and see whether the judges are as confused as me! Time for a split decision perhaps?!. Over to the ring announcer for the scorecards.
Ladies and gentlemen, after 3 rounds of action, we go to the scorecards for a decision.
Judge Robert Twigg scores the fight 29:28
Judge George Francis scores the fight 29:28
Judge Daniel Franklin scores the fight 29:28
In favor of your winner, by unanimous decision... Hayden Strong!
|
|
|
|
|
|
|
|
|
|
|
|
|
|
|
|
|
|
|
|
|
|
|
| S |
C
A |
G |
S |
C
B |
G |
|
S |
C |
G |
|
energy
A | B |
|
hype
A | B |
|
pop
A | B |
|
mgr
A | B |
|
FIGHT
RATING
45% |
|
|
|
|
|
|
