|
|
PBP Commentary |
Coming up we have a bantamweight MMA rules bout between Scot Hines (ranked 24688 p4p, 0 weight class) and Naruto Uzumaki (ranked 5014 p4p, 0 weight class). There are an array of beautiful celebrities at ringside tonight! I wonder if any of them paid for their tickets.
 |
|
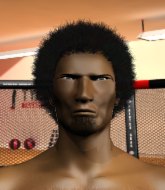 |
| 202 cm
24
140 lbs
0 - 1 - 0 |
|
168 cm
26
143 lbs
3 - 1 - 0 |
BJJ Blue Belt
Counter fighter
Cuts easily |
|
BJJ Purple Belt
Basic striking
Very confident |
|
| |
|
Ladies and gentlemen. This fight is 3 rounds, in the bantamweight division.
Introducing the fighter to my left, fighting out of the red corner.
With a record of
0 - 1 - 0, fighting out of London, Scot Hines!
And introducing the fighter to my right, fighting out of the blue corner.
With a record of
3 - 1 - 0, fighting out of Tokyo, Naruto Uzumaki!
The judges for this bout are James Ackerman, Colin Fotheringham and Andrew Berry.

The bell rings for round one and we are underway!

Hines gets in close and instigates a clinch.
Uzumaki tries to score a body lock takedown but Hines shows good agility there to stay on his feet.
Uzumaki is working on a leg, looking for a takedown but Hines is defending well.
Hines really does look like a pencil wearing a pair of gloves. Let's hope he has a gameplan to suit that ridiculous body shape.
Uzumaki wants a takedown.
Scot Hines has stuffed three takedown attempts in the round now. That's going to take a lot out of Naruto Uzumaki.
Hines lands a knee to the body.
Hines tries a body shot but Uzumaki blocks it.
Uzumaki tries to pull guard but Hines holds him up against the cage and eventually Uzumaki drops back down to his feet.

Uzumaki successfully pulls guard.
Hines scoring with some ground and pound.
We've had a slow start to the round here - hopefully the action picks up.

Uzumaki looking for submissions off his back, moving his hips, looking for an opening.
Hines wants to stand but Uzumaki is controlling his posture from full guard.
Hines lands a couple of digs.

That's one minute gone in the round.
Hines with a nice head shot there.
Uzumaki has a closed guard, preventing Hines from standing up.
Uzumaki working from the bottom, still in full guard. He's managed to get a loose triangle. Hines doesn't seem to be doing much to defend here, obviously he feels comfortable in the position. Hines manages to throw the legs off his shoulder and he's back into guard - no problem.
Uzumaki looking for a guillotine here but Hines defends easily.

Hines gets to his feet - Uzumaki follows without any prompting.

Uzumaki gets caught flat footed, as Hines shoots in with a quick takedown into guard.
Hines stands up from guard. Let's bang!

That's two minutes gone in the round.
Uzumaki fakes an overhand right and shoots for a takedown. Hines sprawls well initially but Uzumaki persists and gets the takedown into half guard.
Hines gets back to full guard.
Uzumaki stands up and looks to throw the legs aside to pass to side control. Hines swivels though and keeps the full guard.
Uzumaki passes into half guard.
The crowd cheering loudly, showing their appreciation for the quality fight we're seeing here.
Uzumaki is trying a forearm choke
I don't think that's going to do much at this level of the game.
Uzumaki wants to work for an arm triangle but Hines is really keeping half guard well and defending the submission attempt.
Uzumaki thows a huge punch but Hines dodges it nicely.
The ref warns both fighters not to hold the cage as they work up against the meshing.

That's three minutes gone in the round.
Uzumaki wants to work for an arm triangle but Hines is really keeping half guard well and defending the submission attempt.
Uzumaki is looking for a kimura. It's pretty deep but Hines still has the half guard so he's probably OK. Oh, Hines has exploded into a beautiful escape there and after a quick scramble, he's ended up in side control on top! Nice work!
Uzumaki takes a couple of big shots there - the referee warns him that he has to defend himself better.
Uzumaki is trying to get back to half guard.
Uzumaki tries to strike from the bottom but misses.
Hines will need to keep those long limbs tucked in whilst he's on the ground, to prevent any submissions.
Hines working away.

That's four minutes gone in the round.
Uzumaki takes a nasty elbow to the side of the head.
Uzumaki can't do much from the bottom here.
Uzumaki wants to get back to his feet but Hines drags him back down.
Hines decides to stand back up.
Uzumaki shoots in looking for a takedown but Hines manages to keep the fight standing, pushing Uzumaki's face into the canvas for good measure before circling away.
Hines closes the distance and gets a double leg, slamming Uzumaki to the mat! Uzumaki manages to get full guard.
Uzumaki looking to control but Hines passes into half guard.
Uzumaki tries to roll over but Hines keeps him under control.
Uzumaki has guillotine here! It looks pretty tight! Could this be all over! No, Hines escapes and passes into side control at the same time. Nice work there by Hines!
We've seen a great period of action over the last minute or so - credit to both fighters for going all out!
Hines lands a nice forearm strike.
And thats the end of the round the fighters go back to their corners.
Scot Hines dominated that round.
That's the end of the interval. I'm sure that seemed a lot quicker than a minute for our two fighters! Back to the action.

Uzumaki keeping a good distance there, avoiding the body shot.
Hines fakes an overhand right and shoots for a takedown. Uzumaki sprawls well initially but Hines persists and gets the takedown into half guard.
Uzumaki is trying to maintain the position but Hines is very close to passing his half guard.

Uzumaki is defending against the submission attempts here by Hines.
We've had a slow start to the round here - hopefully the action picks up.
Uzumaki wants to sweep but Hines has passed to side control!
That's one minute gone in the round.
Uzumaki is trying to get back to his feet.
Uzumaki can't do much from the bottom here.
Hines tries for a kimura but Uzumaki is defending well.
Uzumaki is positioning himself to get back to half guard.
Uzumaki sneaks a leg under to get back to half guard.
Uzumaki looking for submissions from an awkward position here.
Uzumaki actively working from the bottom here.
That's two minutes gone in the round.
My god... these two guys really need to pick up the pace or everyone will leave to go get a beer.
Hines is looking for a kimura here.
Uzumaki is trying to control but can't.
Uzumaki flails away from the bottom but he's not doing any damage.
Uzumaki manages to get to full guard.
Uzumaki working from the bottom, still in full guard. He's managed to get a loose triangle. Hines doesn't seem to be doing much to defend here, obviously he feels comfortable in the position. Hines manages to throw the legs off his shoulder and he's back into guard - no problem.
That's three minutes gone in the round.
Uzumaki escapes his hips to the side and looks to be working for an armbar. Hines gives him a little smile and shakes his head. No chance.
Uzumaki is looking for a triangle but Hines pushes his legs off easily.
Uzumaki is actively looking for submissions from his back. He's worked himself a little space on the bottom and seems to be going for a triangle. No, he's switched into an armbar! That was slick! Hines rolls with it to try and escape but Uzumaki cranks on the arm and Hines is forced to tap out! This one is aaaaaaaaall over!
Ladies and gentlemen, after 3:49 of round 2, we have a winner by way of Submission (Armbar). Naruto Uzumaki!
|
|
|
|
|
|
|
|
|
|
|
|
|
|
|
|
|
|
|
|
|
|
|
| S |
C
A |
G |
S |
C
B |
G |
|
S |
C |
G |
|
energy
A | B |
|
hype
A | B |
|
pop
A | B |
|
mgr
A | B |
|
FIGHT
RATING
36% |
|
|
|
|
|
|
