|
|
PBP Commentary |
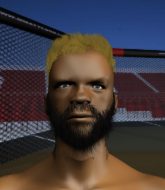
Coming up we have a bantamweight MMA rules bout between Molokai Built (ranked 1889 p4p, 94 weight class) and Connor Joieson (ranked 2072 p4p, 106 weight class). Both fighters look fresh as a daisy as they make their way towards the cage.
 |
|
 |
| 169 cm
24
140 lbs
4 - 3 - 0 |
|
168 cm
21
145 lbs
4 - 5 - 0 |
Good wrestling
Excellent boxer
Granite chin |
|
Good wrestler
Decent boxing
Good gas tank |
|
| |
|
Ladies and gentlemen. This fight is 3 rounds, in the bantamweight division.
Introducing the fighter to my left, fighting out of the red corner.
With a record of
4 - 3 - 0, fighting out of Los Angeles, Molokai Built!
And introducing the fighter to my right, fighting out of the blue corner.
With a record of
4 - 5 - 0, fighting out of Sydney, Connor Joieson!
The judges for this bout are Alyssa Summers, Jonathan Paton and Bruno Lombardi.

The bell rings for round one and we are underway!

Joieson looks for a takedown. He's got it. We're now in half guard.

Built manages to escape and get back to his feet!
We've been told by Built's head coaches at 3Band MMA ($700/week) that he's been working on his takedown defense in preparation for this fight.
Joieson takes a really solid shot there but just smiles back and shrugs his shoulders.
Built lunges in with swinging rights and lefts but Joieson circles away quickly and effectively.
Joieson shoots in looking for a takedown. Built tries to sprawl out of it but Joieson keeps driving through. The fighters are pinned against the cage. Built manages to get underhooks and after a bit of a struggle, circles away and we're back to standing.
No luck for Joieson with that takedown attempt.
This has been an exciting period of action!
Built stuffs the takedown attempt from Joieson. Joieson gets slowly back to his feet.
Molokai Built has stuffed three takedown attempts in the round now. That's going to take a lot out of Connor Joieson.
Joieson on the wrong end of a decent looking cross there.
Joieson fakes high and shoots in for a takedown but Built avoids it really well and circles away.
Joieson shoots in for a double leg but Built sprawls well. That's going to sap some energy.
Joieson has done a lot of speed work in the buildup to this fight.
Built lands a right hook to the body.

That's one minute gone in the round.
Built digs a good body shot into Joieson's ribs.
Built fakes and then throws a beautiful body shot. Joieson looks a bit winded and takes a step backwards to take a breath.
Built misses with a two punch combination.
Joieson misses with a takedown
and Built counters with a lovely straight right hand!
Built just misses with a punch to the body.
Connor Joieson seems to be the more aggressive standup fighter in this bout.
Built lands a nice hook to Joieson's body. Joieson takes it in his stride and looks to land his own strikes.
Built scores with a sloppy punch to the body. Not much technique there but it did the business.
Built scores with a head kick.
Built scores with a decent looking hook.
This has been an exciting period of action!
Built scores with a hook.
Built misses with a body shot
and Joieson counters with a nice double leg into guard.
Joieson missing there with some ground and pound from the guard.
Joieson in full guard, throwing the ground and pound. No damage this time.
Joieson working some ground and pound from guard but it's not doing any damage.
Joieson is fighting to break Built's control of his arms but Built is doing a good job of controlling the position at the moment.

That's two minutes gone in the round.
Built keeping moving, preventing Joieson from controlling successfully.
Built controlling Joieson's posture.
Built has controlled the position for a good 20 seconds, which will no doubt be starting to frustrate his opponent.
It looks like the ref is thinking about a standup.
Built wants to sweep here but Joieson controlling him for the moment.
Joieson loading up with the ground and pound but he's missing more than he's landing in this flurry.
Joieson working some ground and pound from guard but it's not doing any damage.
Joieson postures up in Built's guard and throws a big left but Built blocks it.

That's three minutes gone in the round.
Built controlling the position.

The referee has stepped in and called for a break in the action. We'll restart on the feet.
Joieson looks for a takedown here. Will he get it? Built is fending him off so far but Joieson persists. Nope, Built circles away and we're back to standing.
Built was looking to counter that move with a punch but didn't quite pull the trigger.
Nice sprawl there from Built as Joieson shoots in.
Joieson slips a jab from Built.
Joieson changes levels and looks for a double leg takedown. Built tries to avoid it but Joieson manages to keep hold of a leg and drag Built to the ground. Built escapes though and pops straight back up to his feet.
Nice cross by Built.
A cross from Built lands.
Joieson fails with a rather predictable takedown attempt.
Built lands a really nice looking cross but Joieson seems unphased.
Built swings for the body but Joieson moves out of range.
Built lands a body shot.
Nice sprawl there from Built as Joieson shoots in.
Built bobbing and weaving, closes the distance and lands a hook to the side of Joieson's head.
Built throws a jab to the body, straight down the pipe. Boom. That sent Joieson stumbling backwards but he manages to regain his composure quickly.
The crowd cheering loudly, showing their appreciation for the quality fight we're seeing here.
Joieson changes levels and looks for a double leg takedown. Built tries to avoid it but Joieson manages to keep hold of a leg and drag Built to the ground. Built escapes though and pops straight back up to his feet.

That's four minutes gone in the round.
Built lands a straight punch to the body, keeping Joieson at a distance.
Joieson tries for a takedown but Built circles away easily
and Built counters with a crisp hook to the side of the head.
Joieson looks winded!
Joieson shoots in for a takedown. "Ole!" shouts Built as he jumps to the side.
Built lands an overhand right.
Built misses with a jab, cross combination.
Built swings and misses with a hook to the body.
Joieson is trying hard to land a takedown here. Built sprawls well and keeps this one on the feet.
Nice takedown defense from Built. No joy for Joieson on that attempt.
Built lands with a two punch combination before moving back out of range.
The crowd applaud the fighters' efforts here as the round comes to an end.
Built lands with a straight right. Joieson didn't see that one coming.

Joieson is rocked!
Built cracks Joieson with a right hand to the side of the head.
Joieson is still on wobbly legs! Can Built finish him?
Joieson fails to land the takedown.
Built appears to be looking for a counter punch to the body.

Built gets in close and instigates a clinch.
And thats the end of the round the fighters go back to their corners.
Molokai Built dominated that round.
The fighters' corners scream their final instructions, as the referee calls time. Here we go, back to the action!

Built stuffs a takedown. It's all about dictating where the fight takes place and Built wants it to stay on the feet.
Joieson just manages to avoid a counter high kick fromBuilt.
Joieson seems to have recovered his senses.
Built stuffs the takedown.
Built is really dominating this fight. Is there anything that Joieson can do to turn this around?
Built connects with a jab.
Joieson looks frustrated there after his takedown attempt is stuffed easily.
Molokai Built has stuffed three takedown attempts in the round now. That's going to take a lot out of Connor Joieson.
Joieson shoots in looking for a double leg takedown. Built defends it nicely.
Joieson fails to land the takedown.
It looked like Built wanted to counter with a hook but didn't fully commit.
Built rushes Joieson and presses him up against the cage.
We've had a slow start to the round here - hopefully the action picks up.
Built is fighting off a takedown attempt but Joieson is just too persistent for him and manages to trip Built to the mat. Built regains guard as soon as the fighters hit the mat.
Built uses the cage to get back to his feet.
We've seen a great period of action over the last minute or so - credit to both fighters for going all out!
Joieson closes the distance and takes a jab right on the nose as he does so.
Joieson tries to shoot in for a takedown. He's got hold of a leg but Built swivels and escapes.
Joieson is breathing heavily.
That's one minute gone in the round.
Built turns his hip over beautifully as he lands a nice leg kick.
Joieson avoids a punch combination nicely.
Built has closed the distance and engaged Joieson in a clinch.
Joieson tries to score a body lock takedown but Built shows good agility there to stay on his feet.
Built stays in close to his opponent and throws a right hand to the body.
A shot in the inside from Built.
Built working some nice short punches in the clinch.
Built lands a shoulder strike.
Joieson tries for a takedown but Built manages to get underhooks.

Built breaks the clinch and we return to the middle of the mat.
Built throws a body shot but no joy.
Built connects with a slap. Keep your fist closed son.
Connor Joieson is looking to throw some combinations by the looks of things.
Joieson takes a jab right on the kisser.
Wooooo! Give it up for these two warriors! They are putting on a show!
A chopping leg kick lands by Built.
Built moves into the clinch.
A shot in the inside from Built.
Joieson can't get the takedown.
That's two minutes gone in the round.
Built pushes Joieson back against the cage and lands a hook to the side of the head.
Built lands with a left to the head.
Built gets underhooks to prevent Joieson's takedown attempt.
Built lands punches inside but they're not really causing much damage.
Molokai Built has scored more points in the clinch so far.
A short right from Built.
Built lands a shoulder strike that jolts his opponent's head backwards.
Built gets through Joieson's defenses to land a nice punch to the side of the head.
Joieson jumps guard but his hands slip and he falls flat on his back. Well, he's made himself look a right mug there, as Built walks away with a smile on his face. Joieson gets slowly back to his feet and shakes his head.
Built swinging wildly here.
Built lands with an overhand left.
Joieson shoots for a takedown but Built saw that one coming a mile off and avoided it easily.
Built getting the better of the striking in that exchange.
Built closes the distance and lands a vicious right hand that drops Joieson! Built dives in looking to finish! Joieson is still trying to defend himself but he's taking too many shots and the referee has no choice but to stop the fight!
Ladies and gentlemen, after 2:53 of round 2, we have a winner by way of TKO (Strikes). Molokai Built!
Molokai Built decided to go for the less than humble approach in his post fight interview, telling everyone how he is going to conquer the world. The crowd seemed to like it when really that sort of approach could have gone either way.
|
|
|
|
|
|
|
|
|
|
|
|
|
|
|
|
|
|
|
|
|
|
|
| S |
C
A |
G |
S |
C
B |
G |
|
S |
C |
G |
|
energy
A | B |
|
hype
A | B |
|
pop
A | B |
|
mgr
A | B |
|
FIGHT
RATING
78% |
|
|
|
|
|
|
