|
|
PBP Commentary |
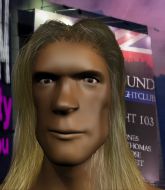
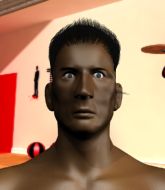
Coming up we have a light heavyweight MMA rules bout between Murky McTavern (ranked 1101 p4p, 166 weight class) and Daniel Booningham (ranked 2617 p4p, 346 weight class). These two fighters really are very evenly matched on the feet - it will be fascinating to see who can assert themselves in that aspect of the fight.
 |
|
 |
| 186 cm
21
205 lbs
6 - 1 - 0 |
|
200 cm
21
215 lbs
8 - 6 - 0 |
BJJ Blue Belt
World class boxer
Cardio machine |
|
BJJ Blue Belt
Excellent boxer
Granite chin |
|
| |
|
Ladies and gentlemen. This fight is 3 rounds, in the light heavyweight division.
Introducing the fighter to my left, fighting out of the red corner.
With a record of
6 - 1 - 0, fighting out of London, Murky McTavern!
And introducing the fighter to my right, fighting out of the blue corner.
With a record of
8 - 6 - 0, fighting out of St Petersburg, Daniel Booningham!
The judges for this bout are Dmitry Maklakov, Igor Prikhodko and Valeri Chadov.

The bell rings for round one and we are underway!
We've got one fighter who appears to only be looking to counter and the other not looking particularly aggressive either, so we could be in for a dull fight.
Booningham is the aggressor but that punch slipped nicely by McTavern.
Booningham has done a lot of speed work in the buildup to this fight.
Booningham cracks McTavern with a good jab.

McTavern moves into the clinch.

Booningham breaks the clinch and we're back to striking at distance.
Booningham lands a jab to the head.
We've had a slow start to the round here - hopefully the action picks up.
McTavern darts in and clinches Booningham up against the cage.
McTavern being controlled against the cage.
McTavern misses with a short punch on the inside.

That's one minute gone in the round.
Booningham is defending well against a takedown attempt.
McTavern swings wildly with an uppercut but Booningham uses good head movement to avoid it.
McTavern pushes Booningham back against the cage and lands a hook to the side of the head.
McTavern throws a punch but it's blocked by Booningham.
McTavern tries a body shot but Booningham blocks it.
McTavern fails to land with a short punch on the inside.
McTavern lands with a right to the head.
McTavern working aggressively here.
McTavern lands on the inside with an uppercut.
McTavern swings away with an uppercut that misses.
McTavern lands with a left to the head.
Booningham breaks from the clinch.
McTavern throws an overhand right that lands on Booningham's shoulder, as Booningham tries to avoid the shot.
Booningham swings away with a counter right hand but no contact made.

That's two minutes gone in the round.
McTavern throws a jab but it's blocked by Booningham.
And an attempted straight right on the counter from Booningham! But no joy.
Nice body punch from McTavern.
McTavern clinches.
The crowd are loving this. Great action here.
McTavern swings wildly with an uppercut but Booningham uses good head movement to avoid it.
Booningham blocks a punch to the side of the head.
McTavern scores with a shoulder strike.
McTavern throws a punch but it's blocked by Booningham.
McTavern pushes Booningham back against the cage and lands a hook to the side of the head.
McTavern has hold of a leg and is looking for a trip takedown. Booningham avoids it nicely though and we remain in the clinch.

That's three minutes gone in the round.
McTavern scores with a hook to the body.
McTavern pushes Booningham back against the cage and unloads with a body punch.
Booningham looks winded!
McTavern throws a punch but it's blocked by Booningham.
McTavern lands with a short head shot on the inside.
Booningham goes for a body shot but it's blocked.
Booningham blocks an uppercut.
Booningham is looking to break free of the clinch but McTavern has double underhooks.
McTavern tries a shoulder strike but it doesn't do any damage.
Booningham tries a body shot but McTavern blocks it.
Booningham dictating the pace here, as the fighters clinch against the cage.
McTavern is trying to work for a single leg takedown but Booningham pulls him back up using the underhooks.
That's three failed takedown attempts in the round for Murky McTavern. That's going to take a lot out of him.
McTavern works on Booningham's body with a couple of short punches.
McTavern pushes Booningham back against the cage and unloads with a body punch.
Booningham blocks a couple of punches on the inside.

That's four minutes gone in the round.
McTavern throws a head punch that misses.
With the fighters clinched against the cage, McTavern creates a bit of distance for himself and scores with a nice uppercut.
An uppercut on the inside fails to land for McTavern.
McTavern drops down for a takedown but doesn't get it.
Booningham is trying to force a seperation but McTavern has the dominant position.
McTavern avoids a wild elbow strike from Booningham.
McTavern swings wildly with an uppercut but Booningham uses good head movement to avoid it.
McTavern scores with a shoulder strike.
A short uppercut from McTavern.
This is a great period of action - very entertaining stuff!
McTavern fails to land with a short punch on the inside.
McTavern misses with some punches.
Booningham pushes off and circles away, back to the middle of the mat.
And thats the end of the round the fighters go back to their corners.
Murky McTavern dominated that round.
The fighters' corners scream their final instructions, as the referee calls time. Here we go, back to the action!

Booningham swings for the body but McTavern moves out of range.
McTavern lands a nice shot to the body.
McTavern goes for a double leg but Booningham avoids the attempt and the two fighters end up clinched against the cage as Booningham continues to drive forward.
Booningham takes a punch right to his stomach. That took the wind out of him momentarily.
The crowd cheers as McTavern lands an impressive looking overhand right. Booningham doesn't seem phased though.
We've had a slow start to the round here - hopefully the action picks up.
McTavern lands a powerful looking uppercut that connected with his opponent's jaw.
McTavern tries to close the distance and clinch but Booningham swats him to one side with an open hand palm strike and circles away.
That's one minute gone in the round.
McTavern slips under a jab from Booningham.
McTavern connects with a lovely right hand, straight down the pipe.
This fight brought to you by 5M nutrition - it's mmmmm tasty. Nice jab by McTavern.
McTavern steps in with a hook that catches Booningham right on the chin and knocks him to the floor! McTavern follows him down with more strikes and that's all she wrote! Booningham looks absolutely devastated.
Ladies and gentlemen, after 1:44 of round 2, we have a winner by way of TKO (Strikes). Murky McTavern!
After the big win, Murky McTavern made sure to do all the important stuff like thanking his sponsors Zenith Nutrition (160q/$200) and telling the interviewer how much he loves him.
The defeated Daniel Booningham had this to say: 'You'll see me again soon even if it means I'm climbing in the cage to get a fight on my off day.'.
|
|
|
|
|
|
|
|
|
|
|
|
|
|
|
|
|
|
|
|
|
|
|
| S |
C
A |
G |
S |
C
B |
G |
|
S |
C |
G |
|
energy
A | B |
|
hype
A | B |
|
pop
A | B |
|
mgr
A | B |
|
FIGHT
RATING
42% |
|
|
|
|
|
|
