|
|
PBP Commentary |
Coming up we have a featherweight MMA rules bout between Karl Bartley (ranked 4436 p4p, 0 weight class) and Reynold March (ranked 4078 p4p, 0 weight class). Over to our ring announcer for the fighter introductions!
 |
|
 |
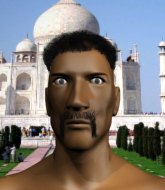
| 170 cm
25
145 lbs
3 - 2 - 0 |
|
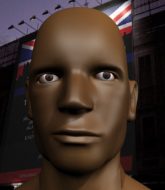
177 cm
25
155 lbs
3 - 5 - 0 |
Good wrestling
Brawler
Very quick |
|
BJJ Blue Belt
Excellent boxer
Knockout power |
|
| |
|
Ladies and gentlemen. This fight is 3 rounds, in the featherweight division.
Introducing the fighter to my left, fighting out of the red corner.
With a record of
3 - 2 - 0, fighting out of Las Vegas, Karl Bartley!
And introducing the fighter to my right, fighting out of the blue corner.
With a record of
3 - 5 - 0, fighting out of Las Vegas, Reynold March!
The judges for this bout are Tiny Johnson, Alan Glass and Daniel Franklin.

The bell rings for round one and we are underway!

March closes the distance and gets a trip takedown into side control. Bartley quickly recovers to half guard.
Bartley regains full guard. Nicely done.

Bartley looking for a guillotine here but March defends easily.
There's a bit of a scramble here and now Bartley is on top in guard.


March has a loose triangle. He'll be looking to tighten that up but Bartley can see exactly what he's planning and manages to posture up and free himself.
Bartley preventing the sweep.
We've had a slow start to the round here - hopefully the action picks up.
Bartley lands a couple of decent looking shots.
Bartley advances position into side control!
March taking a bit of punishment here - Bartley scoring with strikes.

That's one minute gone in the round.
Bartley is looking to take a break and control but March is keeping him honest, looking to work from the bottom.
Bartley in side control lands a decent elbow.
Bartley working the body and head with strikes.
Bartley is looking for a kimura. He might have it! No, March has escaped the position, nice work there.
March struggling a bit here.
Bartley scores with punches from side control.
Bartley is trying to get an arm triangle but March is defending well.
Bartley is looking for a kimura. He might have it! No, March has escaped the position, nice work there.
The ref warns both fighters not to hold the cage as they work up against the meshing.

That's two minutes gone in the round.
Bartley is putting a hurting on March here, landing some big shots from side control.
Bartley lands a knee to the body and a forearm to the face.
March tries to bench press Bartley off him but Bartley keeps the position.
The fighters are starting to perspire pretty heavily.
Bartley is trying to get an arm triangle but March is defending well.
Bartley is trying to get an arm triangle but March is defending well.
March is looking for a sweep.

That's three minutes gone in the round.
Bartley working away.
March is trying to get back to half guard. He's pushing on Bartley's leg. He's managed it. Nice work.
March is staying active underneath Bartley, who seems content to just control the action from this position.
March is trying to maintain the position but Bartley is very close to passing his half guard.
March is trying is best to control the position here.
Bartley is just content to waste time from the top position. March takes advantage of the situation and regains full guard.
March lands a decent shot there.
Bartley postures up and lands some nice ground and pound.
March keeping moving, preventing Bartley from controlling successfully.

That's four minutes gone in the round.
The crowd are showing their displeasure at the lack of action as loud boos ring out around the arena.
Bartley avoids a guillotine attempt easily.
Bartley avoids a guillotine attempt easily.
Bartley with a couple of shots to the head there. Not particularly brutal.
Bartley content to strike from guard, landing some decent shots.
The crowd thankful this round is nearly over.
March keeping moving, preventing Bartley from controlling successfully.
Bartley content to strike from guard, landing some decent shots.
And thats the end of the round the fighters go back to their corners.
Karl Bartley dominated that round.
That's the end of the interval. I'm sure that seemed a lot quicker than a minute for our two fighters! Back to the action.

March tries to clinch but is not successful on this occasion.
Bartley is really dominating this fight. Is there anything that March can do to turn this around?
Bartley shoots in looking for a takedown but March manages to keep the fight standing, pushing Bartley's face into the canvas for good measure before circling away.
March shoots in for a takedown and gets it. Let's see what he's got on the mat.
Bartley is trying to control the position but March postures up.
Bartley tries to land a sweep but no joy.
Bartley not looking particularly offensive just at the moment.
March is working the ground and pound from guard. He might want to try advancing position though to get more of an impact.
Bartley keeping full guard, as March tries to pass.
Bartley working for submissions but it's allowed March to get to half guard.
We've had a slow start to the round here - hopefully the action picks up.
March prevents Bartley from improving his position.
Bartley trying to hold on to March's head to control him but March postures up.
That's one minute gone in the round.
March tries to stand but his arm is trapped.
Bartley wants to get back to full guard.
March throwing punches and elbows but they're not doing any damage.
Karl Bartley overall seems to be getting the better of the ground position in the fight so far.
March content to control rather than advance.
Bartley regains full guard. Nicely done.
Bartley keeping moving, preventing March from controlling successfully.
Bartley tries to land a sweep but no joy.
That's two minutes gone in the round.
The crowd are hurling abuse towards the fighters... You can hardly blame them though because there isn't a lot going on in the fight.
The referee is pacing around the two fighters - he looks like he's thinking about a standup.
Bartley throwing his legs up looking for a triangle.
Bartley trying to strike from the bottom but really, it's not the best position to be doing that from!
March scoring with some ground and pound.
March working from the guard for now, landing some ground and pound.
March would like to get this fight back to the feet but can't get free from the closed guard.
Bartley on his back here. We all know that wrestlers don't like being on their back so let's see if Bartley tries to get out of the position.
March slips effortlessly into side control - very nice.
That's three minutes gone in the round.
Bartley manages to get one leg in to regain half guard.
Bartley is looking to regain full guard. Not this time though.
Bartley has no desire to be mounted, so is trying to control. March is working away from the top position though.
Bartley makes his way to full guard. A much better position for Bartley.
Bartley bucks up whilst keeping hold of a body lock, managing to reverse the position. Now he's in top in March's guard.
March is working from a closed guard but he's struggling to control his opponent.
That's four minutes gone in the round.
Bartley wants to control from the top but March keeps moving.
Bartley cracks March with a solid left hand.
Bartley landing some decent shots from guard.
March looking for a guillotine here but Bartley defends easily.
March is breathing heavily.
Bartley trying to control but March is working from the bottom.
Boooooooooooooooooooo!!! God, this has been a terrible round. Come on you two, sort yourselves out!
Bartley won't allow March to get back to his feet.
And thats the end of the round the fighters go back to their corners.
Reynold March showed his class in that round. I'd imagine he'll take it on all the scorecards.
That's time! Bartley's corner gives him a slap on the ass as he gets ready to fight. This is the final round!

March tries to clinch there but Bartley circles away.
March gets a double leg takedown into Bartley's guard.
March wants to control from the top but Bartley keeps moving.
Bartley looking for a sweep. Not yet Bartley, not yet.
Bartley escapes his hips to the side and looks to be working for an armbar. March gives him a little smile and shakes his head. No chance.
Bartley keeping moving, preventing March from controlling successfully.
We've had a slow start to the round here - hopefully the action picks up.
Bartley is trying to control the position from the bottom.
Bartley wants to improve his position but instead March has moved into half guard.
That's one minute gone in the round.
Bartley trying to hold on to March's head to control him but March postures up.
March is looking to advance position but Bartley won't allow it.
Bartley has no desire to be mounted, so is trying to control. March is working away from the top position though.
Bartley moves his hips nicely and gets into full guard.
Bartley will have to put a bit more behind his punches if he's going to do any damage from this position.
Bartley working the defensive guard well to avoid strikes from March.
Bartley wants to sweep but no luck.
That's two minutes gone in the round.
The crowd are starting to boo a lack of action.
Bartley controls March momentarily but March frees himself.
Bartley working for a triangle but March defends it easily.
Both fighters are breathing heavily.
March wanted to stand there but Bartley had control of the position.
Bartley thows some rabbit punches from the bottom but they don't do any damage.
Bartley is working from a closed guard but he's struggling to control his opponent.

The ref stands the fighters back up due to a lack of activity.

Bartley clinches with his opponent.
March has moved round to his opponent's back and is looking for a suplex! Oh snap! He's tossed Bartley clear over his head and slammed him to the mat!
That's three minutes gone in the round.
March tries to get the hooks in deep but Bartley pushed the leg off.
March controlling the position well here. Bartley rolled but March kept the hooks locked in and stayed in the dominant position.
Bartley tries to roll but March sticks to his back.
March gets his hands free as Bartley looks to control.
Bartley staying busy and making it hard for March to control.
Bartley tries to roll but March sticks to his back.
March is working on the RNC. He looks like he's got it but Bartley won't tap... Oh, he's out! The ref rips March off his unconscious opponent!
Ladies and gentlemen, after 4:59 of round 3, we have a winner by way of Submission (RNC). Reynold March!
|
|
|
|
|
|
|
|
|
|
|
|
|
|
|
|
|
|
|
|
|
|
|
| S |
C
A |
G |
S |
C
B |
G |
|
S |
C |
G |
|
energy
A | B |
|
hype
A | B |
|
pop
A | B |
|
mgr
A | B |
|
FIGHT
RATING
38% |
|
|
|
|
|
|
