|
|
PBP Commentary |
Coming up we have a heavyweight MMA rules bout between Roofus Bumfight (ranked 0 p4p, 0 weight class) and Masahiko Muta (ranked 0 p4p, 0 weight class). Bumfight comes into the arena with Amazing by Kanye West blaring out of the sound system. Both fighters will be looking to make this an exciting fight for the fans, I'm sure!
 |
|
 |
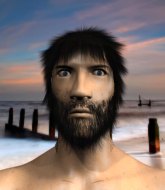
| 193 cm
22
250 lbs
1 - 1 - 0 |
|
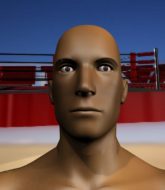
193 cm
18
244 lbs
0 - 2 - 0 |
BJJ Blue Belt
Improved boxing
Granite chin |
|
BJJ Blue Belt
Counter striker
Determined |
|
| |
|
Ladies and gentlemen. This fight is 3 rounds, in the heavyweight division.
Introducing the fighter to my left, fighting out of the red corner.
With a record of
1 - 1 - 0, fighting out of Rio de Janeiro, Roofus Bumfight!
And introducing the fighter to my right, fighting out of the blue corner.
With a record of
0 - 2 - 0, fighting out of Rio de Janeiro, Masahiko Muta!
The judges for this bout are Daniel Cesar, Thiago Cunha and Matheus Silva.

The bell rings for round one and we are underway!
Bumfight tries to shoot in for a takedown. He's got hold of a leg but Muta swivels and escapes.
Bumfight tries to clinch but is not successful on this occasion.
Muta on the wrong end of a nice jab.
Muta tries for a takedown but Bumfight circles away easily
and Bumfight counters with a two punch combo.
Bumfight will need to tighten up his combinations if he doesn't want to gas himself out, swinging at thin air.
Muta with a lazy takedown attempt
and Bumfight counters with a straight right hand.
Bumfight lands a jab, followed by a cross and another cross, as Muta backs up against the cage.

Muta is rocked!
Bumfight misses with a few strikes there.
Muta is still on wobbly legs! Can Bumfight finish him?
Bumfight is looking to take this fight into the clinch.
Muta takes a punch to the jaw and another one to the bread basket.
Bumfight throws a right and a left that Muta avoids nicely.

That's one minute gone in the round.

Bumfight changes levels and drives through with a really nice takedown into side control. Muta looks really pissed at himself for not defending that better.

Bumfight thinks about going for a far side armbar but bails out and retains the dominant position instead.
Muta seems to have recovered his senses.
Muta stops Bumfight from passing to mount.
The ref warns both fighters not to hold the cage as they work up against the meshing.
Muta is trying to get back to half guard.
Bumfight is looking to finish here, going for an Americana. Muta knows the correct defense though, so he's OK.
Muta struggling a bit here.
Bumfight goes for an armbar! This could be all over! Wait, no, Muta rolls with the submission and now he's on top in Bumfight's guard! Nice work there by Muta!
Bumfight not looking particularly offensive just at the moment.

That's two minutes gone in the round.
Bumfight working from the bottom, still in full guard. He's managed to get a loose triangle. Muta doesn't seem to be doing much to defend here, obviously he feels comfortable in the position. Muta manages to throw the legs off his shoulder and he's back into guard - no problem.
Bumfight is breathing heavily.
Muta passes into half guard.
Muta is looking for a kimura but Bumfight is holding onto that half guard position, so it's hard for Muta to get the leverage.
Muta is trying to control the action in half guard but Bumfight is working away on the bottom, looking perhaps to get back to full guard.
The fighters are pressed up against the cage, both looking to find a bit of space to work.
Bumfight is looking to improve his position.
Muta winds up and cracks Bumfight with a swinging punch to the side of the head.
Muta sitting in half guard, looking to land shots. Bumfight defending well though.
Muta looks to score some points with some ground and pound.
Bumfight is looking to sinch up a gullotine here but Muta pulls his head out easily.
Muta is working for a submission of some sort.
Bumfight wants to get back to full guard.

That's three minutes gone in the round.

Well, the referee has seen enough. Neither fighter is active enough on the ground so he's stood them back up.
Bumfight fails with an attempt to clinch.
Bumfight with a poor takedown
and Muta decides to take the opportunity to score a takedown. He's landed in Bumfight's guard.
Bumfight looking for submissions from the bottom but instead Muta passes into side control.
The fighters are starting to get a bit slippery now, which will make submissions a bit more difficult.
Bumfight is trying to stand back up. He's worked his way up against the cage but Muta has just dragged him back down to the mat.
Muta sitting in side control, looking to soften his opponent up with elbows and hammerfists but Bumfight is avoiding damage well and looking to escape the position.
Bumfight sneaks back into half guard.
Bumfight is trying to maintain the position but Muta is very close to passing his half guard.
Bumfight is working for an escape here. He's hooked one of Muta's legs and he's managed to sneak out and take Muta's back!
Muta defending nicely against the rear naked choke attempt.
The crowd cheering loudly, showing their appreciation for the quality fight we're seeing here.
Muta is defending well here and trying to improve his position.

That's four minutes gone in the round.
Muta defends a rear naked choke attempt by controlling one of Bumfight's arms.
Muta rolls and manages to get back to half guard. Nicely done.
Muta connecting with a few gentle strikes.

Muta manages to escape and get back to his feet!
Muta has his takedown stuffed
so Bumfight counters with a double leg into guard. Good agility.
Roofus Bumfight has stuffed three takedown attempts in the round now. That's going to take a lot out of Masahiko Muta.
Muta looking to hit a scissor sweep but Bumfight is one step ahead there.
As the round comes to an end the crowd are showing their appreciation for a great round of action.
Muta keeping moving, preventing Bumfight from controlling successfully.
And thats the end of the round the fighters go back to their corners.
Roofus Bumfight dominated that round.
That's time! Back to the action!

Muta darts in and lands a nice takedown into half guard.
Muta is looking to take a break and control but Bumfight is keeping him honest, looking to work from the bottom.
Bumfight on the receiving end of some nice ground and pound.
Bumfight looking to work for a kimura from the bottom.
Muta is trying to control the action in half guard but Bumfight is working away on the bottom, looking perhaps to get back to full guard.
Bumfight is looking to control Muta's leg but it's slowly edging free. Can Bumfight avoid being mounted?
The two fighters exchange a few words. I couldn't hear what they were saying but maybe it's more fun if you make it up yourself. Muta connects with a nice short shot to Bumfight's temple.
Both fighters are absolutely exhausted here.
Bumfight is looking to regain full guard. Not this time though.
Muta passes the guard and advances to mount!
That's one minute gone in the round.
A nice elbow there by Muta.
Muta is still in mount, landing shots to his trapped opponent. Bumfight can't stay in a position like this for much longer.
Bumfight is looking to get to half guard.
Muta tries to control but Bumfight wriggling away.
Muta pausing momentarily but resumes with a couple of decent strikes that do a bit of damage.
Muta unloading with bombs!
Muta goes for an armbar but he's fallen flat on his backside there and now Bumfight is on top in guard.
Bumfight loading up with the ground and pound but he's missing more than he's landing in this flurry.
Muta has a loose triangle. He'll be looking to tighten that up but Bumfight can see exactly what he's planning and manages to posture up and free himself.
Bumfight forces his way into half guard.
That's two minutes gone in the round.
Muta gets full guard.
Muta keeping full guard, as Bumfight tries to pass.
Muta trying to strike off his back.
Bumfight slips nicely into half guard.
Muta wants to control but Bumfight is keeping busy.
Muta wants to improve his position but Bumfight is controlling well.
Bumfight is trying to work for a kimura but Muta is defending well.
Bumfight is looking for a kimura here.
Muta has no desire to be mounted, so is trying to control. Bumfight is working away from the top position though.
That's three minutes gone in the round.
Bumfight working over Muta with some ground and pound. Muta looks like he wants out of this position, which is understandable.
Muta is working for an escape here. He's hooked one of Bumfight's legs and he's managed to sneak out and take Bumfight's back!
Bumfight rolls, trying to escape but Muta keeps control of the position.
Bumfight avoids the strikes from Muta.
Bumfight just trying to survive but Muta is wriggling into a better position, looking to finish.
Muta tries to get the hooks in deep but Bumfight pushed the leg off.
Bumfight manages to reverse the position and now he's in Muta's guard. Nice work there by Bumfight.
Muta is working the butterfly guard. He manages to land a nice scissor sweep and is now in half guard on the top. Nice move.
Muta takes advantage of the dominant position to land a couple of big hammer fists.
Bumfight looking for submissions from an awkward position here.
Roofus Bumfight overall seems to be getting the better of the ground position in the fight so far.
Bumfight is staying active underneath Muta, who seems content to just control the action from this position.
Bumfight throws a strike from the bottom that misses.
Bumfight tries to roll over but Muta keeps him under control.
That's four minutes gone in the round.
Bumfight looking to work for a kimura from the bottom.
Bumfight is trying to get back to full guard.
It looks like we're going to have a standup here. Neither fight is doing enough on the ground.
Bumfight scores with a slapping inside leg kick.
Bumfight lets the fists fly and connects with a left straight followed by a right hook.
A punch combination from Bumfight misses.
Bumfight uses decent footwork to sidestep a right hand from Muta.
Muta shoots in but doesn't get the takedown
and Bumfight counters with a three punch combination, finished off with a leg kick. Nice work.
And thats the end of the round the fighters go back to their corners.
That was a close second round but I would say that Roofus Bumfight will probably get the nod.
That's time! Bumfight's corner gives him a slap on the ass as he gets ready to fight. This is the final round!

Muta tries for a takedown but Bumfight circles away easily
and Bumfight counters with a stiff right hand.
Bumfight throws and low kick but Muta moves out of range easily.
Bumfight displaying good standup as he scores with a three punch combination.
Masahiko Muta seems to be the more aggressive standup fighter in this bout.
Bumfight misses with a wild combination.
Bumfight tries to clinch up but Muta circles away and keeps his distance.
Jab, jab by Bumfight - just one landing.
Bumfight lands a glancing blow to the side of Muta's head.
Bumfight tries to clinch up but Muta circles away and keeps his distance.
Bumfight scores with a jab. Muta acknowledges it with a nod of the head.
Bumfight shoots in but doesn't get the takedown
and Muta counters with a nice shoot takedown that brings the fighters to the ground.
That's one minute gone in the round.
Muta postures up.
Bumfight is active off his back here, looking for submissions.
Both fighters are breathing heavily.
Muta is looking to work some ground and pound but Bumfight has wrist control.
Muta pushing down on Bumfight's thigh, trying to pass to half guard. He's managed it... Nice work.
Bumfight looking for submissions from an awkward position here.
Muta drops an elbow to the side of Bumfight's head.
Bumfight pushes Muta off looking to stand but Muta dives back in and keeps control.
Bumfight looking to work for a kimura from the bottom.
Bumfight gets back to full guard.
Bumfight working from the bottom, still in full guard. He's managed to get a loose triangle. Muta doesn't seem to be doing much to defend here, obviously he feels comfortable in the position. Muta manages to throw the legs off his shoulder and he's back into guard - no problem.
Bumfight had isolated an arm as going for an omaplata. Muta is defending the submission well but is in a very vulnerable position. Bumfight Is leaning forward trying to finish the omaplata but decides to abandon it, and take Muta's back instead.
That's two minutes gone in the round.
Muta staying busy and making it hard for Bumfight to control.
Bumfight looking for the choke from the back.
Bumfight gets his hands free as Muta looks to control.
Bumfight tries to keep control of the position but Muta is staying busy.
Muta defends a prolonged rear naked choke attempt and turns nicely into his opponent's guard.
Bumfight looking for submissions from the bottom here. Moving his hips around, possibly looking for an armbar.
Bumfight is working actively off his back, looking to secure an arm or perhaps work for a triangle.
We've seen a great period of action over the last minute or so - credit to both fighters for leaving it all in the cage!
Bumfight not looking particularly offensive just at the moment.
Bumfight working for a triangle but Muta defends it easily.
That's three minutes gone in the round.
Bumfight looking for submissions from the bottom here. Moving his hips around, possibly looking for an armbar.
Muta trying to control but Bumfight is working from the bottom.
Bumfight looking for a guillotine here but Muta defends easily.
Bumfight is working for submissions here. He's thrown up his legs looking for a tringle but Muta frees his head nicely. Oh but Bumfight has switched to an armbar! Muta is tapping furiously! Lovely submission there!
Ladies and gentlemen, after 3:47 of round 3, we have a winner by way of Submission (Triangle Armbar). Roofus Bumfight!
|
|
|
|
|
|
|
|
|
|
|
|
|
|
|
|
|
|
|
|
|
|
|
| S |
C
A |
G |
S |
C
B |
G |
|
S |
C |
G |
|
energy
A | B |
|
hype
A | B |
|
pop
A | B |
|
mgr
A | B |
|
FIGHT
RATING
100% |
|
|
|
|
|
|
