|
|
PBP Commentary |
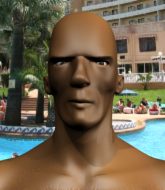
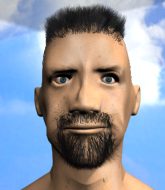
Coming up we have a heavyweight MMA rules bout between Cole Norton (ranked 24835 p4p, 0 weight class) and Brayden Williams (ranked 5163 p4p, 0 weight class). Cole Norton has the edge in experience - let's see if he can make that count tonight.
 |
|
 |
| 157 cm
18
278 lbs
2 - 5 - 0 |
|
188 cm
18
220 lbs
0 - 0 - 0 |
BJJ Blue Belt
Counter fighter
Experienced |
|
BJJ Blue Belt
Brawler
Solid chin |
|
| |
|
Ladies and gentlemen. This fight is 3 rounds, in the heavyweight division.
Introducing the fighter to my left, fighting out of the red corner.
With a record of
2 - 5 - 0, fighting out of Las Vegas, Cole Norton!
And introducing the fighter to my right, fighting out of the blue corner.
With a record of
0 - 0 - 0, fighting out of Las Vegas, Brayden Williams!
The judges for this bout are Cecil Peabody, Tiny Johnson and Alan Glass.

The bell rings for round one and we are underway!

Williams closes the distance and clinches.
Williams slowing the pace effectively.

Norton manages to pull guard.
Williams is looking to work some ground and pound but Norton has wrist control.
Norton looking for a sweep. Not yet Norton, not yet.
Williams throwing elbows and punches but not connecting, as Norton works some decent striking defense from the bottom.
Williams tries to free his leg and advance position but Norton is retaining full guard.
Williams trying to control but Norton is working from the bottom.
Williams controls from within his opponent's guard.
We've had a slow start to the round here - hopefully the action picks up.
Williams wants to pass the guard but Norton is keeping the position.
If this pace continues, the referee will definitely step in and force a standup.

That's one minute gone in the round.
Williams is in close to Norton's body, working some short punches and elbows.
Norton is pulling down on Williams's head. It's preventing any offense from Williams, at least for the moment.
Williams throwing shots from guard but he's hitting more mat than opponent.

The ref stands the fighters back up due to a lack of activity.
Williams throws a combination but comes up with nothing but fresh air.

That's two minutes gone in the round.
The crowd are getting on the fighters' backs, as the pace has dropped off in the last minute or so.
Williams throws a head kick that Norton semi-blocks.
Williams fails with a takedown attempt from distance.
Norton with a poor takedown
and Williams counters with a flying knee. Nice.

Williams closes the distance and scores a nice trip takedown into half guard. Norton did well to prevent Williams getting side control.
Williams is trying to get back to his feet now but his leg is trapped.
Norton wants to improve his position but Williams is controlling well.
Williams tries to pass to full mount but Norton defends it.
Norton is trying to get back to full guard.
Norton keeping control of the leg, stopping his opponent passing to mount.
Norton really is a fat lump.

That's three minutes gone in the round.
Norton is pressing down on Williams's left leg trying to get back to full guard. He's managed it.
Williams looking to sit in guard and control but Norton gets the butterfly guard and sweeps. He's now in the guard on the top.

The fighters are starting to perspire pretty heavily.
Norton controls the pace of the fight for a moment.
Williams tries to strike from the bottom.
Norton's corner is telling him to maintain position.
Williams controlling Norton's posture.
The fighters are pressed up against the cage, both looking to find a bit of space to work.
Williams has a closed guard, preventing Norton from standing up.
Norton might be looking to lock onto one of his opponent's long limbs for a submission, whilst we're on the ground.

That's four minutes gone in the round.
Neither fighter has done anything of merit for a good minute or two here and the crowd are not happy about it.
Norton is stalling in the full guard.
Williams looking to sweep here. No luck so far.
Norton looking to control the position here, rather than advance.
The ref stands the fighters back up due to a lack of activity.
Norton shoots in and scores a nice double leg takedown into half guard.
The crowd thankful this round is nearly over.
Norton keeping composed on the top, looking to control the action.
And thats the end of the round the fighters go back to their corners.
Brayden Williams dominated that round.
That's time! Norton's corner gives him a slap on the ass as he gets ready to fight.

Williams tries to clinch up against the cage, rushing in to close the distance. Norton manages to break the clinch and circles back to the middle of the mat.
Brayden Williams seems to be the more aggressive standup fighter in this bout.
Williams misses with a few strikes there.
Williams pushes Norton away with a front kick.
Norton slaps away a takedown attempt from Williams, before circling back to the center of the mat.
Williams throws the overhand right but ducks down into a quick takedown attempt. Norton was covering up waiting for the punch and Williams finishes the takedown easily into guard.
The step up in weight doesn't seem to be a problem for Williams. He's performing admirably here against the bigger man.
Norton wants to sweep but no luck.
We've had a slow start to the round here - hopefully the action picks up.
Williams wants to control from the top but Norton keeps moving.
That's one minute gone in the round.
Williams stands up and looks to throw the legs aside to pass to side control. Norton swivels though and keeps the full guard.
Norton lands a beautiful sweep and he's now moved into his opponent's guard.
Williams wants to sweep here but Norton controlling him for the moment.
Williams striking off his back but it's not causing Norton any problems.
Norton in full guard, throwing the ground and pound. No damage this time.
Brayden Williams has got the better of the ground game so far.
Williams can't do much from the bottom at the moment, as Norton controls the pace.

Williams working from the bottom, still in full guard. He's managed to get a loose triangle. Norton doesn't seem to be doing much to defend here, obviously he feels comfortable in the position. Norton manages to throw the legs off his shoulder and he's back into guard - no problem.
Williams is breathing heavily.
Norton controls the pace of the fight for a moment.
That's two minutes gone in the round.
Norton seems to have a rather negative gameplan on the ground. He seems keen to just score the takedown and hold down Williams for as long as he can get away with.
Norton continues to stall.
Williams manages to sweep nicely, so he's now on top. Norton manages to get himself to full guard.

Williams has been the more effective fighter overall so far.
Norton pulls Williams in close to his closed guard and prevents Williams from doing any damage or advancing position.
That's three minutes gone in the round.
Williams wants to pass the guard but Norton is keeping the position.
Norton manages to sweep nicely, so he's now on top. Williams manages to get himself to full guard.

Norton gets to his feet and steps away from his opponent.
Norton is trying hard to land a takedown here. Williams sprawls well and keeps this one on the feet.
Williams rushes Norton and presses him up against the cage.
Norton tightens his grip and picks Williams up, before dumping him to the ground. Williams manages to land in guard.
Norton controlling from the top position.
That's four minutes gone in the round.
Williams looking for a sweep. Not yet Williams, not yet.
Williams is looking to stand up but Norton isn't so interested in that idea.
Norton stands and steps away. Williams gets to his feet too and we're back to the striking game.
Williams fakes a strike and closes the distance, dragging Norton to the ground. Williams is now in Norton's guard.
Norton trying to control the position here.
The crowd thankful this round is nearly over.
More hug and hope from Norton.
And thats the end of the round the fighters go back to their corners.
Brayden Williams showed his class in that round. I'd imagine he'll take it on all the scorecards.
That's the end of the round. The referee orders the cornermen out of the cage so we can get back down to business. This is the final round!

Norton dives in and grabs Williams's left leg, looking for a takedown. Williams pushes down on Norton's head and hops out.
And Williams tries to counter it with a takedown but Norton pushes his down on his head and steps out.

Norton clinches up with Williams and pushes him back against the cage.
Williams is working for takedown but Norton is calmly controlling the position for now.
Norton keeps control of Williams as he tries to wriggle out of the double underhooks.
Norton tries for a takedown but Williams manages to get underhooks.
Norton has Williams pressed against the cage, preventing Williams from circling away and getting back to striking at range.
Williams has had enough of the clinch and is looking to separate.
We've had a slow start to the round here - hopefully the action picks up.
Norton wants the takedown. Williams is fighting it off but Norton persists and manages to bring the fight to the ground, ending up in Williams's guard against the cage.
Williams working a defensive guard here.
Norton is stalling in the full guard.
That's one minute gone in the round.
Williams has his foot on Norton's thigh. He's trying to push off and get in position for a triangle, I think. Norton works his way back into a safe position though.
Williams takes a big intake of breath there - he's definitely tired.
Williams is looking to get back to his feet but can't, whilst Norton is controlling him.
Norton decides to stand up and beckons his opponent to follow.
Norton shoots in looking for a double leg takedown. Williams defends it nicely.
That's three failed takedown attempts in the round for Cole Norton. That's going to take a lot out of him.
Norton gets taken down but at least he's managed to land in guard.
That's two minutes gone in the round.
Williams with a couple of shots to the head there. Not particularly brutal.
Williams controlling from the guard. I say controlling but really, he's stalling.
Norton pulls Williams in to control the position.

Williams stands over his opponent and dives in with a flying punch! Norton throws up his legs and catches Williams in a triangle! Oh this looks tight! Williams tries to escape but he's forced to tap! Wow, fantastic work there by Norton! That came out of nowhere!
Ladies and gentlemen, after 3:55 of round 3, we have a winner by way of Submission (Triangle Choke). Cole Norton!
|
|
|
|
|
|
|
|
|
|
|
|
|
|
|
|
|
|
|
|
|
|
|
| S |
C
A |
G |
S |
C
B |
G |
|
S |
C |
G |
|
energy
A | B |
|
hype
A | B |
|
pop
A | B |
|
mgr
A | B |
|
FIGHT
RATING
37% |
|
|
|
|
|
|

