|
|
PBP Commentary |
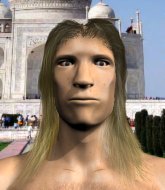
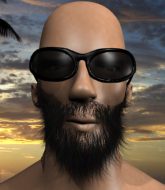
Coming up we have a super heavyweight MMA rules bout between Papa John (ranked 4428 p4p, 101 weight class) and King Murhaa (ranked 4129 p4p, 90 weight class). This should be a great matchup!
 |
|
 |
| 170 cm
26
140 lbs
5 - 7 - 1 |
|
188 cm
25
210 lbs
8 - 8 - 1 |
BJJ Brown Belt
Great elbows
Insanely flexible |
|
Olympic wrestler
Excellent MT
Granite chin |
|
| |
|
Ladies and gentlemen. This fight is 3 rounds, in the super heavyweight division.
Introducing the fighter to my left, fighting out of the red corner.
With a record of
5 - 7 - 1, fighting out of Los Angeles, Papa John!
And introducing the fighter to my right, fighting out of the blue corner.
With a record of
8 - 8 - 1, fighting out of Las Vegas, King Murhaa!
The judges for this bout are Wesley Smith, Daniel Franklin and Stewart Dunkirk.

The bell rings for round one and we are underway!
A telegraphed takedown attempt from Murhaa is defended easily by John.
John is looking to counter the offense by Murhaa and move into the clinch.

Murhaa closes the distance and gets a trip takedown into side control. John quickly recovers to half guard.
Murhaa not landing any meaningful shots this time.
John is looking to regain full guard. Not this time though.
Murhaa wants to pass the guard but John is defending well.
Murhaa is taking a breather. John says something to him but it's hard to make out. Perhaps he's telling him to get on with it and actually do something.
We've had a slow start to the round here - hopefully the action picks up.
John gets full guard.
Murhaa throws a big elbow that misses.
Murhaa stands and throws John's legs to the side, diving into side control.

That's one minute gone in the round.
Murhaa wants to control but John is keeping him busy.
John is trying to control Murhaa's posture but Murhaa avoids it.
John is trying to stand back up. He's worked his way up against the cage but Murhaa has just dragged him back down to the mat.
Murhaa wants to control but John is keeping him busy.
John stops Murhaa from passing to mount.
Murhaa controlling from side mount.
John is looking to regain half guard here but Murhaa keeps moving and retains side control.

That's two minutes gone in the round.
Well. There's a bit of a lull in the action here and the crowd are starting to get restless.

John explodes and escapes back to his feet! Nice escape there!

John fakes with an overhand right and moves in to clinch with Murhaa, pushing him back against the cage.
John with the Thai clinch. He's looking to land a big knee but he's not managed it this time.
Both guys are working to get underhooks.
Murhaa works for the underhooks and manages to get a trip takedown into guard.
John controlling Murhaa's posture.
Murhaa sneaks a leg through and gets to half guard. That was like a knife through butter how easily he passed John's guard.
Murhaa is taking a breather. John says something to him but it's hard to make out. Perhaps he's telling him to get on with it and actually do something.

Murhaa is thinking about going for an arm triangle but he can't free his leg.
John wants to control but Murhaa is keeping busy and won't allow it.

That's three minutes gone in the round.
Murhaa is pressing down on John's thigh, looking to free his foot. John is holding on for now.
Murhaa seems very keen to just sit and control from half guard but John does not like that idea so much and is remaining active off his back.
Murhaa passes to side control.
The referee asks Murhaa politely if he wouldn't mind getting on with it and actually doing something. Murhaa prefers to stall for the moment though.
John is looking for a sweep.
Murhaa tries to move into full mount but can't pass John's legs.
Murhaa gets to mount! John was on the offensive and wasn't defending properly.
Murhaa looking to control and managing it successfully.

That's four minutes gone in the round.
John bucks up and manages to get a nice reversal! He's in guard on the top - nicely done!
Murhaa has a butterfly guard looking to sweep but John has passed into side control.
Murhaa has found himself in a tricky position here. He's been working his transitions in training so let's see if he can work his way out of it.
Murhaa is looking to regain half guard here but John keeps moving and retains side control.
Murhaa is sneaking out the side here. He's bucked John off and has taken his back!
John preventing the rear naked choke attempt from Murhaa.
The fans in attendance giving it up for the two fighters, who have really let it all hang out in the last minute or so!
Murhaa has good solid back control here.
And thats the end of the round the fighters go back to their corners.
King Murhaa dominated that round.
The referee calls time. The cornermen exit stage left and we're back to business.

Murhaa with a lazy takedown attempt
and John cracks him with a counter punch right on the button.
John closes the distance and presses his opponent up against the cage.
John is defending well against a takedown attempt.
Murhaa tries to score a body lock takedown but John shows good agility there to stay on his feet.
Papa John has stuffed three takedown attempts in the round now. That's going to take a lot out of King Murhaa.
Murhaa lands a takedown into guard.
Murhaa wants to control from the top but John keeps moving.
Murhaa stopping the sweep attempt from John.

John looking for submissions from the bottom here. Moving his hips around, possibly looking for an armbar.
The ref warns both fighters not to hold the cage as they work up against the meshing.
Murhaa won't allow John to get back to his feet.
We've had a slow start to the round here - hopefully the action picks up.
John keeping full guard, as Murhaa tries to pass.
Murhaa keeps trying to improve his position.
Murhaa wants to control from the top but John keeps moving.
That's one minute gone in the round.
Murhaa sneaks a leg through and gets to half guard. That was like a knife through butter how easily he passed John's guard.
Murhaa frees up his trapped foot and advances to mount.
Murhaa wants to control the pace but John is squirming around nicely.
John tries to lock up and control but Murhaa gives him a forearm to the face and pushes him away.
Murhaa is landing with some decent strikes but John is trying to advance his position so the referee is letting the fight continue.
John is looking to get to half guard.
Murhaa cracks John with a nasty head shot there - the crowd let out an audible gasp there, as the noise reverberated around the arena.
John tries to hold on but Murhaa pushes him away.
That's two minutes gone in the round.
John is going to have to think about doing something other than just controlling because Murhaa is managing to avoid having the position dictated to him.
Murhaa looking to control and managing it successfully.
Murhaa prevents John from getting the reversal.
Murhaa looking to secure an arm triangle but John defends it well.
Murhaa lands a shot to the body, followed up by a shot to the exposed head of his trapped opponent.
John in a bad spot here, taking shots to the head.
John tries to hold on but Murhaa postures up.
John is in a bad position, trying to hold on for dear life but he is really struggling to maintain any sort of control.
We've seen a great period of action over the last minute or so - credit to both fighters for going all out!
John is working to get back to half guard.
That's three minutes gone in the round.
Murhaa can't quite control the action as he would like just now, as John is looking to escape.
John wants to hold on but Murhaa pushes him away.
Murhaa controlling the pace for now.
Murhaa lands an elbow that was bordering on illegal but the referee lets it go with a warning.
Murhaa trying to control but he's not successful this time.
John is writhing around trying to get back to his feet.
Murhaa trying to control but he's not successful this time.
John in a bad spot here, taking shots to the head.
That's four minutes gone in the round.
Murhaa trying to control but he's not successful this time.
Murhaa lands a couple of nice shots there from mount.
Murhaa trying to control but John is having none of it.
John might be looking to lock onto one of his opponent's long limbs for a submission, whilst we're on the ground.
John tries to reverse the position but Murhaa maintains control.
The crowd thankful this round is nearly over.
Murhaa is thinking about an arm triangle here, looking to tighten it up before moving to side control. John can see it coming though and defends well with a couple of strikes to the head and some good arm positioning.
King Murhaa has got the better of the ground game so far.
Murhaa trying to control but he's not successful this time.
And thats the end of the round the fighters go back to their corners.
King Murhaa showed his class in that round. I'd imagine he'll take it on all the scorecards.
The referee calls time. The cornermen exit stage left and we're back to business. This is the final round!

Murhaa tries to score a power double leg takedown but John sees that one coming and sprawls well. That will dishearten Murhaa somewhat.
Murhaa shoots in for a takedown from distance. He catches John napping and manages to drive through into side control!
John wants to control but Murhaa postures up.
John is looking to regain half guard here but Murhaa keeps moving and retains side control.
John being controlled for a moment.
John can't do much from the bottom here.
We've had a slow start to the round here - hopefully the action picks up.
That's one minute gone in the round.
Murhaa is looking to take a break and control but John is keeping him honest, looking to work from the bottom.
Murhaa is staying tight to John's torso, preventing him from escaping.
John is trying to get back to half guard.
Murhaa moves into full mount!
Murhaa fails to advance to John's back.
Murhaa lands with some vicious ground and pound - can John hang on?
That's two minutes gone in the round.
Murhaa can't quite control the action as he would like just now, as John is looking to escape.
John tries to lock up and control but Murhaa gives him a forearm to the face and pushes him away.
John working to try and regain half guard.
Murhaa wants to control the pace but John is squirming around nicely.
Murhaa working the ground and pound effectively.
That's three minutes gone in the round.
John tries to lock up and control but Murhaa gives him a forearm to the face and pushes him away.
Murhaa postures up and cracks his opponent a couple of times before moving back into close ground control. John looks a forlorn figure.

John is rocked!

It looks like Papa John has been cut.
The fighters are pressed up against the cage, both looking to find a bit of space to work.
Murhaa looks like he's working for a submission but he's not found anything just yet.
Oh John is still in real trouble! Will he be able to recover?!!
John is wriggling around trying to escape.
Murhaa putting on the heat here with some good ground and pound!
Murhaa connects with a bit shot that sees John covering up! More strikes from Murhaa and the referee jumps in to stop the fight! Murhaa is our winner by TKO!
Ladies and gentlemen, after 3:53 of round 3, we have a winner by way of TKO (Strikes). King Murhaa!
King Murhaa managed to slip a mention for his sponsors, Bullet Proof System, into his post fight interview.
|
|
|
|
|
|
|
|
|
|
|
|
|
|
|
|
|
|
|
|
|
|
|
| S |
C
A |
G |
S |
C
B |
G |
|
S |
C |
G |
|
energy
A | B |
|
hype
A | B |
|
pop
A | B |
|
mgr
A | B |
|
FIGHT
RATING
47% |
|
|
|
|
|
|

