|
|
PBP Commentary |
Coming up we have a welterweight MMA rules bout between Francesco Burke (ranked 6366 p4p, 0 weight class) and Test Fighter A (ranked 4987 p4p, 0 weight class). I can't wait for this one - let's get the fighter introductions out of the way and get this one started!
 |
|
 |
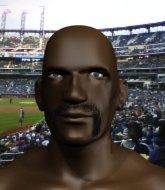
| 154 cm
24
178 lbs
1 - 1 - 0 |
|
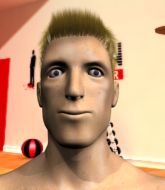
180 cm
25
175 lbs
0 - 0 - 0 |
BJJ Blue Belt
Counter fighter
Cuts easily |
|
BJJ Blue Belt
Decent boxing
Granite chin |
|
| |
|
Ladies and gentlemen. This fight is 3 rounds, in the welterweight division.
Introducing the fighter to my left, fighting out of the red corner.
With a record of
1 - 1 - 0, fighting out of Hilo, Francesco Burke!
And introducing the fighter to my right, fighting out of the blue corner.
With a record of
0 - 0 - 0, fighting out of Hilo, Test Fighter A!
The judges for this bout are Chris Saunders, Josh West and Roger Salmon.

The bell rings for round one and we are underway!

Fighter A has Burke up against the cage in a clinch.

Burke breaks from the clinch.
Burke really is a fat lump.

A momentary lapse in concentration from Burke enables Fighter A to shoot in and score with a neat double leg. Burke manages to secure a closed guard as the fighters hit the mat.
Burke might be looking to lock onto one of his opponent's long limbs for a submission, whilst we're on the ground.
Fighter A wants to get up but he can't break Burke's closed guard. He needs to be careful trying to break the legs open, as he's open to submissions here.
Burke being controlled here, momentarily.
Burke trying to control the position.
We've had a slow start to the round here - hopefully the action picks up.
Fighter A passes Burke's right leg, so he's now in half guard.
Burke is looking to improve his position.
Fighter A uses his free foot to push down on Burke's thigh. Eventually he works his other foot free and he's advanced to mount - this is trouble for Burke.

That's one minute gone in the round.
Fighter A controlling from mount.
Fighter A trying to control but Burke is having none of it.
Burke wants to hold on but Fighter A pushes him away.
Burke throwing punches from his back but nothing is landing.
Fighter A trying to control but Burke is having none of it.
Fighter A thuds his fist into the canvas! Oooouch!

That's two minutes gone in the round.
The crowd are starting to boo a lack of action.
Burke tries to hold on but Fighter A postures up.
Burke is flailing around like a fish out of water, trying to land strikes.
Fighter A throws some wild stikes that Burke manages to avoid easily.
Burke is writhing around trying to get back to his feet.
Burke is in a horrible position here, under a barrage of strikes, he's managing to avoid any damage.
Burke swinging wildly from the bottom but he's not landing.
Fighter A avoids the attempt from Burke to control.

Fighter A goes for an armbar but Burke turns quickly into his guard - lovely anticipation from Burke.

That's three minutes gone in the round.

Burke stands up and waves to Fighter A to follow him.

Burke drives through with a takedown into Fighter A's guard. Let's see what he can do from the top position.
Burke stands and steps away. Fighter A gets to his feet too and we're back to the striking game.
Fighter A closes the distance and gets a double leg, slamming Burke to the mat! Burke manages to get full guard.
Fighter A tries to free his leg and advance position but Burke is retaining full guard.
Burke striking from the bottom.
Fighter A throwing elbows and punches but not connecting, as Burke works some decent striking defense from the bottom.

That's four minutes gone in the round.
Burke lands a couple of shots from the bottom.
Burke is working the butterfly guard. He manages to land a nice scissor sweep and is now in half guard on the top. Nice move.

Fighter A is trying to stand back up but Burke is controlling him
Fighter A is doing well to avoid being mounted. He's controlling the position at the moment.
Fighter A tries to push off, looking to stand up, but Burke manages to move to mount!
The ref warns both fighters not to hold the cage as they work up against the meshing.
The crowd thankful this round is nearly over.
Fighter A tries to lock up and control but Burke gives him a forearm to the face and pushes him away.
And thats the end of the round the fighters go back to their corners.
Test Fighter A dominated that round.
OK. That's time! The bell goes and we're back to the action.

Fighter A closes the distance and clinches.
Fighter A taking a break, stalling in the clinch.
Burke wants a takedown but no success here.
Burke drops to a knee looking for a takedown but Fighter A gets the underhooks and prevents it.
Fighter A turns his hips and lands a very nice judo throw into side control!
Fighter A has been the more effective fighter overall so far.
Burke is positioning himself to get back to half guard.
Fighter A throwing shots but missing, from side control.
We've had a slow start to the round here - hopefully the action picks up.
Fighter A tries for a kimura but Burke is defending well.
Fighter A takes advantage of some sloppy striking from Burke to pass into mount.
That's one minute gone in the round.
Fighter A misses with a head shot.
Burke srikes from the bottom but he's lost position and has given up his back.
Fighter A is riding his opponent, not letting Burke buck him off.
Burke tries to escape the position.
Fighter A trying to secure his dominant position for a moment - making sure Burke doesn't escape.
Fighter A doesn't have the hooks in and Burke manages to turn into his guard.
That's two minutes gone in the round.
Fighter A thows some rabbit punches from the bottom but they don't do any damage.
Fighter A throws his legs up looking to secure a triangle. Oh, that looks pretty tight, I gotta say! Burke escapes and throws Fighter A's legs to the side, diving into side control!
You can see the frustration on Fighter A's face, being in this tough position on the bottom.
Fighter A taking punishment in the form of punches.
Burke decides to take the fight back to the feet.
Burke misses with a two punch combination.
Fighter A drives through with a takedown into Burke's guard. Let's see what he can do from the top position.
That's three minutes gone in the round.
Fighter A trying to control the position from guard on top but Burke is wriggling around, looking for whatever he can.
Burke utilising some decent striking defenses from the guard, preventing the ground and pound.
Burke is working the butterfly guard. He manages to land a nice scissor sweep and is now in half guard on the top. Nice move.
Fighter A is looking to regain full guard. Not this time though.
Burke slips a nice elbow through Fighter A's hands, connecting with Fighter A's forehead.
Fighter A makes his way to full guard. A much better position for Fighter A.
Fighter A seems keen to control Burke's posture.
That's four minutes gone in the round.
Fighter A wants to sweep but no luck.
Burke is working the ground and pound from guard. He might want to try advancing position though to get more of an impact.
Burke stopping the sweep attempt from Fighter A.
Burke would like to get this fight back to the feet but can't get free from the closed guard.
Burke working some ground and pound from guard but it's not doing any damage.
The crowd thankful this round is nearly over.
Burke chips away with some ground and pound.
Burke postures up and lands some nice ground and pound.
Burke wants to stand but Fighter A has a closed guard, so he can't escape.
And thats the end of the round the fighters go back to their corners.
That was a close second round but I would say that Francesco Burke will probably get the nod.
The fighters get back to their feet, the hooter sounds and we're back to the action! Let's hear some noise people - this is the final round!

Fighter A keeps the fight on the outside.
Burke shoots in for a takedown from distance. He catches Fighter A napping and manages to drive through into side control!
Fighter A sneaks back into half guard.
Fighter A is pressing down on Burke's left leg trying to get back to full guard. He's managed it.
Burke would like to get this fight back to the feet but can't get free from the closed guard.
Burke throwing strikes but missing.
We've had a slow start to the round here - hopefully the action picks up.
Burke scores with a decent looking elbow strike.
Fighter A has his hands on Burke's head, controlling the position.
That's one minute gone in the round.
Burke is sitting in guard, working some ground and pound.
Burke postures up and lands a big shot to Fighter A's brow.
Burke decides he's had enough of playing guard and decides to stand. Come on Fighter A, up you get!
Fighter A is looking for a takedown here. He's shot in and has managed to get it, finishing up in Burke's half guard.
It looks like Fighter A is going to stand back up.
Test Fighter A has got the better of the ground game so far.
That's two minutes gone in the round.
Burke punching from the bottom.
Fighter A is taking a breather. Burke says something to him but it's hard to make out. Perhaps he's telling him to get on with it and actually do something.
Burke flails away from the bottom but he's not doing any damage.
Fighter A not landing any meaningful shots this time.
Burke makes his way to full guard. A much better position for Burke.
Burke thows some rabbit punches from the bottom but they don't do any damage.
Fighter A stopping the sweep attempt from Burke.
That's three minutes gone in the round.
Burke utilising some decent striking defenses from the guard, preventing the ground and pound.
Burke throwing strikes off his back to little effect.

The referee has motioned to the fighters to stand back up. He just wasn't happy with the level of activity.
Fighter A takes the fight into the clinch.
Fighter A manages to get underhooks and slows down the pace for a moment.
Burke can't find room to land a body shot as Fighter A controls the action.
Fighter A misses with a hook to the ribs.
Burke tries to score a body lock takedown but Fighter A shows good agility there to stay on his feet.
Fighter A gets a trip takedown into half guard.
Burke trying to control from the bottom.
That's four minutes gone in the round.
Fighter A seems very keen to just sit and control from half guard but Burke does not like that idea so much and is remaining active off his back.
Burke is trying to control but Fighter A passes into side control!
Burke wants to control but Fighter A postures up.
Burke prevents Fighter A from moving into mount.
Burke is looking to slip a leg under and get half guard but Fighter A is one step ahead and moves to full mount!
The crowd thankful this round is nearly over.
Burke wants to hold on but Fighter A pushes him away.
Fighter A unloads with some shots from mount but Burke bucks and avoids them well.
Fighter A throwing sloppy strikes here. Perhaps if he tightened up his striking from such a dominant position, he'd be able to finish easier.
And that's the end of the fight!
Test Fighter A comfortably won the final round on my scorecard.
I think Fighter A has won this one but let's see whether the judges agree with me. Over to the ring announcer for the scorecards.
Ladies and gentlemen, after 3 rounds of action, we go to the scorecards for a decision.
Judge Chris Saunders scores the fight 28:29
Judge Josh West scores the fight 28:30
Judge Roger Salmon scores the fight 28:29
In favor of your winner, by unanimous decision... Test Fighter A!
|
|
|
|
|
|
|
|
|
|
|
|
|
|
|
|
|
|
|
|
|
|
|
| S |
C
A |
G |
S |
C
B |
G |
|
S |
C |
G |
|
energy
A | B |
|
hype
A | B |
|
pop
A | B |
|
mgr
A | B |
|
FIGHT
RATING
34% |
|
|
|
|
|
|
