|
|
PBP Commentary |
Coming up we have a light heavyweight MMA rules bout between Bubba Kayo (ranked 0 p4p, 0 weight class) and Eric Mccaughan (ranked 0 p4p, 0 weight class). Chooooooooon! I think Kayo might be my favorite fighter, now he's come out to Judith . Both fighter's entrance songs getting the crowd jumping here.
 |
|
 |
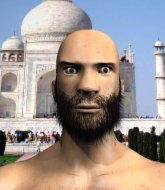
| 184 cm
24
210 lbs
9 - 5 - 0 |
|
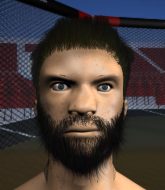
180 cm
20
205 lbs
7 - 3 - 0 |
Decent wrestler
Solid boxing
KO power |
|
BJJ Purple Belt
Decent boxing
Determined |
|
| |
|
Ladies and gentlemen. This fight is 5 rounds, in the light heavyweight division.
Introducing the fighter to my left, fighting out of the red corner.
With a record of
9 - 5 - 0, fighting out of Montreal, Bubba Kayo!
And introducing the fighter to my right, fighting out of the blue corner.
With a record of
7 - 3 - 0, fighting out of Montreal, Eric Mccaughan!
The judges for this bout are Ian Loll, William Peck and Alec Ball.

The bell rings for round one and we are underway!
Kayo throws a head kick but Mccaughan moves out of range.

Mccaughan changes levels and drives through with a really nice takedown into side control. Kayo looks really pissed at himself for not defending that better.
Kayo is looking for a sweep.
Kayo on his back here. We all know that wrestlers don't like being on their back so let's see if Kayo tries to get out of the position.
A bit of a lull in the action here.

Mccaughan tries for a kimura but Kayo is defending well.
Mccaughan is trying to land an Americana. He has the arm isolated but Kayo is keeping cool and he's avoided the danger for now.
Kayo wants to control but Mccaughan postures up.
The fighters are pressed up against the cage, both looking to find a bit of space to work.
Kayo is going to have to think about doing something other than just controlling because Mccaughan is managing to avoid having the position dictated to him.
Mccaughan is staying tight to Kayo's torso, preventing him from escaping.
Kayo wants to control but Mccaughan postures up.
Kayo tries to work a leg under to get back to half guard but Mccaughan wriggles his own leg back out and remains in side control.

That's one minute gone in the round.

It looks like we're going to have a standup here. Neither fighter is doing enough on the ground.
Mccaughan uses decent footwork to sidestep a right hand from Kayo.
Kayo misses the jab.
Mccaughan tries to clinch but Kayo moves out of range.
Mccaughan tries to close the distance and clinch up but Kayo swats him away and circles back towards the center.
Kayo scores with a nice one two combo and darts back out of range to avoid anything coming in the opposite direction.
Mccaughan tries to close the distance and clinch but Kayo swats him to one side with an open hand palm strike and circles away.
Kayo looks to score with a jab to the body but Mccaughan is just out of range.
Kayo lands an overhand right.
A jab from Kayo misses.
Kayo lunges in with swinging rights and lefts but Mccaughan circles away quickly and effectively.
A jab from Kayo misses.
A combination from Kayo does no damage.

That's two minutes gone in the round.
Mccaughan avoids the head kick by Kayo.
Good standup being displayed there by Mccaughan as he connects with a hook.
No joy there for Kayo, who threw a few shots but didn't land.
Kayo throws a nice looking combination but Mccaughan bobs and weaves to avoid any damage.
Kayo throws a hook to the body but it doesn't connect.
Mccaughan throws a low kick, looking for Kayo's leg but Kayo calmly moves out of range.
Kayo swings for the body but Mccaughan moves out of range.
Kayo thows a leg kick but Mccaughan checks it
and Mccaughan counters with a takedown into side control.
Mccaughan is trying to land an Americana. He has the arm isolated but Kayo is keeping cool and he's avoided the danger for now.
Kayo tries to bench press Mccaughan off him but Mccaughan keeps the position.
Mccaughan wants to lay and pray for a moment but Kayo keeps working.
You can see the frustration on Kayo's face, being in this tough position on the bottom.

That's three minutes gone in the round.
Kayo is looking to regain half guard here but Mccaughan keeps moving and retains side control.
Mccaughan is looking to take a break and control but Kayo is keeping him honest, looking to work from the bottom.
Kayo is trying to get back to half guard.
You can see the frustration on Kayo's face, being in this tough position on the bottom.
Neither fighter is doing enough for the referee's liking and he's decided to stand them back up.
Kayo swings wildly with a couple of big hooks
and Mccaughan counters with a nice double leg into guard.
Mccaughan wants to pass the guard but Kayo is keeping the position.
Mccaughan stands up over Kayo, holding his feet. He dives back in and lands a decent shot to the head.
Kayo is looking to stand up but Mccaughan isn't so interested in that idea.
Kayo is breathing heavily.
Mccaughan postures up and scores with a shot to the body and a follow up elbow to the head.

That's four minutes gone in the round.
Mccaughan sitting in guard here, content to control.
Kayo wants to get back to his feet but Mccaughan is in a dominant position and won't allow it.
Kayo keeping moving, preventing Mccaughan from controlling successfully.
Mccaughan drops back looking for a leg! Kayo is in trouble here! The fighters roll with the hold and Kayo manages to kick Mccaughan off! Mccaughan jumps back into Kayo's guard.
Mccaughan drops back looking for a leg! Kayo is in trouble here! The fighters roll with the hold and Kayo manages to kick Mccaughan off! Mccaughan jumps back into Kayo's guard.
Kayo trying to control the position here.
And thats the end of the round the fighters go back to their corners.
Eric Mccaughan dominated that round.
That's time! Back to the action!

Mccaughan defending well as Kayo loads up on a big left hand.
Mccaughan moves forwards but Kayo connects with a nice, crisp jab.
Mccaughan shoots in for a takedown and gets it. Oh and he's advanced to full mount straight away.
Kayo sneaks a leg under to get to half guard.
Kayo trying to control but Mccaughan postures up.
Mccaughan is working for submissions here but there's nothing on.
Kayo gets back to full guard.
Mccaughan being controlled here momentarily.
Kayo tries to land a sweep but no joy.
That's one minute gone in the round.
Kayo had isolated an arm as going for an omaplata. Mccaughan is defending the submission well but is in a very vulnerable position. Kayo Is leaning forward trying to finish the omaplata but decides to abandon it, and take Mccaughan's back instead.
Both fighters are absolutely exhausted here.
Mccaughan defends a rear naked choke attempt by controlling one of Kayo's arms.
Kayo wants to control the position but Mccaughan frees himself and scrambles - Kayo manages to regain control in side control.
Mccaughan is trying to control Kayo's posture but Kayo avoids it.
That's two minutes gone in the round.
The crowd are getting on the fighters' backs, as the pace has dropped off in the last minute or so.
The referee has ruled that neither fighter is active enough on the ground and has stood them back up.
Kayo missing with a left hand there. Mccaughan was out of range so wasted energy throwing that one.
Kayo looks to throw a body kick

and Mccaughan counters by moving into the clinch.
Mccaughan creates a bit of distance and throws an elbow that only just misses.
Mccaughan with the Thai clinch. He's looking to land a big knee but he's not managed it this time.
The two fighters are working to gain dominance in the clinch.
Mccaughan lands a body shot in the clinch.
Mccaughan keeps control of Kayo as he tries to wriggle out of the double underhooks.
Kayo avoiding damage as Mccaughan throws knees to the body.
Mccaughan prevents Kayo from breaking the clinch.
Mccaughan lands punches inside but they're not really causing much damage.
Kayo wants to break free but Mccaughan has control.
Mccaughan throws a vicious knee straight up the middle but Kayo blocks it with crossed arms.
Mccaughan missing with knees to the body.
Mccaughan is trying to work for a single leg takedown but Kayo pulls him back up using the underhooks.
Mccaughan prevents Kayo from breaking the clinch.
Mccaughan tries a knee to the head but he's missed.
Kayo wants to break the clinch but can't.

Kayo breaks from the clinch.
Kayo cracks Mccaughan with a nice right hand that draws applause from the crowd.
Kayo is moving around nicely and scores here with a single head shot.
That's three minutes gone in the round.
Kayo looks to throw the jab but Mccaughan is out of range.
A big right from Kayo misses.
Kayo misses with a straight left.
Mccaughan rushes Kayo and presses him up against the cage.
Mccaughan lands a nice elbow.
Mccaughan stalling in the clinch.
Mccaughan misses the knee to the body. Nice hip positioning from Kayo.
Kayo is trying to break the clinch but Mccaughan has him pressed against the cage.
Mccaughan throws an elbow but it's blocked.
Mccaughan landing knees to the body. They look like they could hurt.
Mccaughan misses with a punch on the inside.
Kayo lands with a good tight uppercut to the head.
Kayo has had enough of the clinch but Mccaughan keeps him there for the moment.
Mccaughan looking for a takedown.
Kayo wants to break free but Mccaughan has control.
Mccaughan looking for a takedown.
Bubba Kayo has stuffed three takedown attempts in the round now. That's going to take a lot out of Eric Mccaughan.
Kayo tries to break the clinch but Mccaughan is controlling the position.
Kayo wants to get back to striking at distance but Mccaughan won't allow it.
Mccaughan creates a bit of space for himself and sneaks an elbow through Kayo's defenses.
Kayo lands with a short shot to the head.
Mccaughan is looking for a takedown up against the cage. Kayo gets underhooks though and prevents the takedown attempt.
That's four minutes gone in the round.
Kayo wants to get back to striking at distance but Mccaughan won't allow it.
Kayo can't break the clinch.
Kayo wants to break the clinch but can't.
Mccaughan lands an uppercut.
Mccaughan prevents Kayo from breaking the clinch.
Kayo breaks the clinch and we return to the middle of the mat.
Mccaughan tries to clinch but is not successful on this occasion.
Kayo is really head hunting here, hardly looking to strike to the body at all.
Kayo misses with a combination
and Mccaughan counters with a nice double leg into side control. Kayo won't be happy with that.
Kayo holds on to Mccaughan's head and controls the position momentarily.

Mccaughan stands up.
Kayo throws a combination that misses
and Mccaughan counters with a nice single leg takedown and he's in Kayo's guard now.
We've seen a great period of action over the last minute or so - credit to both fighters for going all out!
The crowd applaud the fighters efforts here as the round comes to an end.
Mccaughan drops back for a leg here. A bit of a high risk move... He's looking for a kneebar by the looks of things. Now both of them are looking for submissions. Mccaughan seems to have locked his on tight now - Kayo screams in pain and taps out furiously! It certainly was a high risk move but it's paid off for Mccaughan, as he picks up the win!
Ladies and gentlemen, after 4:57 of round 2, we have a winner by way of Submission (Kneebar). Eric Mccaughan!
|
|
|
|
|
|
|
|
|
|
|
|
|
|
|
|
|
|
|
|
|
|
|
| S |
C
A |
G |
S |
C
B |
G |
|
S |
C |
G |
|
energy
A | B |
|
hype
A | B |
|
pop
A | B |
|
mgr
A | B |
|
FIGHT
RATING
39% |
|
|
|
|
|
|

