|
|
PBP Commentary |
Coming up we have a middleweight MMA rules bout between Baz Baldwin (ranked 0 p4p, 0 weight class) and Jamie Leigh Kent (ranked 0 p4p, 0 weight class). Kent has chosen Stand Up (Akala) as his entrance music. These two fighters really are very evenly matched on the feet - it will be fascinating to see who can assert themselves in that aspect of the fight.
 |
|
 |
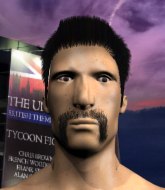
| 180 cm
20
190 lbs
6 - 3 - 0 |
|
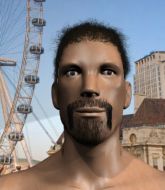
184 cm
24
189 lbs
8 - 5 - 0 |
BJJ Purple Belt
Solid Muay Thai
Good chin |
|
BJJ Purple Belt
Solid Muay Thai
Granite chin |
|
| |
|
Ladies and gentlemen. This fight is 3 rounds, in the middleweight division.
Introducing the fighter to my left, fighting out of the red corner.
With a record of
6 - 3 - 0, fighting out of London, Baz Baldwin!
And introducing the fighter to my right, fighting out of the blue corner.
With a record of
8 - 5 - 0, fighting out of London, Jamie Leigh Kent!
The judges for this bout are Donald Grub, Sam Margolis and James Atkins.

The bell rings for round one and we are underway!
Baldwin looking to take his opponent's legs away with the low kicks.
Kent fails with the takedown.
Baldwin thuds a mid kick into his opponent's body. That will wear on Kent if he has to take too many more of those.
Kent looks gassed!
Baldwin looking to take his opponent's legs away with the low kicks.
The fans in attendance giving it up for the two fighters, who have really let it all hang out in the last minute or so!

Baldwin fakes with an overhand right and moves in to clinch with Kent, pushing him back against the cage.
Baldwin throws a vicious knee straight up the middle but Kent blocks it with crossed arms.
Baldwin tries to land a knee to the head but Kent blocks with his arms.
Knees to the body from Baldwin.
Baldwin landing knees to the body. They look like they could hurt.
Baldwin tries to land a knee to the head but misses.
Knees in the clinch landing for Baldwin.
Baldwin with a knee to the head.

It looks like Jamie Leigh Kent has been cut.
Baldwin using the Thai clinch to land knees to the body.
Baldwin landing knees to the head.
A knee to the head by Baldwin.
Baldwin with a knee to the head.
Baldwin gets an overhook and lands an elbow to the side of the head.
Baldwin connects with a nasty looking knee right to Kent's face.
Baldwin with a knee to the head.
Baldwin lands a knee to the head there! That was nasty!
Knees in the clinch landing for Baldwin.
Kent has Baldwin pressed up against the cage and is working for takedown. Baldwin manages to improve position though and keeps the fight standing.
Kent is working for takedown but Baldwin is calmly controlling the position for now.
Baz Baldwin has stuffed three takedown attempts in the round now. That's going to take a lot out of Jamie Leigh Kent.
Baldwin throws a vicious knee straight up the middle but Kent blocks it with crossed arms.
Baldwin scores a nice knee to the body.
Kent is working for a takedown up against the cage. He can't get it on this occasion though.
Kent looking for a takedown.

That's one minute gone in the round.
Baldwin landing knees to the head.
Kent tries to score a body lock takedown but Baldwin shows good agility there to stay on his feet.
Baldwin stops a takedown attempt from Kent.

Baldwin's corner calls for him to break the clinch, which he does.
Baldwin looks to score with a combo but nothing lands.
Nice takedown defense from Baldwin. No joy for Kent on that attempt.
Kent misses with a takedown attempt - Baldwin sprawls well and throws a nice strike on the way out which just misses.
Baldwin misses with a few strikes there.
Kent shoots in for a takedown but doesn't get it.
Baldwin misses with a double jab.
Baldwin stuffs the takedown.
Baldwin bobs and weaves and unloads with a good uppercut.
Baldwin misses the shot to the body.
Kent shoots in for a double leg but Baldwin sprawls well. That's going to sap some energy.

Excellent takedown into side control there by Baldwin.
Baldwin taking a breather here.

That's two minutes gone in the round.

Baldwin tries for a kimura but Kent is defending well.
Kent is looking to regain half guard here but Baldwin keeps moving and retains side control.
Baldwin staying calm.

That's three minutes gone in the round.
The fighters are going at a pretty good pace and they're both starting to sweat now.
Kent is looking for a sweep.

The referee decides to stand the fighters back up.
Kent tries to keep at a distance but Baldwin has taken the fight into the clinch.
Baldwin trying to land knees to the body.
Kent is working for takedown but Baldwin is calmly controlling the position for now.
Baldwin scores a nice knee to the body.
Baldwin scores with a knee to the head.
Baldwin comes over the top with an elbow. That landed flush.
Baldwin tries to land a knee to the head but Kent blocks with his arms.
Kent wants a takedown.
Baldwin connects with a nasty looking knee right to Kent's face.
Good anti-grappling being displayed by Kent as Baldwin tries to tie him up.
Kent has Baldwin pressed up against the cage and is working for takedown. Baldwin manages to improve position though and keeps the fight standing.
Baldwin lands a left hand.

That's four minutes gone in the round.
Kent is looking for a takedown up against the cage. Baldwin gets underhooks though and prevents the takedown attempt.
Baldwin misses with a knee strike.
Baldwin is pressed up against the cage. Kent has hold of a leg and is looking to drag Baldwin down to the mat. Baldwin avoids the attempt though and has circled away. We're back to striking at a distance.
Kent doesn't succeed with the takedown
and Baldwin counters with a quick right hand to the jaw.
Baldwin lands with a head kick! That's gotta hurt.
Kent displays some good footwork, moving neatly out of range as Baldwin throws out the jab.
Kent fails with the takedown
and Baldwin counters with a flying knee. Nice.
Baldwin scores with a jab to the jaw of his opponent.
Kent shoots in for a takedown but doesn't get it.
Baldwin thumps Kent with a low kick.
Kent closes the distance, clinches up and gets a nice trip takedown into side control. Very smooth.
Kent wants to work for a kimura but he's foiled early by Baldwin, who protects the arm well.
As the round comes to an end the crowd are showing their appreciation for a great round of action.
Baldwin is sneaking out the side here. He's bucked Kent off and has taken his back!
And thats the end of the round the fighters go back to their corners.
Baz Baldwin dominated that round.
The cut man is working on Jamie Leigh Kent's cut.
Well, the break between rounds is over. Let's get back to the scrappin!

Baldwin misses with the combination.
A slow jab from Baldwin misses its intended target.
Good shot there by Baldwin.
Kent has his takedown stuffed
and Baldwin counters by moving into the clinch. Good anticipation by Baldwin.
Baldwin tries to land a knee to the head but Kent blocks with his arms.
Kent changes levels and goes for a takedown here. Baldwin fights it off and pushes away nicely.
Kent uses decent footwork to sidestep a right hand from Baldwin.
Kent gets his takedown attempt stuffed easily
and Baldwin counters by clinching up.
Baz Baldwin has stuffed three takedown attempts in the round now. That's going to take a lot out of Jamie Leigh Kent.
Kent takes a knee right on the jaw!
Baldwin scores with a knee to the head.
Baldwin throws a vicious knee straight up the middle but Kent blocks it with crossed arms.
Baldwin using the Thai plumb to throw knees but Kent has his back arched nicely, preventing the strike.
Both fighters are absolutely exhausted here.
Kent can't get the takedown.
Baldwin unloads a knee to the mid-section. Kent lets out a prehistoric sounding urrrrgh.
Baldwin scores with a nice hook to the head.
Baldwin stops a takedown attempt from Kent.
That's one minute gone in the round.
Baldwin with the Thai clinch. He's looking to land a big knee but he's not managed it this time.
Baldwin crunches a lovely knee into Kent's ribcage.
Baldwin is leaning against Kent and scores with a nice uppercut to the body.
Baldwin gets double underhooks to prevent a takedown attempt from Kent.
Baldwin misses with a knee strike.
Baldwin is pressed up against the cage. Kent has hold of a leg and is looking to drag Baldwin down to the mat. Baldwin avoids the attempt though and has circled away. We're back to striking at a distance.
Baldwin moves into range and throws a lovely three punch combination.
Kent shoots and misses
and Baldwin counters with a crisp hook to the side of the head.
Baldwin throws a one two combo.
Kent misses with a takedown
and Baldwin counters by moving into the clinch. Good anticipation by Baldwin.
Baldwin misses with a knee strike.
Kent tries to score a body lock takedown but Baldwin shows good agility there to stay on his feet.
Baldwin lands a nice knee to the body.
Baldwin tries to land a knee to the head but Kent blocks with his arms.
Nice body punch from Baldwin.
Kent has Baldwin pressed up against the cage and is working for takedown. Baldwin manages to improve position though and keeps the fight standing.
Baldwin with a knee to the head.
Baldwin tries to land a knee to the head but misses.
Baldwin gets underhooks to prevent Kent's takedown attempt.
Baldwin crunches a lovely knee into Kent's ribcage.
That's two minutes gone in the round.
Kent is working for a takedown up against the cage. He can't get it on this occasion though.
Kent is trying to work for a single leg takedown but Baldwin pulls him back up using the underhooks.
Kent goes for a takedown in the clinch but Baldwin prevents it.
Baldwin landing some nice looking knees to the body.
Baldwin looking to throw knees to the head but Kent is blocking nicely.
Kent blocks a knee to the body. He'll have a nicely bruised forearm in the morning.
Baldwin stops a takedown attempt from Kent.
Baldwin landing knees to the body.
Kent blocks a knee to the body. He'll have a nicely bruised forearm in the morning.
Kent missing with knees to the body.
Baldwin gets a nice trip takedown into half guard.
Kent moves his hips nicely and gets into full guard.
Kent working away from the bottom but not quite defensive enough there because Baldwin has passed into half guard!
The fighters are pressed up against the cage, both looking to find a bit of space to work.
Kent looking for submissions from an awkward position here.
That's three minutes gone in the round.
Baldwin content to control rather than advance.
Baldwin's ground tactics aren't going to win him many fans. Let's hope he's got fireworks for us if he gets back to his feet because he's not doing much on the ground.
The ref warns both fighters not to hold the cage as they work up against the meshing.
Kent tries to get to full guard but Baldwin has control of the leg.
Kent blocking the ground and pound attempt from Baldwin.
Kent is looking to get back to full guard here but Baldwin has managed to pass to side control instead.
Baldwin controlling from mount.
That's four minutes gone in the round.
A few boos can be heard. I'm sure they will multiply if the fighters don't pick up the pace.
Kent is desperately trying to get back to half guard.
Baldwin controlling from the full mount.
Kent keeping his composure momentarily, calmly looking to get back to half guard.
Baldwin controlling the position easily from mount.
And thats the end of the round the fighters go back to their corners.
Baz Baldwin dominated that second round.
The cut man is working on Jamie Leigh Kent's cut.
That's time! Baldwin's corner gives him a slap on the ass as he gets ready to fight. This is the final round!

A slapping leg kick lands for Baldwin.
Kent misses with a takedown attempt
and Baldwin counters with a leg kick.
Baldwin rushes Kent and presses him up against the cage.
Baldwin throws a knee to the head but misses.
Baldwin using the Thai plumb to throw knees but Kent has his back arched nicely, preventing the strike.
The fighters are pressed against the cage, as the pace of the fight slows.
Baldwin lands a knee to the head.
Kent goes for a takedown in the clinch but Baldwin prevents it.
Baldwin tries a knee to the head but he's missed.
Kent goes for a takedown attempt but Baldwin pushes him away and we're back to fighting at a distance.
Baz Baldwin has stuffed three takedown attempts in the round now. That's going to take a lot out of Jamie Leigh Kent.
Baldwin tries to bum rush Kent with a series of wild strikes but Kent uses good footwork to avoid the assault.
Both fighters are breathing heavily.
Baldwin swings wildly with a right hand that was never going to find it's target.
Jamie Leigh Kent seems to be the more aggressive standup fighter in this bout.
Kent tries for a takedown but Baldwin circles away easily
and Baldwin counters with a crisp hook to the side of the head.
That's one minute gone in the round.
Baldwin fakes an overhand right and shoots for a takedown. Kent sprawls well initially but Baldwin persists and gets the takedown into half guard.
Kent tries to get to full guard but Baldwin has control of the leg.
Kent looking for submissions from an awkward position here.
Kent wants to get back to full guard.
Baldwin is taking a breather. Kent says something to him but it's hard to make out. Perhaps he's telling him to get on with it and actually do something.
Kent tries to get to full guard but Baldwin has control of the leg.
That's two minutes gone in the round.
Baldwin seems content to maintain position for now, rather than mounting any offense.
Kent looking for submissions off his back.
The referee has ruled that neither fighter is active enough on the ground and has stood them back up.
Baldwin scores with a sloppy right hand. Kent should have avoided that one.
Kent avoids a punch combination nicely.
Kent shoots and misses
and Baldwin counters with a nice uppercut.
Kent tries for a takedown but Baldwin circles away easily
and Baldwin counters by moving into the clinch.
Baldwin landing knees to the body. They look like they could hurt.
Baldwin tries to land a knee to the head but Kent blocks with his arms.
Kent wants a takedown.
That's three minutes gone in the round.
Kent is working for takedown but Baldwin is calmly controlling the position for now.
Kent drops to a knee looking for a takedown but Baldwin gets the underhooks and prevents it.
Baldwin breaks the clinch.
Kent shoots and misses
and Baldwin counters with a straight right hand.
Kent shoots in but doesn't get the takedown
letting Baldwin counter with a right hand.
Baldwin throws a leg kick which misses Kent's front leg but catches the back leg as Kent tries to avoid it.
Kent gets his takedown attempt stuffed easily
and Baldwin counters with a crisp hook to the side of the head.
A slow jab from Baldwin misses its intended target.
Kent gets his takedown attempt stuffed easily
and Baldwin counters by moving into the clinch.
Baldwin connects with a knee to the head.
Baldwin is really dominating this fight. Is there anything that Kent can do to turn this around?
Kent is working for takedown but Baldwin is calmly controlling the position for now.
Baldwin tries to land a knee to the head but Kent blocks with his arms.
Baldwin with the Thai clinch. He's looking to land a big knee but he's not managed it this time.
Baz Baldwin has scored more points in the clinch so far.
Kent has a body lock and is looking for a takedown. Baldwin is bouncing around trying to prevent the takedown and somehow he has indeed managed to stay on his feet.
Baldwin scores with a knee to the head.
Kent drops down looking for an ankle pick but Baldwin pulls his leg out and moves away.
That's four minutes gone in the round.
Baldwin lands a straight punch to the body, keeping Kent at a distance.
Baldwin throws a right hand that Kent ducks under and follows up with a left that Kent also avoids with ease.
Kent doesn't succeed with the takedown
and Baldwin counters with a shot to the ribs. That looked like it hurt.
Baldwin throws a shot from downtown. Kent moves away and avoids it.
Kent with a lazy takedown attempt
and Baldwin counters with a head kick.
The fight moves into the clinch position.
Baldwin prevents the takedown attempt.
Kent avoiding damage as Baldwin throws knees to the body.
Kent wants a takedown.
Baldwin misses with a knee to the head.
Kent can't get the takedown.
Baldwin landing knees to the body.
A knee to the head by Baldwin.
Jamie Leigh Kent has stepped it up - he knows he needs a finish here!
Kent can't get the takedown.
Baldwin lands a knee to the head there! That was nasty!
Baz Baldwin is fighting for a decision here - he's started to take the cautious approach.
Kent tries for a takedown. No joy.
Baldwin comes over the top with an elbow. That landed flush.
And that's the end of the fight!
Baz Baldwin showed his dominance in that final round.
Well Baldwin has outscored his opponent in every aspect of the fight today. Only a scarily incompetent judge or two will keep him from a well deserved win... Over to the ring announcer for the scorecards.
Ladies and gentlemen, after 3 rounds of action, we go to the scorecards for a decision.
Judge Donald Grub scores the fight 30:26
Judge Sam Margolis scores the fight 30:27
Judge James Atkins scores the fight 30:27
In favor of your winner, by unanimous decision... Baz Baldwin!
|
|
|
|
|
|
|
|
|
|
|
|
|
|
|
|
|
|
|
|
|
|
|
| S |
C
A |
G |
S |
C
B |
G |
|
S |
C |
G |
|
energy
A | B |
|
hype
A | B |
|
pop
A | B |
|
mgr
A | B |
|
FIGHT
RATING
60% |
|
|
|
|
|
|

