|
Play
by Play - Fighter's Fight Commentary
|
Event:
Quick Fight Championship
Date: Nov 02, 2016 |
#R1#
Rowanda swinging wildly here.
Riaq Rowanda seems to be the more aggressive standup fighter in this bout.
Rowanda misses with a two punch combination.
Force steps in looking to clinch after the strikes miss from Rowanda.
Rowanda closes the distance and lands a one-two.
Rowanda scores with a jab to the head.
Rowanda feints and then cracks Force's leading leg with a nice low kick. He's obviously looking to slow Force down.
A nice combination there by Rowanda.
Rowanda connects with a jab.
Fantastic stuff here - a very entertaining period of action, which has drawn cheers from the crowd.
Force throws a body shot but no joy.
Rowanda throws a nice outside leg kick.
Force looks for a takedown here. Will he get it? Rowanda is fending him off so far but Force persists. Nope, Rowanda circles away and we're back to standing.
Force shoots in for a takedown but Rowanda shows good takedown defense.
Rowanda lands with a good body shot.
A telegraphed takedown attempt from Force is defended easily by Rowanda.
Riaq Rowanda has stuffed three takedown attempts in the round now. That's going to take a lot out of Bubba Force.#T1#
Rowanda throws a nice hook to the body that draws an oooh from the crowd.
Rowanda lands a two punch combo.
Rowanda tries a switch kick but it misses it's target.
Rowanda dips to his left and cracks Force with an uppercut!
Rowanda tries to bum rush Force with a series of wild strikes but Force uses good footwork to avoid the assault.
Force feints the counter takedown.
Rowanda looks to land a combination but Force avoids it well.
Rowanda lands a powerful looking uppercut that connected with his opponent's jaw.
Sloppy strikes from Rowanda. Those never looked like landing.
Rowanda lands a vicious shot with the stealth of a sniper and the strength of a viper. Are vipers that strong? I can think of lots of things that are stronger than a viper - not many rhyme with sniper though.
#T2#
This has been an exciting period of action!
Force goes for a double leg but Rowanda avoids the attempt and the two fighters end up clinched against the cage as Rowanda continues to drive forward.
Ooooh, nice body kick lands from Rowanda. Force shrugs it off though. #CL#
Rowanda gets to the clinch - let's see what his plan is here.#BC#
Rowanda breaks from the clinch.
Rowanda lands a jab. Then a cross. Then finally a nice hook to the body. Good work there by Rowanda.
Rowanda lands with a nice body punch.
Rowanda fails to land with a series of punches.
And Force tries to counter it with a takedown but Rowanda pushes his down on his head and steps out.
Riaq Rowanda is looking to keep the fight on the feet at all costs.
Rowanda lands with a shot to the body. #CL#
Rowanda moves into range and clinches up with Force.
Rowanda lands an uppercut.#BC#
Rowanda breaks the clinch.
Rowanda lands a glancing blow to the side of Force's head.#T3#
Rowanda scores to the head and body with a nice combination!
Rowanda sizes up Force with a pawing jab and scores with a straight right down the middle. #ROC#
Force is rocked!
Rowanda throws an overhand right that has Force reeling! Rowanda follows up with more punches and Force is out cold! This one is all over!
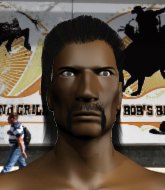
Ladies and gentlemen, after 3:19 of round 1, we have a winner by way of KO (Punches). Riaq Rowanda!
Riaq Rowanda seemed lost for words in his post fight interview but he remembered to thank his fans and directed everyone to his website.
|
|
|
|
Event:
TWGC 13 (205lbs, D4): Finals - Round 1
Date: Oct 16, 2016 |
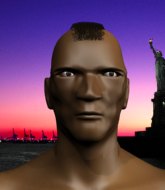
Coming up we have a light heavyweight Tycoon World Grappling Championship rules bout between Borris Truck and Bubba Force. Bubba Force acknowledges the crowd's support as he enters the cage.
This TWGC bout is 1 fifteen minute round in the light heavyweight division. Introducing today's competitors. In the red corner, competing out of Sydney, with a TWGC record of 2 wins and 1 losses; Borris Truck! And in the blue corner, fighting out of Montreal, with a TWGC record of 2 wins and 0 losses; Bubba Force!
The judges for this bout are Patrick Alders, Paul Aken and Wagner Zegers.
The fighters connect hands in the middle of the mat and we are under way.

Truck closes the distance, clinches up and gets a nice trip takedown into side control. Very smooth. Score +4 for clean takedown past guard: Truck (4) vs (0) Force
Force can't do much from the bottom here.
Force manages to get back to half guard.
Force tries to roll over but Truck keeps him under control.
Force is doing well to avoid being mounted. He's controlling the position at the moment.

Truck is looking for a kimura. It's going to be difficult to finish that from half guard though and Force defends it well.
Truck is working for a submission of some sort.
We've had a slow start to the round here - hopefully the action picks up.
Truck not doing much here.
Force moves his hips nicely and gets into full guard.

That's one minute gone in the round.
Truck passes Force's left leg - he's now in half guard.
The ref warns both fighters not to hold the cage as they work up against the meshing.
Force is trying to get back to full guard.
Force is doing well to avoid being mounted. He's controlling the position at the moment.
Force has no desire to be mounted, so is trying to control. Truck is working away from the top position though.
Truck is trying to work for a kimura. This could be trouble! No, Force has managed to free his arm - good work.
Truck wants to take a breather but Force is having none of it.

That's two minutes gone in the round.
Force is trying to maintain the position but Truck is very close to passing his half guard.
Force slips a foot under and gets full guard. Nice work.
Force keeping moving, preventing Truck from controlling successfully.
Truck pressing down on his opponent's thigh, looking to pass guard. Force is keeping the position for now.
Truck drops back looking for a leg! Force is in trouble here! The fighters roll with the hold and Force manages to kick Truck off! Truck jumps back into Force's guard.
Force has his hands on Truck's head, controlling the position.
Force manages to sweep nicely, so he's now on top. Truck manages to get himself to full guard.
Score +2 for sweep to guard / half guard: Truck (4) vs (2) Force

That's three minutes gone in the round.
Truck not looking particularly offensive just at the moment.
Truck is adopting a defensive guard.
Force trying to control the position from guard on top but Truck is wriggling around, looking for whatever he can.
Truck working for a triangle but Force defends it easily.

That's four minutes gone in the round.
Force looking to sit in guard and control but Truck gets the butterfly guard and sweeps. He's now in the guard on the top. Score +2 for sweep to guard / half guard: Truck (6) vs (2) Force
Truck looking to pass the guard.
Force wants to control here, rather than go for any submissions from the bottom. At least for now.
Truck tries to free his leg and advance position but Force is retaining full guard.
Truck postures up.

Force working for a triangle but Truck defends it easily.
Force trying to keep a closed guard but Truck is proving a slippery customer.

That's five minutes gone in the round.
A real slowdown in the pace of the fight for a moment, as Force holds on and takes a little breather.
Force working from the bottom, still in full guard. He's managed to get a loose triangle. Truck doesn't seem to be doing much to defend here, obviously he feels comfortable in the position. Truck manages to throw the legs off his shoulder and he's back into guard - no problem.
Truck has gone for a leg lock! Force slips out almost immediately though and dives into Truck's guard. Score +2 for sweep to guard / half guard: Truck (6) vs (4) Force
Force trying to control the position from guard on top but Truck is wriggling around, looking for whatever he can.
Truck tries to land a sweep but no joy.

That's six minutes gone in the round.
Truck keeping moving, preventing Force from controlling successfully.
Force tries to free his leg and advance position but Truck is retaining full guard.
Truck bucks up whilst keeping hold of a body lock, managing to reverse the position. Now he's in top in Force's guard. Score +2 for sweep to guard / half guard: Truck (8) vs (4) Force
Force looking for a sweep. Not yet Force, not yet.
Force keeping full guard, as Truck tries to pass.
Truck might be looking to lock onto one of his opponent's long limbs for a submission, whilst we're on the ground.
Force has Truck pulled in close to control his posture.
Truck passes into half guard.
Force tries to roll over but Truck keeps him under control.

That's seven minutes gone in the round.
Truck wants to pass to mount but Force is defending the position.
Truck is working for a submission of some sort.
Truck prevents Force from improving his position.
Force is trying to control but Truck passes into side control!
Score +3 for passing guard: Truck (11) vs (4) Force
Truck tries for a kimura. Not really close to a finish though.
Force manages to land a sweep and he's now on top! Lovely Jiu Jitsu! Score +2 for sweep to guard / half guard: Truck (11) vs (6) Force

That's eight minutes gone in the round.
The fighters are battling for position here. Truck manages to regain full guard. Nice work.
Truck looking for a guillotine here but Force defends easily.
Force wants to control from the top but Truck keeps moving.
Truck is avoiding any damage by keeping wrist control.

That's nine minutes gone in the round.
Force wants to control from the top but Truck keeps moving.
Truck manages to sweep nicely, so he's now on top. Force manages to get himself to full guard.
Score +2 for sweep to guard / half guard: Truck (13) vs (6) Force
Force managing to control the position.
Truck got a little sloppy there for a moment and Force has worked his way into a loose triangle - can he finish it?! No, Truck has managed to get both his arms back between Force's legs - danger averted.
Force looking to control.
Force wants to sweep but no luck.
Truck pressing down on his opponent's thigh, looking to pass guard. Force is keeping the position for now.
Truck is working hard here to advance position.

That's ten minutes gone in the round.
Force pulls Truck in close to prevent any damage.
The fighters are pressed up against the cage, both looking to find a bit of space to work.
Truck is looking to advance position but Force has hit a scissor sweep - now he's on top in mount! Score +4 for clean sweep to past guard: Truck (13) vs (10) Force
Truck can't escape the position.
Truck regains half guard.
Force prevents Truck from improving his position.

That's eleven minutes gone in the round.
Force wants to lay and pray for a moment but Truck keeps working.
Truck is concentrating on defense, preventing Force from advancing position.
Force wants to lay and pray for a moment but Truck keeps working.
Force tries to pass to full mount but Truck defends it.
Force is persisting with the attempt to improve his position.
Truck wants to control but Force is keeping busy.
Truck wants to get back to full guard.

That's twelve minutes gone in the round.
Force wants to work for an arm triangle but Truck is really keeping half guard well and defending the submission attempt.
Truck is trying to maintain the position but Force is very close to passing his half guard.
Force wants to take a breather but Truck is having none of it.
Force is looking for a kimura but Truck is holding onto that half guard position, so it's hard for Force to get the leverage.
Force looks winded!
Force prevents Truck from improving his position.
Force trying to control the action but Truck is working from the bottom.
Force is looking for an arm triangle, whilst trying to pass to side control. Truck doesn't seem that keen to cooperate though. No luck this time Force.

That's thirteen minutes gone in the round.
Force is looking to pass Truck's guard but actually Truck recovers to full guard.
Truck is looking for a guillotine. You can't force these things though and Force defends well.
Truck looking for submissions from the bottom here. Moving his hips around, possibly looking for an armbar.

That's fourteen minutes gone in the round.
Force trying to pass the guard but can't manage it just yet.
Force drops back for a leg but he's not going to get it - he lets go and Truck dives on top into guard. Score +2 for sweep to guard / half guard: Truck (15) vs (10) Force
Truck trying to control the position from guard on top but Force is wriggling around, looking for whatever he can.
Force has his hands on Truck's head, controlling the position.
Truck tries to free his leg and advance position but Force is retaining full guard.
Boooooooooooooooooooo!!! God, this has been a terrible round. Come on you two, sort yourselves out!
Force keeping moving, preventing Truck from controlling successfully.
Force controlling the position.
And that's the end of the fight!
Truck takes the fight on points by 15 to 10.
After winning the bout, Borris Truck thanked all his fans and promised he'd do even better in his next fight. The crowd seemed to love his humility. |
|
|
|
Event:
TWGC 13 (205lbs, D4): St Petersburg Qualifier - Round 2
Date: Oct 08, 2016 |
Coming up we have a light heavyweight Tycoon World Grappling Championship rules bout between Linwood Purcell and Bubba Force. Well, the cameraman is lingering on a pretty young lady for a bit too long there. Keep your eyes on the prize buddy or you'll miss the fighter intros!
This TWGC bout is 1 fifteen minute round in the light heavyweight division. Introducing today's competitors. In the red corner, competing out of St Petersburg, with a TWGC record of 1 wins and 0 losses; Linwood Purcell! And in the blue corner, fighting out of Montreal, with a TWGC record of 1 wins and 0 losses; Bubba Force!
The judges for this bout are Aleksei Zolotukhin, Igor Prikhodko and Sergei Dronov.
The official calls the fighters to the middle and the contest is under way.

Force closes the distance and scores a nice trip takedown into half guard. Purcell did well to prevent Force getting side control. Score +2 for takedown into guard / half guard: Purcell (0) vs (2) Force
Force seems to be working for a kimura but Purcell defends the submission attempt.
Force is keen to just control but Purcell is a slippery customer.
Purcell looking to work for a kimura from the bottom.
Purcell actively working from the bottom here.
Force in half guard on the top. He's looking for a kimura... He's got it locked and he's managed to free his trapped foot. Purcell tries to escape but it's on too tight and he has to tap! Great BJJ skills there from Force!
Ladies and gentlemen, after 0:52 of round 1, we have a winner by way of Submission (Kimura). Bubba Force! |
|
|
|
Event:
TWGC 13 (205lbs, D4): St Petersburg Qualifier - Round 1
Date: Oct 07, 2016 |
Coming up we have a light heavyweight Tycoon World Grappling Championship rules bout between Bubba Force and Pike Merry. Both fighters look fresh as a daisy as they make their way towards the cage.
This TWGC bout is 1 fifteen minute round in the light heavyweight division. Introducing today's competitors. In the red corner, competing out of Montreal, with a TWGC record of 0 wins and 0 losses; Bubba Force! And in the blue corner, fighting out of London, with a TWGC record of 0 wins and 0 losses; Pike Merry!
The judges for this bout are Fedor Mirinova, Igor Prikhodko and Sergei Dronov.
Let's get this grappling contest under way! Who will be victorious?

Merry clinches with his opponent.
Force has double underhooks and is working for a body lock takedown. He's got it. The fighters land in half guard but Merry regains guard immediately. Score +2 for takedown into guard / half guard: Force (2) vs (0) Merry
Merry looking for a sweep. Not yet Merry, not yet.
Force content to stall in guard here.
Force trying to control but Merry is working from the bottom.
Merry is trying to control the position but Force postures up.
We've had a slow start to the round here - hopefully the action picks up.
Force wants to pass the guard but Merry is keeping the position.
That's one minute gone in the round.
Force wants to control from the top but Merry keeps moving.
Force is trying to work a guillotine from the top, or something like that? Don't know how he thinks he's going to get a finish from there.
Force tries to free his leg and advance position but Merry is retaining full guard.
Merry is looking for a triangle but Force pushes his legs off easily.
Force engaging in some classic timewasting tactics.
Force stands up and looks to throw the legs aside to pass to side control. Merry swivels though and keeps the full guard.
That's two minutes gone in the round.
Force's corner is telling him to maintain position.
Force is pushing down on Merry's leg trying to pass to half guard. Merry is fighting to maintain full guard but Force has managed to sneak the leg through.
Force looks over to his corner - he wants some instructions but his corner are not responding.
Force seems to have a rather negative gameplan on the ground. He seems keen to just score the takedown and hold down Merry for as long as he can get away with.
Force seems to be looking for submissions.
Force prevents Merry from improving his position.
Merry trying to hold on to Force's head to control him but Force postures up.
Force controlling the action here.
That's three minutes gone in the round.
Force seems to be working for a kimura but Merry defends the submission attempt.
Force tries to pass the half guard into mount. Merry knows what he's doing though and prevents the attempt.
Force is thinking about going for an arm triangle but he can't free his leg.
Force is trying for a guillotine from the top but the pressure isn't in the right place so Merry is just riding it out for now. Force eventually gives up the hold.
That's four minutes gone in the round.
Force is working for a kimura but Merry is defending it quite comfortably.
Force looking for a submission but Merry manages to get full guard, putting an end to that submission attempt.
Force seems content to control from guard here. He's going to have to remain active though if he doesn't want to get stood back up.
That's five minutes gone in the round.
Force wants to pass the guard but Merry is keeping the position.
The ref warns both fighters not to hold the cage as they work up against the meshing.
Force wants to control from the top but Merry keeps moving.
Force is pushing down on Merry's leg trying to pass to half guard. Merry is fighting to maintain full guard but Force has managed to sneak the leg through.
Force wants to lay and pray for a moment but Merry keeps working.
Merry regains full guard. Nicely done.
There's a bit of a scramble here and now Merry is on top in guard.
Score +2 for sweep to guard / half guard: Force (2) vs (2) Merry
Force is controlling Merry's posture.
That's six minutes gone in the round.
Force tries to land a sweep but no joy.
Force seems keen to control Merry's posture.
Force's ground tactics aren't going to win him many fans. Let's hope he's got fireworks for us if he gets back to his feet because he's not doing much on the ground.
Force is working an open guard here, looking to improve his position. No doubt that will leave him open to counters but at least he's being more offensive.
Merry drops back for a leg! It's a sloppy attempt though and Merry jumps back into guard quickly, to retain the dominant position.
Force looking to control the pace of the fight rather than finish it.
That's seven minutes gone in the round.
Force bucks up whilst keeping hold of a body lock, managing to reverse the position. Now he's in top in Merry's guard. Score +2 for sweep to guard / half guard: Force (4) vs (2) Merry
Force wants to control from the top but Merry keeps moving.
Force advances position into side control! Score +3 for passing guard: Force (7) vs (2) Merry
Force is trying to land an Americana. He has the arm isolated but Merry is keeping cool and he's avoided the danger for now.
Merry is not content to let Force control the position.
Force is going to have to think about doing something other than just controlling because Merry is managing to avoid having the position dictated to him.
That's eight minutes gone in the round.
Force is trying to land an Americana. He has the arm isolated but Merry is keeping cool and he's avoided the danger for now.
Merry is not content to let Force control the position.
Merry can't do much from the bottom here.
Merry is looking for a sweep.
That's nine minutes gone in the round.
Force is looking to finish here, going for an Americana. Merry knows the correct defense though, so he's OK.
Merry stops Force from passing to mount.
Force has knee on belly and moves into mount. Score +2 for reaching mount: Force (9) vs (2) Merry
Force working from mount. He moves in close and looks like he might be going for an arm triangle... He's hopped off to the side and he's transitioned into an Anaconda choke. Merry turning a nasty shade of purple. He's refusing to tap but he's gone! He's out! The ref rips Force off and cradles Merry's limp body as Force celebrates with his corner.
Ladies and gentlemen, after 10:55 of round 1, we have a winner by way of Submission (Anaconda Choke). Bubba Force! |
|
|
|
Event:
Quick Fight Championship
Date: Sep 30, 2016 |
#R1#
Borg misses with a half-hearted attempt at a head kick.
Borg misses with a half-hearted attempt at a head kick.
Force doesn't manage to clinch there - Borg circles away.
A head kick misses from Borg.
Borg tries a switch kick but it misses it's target.
Junior Borg seems to be the more aggressive standup fighter in this bout.
Borg misses with a half-hearted attempt at a head kick.
Force is definitely looking for the counter takedowns here.
Borg throws a head kick that misses.
Force tries to drive through with a takedown attempt but Borg defends well and Force ends up having to push Borg into the cage where they will battle it out in the clinch.
Force avoids the head kick by Borg.
We've had a slow start to the round here - hopefully the action picks up.
Borg throws a head kick but Force moves out of range.
Borg has been talking about how he's improved his wrestling in the run up to the fight so let's see if that's enough to sway the balance.
Force blocks a head kick by Borg.
Borg misses with a head kick.
Force is definitely looking for the counter takedowns here.
Borg throws a head kick that misses.
Borg tries a switch kick but it misses it's target. #T1##CL#
Borg rushes Force and presses him up against the cage.#BC#
Borg breaks the clinch and we return to the middle of the mat.
Force shoots in looking for a takedown but Borg manages to keep the fight standing, pushing Force's face into the canvas for good measure before circling away.
A head kick misses from Borg.
Borg lands a head kick. Force smiles back at him and beckons him forward.
Force tries for a takedown but Borg sees it coming a mile off and avoids it easily.
Junior Borg has stuffed three takedown attempts in the round now. That's going to take a lot out of Bubba Force.
A head kick misses from Borg.
Force wants to counter with a clinch but Borg pushes him away.
Borg throws a head kick but Force moves out of range.
Force avoids the head kick by Borg.
And Force tries to counter it with a takedown but Borg pushes his down on his head and steps out.
Borg pulls out of a head kick attempt.
Borg throws a head kick but Force moves out of range.
Force steps in looking to clinch after the strikes miss from Borg.
Nice takedown defense from Borg. No joy for Force on that attempt. #T2#
Borg throws a quick head kick that skims the top of Force's head.
Force blocks a head kick by Borg.
Borg throws a head kick that half lands.
Fantastic stuff here - a very entertaining period of action, which has drawn cheers from the crowd.
A head kick misses from Borg.
Borg sets himself, and Force steps forward looking for the clinch! Borg avoids it this time.
Borg misses with a half-hearted attempt at a head kick.
Force unleashes a big counter combination but Borg bobs and weaves and avoids any damage.
Force blocks a head kick by Borg.
Borg tries a switch kick but it misses it's target.
Borg throws a nice head kick!
Borg tries a head kick but it misses.
Borg throws a sloppy head kick and Force moves out of range easily.
Borg throws a head kick that Force semi-blocks.
Borg is breathing heavily.
Borg swats away the attempt to clinch by Force.#T3#
Borg stuffs the takedown.
Force tries to clinch up.
Borg throws a sloppy head kick and Force moves out of range easily.
A really sloppy takedown attempt there from Force.
Borg throws a head kick that misses and slips in the process. He scrambles back to his feet and the fighters circle.
Junior Borg is looking to keep the fight on the feet at all costs.
Force avoids the head kick by Borg.
Force is definitely looking for the counter takedowns here.
Borg lands with a slapping head kick.
Borg throws a head kick but Force moves out of range.
Borg throws a head kick that misses and slips in the process. He scrambles back to his feet and the fighters circle.
Force follows through with a counter body kick but it doesn't land.#T4#
Borg tries a switch kick but it misses it's target.
Borg slaps away a takedown attempt from Force, before circling back to the center of the mat.
Force wants to clinch up but Borg keeps it at a distance.
A head kick misses from Borg.
Force is definitely looking for the counter takedowns here.
Borg throws a head kick but Force moves out of range.
Force drops down looking to force a counter takedown but Borg defends it well.#CL#
Borg gets in close and instigates a clinch.
Force wants to push off and get back to the center of the mat but Borg has him pressed against the cage.#BC#
Borg breaks the clinch and we return to the middle of the mat.
Borg pulls out of a head kick attempt.
Borg keeps the fight on the outside.
Borg misses with a half-hearted attempt at a head kick.
And thats the end of the round the fighters go back to their corners.
Junior Borg dominated that round.
That's time! Borg's corner gives him a slap on the ass as he gets ready to fight.
#R2#
Borg throws a sloppy head kick and Force moves out of range easily.
Force feints the counter takedown.
Borg circles away from the clinch attempt.
A head kick misses from Borg.
Borg pulls out of a head kick attempt.
#CL#
Borg drives through and clinches with Force against the cage.
Force has Borg pressed up against the cage and is working for takedown. Borg manages to improve position though and keeps the fight standing. #BC#
Borg pushes off and circles away, back to the middle of the mat.
Borg tries a head kick but it misses.
Bubba Force is looking to throw some combinations by the looks of things.
Force shoots in for a takedown. He's persisting with it as Borg sprawls well. Borg wins this battle and keeps the fight standing. Force gets slowly back to his feet.
We've had a slow start to the round here - hopefully the action picks up.
Force is looking to take this fight into the clinch.
Borg throws a counter high kick but Force was just alert enough to avoid it.#T1#
Borg misses with a half-hearted attempt at a head kick.
Force feints the counter takedown.
Borg throws a head kick that misses and slips in the process. He scrambles back to his feet and the fighters circle.
Borg pulls out of a head kick attempt.
Force blocks a head kick by Borg.
Borg misses with a head kick.
Force avoids the head kick by Borg.
Borg tries a head kick but it misses.
Force avoids the head kick by Borg.
Both fighters are absolutely exhausted here.
Force avoids the head kick by Borg.
Force shoots in for a takedown but Borg shows good takedown defense.
Junior Borg has stuffed three takedown attempts in the round now. That's going to take a lot out of Bubba Force.
Force moves in looking to clinch but Borg pushes him off.#T2#
Force closes the distance and clinches up with Borg, looking for a takedown. Force pushes Borg against the cage but Borg circles to the side and manages to break the clinch.
Borg throws a head kick that misses and slips in the process. He scrambles back to his feet and the fighters circle.
Force blocks a head kick by Borg.
Borg keeps the fight standing with a nice sprawl.
Borg is really dominating this fight. Is there anything that Force can do to turn this around?
Force tries to clinch there but Borg circles away.
Borg throws a sloppy head kick and Force moves out of range easily.
Force doesn't manage to clinch there - Borg circles away.
Borg tries a head kick but it misses.
Borg tries a switch kick but it misses it's target.
Borg misses with a half-hearted attempt at a head kick.
Force is definitely looking for the counter takedowns here.#T3#
Force throws a series of punches but Borg moves out of range.
Borg tries a head kick but it misses.
Borg tries a head kick but it misses.
A head kick misses from Borg.
Borg pulls out of a head kick attempt.
Borg throws a sloppy head kick and Force moves out of range easily.
Borg tries a head kick but it misses.
Borg keeps the fight on the outside.
Force throws a looping left and ducks down for a takedown. He's got his arms around Borg's waist but Borg gets an underhook and avoids the takedown by throwing Force off to one side.
Borg tries a switch kick but it misses it's target.
A head kick misses from Borg. #T4#
Borg pulls out of a head kick attempt.
Borg stuffs the takedown attempt from Force. Force gets slowly back to his feet.
Force blocks a head kick by Borg.
Force tries to close the distance and clinch up but Borg swats him away and circles back towards the center.
Borg misses with a half-hearted attempt at a head kick.
And Force tries to counter it with a takedown but Borg pushes his down on his head and steps out.
Force is looking to clinch but Borg is avoiding it.
Borg tries a switch kick but it misses it's target.
Force misses the shot to the body.
The crowd thankful this round is nearly over.
Borg throws a head kick that misses.
Force misses with a takedown attempt - Borg sprawls well and throws a nice strike on the way out which just misses.
And thats the end of the round the fighters go back to their corners.
Junior Borg dominated that second round.
That's the end of the round. The referee orders the cornermen out of the cage so we can get back down to business. So, we enter the final round. Let's see if either fighter can bring us a finish, or whether we're going to the judges scorecards.
#R3#
Borg throws a head kick that misses and slips in the process. He scrambles back to his feet and the fighters circle.
Force blocks a head kick by Borg.
Force drops down looking to force a counter takedown but Borg defends it well.
Force blocks a head kick by Borg.
Force changes levels for a counter takedown but doesn't follow through with his attempt.
Borg tries a head kick but it misses.
Force changes levels for a counter takedown but doesn't follow through with his attempt.
Borg tries a head kick but it misses.
Borg throws a head kick that misses and slips in the process. He scrambles back to his feet and the fighters circle.
Force shoots in but doesn't get the takedown
and Borg counters with a head kick. That will keep Force thinking before he tries any more sloppy attacks!
Force is trying desperately to land a takedown but Borg is having absolutely none of it. This is turning into a bit of a nightmare for Force.
We've had a slow start to the round here - hopefully the action picks up.
Force fails miserably with a takedown attempt.
Force shoots for a takedown but Borg saw that one coming a mile off and avoided it easily.
Junior Borg has stuffed three takedown attempts in the round now. That's going to take a lot out of Bubba Force.
Borg throws a sloppy head kick and Force moves out of range easily. #T1#
Borg misses with a half-hearted attempt at a head kick.
Both fighters are breathing heavily.#CL#
Borg pushes Force up against the cage in a clinch.#BC#
Borg pushes off and circles away, back to the middle of the mat.
Borg pulls out of a head kick attempt.
Force feints the counter takedown.
A head kick misses from Force.
Force tries to clinch but Borg moves out of range.
Borg throws a sloppy head kick and Force moves out of range easily.
Force is loading up here, looking for a big counter of his own.
Borg misses with a half-hearted attempt at a head kick.
Borg uses decent footwork to sidestep a right hand from Force.
Borg lifts his leg as if looking to counter with a high kick.
Force fails with a takedown attempt. #T2#
Borg misses with a head kick.
Force blocks a head kick by Borg.
Force shoots in with a takedown attempt and he has Borg pinned against the cage. Borg gets the underhooks and manages to circle away.
Borg throws a head kick but Force moves out of range.
Borg throws a sloppy head kick and Force moves out of range easily.
Force tries a counter takedown but it's more of a dummy move, and he uses it to push himself away.
Borg leaves Force with his face pressed against the mat as he sprawls beautifully, defending against a solid takedown attempt.
Force tries to clinch but Borg moves away
and Borg counters with a kick to the head that grazes his opponent. Force is lucky that one didn't land flush.
A head kick misses from Borg. #T3#
Borg pulls out of a head kick attempt.
Borg misses with a head kick.
Force shapes to counter with a head kick.
Borg throws a head kick that misses.
Borg throws a head kick that misses and slips in the process. He scrambles back to his feet and the fighters circle.
Force shoots in for a takedown - he's clinched up with Borg but Borg pushes him off and we're back to square one.
A head kick misses from Borg.
Borg tries a head kick but it misses.
Force looks for a takedown here. Will he get it? Borg is fending him off so far but Force persists. Nope, Borg circles away and we're back to standing.
Borg throws a head kick that misses.
And Force tries to counter it with a takedown but Borg pushes his down on his head and steps out.#T4#
A head kick misses from Borg.
Force is trying to avoid his opponent's strikes and get into the clinch.#CL#
Borg closes the distance and clinches. #BC#
Borg manages to break the clinch.
Force pivots as if he's going to throw a leg kick but stops half way.
Borg throws a head kick that misses. #CL#
Borg pushes Force up against the cage in a clinch.#BC#
Borg's corner calls for him to break the clinch, which he does.
Force tries to clinch up but Borg circles away and keeps his distance.
Force just manages to avoid a counter high kick fromBorg.
The crowd thankful this round is nearly over.
Borg throws a sloppy head kick and Force moves out of range easily.
Borg throws a sloppy head kick and Force moves out of range easily.
Bubba Force has stepped it up - he knows he needs a finish here!
Borg throws a head kick that misses.
Force with the counter takedown but Borg avoids it easily.
And that's the end of the fight!
Junior Borg showed his dominance in that final round.
Well Borg has outscored his opponent in every aspect of the fight today. Only a scarily incompetent judge or two will keep him from a well deserved win... Over to the ring announcer for the scorecards.
Ladies and gentlemen, after 3 rounds of action, we go to the scorecards for a decision.
Judge Sam Margolis scores the fight 30:24
Judge Paul Tew scores the fight 30:24
Judge Daniel Bishop scores the fight 30:24
In favor of your winner, by unanimous decision... Junior Borg!
Junior Borg thanked the fans post fight for their support.
|
|
|
|
Event:
Quick Fight Championship
Date: Aug 24, 2016 |
#R1##TD#
Kapustka tries to sprawl but Force drives through with a takedown into half guard.
Force wants to control but Kapustka is keeping him busy.
Kapustka is trying to defend against the ground and pound but Force scores with a couple of nice shots.#SUB2#
Kapustka looking for submissions off his back.
Kapustka is staying active underneath Force, who seems content to just control the action from this position.
The fighters are pressed up against the cage, both looking to find a bit of space to work.
Force winds up and cracks Kapustka with a swinging punch to the side of the head.
Force is pressing down on Kapustka's thigh, looking to free his foot. Kapustka is holding on for now. #SUB#
Force is trying to work for a kimura. This could be trouble! No, Kapustka has managed to free his arm - good work.
We've had a slow start to the round here - hopefully the action picks up.
Force scores with a couple of good hammerfists.#SUB#
Force is trying for a guillotine from the top but the pressure isn't in the right place so Kapustka is just riding it out for now. Force eventually gives up the hold. #T1#
Kapustka missing with punches from the bottom.
Kapustka is trying to stand.
Kapustka wants to improve his position but Force is controlling well.
#SUB#
Force seems to be working for a kimura but Kapustka defends the submission attempt.#SUB#
Force is working for a kimura but Kapustka is defending it quite comfortably.
#T2#
A few boos can be heard. I'm sure they will multiply if the fighters don't pick up the pace.
Kapustka is trying to maintain the position but Force is very close to passing his half guard.
Kapustka is trying to stand.
#SUB#
Force is sneakily working for an arm triangle but Kapustka sees it coming and defends easily.
Kapustka is looking to improve his position.
Force trying to mount his opponent but Kapustka defends it. #SUB#
Force seems to be working for a kimura but Kapustka defends the submission attempt.#T3#
Kapustka is looking to control Force's leg but it's slowly edging free. Can Kapustka avoid being mounted?
Force is keen to just control but Kapustka is a slippery customer.#SUB#
Force is looking for a kimura here.
Force wants to free his trapped foot but Kapustka is holding on for dear life with his legs. #SUB#
Force is trying a forearm choke
I don't think that's going to do much at this level of the game.
#T4#
The crowd are showing their displeasure at the lack of action as loud boos ring out around the arena.
Force seems very keen to just sit and control from half guard but Kapustka does not like that idea so much and is remaining active off his back. #SUB#
Kapustka is trying to control Force's posture. Force takes advantage of the lull and advances to side control. He also appears to have an arm triangle here! Uh oh, big trouble for Kapustka! Force is rotating here... this could be the end... Kapustka is out! Force has ended this one emphatically! Great submission!
Ladies and gentlemen, after 4:53 of round 1, we have a winner by way of Submission (Arm Triangle). Bubba Force!
|
|
|
|
Event:
AFC5
Date: May 28, 2016 |
#R1#
Roditis misses with a few strikes there.
Roditis swings wildly with a couple of big hooks
#CL#
and Force counters by clinching up.
Roditis avoiding damage.
Roditis wants a takedown but no success here.
Force changes levels and goes for a takedown here. Roditis fights it off and pushes away nicely.
#CL#
Force closes the distance and pushes Roditis back into the cage.
We've had a slow start to the round here - hopefully the action picks up.
Force tries for a takedown. No joy.
Roditis stalling in the clinch but Force improves position. #T1##TD2#
Roditis gets control of Force's arms and successfully pulls guard. Roditis will no doubt be looking for submissions off his back.
Roditis looking for a sweep. Not yet Roditis, not yet.
Force stands and throws Roditis's legs to the side, diving into side control.
Force wants to control but Roditis is keeping him busy.
Roditis prevents Force from moving into mount.
Roditis gives up the full mount - oops, sloppy defensive grappling there!
Roditis is writhing around trying to get back to his feet.
Force controlling his opponent. #T2##SUB#
Force wants to finish this one by submission but Roditis is holding onto his waist, trying to prevent any attacks from Force. #SUB#
Force working for a guillotine from mount but Roditis is in no mood to give up.
Roditis wants to hold on but Force pushes him away.#SUB#
Force looking for a guillotine from mount but Roditis is having none of it. #SUB#
Force goes for an armbar but he's not got it
Roditis turns into him and now he's in Force's guard.
Force managing to control the position. #T3#
Force controls Roditis momentarily but Roditis frees himself.
Force is going to have to think about doing something other than just controlling because Roditis is managing to avoid having the position dictated to him.
The fighters are pressed up against the cage, both looking to find a bit of space to work.
Force managing to control the position.
Roditis's corner is telling him to maintain position.#T4#
A lull in the action here being met with boos from the crowd.
Force manages to sweep nicely, so he's now on top. Roditis manages to get himself to full guard.
#REVR#
Roditis looking to sweep using the butterfly guard but Force puts pay to that idea as he passes nicely into half guard.
Roditis tries to roll over but Force keeps him under control.
Roditis is trying to control but Force passes into side control!
Force controlling from side mount.
Boooooooooooooooooooo!!! God, this has been a terrible round. Come on you two, sort yourselves out!
Force has knee on belly momentarily but Roditis bucks him off and regains half guard.
And thats the end of the round the fighters go back to their corners.
Bubba Force dominated that round.
That's the end of the round. The referee orders the cornermen out of the cage so we can get back down to business.
#R2#
Force with a lazy takedown attempt
and Roditis counters with a one-two to the body.
Bubba Force is looking to throw some combinations by the looks of things.
Force fakes high and shoots in for a takedown but Roditis avoids it really well and circles away.#TD2#
Roditis drives through with a takedown into guard.
Force pulls Roditis in to control the position.
Roditis must be cautious of submissions here, given that his opponent has the superior Jiu Jitsu.
We've had a slow start to the round here - hopefully the action picks up.
Force trying to control the position.
We've been informed that Roditis has been working hard on his conditioning in the buildup to the fight.
Force looking for a sweep. Not yet Force, not yet. #T1##SU2#
Roditis stands up from guard. Let's bang! #TD#
Roditis gets caught on his heels momentarily as he allows Force to score an easy takedown into full guard.
Roditis wants to get back to his feet but he's too absorbed in his own little project and Force manages to pass to side control.
The ref warns both fighters not to hold the cage as they work up against the meshing.
Force is looking to pass Roditis's guard but actually Roditis recovers to full guard.
Roditis looking to hit a scissor sweep but Force is one step ahead there. #T2#
Roditis is persisting with the attempt to improve his position.
Roditis controls Force momentarily but Force frees himself. #SUB#
Roditis wants to reverse the position here. Force has hold of a leg though and he's dropped back looking for a kneebar! The fighters roll across the mat but Roditis is forced to tap! Roditis looks devastated but at least his leg points in the right direction.
Ladies and gentlemen, after 2:50 of round 2, we have a winner by way of Submission (Kneebar). Bubba Force!
|
|
|
|
Event:
Quick Fight Championship
Date: Apr 16, 2016 |
#R1##TD2#
Force closes the distance and after a bit of a stuggle, scores a takedown into Donaldson's guard.
Donaldson could do with losing a few pounds - he looks very soft around the mid section, to put it politely.
Force controlling from the top position.
A big thud reverberates around the arena there as Force accidentally thumps the mat. Hopefully he's not broken his hand.
Force stops Donaldson from standing up. #SUB#
Force got a little sloppy there for a moment and Donaldson has worked his way into a loose triangle - can he finish it?! No, Force has managed to get both his arms back between Donaldson's legs - danger averted.#SUB#
Donaldson escapes his hips to the side and looks to be working for an armbar. Force gives him a little smile and shakes his head. No chance.
Force trying to control the position from guard on top but Donaldson is wriggling around, looking for whatever he can.
We've had a slow start to the round here - hopefully the action picks up.
Force is frustrating his opponent with some stalling tactics from top position.#REF3#
The referee has motioned to the fighters to stand back up. He just wasn't happy with the level of activity.#T1##CL#
Donaldson moves into the clinch successfully.
#TD2#
Force gets a nice trip takedown into half guard.
Force trying to control the pace. #SUB2#
Force is looking for a kimura. It's going to be difficult to finish that from half guard though and Donaldson defends it well. #T2##SUB2#
Force is working for submissions here but there's nothing on.
#SUB#
Donaldson actively working from the bottom here.
Force looks over to his corner - he wants some instructions but his corner are not responding.
Force works his foot free and advances to mount.
The fighters are going at a pretty good pace and they're both starting to sweat now.
Force trying to control but Donaldson is having none of it. #T3##SUB2#
Force jumps to the side looking to secure the arm triangle
. Ooooh, that looks tight
Donaldson is gargling but he's managed to escape! Nice work there by Donaldson and Force has given up the dominant position trying to land that submission.
#SUB2#
Force tries for a kimura. Not really close to a finish though.
Donaldson tries to bench press Force off him but Force keeps the position.
Force lands an elbow.
Donaldson knows he needs to get back to his feet asap. He's simply no match for Force on the ground.
Force trying to control the position but Donaldson is working away. #T4#
A bit of a lull in the action. I'm sure it will pick up again soon... even if the ref has to physically pick them up and put them back on their feet.
Force looking to control but instead Donaldson has slipped a leg in, to regain half guard.
Force looks over to his corner - he wants some instructions but his corner are not responding.
Boooooooooooooooooooo!!! God, this has been a terrible round. Come on you two, sort yourselves out!
Donaldson is not content to let Force control the position.#SUB2#
Force is sneakily working for an arm triangle but Donaldson sees it coming and defends easily.
And thats the end of the round the fighters go back to their corners.
Bubba Force dominated that round.
That's the end of the round. The referee orders the cornermen out of the cage so we can get back down to business.
#R2##CL#
Force gets tackled into the cage by Donaldson. Donaldson maintains the clinch.
Force has been the more effective fighter overall so far.
Donaldson goes for a takedown in the clinch but Force prevents it.
Good anti-grappling being displayed by Force as Donaldson tries to tie him up.
Donaldson is trying to break the clinch but Force is controlling him.
We've had a slow start to the round here - hopefully the action picks up.#TD2#
Force turns his hips and lands a very nice judo throw into side control!#SUB2#
Force working hard here to secure a kimura but he's not really in the right position for it. #SUB2#
Force has hold of Donaldson's arm. He's looking for a kimura. Donaldson seems comfortable defending it but Force has shifted his position slighty and is cranking on the arm! Donaldson is real pain and he's forced to tap out! Donaldson is disgusted with himself for not defending it better but Force couldn't care less - he's delighted!
Ladies and gentlemen, after 0:56 of round 2, we have a winner by way of Submission (Kimura). Bubba Force!
|
|
|
|
Event:
Quick Fight Championship
Date: Apr 12, 2016 |
#R1#
Minh swings away with a leg kick that misses.
Minh shoots for a takedown but Force saw that one coming a mile off and avoided it easily.
Minh definitely looks more muscular than last time we saw him fight.#CL#
Minh clinches.
Minh is defending well against a takedown attempt.
Force drops down for a takedown but doesn't get it.
Force stalling in the clinch.
We've had a slow start to the round here - hopefully the action picks up.
Minh lands a nice shot to the body.
Minh stops a takedown attempt from Force.
Quach Minh has stuffed three takedown attempts in the round now. That's going to take a lot out of Bubba Force.
A short left from Minh. #TD#
Minh manages to pull guard. Let's see whether he can land a sub off his back. #T1#
Force passes into half guard. #SUB2#
Force is trying for a guillotine from the top but the pressure isn't in the right place so Minh is just riding it out for now. Force eventually gives up the hold. #SUB2#
Force seems to be working for a kimura but Minh defends the submission attempt.#SUB2#
Force seems like he's working for an arm triangle here. He's freed his trapped foot and he's rotating nicely. Minh is in big trouble! He's tapping out! This one is aaaaaaaaaaaall over!
Ladies and gentlemen, after 2:58 of round 1, we have a winner by way of Submission (Arm Triangle). Bubba Force!
Quach Minh spoke after the fight, saying 'fuck'.
|
|
|
|
Event:
Quick Fight Championship
Date: Apr 09, 2016 |
#R1#
Minh gets his takedown attempt stuffed easily #CL#
and Force counters by clinching up.
The fighters are pressed against the cage, as the pace of the fight slows.
Force has a body lock and is looking for a takedown. Minh is bouncing around trying to prevent the takedown and somehow he has indeed managed to stay on his feet.
Minh is trying to push Force away but Force has him pressed against the cage, so he's going nowhere.
Force wants a takedown.
We've had a slow start to the round here - hopefully the action picks up.
Minh wants to break free. God knows he wants to breaaaak freeee.
Minh looks more muscular than last time we saw him. He must have been on the weights.
A frustrated look appears on Minh's face as he tries to break the clinch.
The pace slowing considerably in the clinch, as Minh takes a break from that fighting nonsense to think about the finer things in life. #TD#
Force has picked Minh up - he's going for a ride! Force dumps his opponent to the mat with a thud and settles into half guard.#T1#
The two fighters exchange a few words. I couldn't hear what they were saying but maybe it's more fun if you make it up yourself. Force connects with a nice short shot to Minh's temple. #SUB#
Force is thinking about going for an arm triangle but he can't free his leg.
Force working some ground and pound from close in. He's looking to maintain this position and strike for a while by the looks of things... although he'll probably advance to full mount in a minute now I've said that.
Well, if Force is going to just lie there, perhaps we should talk about what we're having for dinner tonight
I'm having a ham and pineapple pizza
Yum. Can't wait.
Minh is looking to regain full guard. Not this time though.
Minh looks winded!
Force drops an elbow to the side of Minh's head.
Force working Minh over with strikes. #T2#
Force passes to full mount!
Force tucks in and makes sure he doesn't lose the dominant position.
Force wants to control the pace but Minh is squirming around nicely.
Force will need to keep those long limbs tucked in whilst he's on the ground, to prevent any submissions.#SUB#
Force with some aggressive grappling here. He's looking for submissions here, rather than waiting for the opportunity to counter.
Force pausing momentarily but resumes with a couple of decent strikes that do a bit of damage.
Minh should think about turning a few of those tyres round his middle into muscle if he wants people to take him seriously as an athlete.
Force controlling from mount.
Force lands a heavy elbow. #T3#
Force unloading with bombs!
Minh tries to hold on but Force pushes him away. #SUB#
Force is giving the impression that he's looking to ground and pound but he switches suddenly into a beautiful far side armbar! Minh is forced to tap! Great finish!
Ladies and gentlemen, after 3:35 of round 1, we have a winner by way of Submission (Armbar). Bubba Force!
Quach Minh spoke after the fight, saying 'fuck'.
|
|
|
|
|
|
|