|
Play
by Play - Fighter's Fight Commentary
|
Event:
Quick Fight Championship
Date: Oct 23, 2016 |
#R1##TD#
Brock throws the overhand right but ducks down into a quick takedown attempt. Lesmono was covering up waiting for the punch and Brock finishes the takedown easily into guard. #SUB#
Brock drops back for a leg! It's a sloppy attempt though and Brock jumps back into guard quickly, to retain the dominant position.
Brock wants to pass the guard but Lesmono is keeping the position.
Brock is pushing down on Lesmono's leg trying to pass to half guard. Lesmono is fighting to maintain full guard but Brock has managed to sneak the leg through.
Brock tries to pass to full mount but Lesmono defends it.
Brock seems very keen to just sit and control from half guard but Lesmono does not like that idea so much and is remaining active off his back. #SUB#
Brock is looking for a kimura. It's going to be difficult to finish that from half guard though and Lesmono defends it well.
Lesmono is looking for a sweep. Brock is wise to his cunning plan and keeps the top position.
We've had a slow start to the round here - hopefully the action picks up.
Lesmono is not content to let Brock control the position.
Lesmono really doesn't want to stay on the ground with Brock. If he can't get it back to his feet, it's only a matter of time before he'll be tapping out.#SUB#
Brock is sneakily working for an arm triangle but Lesmono sees it coming and defends easily.
Lesmono wants to control but Brock is keeping busy.
#T1##SUB#
Brock is trying to work for a kimura. This could be trouble! No, Lesmono has managed to free his arm - good work.
Lesmono is looking for a sweep. Brock is wise to his cunning plan and keeps the top position.#SUB#
Brock is working for a submission of some sort.
#SUB#
Brock is looking for a kimura here.
Brock has been talking about how he's improved his wrestling in the run up to the fight so let's see if that's enough to sway the balance.
Brock controlling the action here.#SUB#
The fighters are starting to perspire pretty heavily.
Brock is looking for a kimura but he's never going to get it from there. #T2##SUB#
Brock is looking for a kimura here.
#SUB2#
Lesmono looking for submissions from an awkward position here.
Brock works his way into side control. #SUB#
Brock wants to work for a kimura but he's foiled early by Lesmono, who protects the arm well.
Lesmono stops Brock from passing to mount. #SUB#
Brock is trying to land an Americana. He has the arm isolated but Lesmono is keeping cool and he's avoided the danger for now. #T3#
Lesmono is looking to regain half guard here but Brock keeps moving and retains side control. #SUB#
Brock looking for an arm triangle but it's way too loose to do anything.
Brock is looking to take a break and control but Lesmono is keeping him honest, looking to work from the bottom. #SUB#
Brock wants to work for a kimura but he's foiled early by Lesmono, who protects the arm well.
Lesmono is looking to reverse the position.#SUB#
Brock working hard here to secure a kimura but he's not really in the right position for it.
Lesmono gets back to half guard.#T4##SUB#
Brock is looking for an arm triangle, whilst trying to pass to side control. Lesmono doesn't seem that keen to cooperate though. No luck this time Brock. #SUB#
Lesmono is defending against the submission attempts here by Brock.
#SUB#
Brock is looking for a kimura. It's going to be difficult to finish that from half guard though and Lesmono defends it well.
Boooooooooooooooooooo!!! God, this has been a terrible round. Come on you two, sort yourselves out!
Lesmono trying to hold on to Brock's head to control him but Brock postures up.
And thats the end of the round the fighters go back to their corners.
Edward Charles Brock dominated that round.
The referee calls time. The cornermen exit stage left and we're back to business.
#R2##TD#
Brock shoots in and bounces Lesmono off the cage to secure the takedown into guard.
Brock's corner is telling him to maintain position.
Brock postures up and scores with a shot to the body and a follow up elbow to the head.
Brock postures up and lands a big shot to Lesmono's brow.
Brock looking to sit in guard and control but Lesmono gets the butterfly guard and sweeps. He's now in the guard on the top. #REVB##SUB#
Brock looking for a guillotine here but Lesmono defends easily.
We've had a slow start to the round here - hopefully the action picks up.#SUB#
Brock had isolated an arm as going for a kimura. Lesmono defends it easily.#SUB#
Lesmono avoids a guillotine attempt easily.
Edward Charles Brock overall seems to be getting the better of the ground position in the fight so far.#T1#
Lesmono throwing shots from guard but he's hitting more mat than opponent. #SUB#
Brock escapes his hips to the side and looks to be working for an armbar. Lesmono gives him a little smile and shakes his head. No chance. #SUB#
Brock looking for submissions from the bottom here. Moving his hips around, possibly looking for an armbar.
Lesmono trying to control but Brock is working from the bottom. #SUB#
Brock is active off his back here, looking for submissions.
Lesmono pushes down on Brock's leg and manages to get into half guard.#SUB#
Brock looking to work for a kimura from the bottom.#SUB#
Brock looking to work for a kimura from the bottom.#T2##SUB2#
Lesmono is looking for a kimura but Brock is holding onto that half guard position, so it's hard for Lesmono to get the leverage. #SUB#
Brock is looking to sinch up a guillotine here but Lesmono pulls his head out easily. #SUB2#
Lesmono is looking for a kimura. It's going to be difficult to finish that from half guard though and Brock defends it well.
Lesmono is keeping good posture, landing some ground and pound. #SUB2#
Lesmono is looking for a kimura but he's never going to get it from there.
Brock is pressing down on Lesmono's left leg trying to get back to full guard. He's managed it.#SUB#
Brock is active off his back here, looking for submissions.
#SUB#
Brock has a loose triangle. He'll be looking to tighten that up but Lesmono can see exactly what he's planning and manages to posture up and free himself.
Both fighters are absolutely exhausted here.#SUB#
Brock working for a triangle but Lesmono defends it easily.
#T3##SUB#
Brock has a loose triangle. He'll be looking to tighten that up but Lesmono can see exactly what he's planning and manages to posture up and free himself.
Lesmono tries to free his leg and advance position but Brock is retaining full guard.
The fighters are pressed up against the cage, both looking to find a bit of space to work.
Lesmono keeps trying to improve his position.
Brock is trying to control the position from the bottom.
#SUB#
Brock escapes his hips to the side and looks to be working for an armbar. Lesmono gives him a little smile and shakes his head. No chance. #SUB2#
Lesmono drops back for a leg! It's a sloppy attempt though and Lesmono jumps back into guard quickly, to retain the dominant position. #T4#
Neither fighter has done anything of merit for a good minute or two here and the crowd are not happy about it.#SUB#
Brock has his foot on Lesmono's thigh. He's trying to push off and get in position for a triangle, I think. Lesmono works his way back into a safe position though.#SUB#
Brock working from the bottom, still in full guard. He's managed to get a loose triangle. Lesmono doesn't seem to be doing much to defend here, obviously he feels comfortable in the position. Lesmono manages to throw the legs off his shoulder and he's back into guard - no problem. #SUB#
Brock is looking for a guillotine. You can't force these things though and Lesmono defends well.
Lesmono must be cautious of submissions here, given that his opponent has the superior Jiu Jitsu.#SUB#
Brock throwing his legs up looking for a triangle.
Lesmono lands a couple of digs.
The crowd thankful this round is nearly over.
Lesmono stands and throws Brock's legs to the side, diving into side control.
Brock is trying to control Lesmono's posture but Lesmono avoids it.
And thats the end of the round the fighters go back to their corners.
Edward Charles Brock dominated that second round.
That's the end of the round. The referee orders the cornermen out of the cage so we can get back down to business. This is the final round!
#R3##TD2#
Brock gets caught flat footed, as Lesmono shoots in with a quick takedown into guard.
Lesmono throws a big elbow that misses. #SUB#
Brock is active off his back here, looking for submissions.
Brock keeping moving, preventing Lesmono from controlling successfully.
Lesmono stands up and looks to throw the legs aside to pass to side control. Brock swivels though and keeps the full guard. #SUB#
Brock looking to try and escape his hips here, looking for a submission. It looks like he's going for a triangle but Lesmono is defending well. Brock quickly switches to an armbar and extends the arm! Lesmono has no choice but to tap, to a very quick submission! Wow, that was lightning fast! Brock celebrates on the cage, with the crowd.
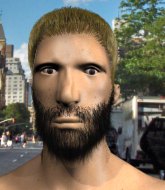
Ladies and gentlemen, after 0:46 of round 3, we have a winner by way of Submission (Armbar). Edward Charles Brock!
Edward Charles Brock got down on his knees post fight and begged the management for a title shot. 'Please, I want that title shot so bad! Give it to me!'
|
|
|
|
Event:
TWGC 11 (265+lbs, D1): Sydney Qualifier - Round 1
Date: May 18, 2016 |
Coming up we have a super heavyweight Tycoon World Grappling Championship rules bout between Kevin Krukowski and Edward Charles Brock. Krukowski comes to the cage accompanied by Disturbed - The Sound of Silence. Edward Charles Brock has the eye of the tiger tonight.
This TWGC bout is 1 fifteen minute round in the super heavyweight division. Introducing today's competitors. In the red corner, competing out of Las Vegas, with a TWGC record of 0 wins and 0 losses; Kevin Krukowski! And in the blue corner, fighting out of Las Vegas, with a TWGC record of 5 wins and 0 losses; Edward Charles Brock!
The judges for this bout are Winston Howard, Summer Carpenter and Bruno Hogan.
Let's get this grappling contest under way! Who will be victorious?
Brock has a takedown stuffed.

Krukowski has managed to clinch.
Brock is trying to work for a single leg takedown but Krukowski pulls him back up using the underhooks.
Krukowski gets underhooks to prevent Brock's takedown attempt.
Kevin Krukowski has stuffed three takedown attempts in the round now. That's going to take a lot out of Edward Charles Brock.
Brock has hold of a leg and is looking for a trip takedown. Krukowski avoids it nicely though and we remain in the clinch.

Krukowski pulls guard effortlessly.

Brock drops back, looking for a kneebar! Krukowski looks panicked! The fighters roll across the mat, one looking to finish, one looking to escape. Krukowski looks to have wriggled free... Yes, he's got his leg free and he's dived into side control! Good work there from Krukowski! Score +4 for clean sweep to past guard: Krukowski (4) vs (0) Brock
Krukowski working away.
We've had a slow start to the round here - hopefully the action picks up.
Krukowski is staying tight to Brock's torso, preventing him from escaping.

Brock wants to improve his position, back to half guard but Krukowski has ideas of his own. He's got hold of Brock's far side arm and it looks like he's got an Americana. Ohh! Ohhhh! OOOOOOOOOH! A human being's arm is not meant to bend like that! Brock is tapping like a morse code operator on the Titanic! SOS SOS! He's out of here! Great win for Krukowski!
Ladies and gentlemen, after 1:58 of round 1, we have a winner by way of Submission (Americana). Kevin Krukowski!
After the fight, Kevin Krukowski was humble in paying tribute to his opponent but made it clear he wants to go on to bigger and better things. It seemed to go down well with the crowd who cheered him loudly. |
|
|
|
Event:
Quick Fight Championship
Date: Apr 14, 2016 |
#R1#
Busioni slaps away a takedown attempt from Brock, before circling back to the center of the mat.
Brock closes the distance and clinches up with Busioni, looking for a takedown. Brock pushes Busioni against the cage but Busioni circles to the side and manages to break the clinch.
Busioni tried to counter with a leg kick but Brock avoided it.
Busioni tries to clinch up but Brock circles away and keeps his distance.#TD2#
Brock shoots in and gets a takedown into Busioni's guard.
Brock in full guard, throwing the ground and pound. No damage this time.
Brock working in close now, lands a nice elbow to the side of Busioni's head.#CUT2#
It looks like Gary Busioni has been cut.
Brock told us pre-fight that he has been working on his escapes in training. Let's see if he can call on some of his new skills to get back to his feet.
We've had a slow start to the round here - hopefully the action picks up.
Brock slips effortlessly into side control - very nice.#SUB2#
Brock has an Americana. Busioni didn't react quickly enough there and he's in big trouble now! He tries to squirm out but is forced to tap! Brock is delighted and gyrates in front of the ring girls. They seem to like the attention - it'll be interesting to see if Brock hooks up with any of them at the after show party.
Ladies and gentlemen, after 1:57 of round 1, we have a winner by way of Submission (Americana). Edward Charles Brock!
A determined Edward Charles Brock didn't want to dwell on this fight in his post fight interview. Instead he was more keen to state he wants a title shot. Let's see if he gets it!
|
|
|
|
Event:
Quick Fight Championship
Date: Apr 09, 2016 |
#R1##TD#
Brock feints and then dives in with a takedown. That was a long way out but the feint bought him enough time to close the distance and complete the takedown. Now we'll play guard for a bit and see who can get the better of that position.
Patterson looks really tired already! That doesn't bode well for a good, competitive fight!
Brock stands up and looks to throw the legs aside to pass to side control. Patterson swivels though and keeps the full guard.
Brock is in a tricky position. We've heard reports from his gym mates at The Iron Palace that he's been drilling escapes, so let's see if he can get back to his feet.
Patterson preventing the ground and pound from doing any damage.
Brock sneaks a leg through and gets to half guard. That was like a knife through butter how easily he passed Patterson's guard. #SUB#
Brock wants to work for an arm triangle but Patterson is really keeping half guard well and defending the submission attempt.
Brock throwing punches and elbows but they're not doing any damage. #SUB#
Brock is trying to work for a kimura but Patterson is defending well.
Brock has been looking to land a fair amount of strikes on the ground. He might be looking to soften his opponent up in order to work for a submission.#SUB#
Brock is looking for a kimura but Patterson is holding onto that half guard position, so it's hard for Brock to get the leverage. #SUB#
Brock is working for a kimura but Patterson is defending it quite comfortably.
#SUB#
Brock is trying to work for a kimura but Patterson is defending well.
#T1#
Brock takes a deep breath and rests his weight momentarily on top of his opponent, to control the position.#SUB#
Brock is sneakily working for an arm triangle but Patterson sees it coming and defends easily.
Brock works his way into full mount! #SUB#
Brock is in full mount, looking to secure a guillotine but Patterson is surviving well by controlling Brock's body position as best he can.
Patterson looks more muscular than last time we saw him. He must have been on the weights.#T2##SUB#
Brock jumps to the side looking to secure the arm triangle
. Ooooh, that looks tight
Patterson is gargling but he's managed to escape! Nice work there by Patterson and Brock has given up the dominant position trying to land that submission.
Patterson is letting Brock control him for a moment.
Brock moves into full mount!
Brock trying to control but he's not successful this time.
The fighters are pressed up against the cage, both looking to find a bit of space to work.
A nice elbow there by Brock.#SUB#
Brock working for a submission but Patterson is keeping him at bay.
Patterson is squirming around, avoiding Brock's attempts to control the action. #T3##SUB#
Brock is controlling this nicely and is looking to make no mistakes. Patterson is trying to wiggle out of this horrible position. Patterson flips to his side and attempts to get a leg in for half guard. Brock anticipates the leg and manages to get behind Patterson and secures both hooks! This could be bad! Brock slips an arm under Patterson chin and tries to position for a rear naked choke. Brock has worked the choke in now and it looks tight. Brock is squeezing on Patterson like an anaconda would it's prey. Patterson fails to tap and has fallen unconscious! We've got ourselves a winner by way of a rear naked choke!
Ladies and gentlemen, after 3:27 of round 1, we have a winner by way of Submission (RNC). Edward Charles Brock!
Edward Charles Brock opened up his post fight interview with a scream to camera that he wants a title shot! Whether he deserves the shot will be up to the management of the organization, so I guess he'll have to wait and see.
Russell Patterson was interviewed post fight and said 'Nothing changes, just the fans!'.
|
|
|
|
Event:
Quick Fight Championship
Date: Apr 02, 2016 |
#R1#
Brock moves out of range of the strikes.
Brock changes levels for a counter takedown but doesn't follow through with his attempt.
Force misses with an uppercut
#TD2#
and Brock decides to take the opportunity to score a takedown. He's landed in Force's guard.
Brock postures up in Force's guard and throws a big left but Force blocks it.
Brock has the superior BJJ but he's also working some ground strikes into his gameplan.#ES#
Force pushes Brock off and gets back to his feet.
Force takes a swing at Brock's ribcage but misses.
Brock steps to the side to avoid the strikes from Force.
Brock gets his takedown attempt stuffed easily
and Brock takes a counter punch right on the button for his troubles.
Brock drops his hands momentarily and Force takes advantage with a crisp shot to the head.
Force looks to score with a jab to the body but Brock is just out of range.
The fans in attendance giving it up for the two fighters, who have really let it all hang out in the last minute or so!
Brock gets his takedown attempt stuffed easily
letting Force counter with a right hand.
Force missing with a left hand there. Brock was out of range so wasted energy throwing that one.
Force sets himself, and Brock steps forward looking for the clinch! Force avoids it this time.
Brock shoots in looking for a double leg takedown. Force defends it nicely.
Nick Force has stuffed three takedown attempts in the round now. That's going to take a lot out of Edward Charles Brock.#T1#
Force takes a swing at Brock's ribcage but misses.
Force lands a glancing blow to the side of Brock's head.
A telegraphed right hand from Force misses the target.
Force connects with a nice looking jab.
#ROC#
Brock is rocked!#KD#
Force throws a big overhand right that connects, sending Brock tumbling to the canvas!
Brock is still in real trouble! Can Force finish him?
The crowd cheering loudly, showing their appreciation for the quality fight we're seeing here.#SU#
Force stands up and waves to Brock to follow him.
Force misses with a double jab
#TD2#
so Brock counters with a double leg into guard. Good agility. #ES#
Force uses the cage to get back to his feet.
Brock seems to have recovered his senses.
Brock looks for a takedown here. Will he get it? Force is fending him off so far but Brock persists. Nope, Force circles away and we're back to standing.
Force seems to be moving with more speed, compared to his last bout. He must have been working on that in the gym.
Force drops Brock with a big left hand! Brock is injured, injured bad! Force jumps in and finished him with strikes! The fight is over!
Ladies and gentlemen, after 2:57 of round 1, we have a winner by way of TKO (Strikes). Nick Force!
A very excited looking Nick Force made sure he remembered to thank all the fans both in the arena and on the internet. He said all the coolest people spend all day on MMA websites, which got a big reaction.
|
|
|
|
Event:
Quick Fight Championship
Date: Mar 26, 2016 |
#R1#
Brock fails miserably with a takedown attempt.
Drogo tries to clinch but Brock moves away #TD2#
and Brock counters with a shoot takedown into half guard. #SUB2#
Brock is trying for a guillotine from the top but the pressure isn't in the right place so Drogo is just riding it out for now. Brock eventually gives up the hold.
Drogo looks like he's trying to stand up.
The ref warns both fighters not to hold the cage as they work up against the meshing.
Brock is scoring with some nice ground and pound from the dominant position.
We've had a slow start to the round here - hopefully the action picks up.#SUB2#
Brock is working for submissions here but there's nothing on.
Drogo tries to roll over but Brock keeps him under control.
The fighters are pressed up against the cage, both looking to find a bit of space to work.#T1##SUB2#
Brock is looking for an arm triangle, whilst trying to pass to side control. Drogo doesn't seem that keen to cooperate though. No luck this time Brock. #SUB2#
Brock is looking for a kimura here.
Brock wants to pass to mount but Drogo is defending the position. #SUB2#
Brock seems to be looking for submissions.
#T2#
Drogo trying to control here.
#SUB2#
Brock is looking for a kimura here.
Drogo trying to control here.
#SUB2#
Brock seems to be working for a kimura but Drogo defends the submission attempt.#SUB2#
Drogo is defending against the submission attempts here by Brock.
#SUB2#
Brock is looking for a kimura but he's never going to get it from there. #T3##SUB2#
Brock seems to be trying to get a kimura but instead Drogo has recovered full guard.
Brock pressing down on his opponent's thigh, looking to pass guard. Drogo is keeping the position for now.
Brock wants to control from the top but Drogo keeps moving. #SUB2#
Brock drops back for a leg here. A bit of a high risk move... He's looking for a kneebar by the looks of things. Now both of them are looking for submissions. Brock seems to have locked his on tight now - Drogo screams in pain and taps out furiously! It certainly was a high risk move but it's paid off for Brock, as he picks up the win!
Ladies and gentlemen, after 4:55 of round 1, we have a winner by way of Submission (Kneebar). Edward Charles Brock!
Edward Charles Brock took to the mic after the fight and begged the organizational hierarchy for a shot at the title.
|
|
|
|
Event:
TWGC 10 (265lbs, D1): Finals - Round 3
Date: Mar 22, 2016 |
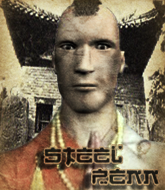
Coming up we have a heavyweight Tycoon World Grappling Championship rules bout between Mr Steel Penn and Edward Charles Brock. Buckle up people - heeeeeeeeeere we go!
This TWGC bout is 1 fifteen minute round in the heavyweight division. Introducing today's competitors. In the red corner, competing out of Hilo, with a TWGC record of 4 wins and 1 losses; Mr Steel Penn! And in the blue corner, fighting out of Las Vegas, with a TWGC record of 4 wins and 0 losses; Edward Charles Brock!
The judges for this bout are Gregory Folan, Robert Douchet and William Peck.
The fighters bow as they face eachother in the middle of the mat and we are under way.
Steel Penn darts in and clinches Brock up against the cage.
Brock is looking for a takedown.
Steel Penn gets a nice trip takedown into half guard. Score +2 for takedown into guard / half guard: Steel Penn (2) vs (0) Brock
Steel Penn is looking for a kimura but Brock is holding onto that half guard position, so it's hard for Steel Penn to get the leverage.
Steel Penn seems to be looking for submissions.
Brock is pressing down on Steel Penn's left leg trying to get back to full guard. He's managed it.
Steel Penn trying to pass the guard but can't manage it just yet.
Brock has managed to work for a loose triangle. I think Steel Penn should be able to defend this one pretty easily though. Oh, Brock has tightened it up now! Steel Penn should have reacted faster there - he's in big trouble and yes, he's tapped out! This one is all over!
Ladies and gentlemen, after 0:45 of round 1, we have a winner by way of Submission (Triangle). Edward Charles Brock!
Edward Charles Brock is the new heavyweight champion!
Edward Charles Brock decided to call for a title shot in his post fight interview, which was very strange given the fact this fight was for a title and he's already the champion. I guess that's what getting punched in the head does for you. |
|
|
|
Event:
TWGC 10 (265lbs, D1): Finals - Round 2
Date: Mar 21, 2016 |
Coming up we have a heavyweight Tycoon World Grappling Championship rules bout between Jari Aarnio and Edward Charles Brock. Aarnio's entrance music is Ice Cube - Why We Thugs. A fine choice. Well, I have no idea who's going to take this one!
This TWGC bout is 1 fifteen minute round in the heavyweight division. Introducing today's competitors. In the red corner, competing out of Amsterdam, with a TWGC record of 3 wins and 0 losses; Jari Aarnio! And in the blue corner, fighting out of Las Vegas, with a TWGC record of 3 wins and 0 losses; Edward Charles Brock!
The judges for this bout are Alec Ball, Trevor Gratis and Steve Smith.
The fighters connect hands in the middle of the mat and we are under way.
Aarnio moves into the clinch.
Brock tries for a takedown. No joy.
Aarnio is looking for a takedown.
Brock drops down for a takedown but doesn't get it.
We've been hearing reports that Aarnio has been drilling takedowns in recent sessions so let's see if that has an impact on the result of this fight.
Aarnio is looking for a takedown up against the cage. Brock gets underhooks though and prevents the takedown attempt.
Aarnio lands a nice trip takedown into half guard.
Score +2 for takedown into guard / half guard: Aarnio (2) vs (0) Brock
Brock actively working from the bottom here.
Aarnio really does look like a pencil wearing a pair of gloves. Let's hope he has a gameplan to suit that ridiculous body shape.
Brock is looking to improve his position.
We've had a slow start to the round here - hopefully the action picks up.
Brock looking to work for a kimura from the bottom.
Brock looking to work for a kimura from the bottom.

That's one minute gone in the round.
Brock looking for submissions from an awkward position here.
Still in half guard, Aarnio seems content to control.
Aarnio passes to side control. Score +3 for passing guard: Aarnio (5) vs (0) Brock
Brock tries to work a leg under to get back to half guard but Aarnio wriggles his own leg back out and remains in side control.
Aarnio working hard here to secure a kimura but he's not really in the right position for it.
Brock tries to improve position but can't.

That's two minutes gone in the round.
Aarnio is looking to take a break and control but Brock is keeping him honest, looking to work from the bottom.
Brock is trying to get back to half guard.
Aarnio trying to control the action but Brock is working from the bottom.
Brock felt the need to train up his defensive grappling in the buildup to the fight. Presumably he was expecting to be in a difficult position like this, so let's see if he can get out of it.
Brock can't do much from the bottom here.
Aarnio tries for an arm triangle. That looks pretty tight to me. Is this one over!?! Possibly, maybe, no Aarnio has let go of the choke. Obviously it wasn't as tight as we thought!

That's three minutes gone in the round.
Brock is positioning himself to get back to half guard.
Aarnio wants to lay and pray for a moment but Brock keeps working.
Aarnio works to advance to full mount. Brock defends for a few seconds but eventually he succumbs. Score +2 for reaching mount: Aarnio (7) vs (0) Brock
The fighters are pressed up against the cage, both looking to find a bit of space to work.
Brock sneaks a leg under to get to half guard.
Aarnio is working for a kimura but Brock is defending it quite comfortably.
Brock wants to improve his position but Aarnio is controlling well.

That's four minutes gone in the round.
Brock actively working from the bottom here.
Brock has no desire to be mounted, so is trying to control. Aarnio is working away from the top position though.
Aarnio seems to be working for a kimura but Brock defends the submission attempt.
Aarnio is working for submissions here but there's nothing on.
Aarnio prevents Brock from improving his position.
Aarnio tries to pass to full mount but Brock defends it.

That's five minutes gone in the round.
Brock looking for submissions from an awkward position here.
Aarnio seems to be looking for submissions.
Brock actively working from the bottom here.
Brock is staying active underneath Aarnio, who seems content to just control the action from this position.
Aarnio passes to full mount! Score +3 for passing guard: Aarnio (10) vs (0) Brock
Aarnio looking to control but Brock is working nicely, looking to advance position himself.
Brock is in all sorts of trouble here.
Aarnio controlling the position easily from mount.

That's six minutes gone in the round.
Brock tries to reverse the position but Aarnio maintains control.
Aarnio trying to control but he's not successful this time.
Brock is trying to escape the mount.
Aarnio is working for a guillotine from mount but Brock frees his head quite easily.
Aarnio prevents Brock from getting the reversal.

That's seven minutes gone in the round.
Brock regains half guard.
Brock has hold of a guillotine but he's not going to be able to crank on it really with only half guard, so it's no trouble for Aarnio. Oh but Brock has got full guard now! Oh boy! This one could be over very soon! Aarnio goes limp - he's gone! Brock jumps up and celebrates with the crowd - fantastic submission finish!
Ladies and gentlemen, after 7:26 of round 1, we have a winner by way of Submission (Guillotine). Edward Charles Brock!
A pretty intense looking Edward Charles Brock took the opportunity post-fight to ask for a shot at the title. |
|
|
|
Event:
TWGC 10 (265lbs, D1): Finals - Round 1
Date: Mar 20, 2016 |
Coming up we have a heavyweight Tycoon World Grappling Championship rules bout between Ho Lee Fuk and Edward Charles Brock. Over to our ring announcer for the fighter introductions!
This TWGC bout is 1 fifteen minute round in the heavyweight division. Introducing today's competitors. In the red corner, competing out of Los Angeles, with a TWGC record of 2 wins and 0 losses; Ho Lee Fuk! And in the blue corner, fighting out of Las Vegas, with a TWGC record of 2 wins and 0 losses; Edward Charles Brock!
The judges for this bout are Alec Ball, Dillan Fox and Robert Douchet.
The fighters bow as they face eachother in the middle of the mat and we are under way.
Fuk closes the distance and pushes Brock back into the cage.
Fuk gets underhooks to prevent Brock's takedown attempt.
Fuk gets a trip takedown into half guard. Score +2 for takedown into guard / half guard: Fuk (2) vs (0) Brock
Brock tries to roll over but Fuk keeps him under control.
Fuk is trying for a guillotine from the top but the pressure isn't in the right place so Brock is just riding it out for now. Fuk eventually gives up the hold.
Fuk trying to pass the guard but Brock defending well.
Fuk wants to control but Brock is keeping him busy.
We've had a slow start to the round here - hopefully the action picks up.
Brock is looking to sinch up a guillotine here but Fuk pulls his head out easily.
Brock looking for submissions from an awkward position here.
Fuk looking for a kimura but he'll have to free his other leg if he wants to finish that. Perhaps he's just using it as a distraction technique.
The fighters are pressed up against the cage, both looking to find a bit of space to work.
That's one minute gone in the round.
Fuk with a momentary lay and pray from half guard.
Brock looking to force a kimura from the bottom here. He's concentrating on that move too much though and Fuk pushes past his half guard into mount! Score +3 for passing guard: Fuk (5) vs (0) Brock
Brock is looking to get to half guard.
Fuk forces the positional change into back control. Score +3 for taking back: Fuk (8) vs (0) Brock
Fuk working for the choke.
Brock prevents Fuk from getting a body triangle.
That's two minutes gone in the round.
Brock manages to reverse the position and now he's in Fuk's guard. Nice work there by Brock.
Score +2 for sweep to guard / half guard: Fuk (8) vs (2) Brock
Fuk tries to land a sweep but no joy.
Fuk looking for a guillotine here but Brock defends easily.
Brock looking to pass the guard.
Fuk working for a triangle but Brock defends it easily.
Fuk wants to improve his position but instead Brock has moved into half guard.
Brock wants to pass the guard but Fuk is defending well.
The ref warns both fighters not to hold the cage as they work up against the meshing.
That's three minutes gone in the round.
Brock is still trying to improve position.
Fuk is in a tricky position but he's been working on his transitions down at Cylon Training Academy, so we'll see if he gets out of it.
Fuk regains full guard. Nicely done.
Brock pressing down on his opponent's thigh, looking to pass guard. Fuk is keeping the position for now.
Brock looking to sit in guard and control but Fuk gets the butterfly guard and sweeps. He's now in the guard on the top. Score +2 for sweep to guard / half guard: Fuk (10) vs (2) Brock
Brock looking for subs off his back but Fuk has passed one foot through into half guard.
Fuk works his way into full mount! Score +3 for passing guard: Fuk (13) vs (2) Brock
Brock is trying desperately to improve position.
That's four minutes gone in the round.
Fuk with some aggressive grappling here, looking for the finish.
Fuk prevents Brock from getting the reversal.
Brock felt the need to train up his defensive grappling in the buildup to the fight. Presumably he was expecting to be in a difficult position like this, so let's see if he can get out of it.
Fuk trying to control but he's not successful this time.
Fuk content just to control the position here.
Fuk looking for an armbar but decides to keep the dominant position instead.
Brock really trying hard to get back to half guard here.
That's five minutes gone in the round.
Brock sneaks a leg back under and regains half guard and is working straight away to try and get back to guard. He hasn't managed just yet though.
Brock looking for submissions from an awkward position here.
Fuk is trying to work for a kimura but Brock is defending well.
Brock actively working from the bottom here.
Brock looking for submissions from an awkward position here.
Brock is defending against the submission attempts here by Fuk.
Fuk wants to work for an arm triangle but Brock is really keeping half guard well and defending the submission attempt.
That's six minutes gone in the round.
Fuk slows the pace down in half guard.
Fuk is keen to just control but Brock is a slippery customer.
Fuk content to sit in half guard and control for a moment.
Fuk trying to control the action but Brock is working from the bottom.
Brock looking to work for a kimura from the bottom.
Fuk is looking for a kimura. It's going to be difficult to finish that from half guard though and Brock defends it well.
That's seven minutes gone in the round.
Brock is trying to maintain the position but Fuk is very close to passing his half guard.
Fuk wants to work for an arm triangle but Brock is really keeping half guard well and defending the submission attempt.
Brock looking to work for a kimura from the bottom.
Fuk wants to work for an arm triangle but Brock is really keeping half guard well and defending the submission attempt.
Brock is looking to improve his position.
Brock moves his hips nicely and gets into full guard.
Brock looks to be working for a triangle here. Oh, it looks like he might have it! Fuk has picked Brock up and slammed him! Brock can't keep hold of the triangle and Fuk manages to pass to side control! Score +3 for passing guard: Fuk (16) vs (2) Brock

That's eight minutes gone in the round.
Brock sneaks a leg under to get back to half guard.
Brock looking for submissions from an awkward position here.
Brock tries to get to full guard but Fuk has control of the leg.
Fuk is controlling the pace.
Fuk is trying for a guillotine from the top but the pressure isn't in the right place so Brock is just riding it out for now. Fuk eventually gives up the hold.
Brock actively working from the bottom here.

That's nine minutes gone in the round.
Fuk is thinking about going for an arm triangle but he can't free his leg.
Brock looking for submissions from an awkward position here.
Fuk stalling.
Brock is looking to sinch up a guillotine here but Fuk pulls his head out easily.
Brock is staying active underneath Fuk, who seems content to just control the action from this position.
Brock looking to work for a kimura from the bottom.
Fuk is trying to work for a kimura but Brock is defending well.

That's ten minutes gone in the round.
Fuk is looking to advance position but Brock won't allow it.
Brock looking to work for a kimura from the bottom.
Fuk controlling the action here.
Fuk trying to control the action but Brock is working from the bottom.
Fuk is working for a kimura but Brock is defending it quite comfortably.
Fuk wants to free his trapped foot but Brock is holding on for dear life with his legs.

That's eleven minutes gone in the round.
Brock looking for submissions off his back.
Brock tries to roll over but Fuk keeps him under control.
Fuk is trying for a guillotine from the top but the pressure isn't in the right place so Brock is just riding it out for now. Fuk eventually gives up the hold.
Brock is looking to regain full guard. Not this time though.
Brock looking for submissions off his back.

That's twelve minutes gone in the round.
Brock is looking to sinch up a guillotine here but Fuk pulls his head out easily.
Fuk seems to be looking for submissions.
Fuk is working for a kimura but Brock is defending it quite comfortably.
Fuk is trying to control. Brock wants to improve his position but can't escape this time.
Fuk trying to pass the guard but Brock defending well.
Fuk seems to be looking for submissions.

That's thirteen minutes gone in the round.
Brock works his way to full guard. Good work.
Brock trying to keep a closed guard but Fuk is proving a slippery customer.
Fuk trying to control the position from guard on top but Brock is wriggling around, looking for whatever he can.
Brock is active off his back here, looking for submissions.
Fuk pressing down on his opponent's thigh, looking to pass guard. Brock is keeping the position for now.
Brock keeping moving, preventing Fuk from controlling successfully.
Brock is active off his back here, looking for submissions.
Fuk is posturing up here but Brock has hold of an arm and he's gone for an armbar! Fuk tries to roll out but it's too tight and Fuk has to tap! Slick submission there by Brock!
Ladies and gentlemen, after 14:55 of round 1, we have a winner by way of Submission (Armbar). Edward Charles Brock!
Edward Charles Brock took his opportunity to call for a title shot in his post fight interview. |
|
|
|
Event:
TWGC 10 (265lbs, D1): Los Angeles Qualifier - Round 2
Date: Mar 12, 2016 |
Coming up we have a heavyweight Tycoon World Grappling Championship rules bout between Maki Pulu and Edward Charles Brock. Pulu comes to the cage accompanied by Alive. Well, the cameraman is lingering on a pretty young lady for a bit too long there. Keep your eyes on the prize buddy or you'll miss the fighter intros!
This TWGC bout is 1 fifteen minute round in the heavyweight division. Introducing today's competitors. In the red corner, competing out of New York, with a TWGC record of 1 wins and 0 losses; Maki Pulu! And in the blue corner, fighting out of Las Vegas, with a TWGC record of 1 wins and 0 losses; Edward Charles Brock!
The judges for this bout are Don Winkell, Percy O'Donnell and Jack Bonds.
The official calls the fighters to the middle and the contest is under way.
Brock misses with a takedown attempt - Pulu sprawls well and throws a nice strike on the way out which just misses.
Brock shoots in and drives through. Pulu sprawls well.
Pulu shoots in and scores a nice double leg takedown into half guard. Score +2 for takedown into guard / half guard: Pulu (2) vs (0) Brock
Pulu is trying to work for a kimura but Brock is defending well.
Brock is not content to let Pulu control the position.
Brock wants to control but Pulu is keeping busy.
Brock felt the need to train up his defensive grappling in the buildup to the fight. Presumably he was expecting to be in a difficult position like this, so let's see if he can get out of it.
We've had a slow start to the round here - hopefully the action picks up.
Pulu is trying to control. Brock wants to improve his position but can't escape this time.
Brock has hold of a guillotine but he's not going to be able to crank on it really with only half guard, so it's no trouble for Pulu. Oh but Brock has got full guard now! Oh boy! This one could be over very soon! Pulu goes limp - he's gone! Brock jumps up and celebrates with the crowd - fantastic submission finish!
Ladies and gentlemen, after 1:59 of round 1, we have a winner by way of Submission (Guillotine). Edward Charles Brock!
A determined Edward Charles Brock didn't want to dwell on this fight in his post fight interview. Instead he was more keen to state he wants a title shot. Let's see if he gets it! |
|
|
|
Event:
TWGC 10 (265lbs, D1): Los Angeles Qualifier - Round 1
Date: Mar 11, 2016 |
Coming up we have a heavyweight Tycoon World Grappling Championship rules bout between Edward Charles Brock and Dennis Oppelaar. I don't know about you partner, but I'm pumped for this one!
This TWGC bout is 1 fifteen minute round in the heavyweight division. Introducing today's competitors. In the red corner, competing out of Las Vegas, with a TWGC record of 0 wins and 0 losses; Edward Charles Brock! And in the blue corner, fighting out of Los Angeles, with a TWGC record of 0 wins and 1 losses; Dennis Oppelaar!
The judges for this bout are Percy O'Donnell, Jack Bonds and Timothy Bukovac.
The fighters connect hands in the middle of the mat and we are under way.
Oppelaar shoots in but no luck this time.

Oppelaar looking for a takedown here - he's got it. Score +2 for takedown into guard / half guard: Brock (0) vs (2) Oppelaar
Brock keeping moving, preventing Oppelaar from controlling successfully.
Oppelaar pressing down on his opponent's thigh, looking to pass guard. Brock is keeping the position for now.
Oppelaar keeps trying to improve his position.
Oppelaar pushes down on Brock's leg and manages to get into half guard.
Brock's coaches at have been working on his defensive grappling in preparation for this fight so let's see if he can get out of this tricky position.
Brock looking for submissions off his back.
We've had a slow start to the round here - hopefully the action picks up.
Oppelaar slows the pace down in half guard.
Brock tries to get to full guard but Oppelaar has control of the leg.
That's one minute gone in the round.
Oppelaar moves into full mount! Brock won't be happy about that! Score +3 for passing guard: Brock (0) vs (5) Oppelaar
Brock is writhing around trying to get back to his feet.
Brock is in all sorts of trouble here.
Brock is working hard here to advance position.
Brock wants to control but Oppelaar is having none of it.
Oppelaar wants to control the pace but Brock is squirming around nicely.
Oppelaar controlling the position easily from mount.
Brock is squirming around, avoiding Oppelaar's attempts to control the action.
Oppelaar controlling from mount.
The fighters are pressed up against the cage, both looking to find a bit of space to work.
Oppelaar trying to control but he's not successful this time.
That's two minutes gone in the round.
Brock really trying hard to get back to half guard here.
Brock gets back to half guard.
Brock works his way to full guard. Good work.
Brock escapes his hips to the side and looks to be working for an armbar. Oppelaar gives him a little smile and shakes his head. No chance.
Brock working from the bottom, still in full guard. He's managed to get a loose triangle. Oppelaar doesn't seem to be doing much to defend here, obviously he feels comfortable in the position. Oppelaar manages to throw the legs off his shoulder and he's back into guard - no problem.
Oppelaar got a little sloppy there for a moment and Brock has worked his way into a loose triangle - can he finish it?! No, Oppelaar has managed to get both his arms back between Brock's legs - danger averted.
Brock is throwing his legs up, looking for submissions. Oppelaar is aware though and is defending well.
Oppelaar passes easily into side control. Nice work. Score +3 for passing guard: Brock (0) vs (8) Oppelaar
Brock is looking to regain half guard here but Oppelaar keeps moving and retains side control.
That's three minutes gone in the round.
Brock gets one leg under and gets the fight to half guard.
Oppelaar is thwarting Brock's attempts to control the position.
The ref warns both fighters not to hold the cage as they work up against the meshing.
Oppelaar wants to take a breather but Brock is having none of it.
Oppelaar moves into full mount! Brock won't be happy about that! Score +3 for passing guard: Brock (0) vs (11) Oppelaar
Brock is squirming around, avoiding Oppelaar's attempts to control the action.
Oppelaar is in a good position here but he's just trying to control... And he's not even managing to do that successfully.
Brock tries to get back to half guard but can't.
Oppelaar can't quite control the action as he would like just now, as Brock is looking to escape.
That's four minutes gone in the round.
Brock gets back to half guard.
Oppelaar is working for a kimura but Brock is defending it quite comfortably.
Brock is looking to regain full guard. Not this time though.
Oppelaar frees up his trapped foot and advances to mount. Score +3 for passing guard: Brock (0) vs (14) Oppelaar
Oppelaar trying to control but Brock is having none of it.
That's five minutes gone in the round.
Oppelaar might have to switch it up a bit here because his efforts to control Brock haven't been going to plan, at least at the current moment in time.
Brock is looking to get to half guard.
Oppelaar can't quite control the action as he would like just now, as Brock is looking to escape.
Brock is desperately trying to get back to half guard.
That's six minutes gone in the round.
Brock bucks up and manages to get a nice reversal! He's in guard on the top - nicely done! Score +2 for sweep to guard / half guard: Brock (2) vs (14) Oppelaar
Oppelaar controls Brock momentarily but Brock frees himself.
Brock thinks about going for a leg but decides against it, in order to maintain the position.
Brock trying to control the position from guard on top but Oppelaar is wriggling around, looking for whatever he can.
Oppelaar is working from a closed guard but he's struggling to control his opponent.
Brock seems content to control from guard here. He's going to have to remain active though if he doesn't want to get stood back up.
Oppelaar trying to control the position.
That's seven minutes gone in the round.
Brock is trying to work a guillotine from the top, or something like that? Don't know how he thinks he's going to get a finish from there.
Brock thinks about going for a leg but decides against it, in order to maintain the position.
Brock stands up and looks to throw the legs aside to pass to side control. Oppelaar swivels though and keeps the full guard.
Oppelaar wants to sweep but no luck.
Brock looking to pass the guard.
Brock stopping the sweep attempt from Oppelaar.
Oppelaar working from the bottom, still in full guard. He's managed to get a loose triangle. Brock doesn't seem to be doing much to defend here, obviously he feels comfortable in the position. Brock manages to throw the legs off his shoulder and he's back into guard - no problem.
Oppelaar wants to sweep here but Brock controlling him for the moment.
That's eight minutes gone in the round.
Brock trying to control but Oppelaar is working from the bottom.
Brock advances position into side control! Score +3 for passing guard: Brock (5) vs (14) Oppelaar
Brock trying to control the position but Oppelaar is working away.
Brock thinks about going for a far side armbar but bails out and retains the dominant position instead.
Oppelaar manages to work his way to half guard, despite Brock's best efforts.
Brock is trying to work for a kimura. This could be trouble! No, Oppelaar has managed to free his arm - good work.
Brock wants to control but Oppelaar is keeping him busy.
That's nine minutes gone in the round.
Oppelaar is pressing down on Brock's left leg trying to get back to full guard. He's managed it.
Brock pressing down on his opponent's thigh, looking to pass guard. Oppelaar is keeping the position for now.
Oppelaar lands a beautiful sweep and he's now moved into his opponent's guard. Score +2 for sweep to guard / half guard: Brock (5) vs (16) Oppelaar
Oppelaar got a little sloppy there for a moment and Brock has worked his way into a loose triangle - can he finish it?! No, Oppelaar has managed to get both his arms back between Brock's legs - danger averted.
Brock keeping full guard, as Oppelaar tries to pass.
Oppelaar wants to control from the top but Brock keeps moving.
Brock is looking for a triangle but Oppelaar pushes his legs off easily.
Oppelaar wants to control from the top but Brock keeps moving.
That's ten minutes gone in the round.
Oppelaar has a momentary lapse of concentration, allowing Brock to throw up a leg and lock on what appears to be a pretty tight triangle! Oppelaar is fighting it off but it's all too little too late - Brock pulls down on the head and he's put Oppelaar to sleep! This one is all over!
Ladies and gentlemen, after 10:20 of round 1, we have a winner by way of Submission (Triangle). Edward Charles Brock!
Edward Charles Brock took to the mic after the fight and begged the organizational hierarchy for a shot at the title. |
|
|
|
|
|
|
|
|
|
|
|
|
|
|
|
|
|
|
|
|
|
|
|
|
|
|
|
|
|
|
|
|
|
|
|
|
|
|
|
|
|
|
|
|
|
|
|
|
|
|
|
|
|
|
|
|
|
|
|
|
|
|
|
|
|
|
|
|
|
|
|
|
|
|
|
|
|
|
|
|
|
|
|
|
|
|
|
|
|
|
|
|
|
|
|
|
|
|
|
|
|
|
|
|
|
|
|
|
|
|
|
|
|
|
|
|
|
|
|
|
|
|
|
|
|
|
|
|
|
|
|
|
|
|
|
|
|
|
|
|
|
|
|
|
|
|
|
|
|
|
|
|
|
|
|
|
|
|
|
|
|
|
|
|
|
|
|
|
|
|
|
|
|
|
|
|
|
|
|
|
|
|
|
|
|
|
|
|
|
|
|
|