|
Play
by Play - Fighter's Fight Commentary
|
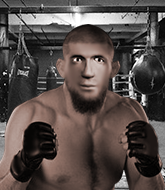
Event:
Revolution XC 17
Date: Mar 25, 2017 |
#R1#
Lacey avoids a punch combination nicely.
Cage looks to score with a combo but nothing lands.
Good shot there by Cage.
Cage misses with a jab, cross combination.
Lacey uses some good footwork to avoid the body shot by Cage.
Lacey shoots in looking for a double leg takedown. Cage defends it nicely.
We've had a slow start to the round here - hopefully the action picks up.
Lacey shoots in for a takedown. "I don't think so" says Cage as he avoids it easily.
Cage throws a combination but comes up with nothing but fresh air.
Lacey feints the counter takedown.
Cage lands a nice shot to the body.
#T1#
Cage lunges in with swinging rights and lefts but Lacey circles away quickly and effectively.
Cage swinging wildly here.
Cage slips in close and lands a nice hook before moving back out of range.
Cage misses with a double jab.
Lacey changes levels for a counter takedown but doesn't follow through with his attempt.
A telegraphed takedown attempt from Lacey is defended easily by Cage.
Max Cage has stuffed three takedown attempts in the round now. That's going to take a lot out of Kron Lacey.
Lacey ducks right into an uppercut from Cage. #T2#
Lacey shoots and misses
and Cage counters with a crisp hook to the side of the head.
Cage lands with a cross to side of his opponent's head.
Cage lands the left hand.
Lacey showing good head movement there, avoiding the strikes from Cage.
We've seen a great period of action over the last minute or so - credit to both fighters for going all out!
Cage thuds his right hand into Lacey's forehead from close range. That could be painful for both fighters.
Cage throws a right and a left that Lacey avoids nicely.
Lacey walks straight into an uppercut. Luckily it didn't land flush.
Cage lands a right hook to the body.
#T3#
A right-left combo lands from Cage.
The fighters circle momentarily. Cage darts into range and connects with a nice straight punch.
Lacey fails with the takedown
and Cage counters with a nice body shot.
Max Cage seems to be the more aggressive standup fighter in this bout.
This fight brought to you by 5M nutrition - it's mmmmm tasty. Nice jab by Cage.
Lacey shoots and misses #CL#
and Cage counters by moving into the clinch. Good anticipation by Cage.
Lacey is working for a takedown up against the cage. He can't get it on this occasion though.
Lacey is looking for a takedown up against the cage. Cage gets underhooks though and prevents the takedown attempt.
Lacey goes for a takedown attempt but Cage pushes him away and we're back to fighting at a distance.
Lacey shoots in for a takedown but doesn't get it.
Lacey misses with a combination
and Cage counters nicely by changing levels and landing a hook to the body.
Lacey looks winded!#T4#
Cage sizes up Lacey with a pawing jab and scores with a straight right down the middle.
The crowd are loving this. Great action here.
Lacey shoots in for a double leg but Cage sprawls well. That's going to sap some energy.
Cage scores with a decent looking hook.
Cage stuffs the takedown attempt from Lacey. Lacey gets slowly back to his feet. #KD#
Oooooh!!! Cage has knocked Lacey down with a huge combo! Cage steps away and waves a wobbly Lacey back to his feet! This one might not go much longer!#ROC#
Lacey is rocked!#CUT#
It looks like Kron Lacey has been cut.
Cage stuffs a takedown. It's all about dictating where the fight takes place and Cage wants it to stay on the feet.
Cage misses with a few strikes there.
Lacey misses with a takedown attempt
and Cage counters with a crisp hook to the side of the head.
And thats the end of the round the fighters go back to their corners.
Max Cage dominated that round.
The cut man is working on Kron Lacey's cut.
That's the end of the round. The referee orders the cornermen out of the cage so we can get back down to business.
#R2#
Lacey tries to close the distance and clinch but Cage swats him to one side with an open hand palm strike and circles away.
Cage stuffs the takedown.
Cage scores with a hook to the body. Lacey takes a step back and tries to catch his breath.
Lacey shoots in and drives through. Cage sprawls well.
Cage lands a jab to Lacey's midsection.
Cage lands with a straight right. Lacey didn't see that one coming.
Cage misses with a double jab.
Lacey uses some good footwork to avoid the body shot by Cage.
We've had a slow start to the round here - hopefully the action picks up.
Nice body punch from Cage.
Cage connects with a looping left hand that seems like it dazed Lacey momentarily.
Max Cage is looking to throw some combinations by the looks of things.
Lacey fails miserably with a takedown attempt.
Max Cage has stuffed three takedown attempts in the round now. That's going to take a lot out of Kron Lacey.#T1#
A jab from Cage does it's job there.
Lacey on the wrong end of a vicious looking body shot.
A decent looking cross lands there for Cage.
Lacey is still on wobbly legs! Can Cage finish him?
Lacey walks into a stiff left hand from Cage.
Lacey takes one on the button.
Lacey leaves his chin hanging out and Cage seizes the opportunity with an uppercut! Lacey crumbles to the floor in a heap, and the referee steps in and tends to the downed fighter! What a knockout!
Ladies and gentlemen, after 1:46 of round 2, we have a winner by way of KO (Punch). Max Cage!
|
|
|
|
Event:
TWGC 15 (155lbs, D4): Helsinki Qualifier - Round 2
Date: Mar 05, 2017 |
Coming up we have a lightweight Tycoon World Grappling Championship rules bout between Kron Lacey and Ali Jamal. The crowd seem to be enjoying Jamal's choice of entrance music: Re-Rewind. The crowd giving both fighters a great reception on their way into the arena. That's good to see.
This TWGC bout is 1 fifteen minute round in the lightweight division. Introducing today's competitors. In the red corner, competing out of Los Angeles, with a TWGC record of 1 wins and 0 losses; Kron Lacey! And in the blue corner, fighting out of London, with a TWGC record of 1 wins and 0 losses; Ali Jamal!
The judges for this bout are Tarja Halkonen, Johanna Lukiainen and Marco Blurström.
The official calls the fighters to the middle and the contest is under way.

Jamal clinches up against the cage.

Lacey tightens his grip and picks Jamal up, before dumping him to the ground. Jamal manages to land in guard. Score +2 for takedown into guard / half guard: Lacey (2) vs (0) Jamal
Jamal looking to control the pace of the fight rather than finish it.
Lacey preventing the sweep.
Jamal is working the butterfly guard. He manages to land a nice scissor sweep and is now in half guard on the top. Nice move. Score +2 for sweep to guard / half guard: Lacey (2) vs (2) Jamal
Jamal is just sitting in half guard, waiting for something to happen.
Lacey trying to control from the bottom.
The fighters are pressed up against the cage, both looking to find a bit of space to work.
We've had a slow start to the round here - hopefully the action picks up.

Jamal is looking for a kimura but Lacey is holding onto that half guard position, so it's hard for Jamal to get the leverage.
Jamal is looking to advance position but Lacey won't allow it.
Jamal is thwarting Lacey's attempts to control the position.
Jamal is just sitting in half guard, waiting for something to happen.

That's one minute gone in the round.
Jamal wants to pass to mount but Lacey is defending the position.
Jamal keeps trying to improve his position.
Lacey wants to get back to full guard.
Jamal is working hard to pass the guard. He's done it - he's now in full mount! Trouble for Lacey! Score +3 for passing guard: Lacey (2) vs (5) Jamal
Lacey is looking to get to half guard.
Jamal fails to advance to Lacey's back.
Jamal looking for an armbar but decides to keep the dominant position instead.
Jamal fails to move to back control.
Lacey can't escape the position.
Jamal is trying to take his opponent's back.

That's two minutes gone in the round.
The fighters are going at a pretty good pace and they're both starting to sweat now.
Lacey tries to hold on but Jamal pushes him away.
Jamal tucks in and makes sure he doesn't lose the dominant position.
Jamal jumps to side control looking for an arm triangle but Lacey manages to avoid the submission attempt.
Jamal tries to advance to mount but Lacey denies him.
Lacey gets back to half guard.
Jamal is working for a kimura but Lacey is defending it quite comfortably.
Jamal seems to be looking for submissions.
Lacey slips a foot under and gets full guard. Nice work.
Lacey not looking particularly offensive just at the moment.

That's three minutes gone in the round.
Jamal is pushing down on Lacey's leg trying to pass to half guard. Lacey is fighting to maintain full guard but Jamal has managed to sneak the leg through.
Jamal wants to pass to mount but Lacey is defending the position.
Jamal wants to work for an arm triangle but Lacey is really keeping half guard well and defending the submission attempt.
Jamal wants to lay and pray for a moment but Lacey keeps working.
Jamal trying to mount his opponent but Lacey defends it.
Jamal is looking for a kimura. It's going to be difficult to finish that from half guard though and Lacey defends it well.
Lacey is trying to control but can't.
Lacey is trying to get back to full guard.
Jamal wants to work for an arm triangle but Lacey is really keeping half guard well and defending the submission attempt.
Jamal is trying to work for a kimura but Lacey is defending well.

That's four minutes gone in the round.
Lacey won't allow Jamal to pass to mount.

Lacey looking for submissions from an awkward position here.
Lacey regains full guard. Nicely done.
Lacey looking to hit a scissor sweep but Jamal is one step ahead there.
Jamal tries to free his leg and advance position but Lacey is retaining full guard.
Jamal must be cautious of submissions here, given that his opponent has the superior Jiu Jitsu.
Jamal slows down the pace of the fight, as he sits in guard.
Lacey has a butterfly guard looking to sweep but Jamal has passed into side control.
Score +3 for passing guard: Lacey (2) vs (8) Jamal
Lacey stops Jamal from passing to mount.

That's five minutes gone in the round.
A lull in the action here as Jamal stalls from top position.
Jamal tries to move into full mount but can't pass Lacey's legs.
Jamal trying to control the action but Lacey is working from the bottom.
Lacey tries to buck Jamal off but Jamal is having none of it.
Lacey prevents Jamal from moving into mount.
The ref warns both fighters not to hold the cage as they work up against the meshing.
Lacey tries to bench press Jamal off him but Jamal keeps the position.
You can see the frustration on Lacey's face, being in this tough position on the bottom.
Jamal tries for a kimura. Not really close to a finish though.
Jamal looking for an arm triangle but it's way too loose to do anything.

That's six minutes gone in the round.
Jamal tries for a kimura. Not really close to a finish though.
Lacey tries to work a leg under to get back to half guard but Jamal wriggles his own leg back out and remains in side control.
Lacey manages to get back to half guard.
Jamal is trying for a guillotine from the top but the pressure isn't in the right place so Lacey is just riding it out for now. Jamal eventually gives up the hold.
Jamal trying to control the action but Lacey is working from the bottom.
Jamal prevents Lacey from improving his position.
Lacey won't allow Jamal to pass to mount.

That's seven minutes gone in the round.
Lacey wants to improve his position but Jamal is controlling well.
Jamal wants to pass to mount but Lacey is defending the position.
Lacey is looking to control Jamal's leg but it's slowly edging free. Can Lacey avoid being mounted?
Lacey wants to get back to full guard.
Jamal wants to pass to mount but Lacey is defending the position.
Jamal is keen to just control but Lacey is a slippery customer.
Lacey is looking to regain full guard. Not this time though.
Jamal wants to pass the guard but Lacey is defending well.
Jamal is sneakily working for an arm triangle but Lacey sees it coming and defends easily.
Jamal is thwarting Lacey's attempts to control the position.

That's eight minutes gone in the round.
Jamal passes to full mount! Score +3 for passing guard: Lacey (2) vs (11) Jamal
Jamal wants to control the pace but Lacey is squirming around nicely.
Lacey tries to lock up and control but Jamal gives him a forearm to the face and pushes him away.
Jamal working for a submission but Lacey is keeping him at bay.
Jamal looking for an armbar but decides to keep the dominant position instead.
Jamal wants to take Lacey's back here but Lacey is holding on to an arm, himself looking to escape.
Lacey manages to regain half guard. Good work.
Jamal wants to take a breather but Lacey is having none of it.
Jamal controlling the action here.
Jamal wants to free his trapped foot but Lacey is holding on for dear life with his legs.

That's nine minutes gone in the round.
Lacey is looking to improve his position.
Jamal is sneakily working for an arm triangle but Lacey sees it coming and defends easily.
Jamal wants to pass the guard but Lacey is defending well.
Jamal trying to control the action but Lacey is working from the bottom.
Lacey manages to get to full guard.
Lacey keeping moving, preventing Jamal from controlling successfully.
Lacey can't keep his opponent in guard - Jamal advances to half guard, no doubt looking to mount.
Lacey is trying to get back to full guard.
Lacey trying to control here.

That's ten minutes gone in the round.
Lacey wants to get back to full guard.
Jamal is looking for an arm triangle, whilst trying to pass to side control. Lacey doesn't seem that keen to cooperate though. No luck this time Jamal.
Jamal seems to be working for a kimura but Lacey defends the submission attempt.
Lacey is trying to maintain the position but Jamal is very close to passing his half guard.
Lacey manages to get to full guard.
Lacey is trying to control the position but Jamal postures up.
Jamal drops back looking for a leg! Lacey is in trouble here! The fighters roll with the hold and Lacey manages to kick Jamal off! Jamal jumps back into Lacey's guard.

That's eleven minutes gone in the round.
Jamal passes into half guard.
Lacey is in trouble now - Jamal has advanced to mount! Score +3 for passing guard: Lacey (2) vs (14) Jamal
Jamal with some aggressive grappling here, looking for the finish.
Lacey is desperately trying to improve his position but Jamal has a good base and remains in mount.
Jamal controlling from the full mount.
Jamal takes his opponent's back. Perhaps a chance to lock up a rear naked choke here.
Score +3 for taking back: Lacey (2) vs (17) Jamal
Lacey breaks Jamal's hooks off and manages to turn into his guard.
Score +2 for sweep to guard / half guard: Lacey (4) vs (17) Jamal
Lacey wants to control from the top but Jamal keeps moving.

That's twelve minutes gone in the round.
Jamal has his foot on Lacey's thigh. He's trying to push off and get in position for a triangle, I think. Lacey works his way back into a safe position though.
Jamal throwing his legs up looking for a triangle.
Lacey trying to control but Jamal is working from the bottom.
Lacey stands up and looks to throw the legs aside to pass to side control. Jamal swivels though and keeps the full guard.
Lacey is working hard here to advance position.
Lacey trying to control the position from guard on top but Jamal is wriggling around, looking for whatever he can.

That's thirteen minutes gone in the round.
Jamal looking for a sweep. Not yet Jamal, not yet.
Jamal is trying to control the position but Lacey postures up.
Jamal is pulling down on Lacey's head. It's preventing any offense from Lacey, at least for the moment.
Jamal working a defensive guard but Lacey manages to pass into side control anyway.
Score +3 for passing guard: Lacey (7) vs (17) Jamal
Jamal tries to get back to half guard but can't.
Jamal is still trying to improve position.

That's fourteen minutes gone in the round.
Lacey tries to move to full mount but Jamal actually manages to regain half guard.
Jamal is looking to regain full guard. Not this time though.
Lacey wants to control but Jamal is keeping him busy.
Jamal is trying to get back to full guard.
Lacey is working for a kimura but Jamal is defending it quite comfortably.
Jamal gets full guard.
And that's the end of the fight!
Jamal wins on points by 17 to 7.
Ali Jamal seemed lost for words in his post fight interview but he remembered to thank his fans and directed everyone to his website. |
|
|
|
Event:
TWGC 15 (155lbs, D4): Helsinki Qualifier - Round 1
Date: Mar 04, 2017 |
Coming up we have a lightweight Tycoon World Grappling Championship rules bout between Wilbur Clemens and Kron Lacey. Both fighters look fresh as a daisy as they make their way towards the cage.
This TWGC bout is 1 fifteen minute round in the lightweight division. Introducing today's competitors. In the red corner, competing out of London, with a TWGC record of 1 wins and 1 losses; Wilbur Clemens! And in the blue corner, fighting out of Los Angeles, with a TWGC record of 0 wins and 0 losses; Kron Lacey!
The judges for this bout are Arvi Lind, Johanna Lukiainen and Ben Zyskovitsi.
The official calls the fighters to the middle and the contest is under way.

Clemens moves into range and clinches up with Lacey.
Clemens jumps guard and drags Lacey to the mat. He's obviously going to be looking for submissions off his back.
Clemens looking for a sweep. Not yet Clemens, not yet.
The ref warns both fighters not to hold the cage as they work up against the meshing.
Lacey is looking to pass into half guard but Clemens pushes him away with his feet and jumps on top - now Clemens is in guard. Score +2 for sweep to guard / half guard: Clemens (2) vs (0) Lacey
Lacey wants to sweep here but Clemens controlling him for the moment.
Clemens wants to control from the top but Lacey keeps moving.
Lacey wants to sweep but no luck.
Clemens trying to control but Lacey is working from the bottom.
Clemens stopping the sweep attempt from Lacey.
We've had a slow start to the round here - hopefully the action picks up.
Clemens stands up and looks to throw the legs aside to pass to side control. Lacey swivels though and keeps the full guard.
Clemens preventing the sweep.
Clemens trying to control the position from guard on top but Lacey is wriggling around, looking for whatever he can.
Lacey wants to sweep but no luck.
That's one minute gone in the round.
Lacey has his foot on Clemens's thigh. He's trying to push off and get in position for a triangle, I think. Clemens works his way back into a safe position though.
Lacey looking to sweep here. No luck so far.
Clemens stays in close to Lacey's body and controls the position.
Clemens won't allow Lacey to sweep him here.
Lacey is doing well to control the posture of his opponent and prevent any damage.
Lacey looking to control but Clemens passes into half guard.
Clemens knows he needs to get back to his feet asap. He's simply no match for Lacey on the ground.
Clemens is looking to take a break and control but Lacey is keeping him honest, looking to work from the bottom.
Lacey wants to improve his position but Clemens is controlling well.
That's two minutes gone in the round.
Lacey is holding on to half guard well.
Lacey wants to control but Clemens is keeping busy and won't allow it.
Lacey is looking to regain full guard. Not this time though.
Lacey trying to control but Clemens postures up.
Clemens is pressing down on Lacey's thigh, looking to free his foot. Lacey is holding on for now.
The fighters are pressed up against the cage, both looking to find a bit of space to work.
Lacey is staying active underneath Clemens, who seems content to just control the action from this position.
Lacey has no desire to be mounted, so is trying to control. Clemens is working away from the top position though.
Lacey wants to improve his position but Clemens is controlling well.
Lacey trying to control from the bottom.
That's three minutes gone in the round.
Lacey is trying to get back to full guard.
Lacey is still trying to improve position.
Lacey is looking to control Clemens's leg but it's slowly edging free. Can Lacey avoid being mounted?
Lacey is looking for a sweep. Clemens is wise to his cunning plan and keeps the top position.
Clemens tries to pass to full mount but Lacey defends it.
Clemens wants to work for an arm triangle but Lacey is really keeping half guard well and defending the submission attempt.
Lacey gets full guard.
Lacey keeping moving, preventing Clemens from controlling successfully.
Lacey is working from a closed guard but he's struggling to control his opponent.
Clemens has to be careful here, sitting in the guard of a superior BJJ player.
Lacey looking for a sweep. Not yet Lacey, not yet.
That's four minutes gone in the round.
Clemens trying to pass the guard but can't manage it just yet.
Clemens stopping the sweep attempt from Lacey.
Lacey is throwing his legs up, looking for submissions. Clemens is aware though and is defending well.
Lacey keeping moving, preventing Clemens from controlling successfully.
Clemens is going to have to think about doing something other than just controlling because Lacey is managing to avoid having the position dictated to him.
Clemens won't allow Lacey to sweep him here.
Lacey is working from a closed guard but he's struggling to control his opponent.
Clemens is just sitting in guard, looking to avoid any submissions.
Lacey looking to sweep using the butterfly guard but Clemens puts pay to that idea as he passes nicely into half guard.
Clemens is working hard to pass the guard. He's done it - he's now in full mount! Trouble for Lacey! Score +3 for passing guard: Clemens (5) vs (0) Lacey
That's five minutes gone in the round.
Lacey tries to lock up and control but Clemens gives him a forearm to the face and pushes him away.
Lacey tries to reverse the position but Clemens maintains control.
Lacey tries to lock up and control but Clemens gives him a forearm to the face and pushes him away.
Clemens trying to control but Lacey is having none of it.
Lacey can't escape the position.
Clemens manages to capitalize on a mistake by Lacey to take his back! Score +3 for taking back: Clemens (8) vs (0) Lacey
Clemens looking for the RNC.
Clemens trying to control momentarily.
Lacey wants to escape the position.
Lacey keeps trying to improve his position.
Lacey tries to escape the position - he's now mounted. Is that better or worse? Hard to tell!
Lacey tries to lock up and control but Clemens gives him a forearm to the face and pushes him away.
Lacey keeping his composure momentarily, calmly looking to get back to half guard.
Clemens can't quite control the action as he would like just now, as Lacey is looking to escape.
That's six minutes gone in the round.
Lacey sneaks a leg back under and regains half guard and is working straight away to try and get back to guard. He hasn't managed just yet though.
Clemens is trying for a guillotine from the top but the pressure isn't in the right place so Lacey is just riding it out for now. Clemens eventually gives up the hold.
Lacey is looking to improve his position.
Clemens is trying to control the action in half guard but Lacey is working away on the bottom, looking perhaps to get back to full guard.
Lacey regains full guard. Nicely done.
Clemens postures up.
Clemens stands up and looks to throw the legs aside to pass to side control. Lacey swivels though and keeps the full guard.
Clemens wants to control from the top but Lacey keeps moving.
That's seven minutes gone in the round.
Lacey manages to sweep nicely, so he's now on top. Clemens manages to get himself to full guard.
Score +2 for sweep to guard / half guard: Clemens (8) vs (2) Lacey
Lacey looking to pass the guard.
Lacey works a leg free and moves into half guard.
Lacey is looking to take a break and control but Clemens is keeping him honest, looking to work from the bottom.
Lacey is thwarting Clemens's attempts to control the position.
Clemens has a hand on Lacey's thigh, trying to get back to full guard. Lacey takes advantage of the position though and mounts him! Score +3 for passing guard: Clemens (8) vs (5) Lacey
That's eight minutes gone in the round.
Clemens tries to get back to half guard but can't.
Lacey looking to control but Clemens is working nicely, looking to advance position himself.
Lacey is looking to take Clemens's back but instead Clemens gets back to half guard. Nice work.
Lacey tries to pass to full mount but Clemens defends it.
Lacey is trying to control the action in half guard but Clemens is working away on the bottom, looking perhaps to get back to full guard.
That's nine minutes gone in the round.
Clemens tries to roll over but Lacey keeps him under control.
Lacey looking to pass the half guard. Not this time.
Clemens is doing well to control the position and prevent Lacey from advancing to side control.
Clemens actively working from the bottom here.
Lacey is looking to take a break and control but Clemens is keeping him honest, looking to work from the bottom.
Lacey is just content to waste time from the top position. Clemens takes advantage of the situation and regains full guard.
That's ten minutes gone in the round.
Lacey trying to control the position from guard on top but Clemens is wriggling around, looking for whatever he can.
Clemens has an omoplata and is looking to use it perhaps as a submission or perhaps to transition. Lacey is in a bit of discomfort here, but he's managed to free himself and has dived into side control! That didn't work out too well for Clemens. Score +3 for passing guard: Clemens (8) vs (8) Lacey
Clemens can't do much from the bottom here.
Lacey advances nicely into full mount. Score +2 for reaching mount: Clemens (8) vs (10) Lacey
Lacey wants to control the pace but Clemens is squirming around nicely.
Clemens is controlling an arm, preventing Lacey from taking his back. Although keeping him in mount is no better to be honest.
That's eleven minutes gone in the round.
Clemens is wriggling around trying to escape.
Lacey trying to control but he's not successful this time.
Clemens gets back to half guard.
Lacey wants to pass the guard but Clemens is defending well.
Lacey takes a deep breath and rests his weight momentarily on top of his opponent, to control the position.
That's twelve minutes gone in the round.
Clemens desperately trying to maintain half guard.
Lacey wants to lay and pray for a moment but Clemens keeps working.
Clemens is trying to maintain the position but Lacey is very close to passing his half guard.
Clemens is looking to improve his position.
Lacey performing his best blanket impression for a moment.
That's thirteen minutes gone in the round.
Lacey looking to pass the half guard. Not this time.
Clemens wants to control but Lacey is keeping busy and won't allow it.
Lacey has freed up his trapped foot and advances to mount. Score +3 for passing guard: Clemens (8) vs (13) Lacey
Clemens stops Lacey from taking his back. Still, being mounted isn't any better.
That's fourteen minutes gone in the round.
Lacey looking for a guillotine from mount but Clemens is having none of it.
Lacey tries to control but Clemens wriggling away.
Clemens is just holding on here. Lacey manages to take his back.
Score +3 for taking back: Clemens (8) vs (16) Lacey
Boooooooooooooooooooo!!! God, this has been a terrible round. Come on you two, sort yourselves out!
Clemens trying to control the hands but Lacey won't let him.
And that's the end of the fight!
Lacey wins on points by 16 to 8. |
|
|
|
|
|
|