|
Play
by Play - Fighter's Fight Commentary
|
Event:
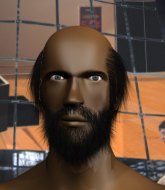
KAMIKAZE 76: Show
Date: Jan 27, 2018 |
#R1#
Lenny throws an off balance right hand
and Gendozo counters with a nice uppercut.
Lenny throws a jab but it's blocked by Gendozo.
Lenny throws a big shot that misses.
A jab from Lenny misses.
As Lenny backs off Gendozo throws a huge counter combo but Lenny manages to avoid it all.
Lenny throws a looping overhand right but Gendozo ducks down to avoid it.
Lenny misses with a combination
and Gendozo connects with a straight left hand counter down the middle.
Tony Lenny seems to be the more aggressive standup fighter in this bout.
Lenny moves out of range of the strikes.
Lenny misses with a straight right.
Nice sprawl there from Lenny as Gendozo shoots in.
A little feinted left hand from Lenny on the counter but he doesn't commit to it.
Lenny swings away with a body shot that misses
and Gendozo counters with a quick right hand to the jaw.
Gendozo lands an overhand right.
Lenny swings wildly with a right hand that was never going to find it's target.
It seemed like Gendozo was going to counter with the hook but didn't fully commit to it.
Lenny throws a combination but comes up with nothing but fresh air.
Gendozo shoots in but Lenny avoids the takedown attempt easily.
Gendozo staying out of range there.
Wooooo! Give it up for these two warriors! They are putting on a show!
Lenny misses with a right hand
and Gendozo counters with a quick right hand to the jaw.
Gendozo displays some good footwork, moving neatly out of range as Lenny throws out the jab.
Gendozo jabbing away but nothing is landing.
Lenny is looking to counter punch.
Gendozo stuns Lenny with a nice body shot, before stepping back out of range.
The fighters circle momentarily. Lenny darts into range and connects with a nice straight punch.#CUT#
It looks like Mauricio Gendozo has been cut.#T1#
A swing and a miss from Lenny.
Gendozo lands with a straight right. Lenny didn't see that one coming.
Gendozo takes a jab on the nose there. A little bit of blood seems to be coming out. Hopefully that won't affect his breathing.
Nice uppercut there from Lenny.
Gendozo throws a hook but Lenny blocks it.
Lenny swings and misses with a hook to the body.
Lenny looks to land a left hand but Gendozo moved out of range nicely.
Gendozo throws out a counter right but Lenny avoids it with no problem.
Lenny throws a poor cross that misses
and Gendozo cracks him with a counter punch right on the button.
Lenny misses with a right hand
and Gendozo counters with a nice uppercut.
Lenny with a lazy takedown attempt
and Gendozo makes him pay by landing a nice hook to the body before moving out of range.
Lenny is really head hunting here, hardly looking to strike to the body at all.
Lenny is breathing heavily.
Gendozo throws a series of punches but Lenny moves out of range.
Lenny takes a shot to the nose. Hopefully that hasn't broken it.
Wooooo! Give it up for these two warriors! They are putting on a show!
Lenny rushes in with a sloppy looking punch
and Gendozo counters with a left to the body.
Gendozo bobs and weaves well there to avoid the strikes.
Wow, both these guys are really going for it!
Gendozo fails with a takedown attempt.
Tony Lenny has stuffed three takedown attempts in the round now. That's going to take a lot out of Mauricio Gendozo.
No joy there for Gendozo, who threw a few shots but didn't land.
Gendozo slips a jab from Lenny.
Lenny misses with an uppercut.
Gendozo is clearly looking to counter with head kicks.#T2#
Lenny swings widly with a right hand
and Gendozo counters with a nice uppercut.
Gendozo dives in for a single leg takedown but Lenny sprawls and the fighters end up clinched against the cage.
A big left from Lenny misses.
Gendozo swings away with a counter right hand but no contact made.
Lenny tries to drive through with a takedown attempt but Gendozo defends well and Lenny ends up having to push Gendozo into the cage where they will battle it out in the clinch.
Lenny throws a lazy uppercut
and Gendozo connects with a straight left hand counter down the middle.
Gendozo scores with a hook.
Gendozo slips in close and lands a nice hook before moving back out of range.
Gendozo lands a glancing blow to the side of Lenny's head.
Gendozo with poor footwork there. He got himself in a bit of a tangle, enabling Lenny to score with a decent uppercut.#CUT#
That has opened up Mauricio Gendozo's cut even more.
Gendozo slips a jab from Lenny.
Gendozo raises up his leg as if looking to counter with a high kick.
Gendozo looks for a takedown but Lenny sprawls well.
Gendozo lands the left hand.
A jab from Lenny misses.
Gendozo bobs and weaves and throws out a fast jab that snaps Lenny's head backwards.
Gendozo throws a head kick that misses and slips in the process. He scrambles back to his feet and the fighters circle.
Gendozo displays some good footwork, moving neatly out of range as Lenny throws out the jab. #T3#
A big left from Lenny misses.
Gendozo looks frustrated there after his takedown attempt is stuffed easily.
A little feinted left hand from Lenny on the counter but he doesn't commit to it.#TD2#
Gendozo looking for a takedown here - he's got it.
Gendozo throwing shots from guard but he's hitting more mat than opponent.
Gendozo won't allow Lenny to sweep him here.
Gendozo has the superior BJJ but he's also working some ground strikes into his gameplan.#SUB#
Lenny escapes his hips to the side and looks to be working for an armbar. Gendozo gives him a little smile and shakes his head. No chance. #SUB#
Lenny has his foot on Gendozo's thigh. He's trying to push off and get in position for a triangle, I think. Gendozo works his way back into a safe position though.#T4#
Lenny looking to control.
#SUB#
Lenny is throwing his legs up, looking for submissions. Gendozo is aware though and is defending well.#SUB#
Lenny looking for a guillotine here but Gendozo defends easily.
#SUB#
Lenny is throwing his legs up, looking for submissions. Gendozo is aware though and is defending well.
The ref warns both fighters not to hold the cage as they work up against the meshing.
Lenny is trying to control the position from the bottom.
#SUB#
Lenny has a loose triangle. He'll be looking to tighten that up but Gendozo can see exactly what he's planning and manages to posture up and free himself.
The fighters are pressed up against the cage, both looking to find a bit of space to work.
Lenny keeping moving, preventing Gendozo from controlling successfully.
And thats the end of the round the fighters go back to their corners.
Mauricio Gendozo dominated that round.
The cut man is working on Mauricio Gendozo's cut.
The minute break is over - no more time for sponges and pep talks - back to the action!
#R2#
Gendozo uses good footwork to avoid the strikes from Lenny.
Mauricio Gendozo seems to be getting the better of the standup.
Lenny takes one on the chin but keeps coming.
Lenny throws a shot from downtown. Gendozo moves away and avoids it.
Lenny misses with an uppercut
and Gendozo counters with a nice uppercut.
A decent looking cross lands there for Gendozo.
Lenny misses with a looping right.
Sloppy strikes from Gendozo. Those never looked like landing.
Gendozo scores with a straight right hand, right through his opponent's guard.
Lenny throws a looping overhand right but Gendozo ducks down to avoid it.
Gendozo ducks under a wild hook from Lenny.
Lenny on the wrong end of a decent looking cross there.
The fight stays on the outside here - Gendozo looks like he's thinking about clinching though.
Gendozo doesn't manage to clinch there - Lenny circles away.
Gendozo slips under a jab from Lenny.
Gendozo tries to move into range but Lenny moves to the side and lands with a nice right hand.
Wooooo! Give it up for these two warriors! They are putting on a show!
Lenny misses with a looping left.
Lenny takes a head kick and shrugs it off.
Lenny takes one on the chin but keeps coming.
Gendozo punishes Lenny's body with a nice straight punch.#T1#
A telegraphed right hand from Lenny misses the target.
No luck for Gendozo with that takedown attempt.
Lenny misses with a hook.
And an attempted straight right on the counter from Gendozo! But no joy.
Lenny's hands are dropping dangerously low here and Gendozo connects clean with a right hook that sends him down to one knee! Lenny scrambles back to his feet.
Gendozo tries to clinch up.
Gendozo has been the more effective fighter overall so far.
Lenny throws a hook to the side of Gendozo's head but Gendozo sees it coming and ducks under it beautifully.
Gendozo slips a jab and a cross from Lenny.
Gendozo tests Lenny's chin there with a solid looking shot.#CL2#
Gendozo takes the fight into the clinch.
Lenny is trying to drag Gendozo to the mat but Gendozo just about manages to keep his footing. He used the cage to his advantage there.
Gendozo prevents a body shot from Lenny. #T2##TD2#
Gendozo has moved round to his opponent's back and is looking for a suplex! Oh snap! He's tossed Lenny clear over his head and slammed him to the mat!
We've seen a great period of action over the last minute or so - credit to both fighters for going all out!#SUB2#
Gendozo is looking to finish the fight by rear naked choke. Lenny knows exactly what he's got planned though, so he's defending well. Maybe a few strikes would soften Lenny for a finish.
Lenny rolls and manages to get back to half guard. Nicely done.
Lenny trying to control but Gendozo postures up.
#SUB2#
Gendozo is sneakily working for an arm triangle but Lenny sees it coming and defends easily.#SUB#
Lenny looking to work for a kimura from the bottom.
Lenny controlling the position well. #T3#
Lenny tries to regain full guard. Instead though, Gendozo has advanced to mount. Uh oh.
Lenny is working to get back to half guard.
Gendozo scoring with strikes but Lenny is staying in there.
Lenny tries to improve his position but instead Gendozo has taken his back!
Mauricio Gendozo has got the better of the ground game so far.#T4#
Lenny tries to escape the position.
Lenny is working hard here to advance position.
Gendozo scores with punches and elbows.
Lenny just trying to survive but Gendozo is wriggling into a better position, looking to finish. #SUB2#
Gendozo looking for the choke from the back.
Lenny tries to break free.
#SUB2#
Gendozo looking for the choke but no joy.
Lenny looking very determined here, making life difficult for Gendozo.
And thats the end of the round the fighters go back to their corners.
Mauricio Gendozo showed his class in that round. I'd imagine he'll take it on all the scorecards.
The cut man is working on Mauricio Gendozo's cut.
That's the end of the round. The referee orders the cornermen out of the cage so we can get back down to business. The crowd applaud as we get ready to start the final round!
#R3#
Gendozo smiles there as he lands a nice right hand right on the button.
Lenny stuffs the takedown.
Lenny shoots for a double leg takedown but Gendozo sprawls well. He's pushed Lenny's face into the mat and manages to get back to his feet relatively easily.
Lenny jabbing away but nothing is landing.
Gendozo throws a nice looking combination but Lenny bobs and weaves to avoid any damage.
Lenny misses with the combination.
A little jabbing left from Gendozo on the counter but it doesn't find it's target.
Lenny throws an uppercut from half a mile away. Gendozo sees it coming and avoids it easily.
Nice shot lands for Gendozo.
Gendozo lands a jab to the head.
Lenny throws a hook to the side of Gendozo's head but Gendozo sees it coming and ducks under it beautifully.
Lenny misses with a lunging right hand
and Gendozo connects with a straight left hand counter down the middle.
Gendozo fails to land the takedown.
Gendozo lands a jab-cross combination.
The crowd are loving this. Great action here.
Gendozo avoids a lazy jab quite easily.
Gendozo throws a couple of head shots and lands with the final one - a decent hook, which struck Lenny on the side of the head. #T1#
Gendozo slips a jab from Lenny.
Lenny looks like he's developed a pretty tasty lump over his left eye. He'll need to avoid taking much more damage to that.
The fight stays on the outside here - Gendozo looks like he's thinking about clinching though.
Lenny half commits to a counter takedown before pushing away, out of range.
Lenny throws the left hand but Gendozo avoids the punch easily.
Jab, cross, leg kick. Nice combination by Gendozo!
Lenny throws a lazy uppercut
and Gendozo counters with a big head kick but Lenny shrugs it off.
Lenny throws a poor cross that misses
and Gendozo connects with a straight left hand counter down the middle.
Both fighters are breathing heavily.
Lenny throws a body punch but Gendozo moves out of range.
Lenny loads up on a big right hand but Gendozo slips the punch.
Lenny takes a really solid shot there but just smiles back and shrugs his shoulders.
Gendozo slips in close and lands a nice hook before moving back out of range.
Gendozo walks into a stiff left hand from Lenny.
Gendozo throws a head kick that misses and slips in the process. He scrambles back to his feet and the fighters circle.
Lenny misses with an uppercut.
We've seen a great period of action over the last minute or so - credit to both fighters for going all out!
Gendozo tries to close the distance and clinch but Lenny swats him to one side with an open hand palm strike and circles away.
Gendozo slips a jab from Lenny.
A big left from Lenny misses.
Gendozo takes a shot right to the liver - Bas would have been proud of that punch.#T2#
Lenny swings wildly with a right hand that was never going to find it's target.
Gendozo slips a straight right by Lenny.
Gendozo will have to do better than that with his takedown attempts.
Tony Lenny has stuffed three takedown attempts in the round now. That's going to take a lot out of Mauricio Gendozo.
Lenny throws a right hand that misses
and Gendozo counters with a stiff right hand.
Lenny takes a shot to the nose. Hopefully that hasn't broken it.
Gendozo tries to clinch up against the cage, rushing in to close the distance. Lenny manages to break the clinch and circles back to the middle of the mat.
Lenny throws a lazy right hand but Gendozo sees it coming a mile off and sidesteps it easily.
Gendozo throws a looping left and ducks down for a takedown. He's got his arms around Lenny's waist but Lenny gets an underhook and avoids the takedown by throwing Gendozo off to one side.
Boom, another hit is landed. "You're gunna get knocked out" taunts Lenny, as that shot connected.
Lenny misses with a straight left.
Lenny misses with a lunging right hand
enabling Gendozo to counter with a crisp jab.
Gendozo walks straight into an uppercut. Luckily it didn't land flush.
A big left from Lenny misses.
Lenny slips a jab and a cross from Gendozo.
Gendozo jabs. That one connects to the head of his opponent.
Nice defenses there by Gendozo.
Gendozo lands with a cross to side of his opponent's head.#T3#
Lenny misses with an uppercut.
Gendozo throws an uppercut from half a mile away. Lenny sees it coming and avoids it easily.
Gendozo slips a jab and a cross from Lenny.
Lenny stuffs the takedown.
Tony Lenny has stepped it up - he knows he needs a finish here!
Lenny throws an uppercut from half a mile away. Gendozo sees it coming and avoids it easily.
Gendozo steps in looking to clinch after the strikes miss from Lenny.
Mauricio Gendozo is fighting for a decision - hopefully he's judged it right and he's actually winning the fight.#TD2#
Lenny gets caught napping as Gendozo dives in and scores a takedown. Lenny manages to retain guard.#SUB#
Lenny looking for submissions off his back, moving his hips, looking for an opening.
#SUB#
Lenny throws his legs up looking to secure a triangle. Oh, that looks pretty tight, I gotta say! Gendozo escapes and throws Lenny's legs to the side, diving into side control!
Gendozo trying to control the position but Lenny is working away.
Lenny is looking to reverse the position.#T4#
Gendozo wants to lay and pray for a moment but Lenny keeps working.
Lenny is looking to regain half guard here but Gendozo keeps moving and retains side control.
Lenny wants to control but Gendozo postures up.
Lenny is positioning himself to get back to half guard.
Lenny throws a couple of strikes even though he's not really in a good position to do so.
And that's the end of the fight!
Mauricio Gendozo comfortably won the final round on my scorecard.
Well Gendozo has outworked and out performed his opponent in all aspects of the game today. He was simply too good and the decision should be no more than a formality. Over to the ring announcer for the scorecards.
Ladies and gentlemen, after 3 rounds of action, we go to the scorecards for a decision.
Judge Yasuomi Hirokawa scores the fight 27:30
Judge Taro Takaoka scores the fight 27:30
Judge Yuuki Gou scores the fight 27:30
In favor of your winner, by unanimous decision... Mauricio Gendozo!
Mauricio Gendozo thanked the fans post fight for their support.
|
|
|
|
Event:
TWGC 19 (265+lbs, D4): Finals - Round 1
Date: Dec 03, 2017 |
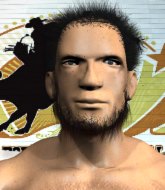
Coming up we have a super heavyweight Tycoon World Grappling Championship rules bout between Tom Tomson (ranked 22226 p4p, 204 weight class) and Tony Lenny (ranked 9003 p4p, 186 weight class). Tomson comes into the arena with R-Swift- Awesome God blaring out of the sound system. Lenny comes into a darkened arena with his song building. Rick Astley - Never Gonna Give You Up kicks in, the lights come on and the crowd goes wild! What a showman! On his way into the cage it seems that Tom Tomson has been attacked by a crazed fan! It looks like it might have been the just bleed guy! Luckily Tom Tomson seems to be OK! I thought that lunatic was in prison!?
This TWGC bout is 1 fifteen minute round in the super heavyweight division. Introducing today's competitors. In the red corner, competing out of London, with a TWGC record of 5 wins and 2 losses; Tom Tomson! And in the blue corner, fighting out of Tokyo, with a TWGC record of 2 wins and 0 losses; Tony Lenny!
The judges for this bout are Nard Betker, Paulsen Ambrosius and Saam Ante.
The fighters bow as they face eachother in the middle of the mat and we are under way.

Lenny clinches.
Lenny is looking for a takedown.
Tomson tries to score a body lock takedown but Lenny shows good agility there to stay on his feet.
Lenny can't get the takedown.

Lenny jumps guard and drags Tomson to the mat. He's obviously going to be looking for submissions off his back.
Tomson wants to control from the top but Lenny keeps moving.
The fighters are pressed up against the cage, both looking to find a bit of space to work.
Tomson pushing down on Lenny's thigh, trying to pass to half guard. He's managed it... Nice work.
Tomson works his way into side control. Score +3 for passing guard: Tomson (3) vs (0) Lenny
Lenny tries to improve position but can't.
We've had a slow start to the round here - hopefully the action picks up.
Tomson trying to control the action but Lenny is working from the bottom.
Lenny is trying to improve his position.

That's one minute gone in the round.
Lenny gets back to half guard.

Lenny looking for submissions from an awkward position here.
Lenny looking for submissions off his back.
Lenny looking for submissions off his back.
Lenny is refusing to be controlled, as Tomson sits in half guard.

That's two minutes gone in the round.
Tomson wants to free his trapped foot but Lenny is holding on for dear life with his legs.

Tomson is working for a submission of some sort.
The fighters are starting to perspire pretty heavily.
Lenny is looking to sinch up a guillotine here but Tomson pulls his head out easily.
Lenny is trying to get back to full guard.
Lenny is looking to sinch up a guillotine here but Tomson pulls his head out easily.

That's three minutes gone in the round.
Lenny is defending against the submission attempts here by Tomson.
Lenny is looking to sinch up a guillotine here but Tomson pulls his head out easily.
Tomson is looking to advance position but Lenny won't allow it.
Lenny actively working from the bottom here.
Tomson prevents Lenny from improving his position.
Tomson passes the half guard and he's now in mount! Big trouble for Lenny! Score +3 for passing guard: Tomson (6) vs (0) Lenny

That's four minutes gone in the round.
Tomson takes Lenny's back. Score +3 for taking back: Tomson (9) vs (0) Lenny
Lenny tries to escape but Tomson has the hooks in and won't let him break free.
Lenny looking very determined here, making life difficult for Tomson.
Lenny tries to escape but Tomson has the hooks in and won't let him break free.
Lenny fending off the submission attempt from Tomson.
I really don't envy Lenny right now.

That's five minutes gone in the round.
Tomson is remaining active here, looking for the choke. The more discerning members of the crowd will appreciate his efforts.
Lenny rolls, trying to escape but Tomson keeps control of the position.
Lenny is very frustrated here, being controlled quite effectively by Tomson.
Tomson is not going to allow Lenny to sit and survive in this position.
Tomson is trying to stick to Lenny's back but Lenny is turning into Tomson. He's managed to reverse the position - now he's in Tomson's guard. Polite applause from the crowd in appreciation of some nice Jiu Jitsu by Lenny. Score +2 for sweep to guard / half guard: Tomson (9) vs (2) Lenny

That's six minutes gone in the round.
Lenny trying to control but Tomson is working from the bottom.
Tomson has a loose triangle. He'll be looking to tighten that up but Lenny can see exactly what he's planning and manages to posture up and free himself.
Tomson wants to control here, rather than go for any submissions from the bottom. At least for now.
Lenny trying to control the position from guard on top but Tomson is wriggling around, looking for whatever he can.
Tomson escapes his hips to the side and looks to be working for an armbar. Lenny gives him a little smile and shakes his head. No chance.
Tomson might be looking to lock onto one of his opponent's long limbs for a submission, whilst we're on the ground.
Tomson keeping moving, preventing Lenny from controlling successfully.

That's seven minutes gone in the round.
Lenny's corner is telling him to maintain position.
Lenny tries to free his leg and advance position but Tomson is retaining full guard.
Tomson keeping moving, preventing Lenny from controlling successfully.
Lenny tries to free his leg and advance position but Tomson is retaining full guard.
Tomson keeping moving, preventing Lenny from controlling successfully.
Tomson looking for a sweep. Not yet Tomson, not yet.
Tomson keeping moving, preventing Lenny from controlling successfully.

That's eight minutes gone in the round.
Lenny wants to pass the guard but Tomson is keeping the position.
Tomson controls Lenny momentarily but Lenny frees himself.
Lenny wants to control from the top but Tomson keeps moving.
Tomson looking to hit a scissor sweep but Lenny is one step ahead there.
Lenny controlling from the guard. I say controlling but really, he's stalling.
Lenny drops back looking for a leg! Tomson is in trouble here! The fighters roll with the hold and Tomson manages to kick Lenny off! Lenny jumps back into Tomson's guard.

That's nine minutes gone in the round.
Lenny looking to pass the guard.
Tomson pulls Lenny in close to prevent any damage.
Lenny trying to control but Tomson is working from the bottom.
Tomson is working actively off his back, looking to secure an arm or perhaps work for a triangle.
Lenny trying to control but Tomson is working from the bottom.

That's ten minutes gone in the round.
Tomson looking to control.
Lenny must be cautious of submissions here, given that his opponent has the superior Jiu Jitsu.
Lenny tries to free his leg and advance position but Tomson is retaining full guard.
Tomson lands a beautiful sweep and he's now moved into his opponent's guard. Score +2 for sweep to guard / half guard: Tomson (11) vs (2) Lenny
Lenny controlling the position.
Lenny being controlled here, momentarily.
Tomson trying to control the position from guard on top but Lenny is wriggling around, looking for whatever he can.

That's eleven minutes gone in the round.
Lenny is looking for a triangle but Tomson pushes his legs off easily.
The ref warns both fighters not to hold the cage as they work up against the meshing.
Lenny is trying to control the position but Tomson postures up.
Tomson trying to control but Lenny is working from the bottom.
Lenny looking for submissions from the bottom here. Moving his hips around, possibly looking for an armbar.

That's twelve minutes gone in the round.
Lenny has a loose triangle. He'll be looking to tighten that up but Tomson can see exactly what he's planning and manages to posture up and free himself.
Lenny has a loose triangle. He'll be looking to tighten that up but Tomson can see exactly what he's planning and manages to posture up and free himself.
Tomson wants to control from the top but Lenny keeps moving.
Lenny is looking for a guillotine. You can't force these things though and Tomson defends well.
Tomson passes Lenny's right leg, so he's now in half guard.

That's thirteen minutes gone in the round.
Tomson is trying to control. Lenny wants to improve his position but can't escape this time.
Tomson has freed up his trapped foot and advances to mount. Score +3 for passing guard: Tomson (14) vs (2) Lenny
Tomson has hold of Lenny's left arm, perhaps looking for a submission. The two fighters tussle over control of the isolated limb and Lenny manages to get his arm back to his side and away from danger.
Lenny slips a leg in and gets back to half guard.
Lenny is looking to control Tomson's leg but it's slowly edging free. Can Lenny avoid being mounted?

That's fourteen minutes gone in the round.
Lenny looking for submissions off his back.
Lenny is not content to let Tomson control the position.
Tomson is really struggling to control Lenny but he's trying to hold on to the position.
Tomson trying to control the pace.
Boooooooooooooooooooo!!! God, this has been a terrible round. Come on you two, sort yourselves out!
Lenny wants to sweep but Tomson has passed to side control! Score +3 for passing guard: Tomson (17) vs (2) Lenny
And that's the end of the fight!
Tomson takes the fight on points by 17 to 2. |
|
|
|
Event:
TWGC 19 (265+lbs, D4): Rio de Janeiro Q - R2
Date: Nov 25, 2017 |
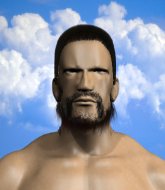
Coming up we have a super heavyweight Tycoon World Grappling Championship rules bout between Frank McDonald (ranked 22873 p4p, 250 weight class) and Tony Lenny (ranked 8747 p4p, 221 weight class). McDonald comes to the cage accompanied by You are My Heart, You are My Soul. Lenny has chosen Rick Astley - Never Gonna Give You Up as his entrance music. This should be a great matchup!
This TWGC bout is 1 fifteen minute round in the super heavyweight division. Introducing today's competitors. In the red corner, competing out of London, with a TWGC record of 1 wins and 0 losses; Frank McDonald! And in the blue corner, fighting out of Tokyo, with a TWGC record of 1 wins and 0 losses; Tony Lenny!
The judges for this bout are Luis Engracia, Seu Braga and Thiago Cunha.
The fighters bow as they face eachother in the middle of the mat and we are under way.
Lenny clinches.
McDonald has hold of a leg and is looking for a trip takedown. Lenny avoids it nicely though and we remain in the clinch.
Lenny tries for a takedown but McDonald manages to get underhooks.
Lenny is working on a leg, looking for a takedown but McDonald is defending well.
Lenny has moved round to his opponent's back and is looking for a suplex! Oh snap! He's tossed McDonald clear over his head and slammed him to the mat! Score +4 for clean takedown past guard: McDonald (0) vs (4) Lenny
Lenny is cranking McDonald's head sideways - that looks painful. He's managed to get his other arm under the chin and this looks bad for McDonald! He's tightened the choke and McDonald is tapping out!
Ladies and gentlemen, after 0:33 of round 1, we have a winner by way of Submission (RNC). Tony Lenny! |
|
|
|
Event:
TWGC 19 (265+lbs, D4): Rio de Janeiro Q - Round 1
Date: Nov 24, 2017 |
Coming up we have a super heavyweight Tycoon World Grappling Championship rules bout between Rishi Darshan (ranked 6991 p4p, 0 weight class) and Tony Lenny (ranked 8701 p4p, 221 weight class). Lenny comes into a darkened arena with his song building. Rick Astley - Never Gonna Give You Up kicks in, the lights come on and the crowd goes wild! What a showman! Over to our ring announcer for the fighter introductions!
This TWGC bout is 1 fifteen minute round in the super heavyweight division. Introducing today's competitors. In the red corner, competing out of Los Angeles, with a TWGC record of 0 wins and 0 losses; Rishi Darshan! And in the blue corner, fighting out of Tokyo, with a TWGC record of 0 wins and 0 losses; Tony Lenny!
The judges for this bout are Edson Gomes, Luis Engracia and Thiago Cunha.
Let's get this grappling contest under way! Who will be victorious?
Lenny tries to clinch but Darshan is having none of it.
Lenny is looking to clinch.

Darshan pushes Lenny up against the cage in a clinch.
Darshan prevents the takedown attempt.
Darshan is defending well against a takedown attempt.
Lenny is trying to drag Darshan to the mat but Darshan just about manages to keep his footing. He used the cage to his advantage there.
Rishi Darshan has stuffed three takedown attempts in the round now. That's going to take a lot out of Tony Lenny.
Lenny prevents a takedown attempt there.
Lenny changes levels and goes for a takedown here. Darshan fights it off and pushes away nicely.
We've had a slow start to the round here - hopefully the action picks up.
Darshan forces Lenny back against the cage and clinches.
Lenny wants a takedown but no success here.

Darshan gets control of Lenny's arms and successfully pulls guard. Darshan will no doubt be looking for submissions off his back.
That's one minute gone in the round.
Lenny is trying to work a guillotine from the top, or something like that? Don't know how he thinks he's going to get a finish from there.
Lenny is stalling in the full guard.
Lenny is pushing down on Darshan's leg trying to pass to half guard. Darshan is fighting to maintain full guard but Lenny has managed to sneak the leg through.
Darshan wants to control but Lenny is keeping busy.
Lenny is trying to work for a kimura. This could be trouble! No, Darshan has managed to free his arm - good work.
Darshan tries to get to full guard but Lenny has control of the leg.
That's two minutes gone in the round.
Lenny is working for submissions here but there's nothing on.
Lenny is thinking about going for an arm triangle but he can't free his leg.
Lenny is trying a forearm choke
I don't think that's going to do much at this level of the game.
Lenny is looking for a kimura but he's never going to get it from there.
Lenny passes the half guard and he's now in mount! Big trouble for Darshan! Score +3 for passing guard: Darshan (0) vs (3) Lenny
That's three minutes gone in the round.
Lenny looking for a guillotine from mount but Darshan is having none of it.
Lenny working for a submission but Darshan is keeping him at bay.
Darshan wants to control but Lenny is having none of it.
Lenny wants to finish this one by submission but Darshan is holding onto his waist, trying to prevent any attacks from Lenny.
Lenny content just to control the position here.
Lenny seems to be looking to move to his opponent's back but Darshan is holding on tight.
The ref warns both fighters not to hold the cage as they work up against the meshing.
That's four minutes gone in the round.
Lenny has control of Darshan's right arm, working for a kimura. It's a bit of a token attempt though and Darshan regains control of the situation pretty easily.
Lenny is going oldschool here, as he tries to force Darshan to tap using a forearm choke. This isn't 1993 though, so Darshan shrugs it off.
Lenny working for a guillotine from mount but Darshan is in no mood to give up.
Lenny controlling the position easily from mount.
Lenny can't quite control the action as he would like just now, as Darshan is looking to escape.
That's five minutes gone in the round.
Lenny fails to take his opponent's back.
Lenny with some aggressive grappling here. He's looking for submissions here, rather than waiting for the opportunity to counter.
Darshan regains half guard.
Darshan won't allow Lenny to pass to mount.
Lenny takes a deep breath and rests his weight momentarily on top of his opponent, to control the position.
That's six minutes gone in the round.
Darshan is refusing to be controlled, as Lenny sits in half guard.
Lenny controlling the action here.
Darshan is in trouble now - Lenny has advanced to mount! Score +3 for passing guard: Darshan (0) vs (6) Lenny
Lenny wants to take his opponent's back but he's not managed it.
Darshan is squirming around, avoiding Lenny's attempts to control the action.
Darshan keeping his composure momentarily, calmly looking to get back to half guard.
That's seven minutes gone in the round.
Lenny has control of Darshan's right arm, working for a kimura. It's a bit of a token attempt though and Darshan regains control of the situation pretty easily.
Darshan is in all sorts of trouble here.
Lenny has hold of Darshan's left arm, perhaps looking for a submission. The two fighters tussle over control of the isolated limb and Darshan manages to get his arm back to his side and away from danger.
Lenny tries to control but Darshan wriggling away.
Darshan wants to control but Lenny is having none of it.
That's eight minutes gone in the round.
Lenny looking for a guillotine from mount but Darshan is having none of it.
Lenny wants to finish this one by submission but Darshan is holding onto his waist, trying to prevent any attacks from Lenny.
Lenny tries to control but Darshan wriggling away.
Lenny is going oldschool here, as he tries to force Darshan to tap using a forearm choke. This isn't 1993 though, so Darshan shrugs it off.
Darshan is desperately trying to get back to half guard.
Lenny is controlling this nicely and is looking to make no mistakes. Darshan is trying to wiggle out of this horrible position. Darshan flips to his side and attempts to get a leg in for half guard. Lenny anticipates the leg and manages to get behind Darshan and secures both hooks! This could be bad! Lenny slips an arm under Darshan chin and tries to position for a rear naked choke. Lenny has worked the choke in now and it looks tight. Lenny is squeezing on Darshan like an anaconda would it's prey. Darshan fails to tap and has fallen unconscious! We've got ourselves a winner by way of a rear naked choke!
Ladies and gentlemen, after 9:56 of round 1, we have a winner by way of Submission (RNC). Tony Lenny! |
|
|
|
Event:
KAMIKAZE 44: Revolution
Date: Aug 05, 2017 |
#R1#
A big right from Lenny misses.
Lenny misses with an uppercut. Betschkeit saw that one coming.
Betschkeit fakes a jab and then connects with a hook.#CUT2#
It looks like Tony Lenny has been cut.
Betschkeit lands the left hand.
Wow, both these guys are really going for it!
Betschkeit keeps the fight standing with a nice sprawl.
A telegraphed right hand from Lenny misses the target.
Lenny throws a leg kick but he was too far away and it doesn't land.
Lenny uses decent footwork to sidestep a right hand from Betschkeit.
Betschkeit misses the jab.
Lenny takes a jab right on the nose. That must have hurt but he shrugs his shoulders and looks to return the favor.
Lenny throws a jab but it's blocked by Betschkeit.
Lenny definitely looks more muscular than last time we saw him fight.
Betschkeit missing with a left hand there. Lenny was out of range so wasted energy throwing that one. #TD#
Lenny closes the distance, clinches up and gets a nice trip takedown into side control. Very smooth. #ES2#
Betschkeit bucks up and manages to escape back to his feet!
This is a great period of action - very entertaining stuff!
Betschkeit avoids the head kick by Lenny.
Lenny throws a looping overhand right but Betschkeit ducks down to avoid it.
And an attempted straight right on the counter from Betschkeit! But no joy.
Betschkeit misses with a hook. Lenny ducked under it nicely. #KD2#
Betschkeit steps into range and cracks Lenny with a monster punch that buckles his knees! Lenny flops backwards and Betschkeit dives into his guard looking to finish!
Betschkeit throwing strikes but missing.
Betschkeit missing there with some ground and pound from the guard. #T1#
Betschkeit lands a couple of elbows.#CUT2#
Tony Lenny's cut is getting worse.
Betschkeit with a flurry of punches that miss.
Betschkeit trying to control the position from guard on top but Lenny is wriggling around, looking for whatever he can.
Lenny preventing the ground and pound from doing any damage.
Betschkeit keeps in close for a moment and lands a decent shot to the side of Lenny's head.#CUT2#
Tony Lenny's cut is bleeding quite badly. He's got to try and protect it.
Betschkeit loads up on a big left hand. Lenny felt that one! He's just covering up now, not defending himself intelligently - Betschkeit looks towards the ref and unloads with 3 more big shots and the ref has no choice but to stop the fight! Lenny can't hide his disappointment, as Betschkeit celebrates the victory.
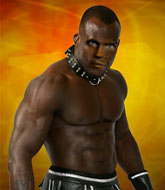
Ladies and gentlemen, after 1:44 of round 1, we have a winner by way of TKO (Strikes). Tim Betschkeit!
|
|
|
|
Event:
KAMIKAZE 42: Walls
Date: Jul 29, 2017 |
#R1#
Nice uppercut lands for Fjeld. That snapped Lenny's head back.
#CUT#
It looks like Tony Lenny has been cut.
Lenny shoots for a takedown but Fjeld saw that one coming a mile off and avoided it easily.
Fjeld swung with a counter right hand that didn't connect.
Fjeld looks for the body kick but Lenny saw that one coming.
Lenny throws a jab but it's blocked by Fjeld.
Fjeld closes the distance and clinches up with Lenny, looking for a takedown. Fjeld pushes Lenny against the cage but Lenny circles to the side and manages to break the clinch.
Fjeld takes an uppercut right on the button but keeps his composure.
#CL#
Fjeld closes the distance and clinches.
Fjeld is defending well against a takedown attempt.
The referee is keeping an eye on Lenny - much more stalling and he will separate the fighters.
#BC#
Fjeld breaks from the clinch.
Lenny misses with a straight right.
Lenny avoids the clinch attempt nicely.
We've had a slow start to the round here - hopefully the action picks up.
Lenny fails miserably with a takedown attempt.
Magnus Fjeld has stuffed three takedown attempts in the round now. That's going to take a lot out of Tony Lenny.
Fjeld has a takedown stuffed.#KD#
Fjeld lands a left and a right that sends Lenny crashing to the canvas! Fjeld dives into mount looking to finish!
We've seen a great period of action over the last minute or so - credit to both fighters for going all out!
Lenny can't escape the position.
#T1#
Lenny gets back to half guard.#SUB2#
Lenny is looking to sinch up a guillotine here but Fjeld pulls his head out easily.
Lenny trying to control from the bottom.
Ground and pound from Fjeld.
Lenny has hold of Fjeld's hands but Fjeld slips his arm to the side and lands an elbow.#SUB#
Fjeld seems to be looking for submissions.
Lenny is refusing to be controlled, as Fjeld sits in half guard. #SUB2#
Lenny looking for submissions off his back.
Fjeld looks to be in better condition than last time we saw him fight. Obviously he's been working hard on his cardio.
Lenny works his way to full guard. Good work.#T2##SUB2#
Lenny throwing his legs up looking for a triangle.
#SUB2#
Lenny is active off his back here, looking for submissions.
Lenny trying to control the position.
Fjeld has to be careful here, sitting in the guard of a superior BJJ player.
Lenny keeping moving, preventing Fjeld from controlling successfully.
Fjeld stopping the sweep attempt from Lenny.
Lenny keeping moving, preventing Fjeld from controlling successfully. #T3#
Lenny trying to control the position here.
Fjeld controls the pace of the fight for a moment.
Lenny wants to sweep here but Fjeld controlling him for the moment.
It looks like the ref is thinking about a standup.#SUB2#
Lenny is looking for a guillotine. You can't force these things though and Fjeld defends well.
Lenny looks more muscular than last time we saw him. He must have been on the weights.
Lenny keeping moving, preventing Fjeld from controlling successfully. #T4#
There's not a lot going on here and the crowd are letting the fighters know they're not willing to tolerate a lack of action.
Lenny pulls Fjeld in to control the position. #SUB2#
Lenny looking for submissions from the bottom here. Moving his hips around, possibly looking for an armbar.
#SUB2#
Lenny is looking for a triangle but Fjeld pushes his legs off easily.
Fjeld trying to control the position from guard on top but Lenny is wriggling around, looking for whatever he can. #SUB2#
Fjeld avoids a guillotine attempt easily.
Fjeld won't allow Lenny to sweep him here.
Fjeld trying to control but Lenny is working from the bottom.
And thats the end of the round the fighters go back to their corners.
Magnus Fjeld dominated that round.
The cut man is working on Tony Lenny's cut.
That's time! Fjeld's corner gives him a slap on the ass as he gets ready to fight.
#R2#
Lenny bobs and weaves and unloads with a good uppercut.
Lenny lunges in with a left hook that violently twists Fjeld head around and knocks him out cold! Lenny hops onto the cage and yells out at the top of his lungs - Yeeeeeeeeaaaaaaaaah! They're showing the replay on the big screens now; that was nasty! I hope one of the photographers got a good shot of it.
Ladies and gentlemen, after 0:12 of round 2, we have a winner by way of KO (Punch). Tony Lenny!
|
|
|
|
Event:
KAMIKAZE 6: Masters
Date: Apr 07, 2017 |
#R1#
Lenny rushes in with a sloppy looking punch
#TD2#
and MacNeill counters with a nice double leg into side control. Lenny won't be happy with that.
MacNeill should think about turning a few of those tyres round his middle into muscle if he wants people to take him seriously as an athlete.
Lenny avoids any damage from the ground and pound of MacNeill.
Lenny regains half guard.#SUB#
Lenny actively working from the bottom here.
MacNeill looks more muscular than last time we saw him. He must have been on the weights.
Lenny is not content to let MacNeill control the position.
We're hearing some news coming in from back stage. It's official - MacNeill has eaten all the pies!
MacNeill is thwarting Lenny's attempts to control the position.
Lenny definitely looks more muscular than last time we saw him fight.#SUB#
Lenny actively working from the bottom here.
We've had a slow start to the round here - hopefully the action picks up.#SUB#
Lenny looking to work for a kimura from the bottom.#SUB#
Lenny looking for submissions off his back.#T1##SUB#
Lenny looking for submissions from an awkward position here.
Lenny is trying to get back to full guard.
Lenny trying to hold on to MacNeill's head to control him but MacNeill postures up.
#SUB#
Lenny is looking to sinch up a guillotine here but MacNeill pulls his head out easily.
Lenny slips a foot under and gets full guard. Nice work.
MacNeill wants to control from the top but Lenny keeps moving. #T2#
A few boos can be heard. I'm sure they will multiply if the fighters don't pick up the pace.
Lenny wants to sweep but no luck. #SUB#
Lenny looking for submissions from the bottom here. Moving his hips around, possibly looking for an armbar.
#SUB#
Lenny is active off his back here, looking for submissions.
Lenny is looking to get back to his feet but can't, whilst MacNeill is controlling him.
MacNeill passes easily into side control. Nice work.
Lenny tries to escape but MacNeill is in control.
You can see the frustration on Lenny's face, being in this tough position on the bottom.#T3#
MacNeill scores with punches from side control.
Lenny tries to bench press MacNeill off him but MacNeill keeps the position.
You can see the frustration on Lenny's face, being in this tough position on the bottom.
Lenny is looking for a sweep.
MacNeill working away.
MacNeill fails to land a wild elbow strike.
Lenny is trying to buck MacNeill off.
MacNeill cracks Lenny with an elbow. That is naaassty.
MacNeill wants to control for a moment but Lenny uses the opportunity to move back to half guard.
Lenny is pressing down on MacNeill's left leg trying to get back to full guard. He's managed it.#T4##SUB#
MacNeill is sitting in close to Lenny's body. Lenny has gone for a guillotine from the bottom. Oh damn, that looks pretty tight! MacNeill is panicking - it looks like this one could be all over! Yes, MacNeill is tapping! That was a very nice submission by Lenny.
Ladies and gentlemen, after 4:32 of round 1, we have a winner by way of Submission (Guillotine). Tony Lenny!
|
|
|
|
Event:
Quick Fight Championship
Date: Mar 14, 2017 |
#R1#
Lenny scores with a jab. Bear acknowledges it with a nod of the head. #CUT#
It looks like Hungry Bear has been cut.
Lenny connects with a nice looking jab.
Bear moves away from the strike by Lenny.
Bear catches Lenny with a nice straight right. He seems pissed - ooooh, it's on now! On like donkey kong!
Bear works his jab well there, keeping his opponent at a distance.
Bear ducks under a wild hook from Lenny.
Bear throws out a counter right but Lenny avoids it with no problem.
Lenny fakes the body blow, causing Bear to drop his hands! Left hook to the temple! Bear goes stiff, and falls face first into the mat. Goodnight!
Ladies and gentlemen, after 0:18 of round 1, we have a winner by way of KO (Punch). Tony Lenny!
|
|
|
|
|
|
|