|
Play
by Play - Fighter's Fight Commentary
|
Event:
TWGC 28 (135lbs, D3): Los Angeles Qualifier - Round 1
Date: Feb 05, 2020 |
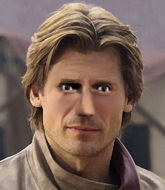
Coming up we have a bantamweight Tycoon World Grappling Championship rules bout between Cruz Dominiguez (ranked 2008 p4p, 0 weight class) and Tyago Da Souza (ranked 6048 p4p, 0 weight class). Both fighters really staring each other down here, as Tyago Da Souza enters the cage!
This TWGC bout is 1 fifteen minute round in the bantamweight division. Introducing today's competitors. In the red corner, competing out of New York, with a TWGC record of 0 wins and 0 losses; Cruz Dominiguez! And in the blue corner, fighting out of Rio de Janeiro, with a TWGC record of 0 wins and 0 losses; Tyago Da Souza!
The judges for this bout are Frank Antenori, Timothy Bukovac and Jack Bonds.
Let's get this grappling contest under way! Who will be victorious?

Dominiguez darts in and lands a nice takedown into half guard. Score +2 for takedown into guard / half guard: Dominiguez (2) vs (0) Da Souza
Da Souza wants to get back to full guard but Dominiguez has mounted him! Score +3 for passing guard: Dominiguez (5) vs (0) Da Souza
Da Souza has given up his back - I dont know if this is a deliberate ploy to try and escape or if he is just struggling down there.
Score +3 for taking back: Dominiguez (8) vs (0) Da Souza
Da Souza can't escape the position.
We've had a slow start to the round here - hopefully the action picks up.

Da Souza fending off the submission attempt from Dominiguez.
Dominiguez working for a RNC but it's not happening just yet.

That's one minute gone in the round.
Da Souza is defending well here and trying to improve his position.
We could do with one of the fighters taking the initiative a bit more on the ground - they're both waiting to capitalize on a mistake.
Da Souza keeps trying to improve his position.
Dominiguez is looking for the choke from the back position but Da Souza is controlling his hands well.
Da Souza can't escape the position.
Da Souza defends a rear naked choke attempt by controlling one of Dominiguez's arms.

That's two minutes gone in the round.
Dominiguez working for a choke but Da Souza reverses nicely into Dominiguez 's guard. Score +2 for sweep to guard / half guard: Dominiguez (8) vs (2) Da Souza
Da Souza looking to sit in guard and control but Dominiguez gets the butterfly guard and sweeps. He's now in the guard on the top. Score +2 for sweep to guard / half guard: Dominiguez (10) vs (2) Da Souza
Dominiguez trying to pass the guard but can't manage it just yet.
Dominiguez pushing down on Da Souza's thigh, trying to pass to half guard. He's managed it... Nice work.

That's three minutes gone in the round.
Dominiguez is trying for a guillotine from the top but the pressure isn't in the right place so Da Souza is just riding it out for now. Dominiguez eventually gives up the hold.
Dominiguez is looking for an arm triangle, whilst trying to pass to side control. Da Souza doesn't seem that keen to cooperate though. No luck this time Dominiguez.
Dominiguez content to control rather than advance.

That's four minutes gone in the round.
Dominiguez looking for a kimura but he'll have to free his other leg if he wants to finish that. Perhaps he's just using it as a distraction technique.
Da Souza trying to control here.

That's five minutes gone in the round.
Dominiguez looking for a kimura but he'll have to free his other leg if he wants to finish that. Perhaps he's just using it as a distraction technique.
Da Souza controlling the position for now.

That's six minutes gone in the round.
Dominiguez controlling the pace.
Da Souza is trying to maintain the position but Dominiguez is very close to passing his half guard.
Dominiguez is just sitting in half guard, waiting for something to happen.

That's seven minutes gone in the round.
Da Souza trying to keep hold of his opponent's head but Dominiguez manages to pass to mount!
Score +3 for passing guard: Dominiguez (13) vs (2) Da Souza
Dominiguez is looking to secure an arm. He's managed it! He's pivoting for an armbar - that looks tight! But Da Souza has managed to get out of it and now he's in a dominant position. Nice work from Da Souza! Score +2 for sweep to guard / half guard: Dominiguez (13) vs (4) Da Souza

Da Souza drops back looking for a heel hook - he quickly realises he's not going to get it but Dominiguez manages to dive on top of him before he can escape and now Da Souza has Dominiguez in his guard. Score +2 for sweep to guard / half guard: Dominiguez (15) vs (4) Da Souza
Dominiguez looking to control the position here, rather than advance.

That's eight minutes gone in the round.
Dominiguez pushes down on Da Souza's leg and manages to get into half guard.

That's nine minutes gone in the round.
Da Souza is defending against the submission attempts here by Dominiguez.
The fighters are pressed up against the cage, both looking to find a bit of space to work.
Da Souza is looking to control Dominiguez's leg but it's slowly edging free. Can Da Souza avoid being mounted?

That's ten minutes gone in the round.
Dominiguez trying to pass the guard but Da Souza defending well.
Dominiguez is thinking about going for an arm triangle but he can't free his leg.
Dominiguez wants to free his trapped foot but Da Souza is holding on for dear life with his legs.
Da Souza is trying to control but can't.

That's eleven minutes gone in the round.
Dominiguez perhaps working for something from half guard, or maybe not. It looks like he's just sitting there.
Da Souza is looking to improve his position.
Dominiguez not doing much here.
Dominiguez is trying to work for a kimura. This could be trouble! No, Da Souza has managed to free his arm - good work.

That's twelve minutes gone in the round.
Da Souza tries to roll over but Dominiguez keeps him under control.
Da Souza wants to control the action here but instead Dominiguez manages to pass to full mount! Score +3 for passing guard: Dominiguez (18) vs (4) Da Souza
Da Souza is working to get back to half guard.
Dominiguez moves to the back position. Score +3 for taking back: Dominiguez (21) vs (4) Da Souza

That's thirteen minutes gone in the round.
Da Souza is staying cool under pressure, defending well against the rear naked choke attempt from his opponent.
Da Souza is staying cool under pressure, defending well against the rear naked choke attempt from his opponent.
Good control from Dominiguez.

That's fourteen minutes gone in the round.
Dominiguez is persistently looking for the submission but Da Souza is defending it well.
Da Souza trying to control the hands but Dominiguez breaks the grip.
And that's the end of the fight!
Dominiguez takes the fight on points by 21 to 4. |
|
|
|
Event:
QFC Tournament 947 Round 3
Date: Jan 18, 2020 |
#R1#
Carpenter bobbing and weaving, closes the distance and lands a hook to the side of Da Souza's head.
A cross from Carpenter lands.
BOOM! Carpenter lands a beautiful left hook that drops Da Souza. Da Souza tries to recover but Carpenter is having none of it, landing more punishing shots from mount. One final crushing shot and Da Souza lies motionless on the canvas. The fight is over!
Ladies and gentlemen, after 0:10 of round 1, we have a winner by way of TKO (Strikes). Matt Carpenter!
|
|
|
|
Event:
QFC Tournament 947 Round 2
Date: Jan 17, 2020 |
#R1#
Bataglia throws a body shot but no joy.
Da Souza tries to shoot in for a takedown. He's got hold of a leg but Bataglia swivels and escapes.
Bataglia scores with a hook to the body. Da Souza takes a step back and tries to catch his breath.
Bataglia misses with a looping left.
Lorenzo Bataglia seems to be the more aggressive standup fighter in this bout.
Bataglia throws a body shot but no joy.
Bataglia waving his hands out in front of him, looking to distract Da Souza.
We've had a slow start to the round here - hopefully the action picks up.
Bataglia fakes a head shot and lands one to the body.
Bataglia's jab looks to have found its range, popping Da Souza under the eye.#T1#
Bataglia connects with a lovely right hand, straight down the pipe.
Bataglia cracks Da Souza with a good jab.
Bataglia throws a lazy body kick #TD2#
and Da Souza counters with a nice double leg into guard.
We could do with one of the fighters taking the initiative a bit more on the ground - they're both waiting to capitalize on a mistake.
Da Souza controlling from the top position. #SUB#
Bataglia is working actively off his back, looking to secure an arm or perhaps work for a triangle.
Da Souza slows down the pace of the fight, as he sits in guard.
Da Souza trying to control but Bataglia is working from the bottom. #T2#
Da Souza advances position into side control!#SUB2#
Da Souza is in a dominant position here, looking for a kimura. Bataglia looks calm but he's in trouble here. Da Souza gets his leg over his opponent's head and yanks on the arm. Bataglia is tapping like a morse code operator on the titanic! SOS! SOS! Da Souza lets go of the hold and Bataglia can pop his arm back in it's socket.
Ladies and gentlemen, after 2:31 of round 1, we have a winner by way of Submission (Kimura). Tyago Da Souza!
|
|
|
|
Event:
QFC Tournament 947 Round 1
Date: Jan 16, 2020 |
#R1##TD2#
Da Souza closes the distance and gets a trip takedown into side control. Walters quickly recovers to half guard.#ES#
Walters has one foot on Da Souza's thigh - he pushes off and manages to get back to his feet.
Toby Walters seems to be the more aggressive standup fighter in this bout.#TD2#
Da Souza scores with a nice takedown into half guard. Let's see what he's got on the ground. #SUB2#
Da Souza is looking for a kimura but he's never going to get it from there.
The crowd are loving this. Great action here.
Walters is looking to improve his position.
#SUB2#
Da Souza seems to be working for a kimura but Walters defends the submission attempt.#SUB2#
Da Souza is looking for a kimura but Walters is holding onto that half guard position, so it's hard for Da Souza to get the leverage. #SUB2#
Da Souza is looking for a kimura. It's going to be difficult to finish that from half guard though and Walters defends it well.
Da Souza seems very keen to just sit and control from half guard but Walters does not like that idea so much and is remaining active off his back.
Walters knows he needs to get back to his feet asap. He's simply no match for Da Souza on the ground.
Walters controlling the leg, holding on to half guard. #T1#
Da Souza scores with a couple of good hammerfists.
Walters is looking for a sweep. Da Souza is wise to his cunning plan and keeps the top position.
Walters is staying active underneath Da Souza, who seems content to just control the action from this position.
The ref warns both fighters not to hold the cage as they work up against the meshing.#SUB2#
Da Souza is looking for a kimura but Walters is holding onto that half guard position, so it's hard for Da Souza to get the leverage. #SUB#
Walters looking for submissions off his back.
Walters wants to improve his position but Da Souza is controlling well.
#SUB2#
Da Souza is working for a kimura but Walters is defending it quite comfortably.
The fighters are pressed up against the cage, both looking to find a bit of space to work.
Walters keeping his head moving to avoid the ground and pound. #T2##SUB2#
Da Souza is working for a kimura but Walters is defending it quite comfortably.
Da Souza is trying to control the action in half guard but Walters is working away on the bottom, looking perhaps to get back to full guard. #SUB2#
Da Souza is looking for a kimura but he's never going to get it from there.
Walters tries to roll over but Da Souza keeps him under control.
Walters is trying to control but can't.
#T3#
Walters is in a bad position, trying to hold on for dear life but he is really struggling to maintain any sort of control.
Da Souza prevents Walters from improving his position.
Da Souza is trying to control. Walters wants to improve his position but can't escape this time.
Walters has his hands clasped together around Da Souza's back. He's all about the action.
The referee is pacing around the two fighters - he looks like he's thinking about a standup.
Walters has no desire to be mounted, so is trying to control. Da Souza is working away from the top position though.#SUB2#
Da Souza seems to be working for a kimura but Walters defends the submission attempt.
Walters tries to roll over but Da Souza keeps him under control.#T4#
The crowd are showing their displeasure at the lack of action as loud boos ring out around the arena.#SUB2#
Da Souza is looking for a kimura here.
Da Souza wants to lay and pray for a moment but Walters keeps working.
Da Souza throwing punches and elbows but they're not doing any damage. #SUB2#
Da Souza is sneakily working for an arm triangle but Walters sees it coming and defends easily.
Walters wants to get back to full guard.
The crowd thankful this round is nearly over.#SUB2#
Da Souza is looking for a kimura but he's never going to get it from there.
Walters is working for an escape here. He's hooked one of Da Souza's legs and he's managed to sneak out and take Da Souza's back!
And thats the end of the round the fighters go back to their corners.
Tyago Da Souza dominated that round.
The fighters get back to their feet, the hooter sounds and we're back to the action!
#R2#
Walters keeps the fight standing with a nice sprawl.
Walters is looking to clinch.
Da Souza keeps the fight on the outside.#TD2#
Da Souza shoots in and gets a takedown into Walters's guard.
Da Souza is looking to work some ground and pound but Walters has wrist control.
Da Souza works a leg free and moves into half guard.
Walters controlling the leg, holding on to half guard.
Da Souza trying to control the action but Walters is working from the bottom.
We've had a slow start to the round here - hopefully the action picks up.#SUB2#
Da Souza is trying a forearm choke
I don't think that's going to do much at this level of the game.
#SUB2#
Da Souza is sneakily working for an arm triangle but Walters sees it coming and defends easily.#T1##SUB2#
Da Souza is looking for a kimura but Walters is holding onto that half guard position, so it's hard for Da Souza to get the leverage. #SUB2#
Da Souza is working for submissions here but there's nothing on.
Walters gets back to full guard.
Da Souza preventing the sweep. #SUB#
Walters escapes his hips to the side and looks to be working for an armbar. Da Souza gives him a little smile and shakes his head. No chance.
Da Souza looking to pass the guard. #T2#
There's not a lot going on here and the crowd are letting the fighters know they're not willing to tolerate a lack of action.
Da Souza wants to control from the top but Walters keeps moving.
Walters is working from a closed guard but he's struggling to control his opponent.
Da Souza forces his way into half guard.
Walters moves into full guard.
Da Souza has been the more effective fighter overall so far.
Da Souza pressing down on his opponent's thigh, looking to pass guard. Walters is keeping the position for now.
Walters looking for a sweep. Not yet Walters, not yet.
Da Souza wants to control from the top but Walters keeps moving.
Walters trying to control the position.
#T3#
Da Souza trying to control the position from guard on top but Walters is wriggling around, looking for whatever he can.
Da Souza sneaks a leg through and gets to half guard. That was like a knife through butter how easily he passed Walters's guard.
Da Souza wants to lay and pray for a moment but Walters keeps working. #SUB2#
Da Souza seems to be working for a kimura but Walters defends the submission attempt.
Walters keeping control of the leg, stopping his opponent passing to mount.
Walters trying to hold on to Da Souza's head to control him but Da Souza postures up.
#T4#
Neither fighter has done anything of merit for a good minute or two here and the crowd are not happy about it.
Walters gets back to full guard.
Walters keeping moving, preventing Da Souza from controlling successfully.
Walters trying to strike from the bottom but really, it's not the best position to be doing that from!
Da Souza stands and throws Walters's legs to the side, diving into side control. #SUB2#
Da Souza is looking for a kimura. He might have it! No, Walters has escaped the position, nice work there. #SUB2#
Da Souza is looking for a kimura. He might have it! No, Walters has escaped the position, nice work there.
Tyago Da Souza has got the better of the ground game so far.
Boooooooooooooooooooo!!! God, this has been a terrible round. Come on you two, sort yourselves out!
Da Souza trying to control the position but Walters is working away.
And thats the end of the round the fighters go back to their corners.
Tyago Da Souza showed his class in that round. I'd imagine he'll take it on all the scorecards.
That's the end of the round. The referee orders the cornermen out of the cage so we can get back down to business. This is the final round!
#R3##TD#
Da Souza gets caught on his heels momentarily as he allows Walters to score an easy takedown into full guard.
Da Souza wants to sweep here but Walters controlling him for the moment.
Walters is stalling in the full guard.
We've had a slow start to the round here - hopefully the action picks up.
Da Souza tries to land a sweep but no joy.
Da Souza is working from a closed guard but he's struggling to control his opponent.#T1#
Walters wants to pass the guard but Da Souza is keeping the position.
Da Souza looking to control.
Walters working some ground and pound from guard but it's not doing any damage.
Da Souza keeping full guard, as Walters tries to pass. #REF3#
The referee decides to stand the fighters back up.
Walters avoids the head kick by Da Souza.
#TD#
Walters fakes an overhand right and shoots for a takedown. Da Souza sprawls well initially but Walters persists and gets the takedown into half guard.
Da Souza wants to control but Walters is keeping busy and won't allow it.
Walters trying to control the pace. #T2#
Da Souza is staying active underneath Walters, who seems content to just control the action from this position.
Da Souza is looking to improve his position.
Da Souza is not content to let Walters control the position.
Walters is really struggling to control Da Souza but he's trying to hold on to the position.#REF3#
The referee has motioned to the fighters to stand back up. He just wasn't happy with the level of activity.#TD2#
Walters tries to sprawl but Da Souza drives through with a takedown into half guard.#T3#
Walters wants to get back to his feet.
Da Souza sitting in half guard, looking to land shots. Walters defending well though. #SUB2#
Da Souza is sneakily working for an arm triangle but Walters sees it coming and defends easily.#SUB2#
Da Souza is trying to work for a kimura but Walters is defending well.
Walters tries to strike from the bottom but it doesn't land. #SUB2#
Da Souza is trying to work for a kimura but Walters is defending well.
Walters is trying to stand up here but Da Souza is controlling him well. #T4#
The crowd are getting on the fighters' backs, as the pace has dropped off in the last minute or so.
Walters is refusing to be controlled, as Da Souza sits in half guard.
Walters punching from the bottom.
Walters is positioning himself well to prevent Da Souza advancing to mount.
Da Souza is thwarting Walters's attempts to control the position.
Da Souza controlling the action here.
Walters looks like he's trying to stand up.
#REF3#
The referee decides to stand the fighters back up.
Boooooooooooooooooooo!!! God, this has been a terrible round. Come on you two, sort yourselves out!
Da Souza fails with the takedown.
And that's the end of the fight!
Toby Walters showed his dominance in that final round.
I think Da Souza has won this one but let's see whether the judges agree with me. Over to the ring announcer for the scorecards.
Ladies and gentlemen, after 3 rounds of action, we go to the scorecards for a decision.
Judge Donatello Bradman scores the fight for Tyago Da Souza!
Judge Skip Squint scores the fight for Tyago Da Souza!
Judge Damien Edna scores the fight for Tyago Da Souza!
Tyago Da Souza wins by unanimous decision!
|
|
|
|
|
|
|