|
Play
by Play - Fighter's Fight Commentary
|
Event:
TWGC 31 (145lbs, D4): Sydney Qualifier - Round 1
Date: Sep 04, 2020 |
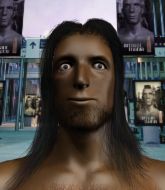
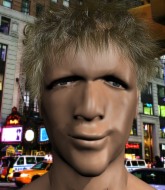
This TWGC bout is 1 fifteen minute round in the featherweight division. Introducing today's competitors. In the red corner, competing out of Amsterdam, with a TWGC record of 0 wins and 0 losses; Bs Sag! And in the blue corner, fighting out of Helsinki, with a TWGC record of 3 wins and 1 losses; Bob Brown!
The judges for this bout are Francis DeMontford, Ben Watson and Ben Hemmingworth.
Let's get this grappling contest under way! Who will be victorious?#TD2#
Brown shoots in and gets a takedown into Sag's guard. Score +2 for takedown into guard / half guard: Sag (0) vs (2) Brown
Brown pushing down on Sag's thigh, trying to pass to half guard. He's managed it... Nice work. #SUB2#
Brown looking for a kimura but he'll have to free his other leg if he wants to finish that. Perhaps he's just using it as a distraction technique.
#SUB#
Sag actively working from the bottom here.#SUB2#
Brown seems to be working for a kimura but Sag defends the submission attempt.#SUB#
Sag looking to work for a kimura from the bottom.
We've had a slow start to the round here - hopefully the action picks up.
Brown moves into full mount! Sag won't be happy about that! Score +3 for passing guard: Sag (0) vs (5) Brown
Brown wants to take his opponent's back but he's not managed it. #SUB2#
Brown has hold of Sag's left arm, perhaps looking for a submission. The two fighters tussle over control of the isolated limb and Sag manages to get his arm back to his side and away from danger.
#T1#
Brown controlling from mount. #SUB2#
Sag tries to improve his position but Brown has taken his back! Brown has a choke - it's sunk in pretty tight... Will Sag tap? No... maybe... yes! He's tapped! Brown pushes Sag away and gets up to celebrate with his corner!
Ladies and gentlemen, after 1:30 of round 1, we have a winner by way of Submission (RNC). Bob Brown! |
|
|
|
Event:
OFK 11 - Cooper Vs Duterte
Date: Aug 15, 2020 |
#R1#
The bell rings for round one and we are underway!#CL2#
Willshire has taken the fight to the clinch.
#TD#
Sag has double underhooks and is working for a body lock takedown. He's got it. The fighters land in half guard but Willshire regains guard immediately. #ES2#
Willshire has his feet on Sag's hips. He pushes off and gets to his feet. Nice work.
A jab from Sag finds it's way through Willshire's defenses.
Willshire has his head snapped back a nice jab. A little nod from Willshire there as he acknowledges the shot.
Willshire tries to grapple but his opponent circles #TD#
and Sag counters with a nice double leg into half guard.
The fans in attendance giving it up for the two fighters, who have really let it all hang out in the last minute or so!#SU#
Sag stands up from half guard.
Sag ducks under a wild hook from Willshire.
As Willshire looks to move away, Sag throws a big counter combo but Willshire just gets out of the way.
Willshire dips down and scores with a jab to the body.#T1#
A combination from Sag does no damage. #CL2#
Willshire darts in and clinches Sag up against the cage.
Sag throws a blind hook that connects with the side of Willshires head.
Sag has a couple of punches blocked by Willshire.
#TD#
Sag wants the takedown. Willshire is fighting it off but Sag persists and manages to bring the fight to the ground, ending up in Willshire's guard against the cage.#SU#
Willshire is working an open guard so Sag takes the opportunity to get back to his feet.
Willshire darts in looking for a takedown but Sag gets double underhooks and turns Willshire into the cage.
Sag throws a wild combination but nothing lands.
Willshire takes a swing at Sag's ribcage but misses.
Willshire shuffles to his left behind two crisp jabs. Sag eats them both and turns towards Willshire to reposition himself and eats a stinging right hand-left hook combo.#ROC2#Sag is rocked!
Wooooo! Give it up for these two warriors! They are putting on a show!
Willshire tries to clinch up but Sag circles away and keeps his distance.#T2##TD#
Sag shoots in for a takedown! He's got it and he's managed to land in side control! That's better than Sag was expecting from the takedown attempt, I'm sure!
Willshire tries to buck Sag off but Sag is having none of it.#SU#
Sag decides to stand back up.
Willshire wants to clinch.
Sag appears to be looking for a big counter.#TD2#
Willshire drives through with a really nice takedown into side control.#T3#
Sag is trying to get back to his feet.
Willshire looks up at the clock and then as Sag takes his cue and looks up at the clock too, Willshire smacks him right in the chops with a big elbow! How rude!
Sag is trying to get back to his feet.#SUB2#
Willshire tries for a kimura. Not really close to a finish though.
Sag tries to escape but Willshire is in control.
Willshire scoring with punches and elbows.
In the pre-fight buildup videos we saw Willshire working his ground and pound in the gym. So far it seems to be working well.
Sag wants to get back to his feet but Willshire drags him back down.
The fighters are pressed up against the cage, both looking to find a bit of space to work.#T4#
Sag trying desperately to get back to his feet here but he's not having any joy at all. He's going to tire himself out if he's not careful.
Sag bucks up and tries to throw Willshire off but instead Willshire has got his back!
Willshire is working the ground and pound here and the referee is taking a close look at Sag. He must escape soon or this one will be stopped.
Sag trying to get back to his feet but Willshire is in full control for now.
A lull in the action here.
Willshire scores with punches and elbows. #SUB2#
Sag fending off the submission attempt from Willshire.
Sag trying to get back to his feet but Willshire is in full control for now.
And thats the end of the round the fighters go back to their corners.
A close round but Perdue Willshire will probably get the nod.
Well, the break between rounds is over. Let's get back to the scrappin!#R2#
A telegraphed takedown attempt from Willshire is defended easily by Sag.
Sag appears to be looking for a counter takedown.#TD2#
Willshire drives through with a really nice takedown into side control.
We've had a slow start to the round here - hopefully the action picks up.
Sag is trying to stand back up. He's worked his way up against the cage but Willshire has just dragged him back down to the mat.
Sag tries to get back to his feet but has found himself mounted instead. Damn, that's gotta suck.
Sag wants to use the cage to get back to his feet here.
Willshire landing strikes from the mount and Sag is in trouble! #T1#
Willshire won't let Sag get back to his feet... He wants to keep the fight where it is for now. #ES#
Sag somehow manages to escape the mount and get back to his feet!
Sag blocks a head kick by Willshire.
It looked like Sag wanted to counter with a hook but didn't fully commit.
Sag circles away from the clinch attempt.
Sag connects with the punch.
A big right from Sag misses. #CL2#
Willshire clinches with his opponent.
Sag scores with an uppercut up the middle.
Sag lands a shoulder strike that jolts his opponent's head backwards. #BC2#
Willshire's corner calls for him to break the clinch, which he does.
Willshire punishes Sag's body with a nice straight punch.#T2##TD#
A momentary lapse in concentration from Willshire enables Sag to shoot in and score with a neat double leg. Willshire manages to secure a closed guard as the fighters hit the mat.
The crowd are loving this. Great action here.
Willshire seems keen to control rather than go for a submission, at least for now.
Willshire wants to stand and escape but Sag is having none of it.
Perdue Willshire has got the better of the ground game so far.#SU#
Sag decides he's had enough of playing guard and decides to stand. Come on Willshire, up you get!
Sag takes a body punch but keeps moving.
Sag avoids the clinch attempt nicely.
Sag lands a leg kick that knocks Willshire off balance momentarily.
Willshire tries to close the distance and clinch but Sag swats him to one side with an open hand palm strike and circles away.
Sag half commits to a counter takedown before pushing away, out of range.
Willshire dives in and grabs Sag's left leg, looking for a takedown. Sag pushes down on Willshire's head and hops out.#TD#
Sag shoots in for a takedown from distance. He catches Willshire napping and manages to drive through into side control!#T3#
Sag tries to land with some ground and pound but misses.
Willshire taking a bit of punishment here - Sag scoring with strikes.
Willshire defending against the ground and pound.
A lull in the action here.
Willshire is looking to regain half guard here but Sag keeps moving and retains side control.
Sag wants to control but Willshire is keeping him busy. #SU#
Sag decides to stand back up. Sag steps back and let's Willshire get back to his feet.
Bs Sag is winning the standup battle so far.
Willshire misses with a body shot.
Sag feinted with a counter takedown.
Willshire just misses with a punch to the body.
#T4#
Sag throws a couple of head shots and lands with the final one - a decent hook, which struck Willshire on the side of the head. #TD#
Sag scores with a takedown into Willshire's guard.#SU#
Sag decides he's had enough of playing guard and decides to stand. Come on Willshire, up you get!
Bs Sag is looking to throw some combinations by the looks of things.
Sag checks a low kick. Bone on bone - not my idea of a good time.
Nice jab there from Sag.
Sag attempts a leg kick but it's missed by a good margin.
Willshire misses with a body shot
and Sag counters with a left to the body.
A looping hook to the body misses from Willshire. Sag does a little dance to reset his feet.
And thats the end of the round the fighters go back to their corners.
Bs Sag dominated that second round.
Well, the break between rounds is over. Let's get back to the scrappin! Ladies and gentlemen, this is the final round!#R3##CL2#
Willshire has taken the fight to the clinch.
Both fighters working to control the clinch.
Sag scores with a nice hook to the head.#TD2#
Sag is fighting off a takedown attempt but Willshire is just too persistent for him and manages to trip Sag to the mat. Sag regains guard as soon as the fighters hit the mat.#ES#
Sag pushes Willshire off and gets back to his feet.
Willshire throws a body kick that misses.
Sag changes levels looking for a counter takedown but doesn't commit.#TD2#
Willshire feints and then dives in with a takedown. That was a long way out but the feint bought him enough time to close the distance and complete the takedown. Now we'll play guard for a bit and see who can get the better of that position.#ES#
The fighters are working up against the cage. Sag manages to wriggle his way back to his feet, so the fighters are now clinched against the cage.
The crowd cheering loudly, showing their appreciation for the quality fight we're seeing here.
Sag misses with a body punch.
Nice body punch from Willshire.
Sag throws a head punch that misses.
Willshire's head jolts backwards as he takes an uppercut right on the button!
The fighters are pressed against the cage, as the pace of the fight slows.
Willshire tries to stall but Sag uses the opportunity to gain a better position.
#T1##TD#
Sag tightens his grip and picks Willshire up, before dumping him to the ground. Willshire manages to land in guard. #ES2#
Willshire uses the cage to get back to his feet.
Willshire takes a swing at Sag's ribcage but misses.
Sag appears to be looking for a counter punch to the body.
Willshire misses with an uppercut
and Sag cracks him with a counter punch right on the button.
Willshire throws a combination but it was largely blocked by Sag.
Sag looks to be in better condition than last time we saw him fight. Obviously he's been working hard on his cardio.
Willshire is throwing a lot of body shots here, looking to wear down Sag rather than just go for the knockout.
Willshire swings wildly with a couple of big hooks
and Sag counters with a left and a right that stings Willshire.
Willshire takes a big intake of breath there - he's definitely tired.
The crowd are loving this. Great action here.
Willshire tries to clinch but is not successful on this occasion.
Willshire walks into a stiff left hand from Sag.
Sag slaps away a takedown attempt from Willshire, before circling back to the center of the mat.#T2#
Willshire misses with a telegraphed body shot
and Sag counters with a nice jab to the body that keeps Willshire thinking.
A shot to the liver by Sag. Beautiful body shot.
Sag lands with a nice combination. Willshire backs away looking to recover.
Willshire is trying hard to land a takedown here. Sag sprawls well and keeps this one on the feet.
Sag throws a shot to the body.
#TD#
Willshire gets taken down but at least he's managed to land in guard.
Sag with a flurry of punches that miss. #T3#
Sag wants to control from the top but Willshire keeps moving.
Sag throws a big right hand that misses. #SU#
Willshire is working an open guard so Sag takes the opportunity to get back to his feet.
Sag takes a punch right to his stomach. That took the wind out of him momentarily.
Willshire tries to clinch up.
Willshire tries for a takedown but Sag circles away easily#TD#
and Sag counters with a nice double leg into guard.
Bs Sag has stuffed three takedown attempts in the round now. That's going to take a lot out of Perdue Willshire.
Sag is frustrating his opponent with some stalling tactics from top position.
Sag landing some decent shots from guard. #T4#
Sag not doing a lot at the moment. He'll have to show some more aggression or the fight will get stood up.
Willshire is trying to control the position from the bottom.
Willshire is working an open guard here, looking to improve his position. No doubt that will leave him open to counters but at least he's being more offensive.
Sag is frustrating his opponent with some stalling tactics from top position.
Sag stands and throws Willshire's legs to the side, diving into side control.
Sag lands a nice forearm strike.
Sag scores with a couple of short elbows.
Willshire taking a bit of punishment here - Sag scoring with strikes.
And that's the end of the fight!
Bs Sag showed his dominance in that final round.
Well Sag has outscored his opponent in every aspect of the fight today. Only a scarily incompetent judge or two will keep him from a well deserved win... Over to the ring announcer for the scorecards.
Ladies and gentlemen, after 3 rounds of action, we go to the scorecards for a decision.
Judge Nard Betker scores the fight 29:28
Judge Daniel Blasius scores the fight 29:28
Judge Wagner Zegers scores the fight 29:28
In favor of your winner, by unanimous decision... Bs Sag!
A relieved looking Bs Sag thanked the fans for their support and gave the usual line about them being amazing. They seemed to believe that he actually meant it. |
|
|
|
Event:
Quick Fight Championship
Date: Jul 24, 2020 |
#R1#
The bell rings for round one and we are underway!#TD2#
Dalenger closes the distance and looks for a trip takedown... aaaand he's got it - Dalenger lands in his opponent's guard.
Dalenger trying to control the position from guard on top but Sag is wriggling around, looking for whatever he can.
Sag wants to stand up but Dalenger is controlling him.
The ref warns both fighters not to hold the cage as they work up against the meshing.
Dalenger advances to half guard.
Dalenger is keen to just control but Sag is a slippery customer.
Sag is trying to stand back up but Dalenger is controlling him
We've had a slow start to the round here - hopefully the action picks up.
Sag blocking the ground and pound attempt from Dalenger.
Sag is trying to stand up here but Dalenger is controlling him well.
Dalenger is figuring out what he wants to do next.
Dalenger passes to side control. #T1#
The strikes coming from Dalenger are missing the target in this wave of attacks.
Dalenger looking to punish the body of his opponent here but Sag is avoiding damage well.
Dalenger has the superior BJJ but he's also working some ground strikes into his gameplan.
Sag is looking to work his way out of this bad position but Dalenger is controlling him well.
Sag is being controlled here.
Dalenger is looking to take a break and control but Sag is keeping him honest, looking to work from the bottom.
Dalenger takes a little break here. Sag wants to take advantage but he is being controlled well.
Sag wants to get back to his feet but Dalenger drags him back down.#T2#
The crowd are showing their displeasure at the lack of action as loud boos ring out around the arena.#REF3#
The ref stands the fighters back up due to a lack of activity.
A really sloppy takedown attempt there from Dalenger.
Dalenger shoots in with a takedown attempt and he has Sag pinned against the cage. Sag gets the underhooks and manages to circle away. #CL2#
Dalenger clinches with his opponent.
#BC#
Sag breaks the clinch.
Dalenger looks frustrated there after his takedown attempt is stuffed easily.
Bs Sag has stuffed three takedown attempts in the round now. That's going to take a lot out of Paul Dalenger.#T3#
Dalenger tries to move into range but Sag moves to the side and lands with a nice right hand.
Good standup being displayed there by Sag as he connects with a hook.
Dalenger drops his hands momentarily and Sag takes advantage with a crisp shot to the head.
Sag catches Dalenger with a nice straight right. He seems pissed - ooooh, it's on now! On like donkey kong!
Sag fakes low and throws an overhand right that catches Dalenger on the side of the head.#TD2#
Dalenger fakes an overhand right and shoots for a takedown. Sag sprawls well initially but Dalenger persists and gets the takedown into half guard.
Sag is looking to escape.#ES#
Sag pushes Dalenger off and gets back to his feet.#T4#
Wooooo! Give it up for these two warriors! They are putting on a show!
Sag's corner calls for a 1, 2 combination and Sag duly obliges.
Sag throws a hook to the body but it doesn't connect.
Sag circles away from the clinch attempt.
Sag appears to be looking for a big counter.
Sag swings for the body but Dalenger moves out of range.
Sag swings wildly with a hook that is half blocked by Dalenger.
Dalenger tries a switch kick but it misses it's target.
Sag cracks Dalenger with a right hand to the side of the head.
Sag connects with the punch.
Sloppy strikes from Dalenger. Those never looked like landing.
Dalenger fakes high and shoots in for a takedown but Sag avoids it really well and circles away.
Sag was looking to counter that move with a punch but didn't quite pull the trigger.
And thats the end of the round the fighters go back to their corners.
Bs Sag dominated that round.
That's the end of the round. The referee orders the cornermen out of the cage so we can get back down to business.#R2#
Sag blocks the body kick.
#TD#
Sag shoots in for a takedown! He's got it and he's managed to land in side control! That's better than Sag was expecting from the takedown attempt, I'm sure!
A lull in the action here as Sag stalls from top position.
Sag working away.
A bit of a lull in the action. I'm sure it will pick up again soon... even if the ref has to physically pick them up and put them back on their feet.
Dalenger tries to work a leg under to get back to half guard but Sag wriggles his own leg back out and remains in side control. #SU#
Sag stands up and beckons Dalenger to his feet.
Dalenger tries to clinch up but Sag circles away and keeps his distance.
Sag seem to be loading up, looking for a big counter.
We've had a slow start to the round here - hopefully the action picks up.
Dalenger walks straight into a jab right on the nose. That one stung - he's blinking and trying to clear his head.
Dalenger with a lazy takedown attempt
and Sag counters with a nice jab to the body that keeps Dalenger thinking.
Sag connects with a body shot that sends Dalenger's belly button to the back.#T1##TD#
Excellent takedown into side control there by Sag.
Sag wants to lay and pray for a moment but Dalenger keeps working.
Sag working away.
Dalenger is not content to let Sag control the position.
Dalenger is looking for a sweep.
Sag wants to lay and pray for a moment but Dalenger keeps working.
Dalenger struggling a bit here.#T2##SU#
Sag has had enough of the ground for now and decides to stand.
Dalenger misses with a takedown
and Dalenger takes a counter punch right on the button for his troubles.
Dalenger misses with a half-hearted attempt at a head kick.
Dalenger is breathing heavily.
Nice sprawl there from Sag as Dalenger shoots in.
Bs Sag has stuffed three takedown attempts in the round now. That's going to take a lot out of Paul Dalenger.#TD#
Sag closes the distance and after a bit of a stuggle, scores a takedown into Dalenger's guard.
The crowd cheering loudly, showing their appreciation for the quality fight we're seeing here.
Dalenger working a defensive guard here.
Sag wants to get up but he can't break Dalenger's closed guard. He needs to be careful trying to break the legs open, as he's open to submissions here.
Sag knows he needs to get back to his feet asap. He's simply no match for Dalenger on the ground.#T3#
Sag is intent on slowing down the pace of the fight, simply looking to control.
Sag is really dominating this fight. Is there anything that Dalenger can do to turn this around?
The referee is asking the fighters to pick up the pace.#REF3#
The referee has decided to stand the fighters back up, so we'll restart on the feet.
Dalenger doesn't succeed with the takedown
and Sag counters with a lovely straight right hand!#T4#
A lull in the action here being met with boos from the crowd.
Dalenger takes a solid shot to the body. That one hurt him but he's trying not to show it.#TD#
Dalenger gets taken down but at least he's managed to land in guard.
The fighters are pressed up against the cage, both looking to find a bit of space to work.
Dalenger wants to sweep but no luck.
Sag controlling from the top position.
Sag's ground tactics aren't going to win him many fans. Let's hope he's got fireworks for us if he gets back to his feet because he's not doing much on the ground.
The crowd thankful this round is nearly over.
Dalenger wants to sweep here but Sag controlling him for the moment.
Dalenger has Sag pulled in close to control his posture.
And thats the end of the round the fighters go back to their corners.
Bs Sag dominated that second round.
The minute break is over - no more time for sponges and pep talks - back to the action! This is the final round!#R3##TD#
Sag looking to score a takedown here. Dalenger is defending well but Sag drives through and ends up in Dalenger's guard.
Dalenger tries to land a sweep but no joy.
Dalenger doesn't do any damage with a couple of strikes from the bottom.
#SU#
Sag stands up from Dalenger's guard - Sag perhaps looking for a knockout.
Sag throws a big shot that misses.
Sag ducks down and throws a hook to the body but Dalenger moves away.#TD#
Dalenger gets caught flat footed, as Sag shoots in with a quick takedown into guard.
We've had a slow start to the round here - hopefully the action picks up.#SUB2#
Dalenger working for a triangle but Sag defends it easily.
Dalenger looking to control.
Dalenger being controlled here, momentarily. #T1#
Dalenger looking for a sweep. Not yet Dalenger, not yet.
Dalenger is persisting with the attempt to improve his position.
Bs Sag overall seems to be getting the better of the ground position in the fight so far.
Dalenger takes a big intake of breath there - he's definitely tired.
Sag trying to control the position from guard on top but Dalenger is wriggling around, looking for whatever he can.
Sag looking to control the position here, rather than advance. #SUB2#
Dalenger is looking for a triangle but Sag pushes his legs off easily.
Sag controls from within his opponent's guard. #SU#
Sag stands up and waves to Dalenger to follow him. #T2#
The crowd are hurling abuse towards the fighters... You can hardly blame them though because there isn't a lot going on in the fight.
Sag thuds a left hand into Dalenger's body.
Sag shoots in for a takedown but Dalenger shows good takedown defense. #TD#
Sag closes the distance and gets a trip takedown into side control. Dalenger quickly recovers to half guard.
Sag trying to control the action but Dalenger is working from the bottom.
Sag not doing much here.
Dalenger wants to control but Sag is keeping busy.
#T3#
It looks like Sag is going to stand back up.
Dalenger is looking to control Sag's leg but it's slowly edging free. Can Dalenger avoid being mounted?
It looks like Sag is going to stand back up.
#SUB2#
Dalenger is looking to sinch up a guillotine here but Sag pulls his head out easily.
Sag looks over to his corner - he wants some instructions but his corner are not responding.
We may be looking at a referee standup if the pace doesn't pick up soon.
Dalenger looks like he's trying to stand up.
#REF3#
The referee has decided to stand the fighters back up, so we'll restart on the feet.
Sag cracks Dalenger with a good shot that sees him stumbling back into the cage.
Bs Sag is winning the standup battle so far.#T4#
The crowd are starting to boo a lack of action.
Dalenger shoots for a takedown but Sag saw that one coming a mile off and avoided it easily.
Dalenger shoots and misses
enabling Sag to counter with a crisp jab.
Sag lets the fists fly and connects with a left straight followed by a right hook.
Sag scores with a slapping inside leg kick.
Bs Sag is looking to throw some combinations by the looks of things.
Dalenger gets his takedown attempt stuffed easily
letting Sag counter with a right hand.
Bs Sag has stuffed three takedown attempts in the round now. That's going to take a lot out of Paul Dalenger.
Sag tries for a takedown but Dalenger sees it coming a mile off and avoids it easily.
The crowd thankful this round is nearly over.
Dalenger takes a shot to the eye socket. That's gotta hurt.
Paul Dalenger has stepped it up - he knows he needs a finish here!
Bs Sag is fighting for a decision here - he's started to take the cautious approach.
Dalenger takes one on the button.
And that's the end of the fight!
Bs Sag showed his dominance in that final round.
Well I reckon that's a shut out for Sag, winning every round. Will the judges agree? They are the ones who matter, even if they are often depressingly incompetent. Over to the ring announcer for the scorecards.
Ladies and gentlemen, after 3 rounds of action, we go to the scorecards for a decision.
Judge Vladimir Khabensky scores the fight 30:27
Judge Ivan Kurochkin scores the fight 30:27
Judge Igor Prikhodko scores the fight 30:27
In favor of your winner, by unanimous decision... Bs Sag!
After winning the bout, Bs Sag thanked all his fans and promised he'd do even better in his next fight. The crowd seemed to love his humility. |
|
|
|
|
|
|