|
Play
by Play - Fighter's Fight Commentary
|
Event:
TWGC 34 (155lbs, D2): Montreal Qualifier - Round 1
Date: Jun 29, 2021 |
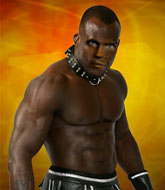
This TWGC bout is 1 fifteen minute round in the lightweight division. Introducing today's competitors. In the red corner, competing out of New York, with a TWGC record of 0 wins and 0 losses; Etimoni Founuku! And in the blue corner, fighting out of Las Vegas, with a TWGC record of 0 wins and 0 losses; Nuri Jafar!
The judges for this bout are Gregory Folan, Dillan Fox and Elvis Blanc.
The fighters connect hands in the middle of the mat and we are under way.
Founuku fails with an attempt to clinch.
Founuku tries to close the distance and clinch up but Jafar swats him away and circles back towards the center. #CL2#
Jafar instigates a clinch. #TD#
Founuku pulls guard successfully.
#SUB#
Founuku is working actively off his back, looking to secure an arm or perhaps work for a triangle.
Jafar pressing down on his opponent's thigh, looking to pass guard. Founuku is keeping the position for now.
Jafar forces his way into half guard.
Jafar prevents Founuku from improving his position.
The ref warns both fighters not to hold the cage as they work up against the meshing.
We've had a slow start to the round here - hopefully the action picks up.#SUB#
Founuku looking for submissions from an awkward position here.
Founuku moves his hips nicely and gets into full guard.
Founuku has been talking about how he's improved his wrestling in the run up to the fight so let's see if that's enough to sway the balance.
The fighters are pressed up against the cage, both looking to find a bit of space to work.#T1#
Jafar preventing the sweep.
Founuku is trying to control the position from the bottom.
Jafar slows down the pace of the fight, as he sits in guard.
Jafar tries to free his leg and advance position but Founuku is retaining full guard.
Jafar is still trying to improve position.#SUB#
Founuku is working actively off his back, looking to secure an arm or perhaps work for a triangle.
Jafar wants to pass the guard but Founuku is keeping the position.#SUB#
Founuku had isolated an arm as going for a kimura. Jafar defends it easily.
Founuku looking to control.
#T2#
Founuku looking to sweep here. No luck so far.
Jafar not doing a lot at the moment. He'll have to show some more aggression or the fight will get stood up.
Jafar pressing down on his opponent's thigh, looking to pass guard. Founuku is keeping the position for now.
Jafar engaging in some classic timewasting tactics. #SUB#
Founuku looks to be working for a triangle here. Oh, it looks like he might have it! Jafar has picked Founuku up and slammed him! Founuku can't keep hold of the triangle and Jafar manages to pass to side control! Score +3 for passing guard: Founuku (0) vs (3) Jafar
Founuku is looking to reverse the position.
Founuku is working hard here to advance position.
Jafar controls the position from side control.#T3#
Founuku prevents Jafar from moving into mount.
Founuku is looking to reverse the position.
Founuku being controlled for a moment.
Founuku is trying to control Jafar's posture but Jafar avoids it.
Jafar controlling from side mount. #T4#
Jafar wants to control but Founuku is keeping him busy.
Jafar tries to cartwheel into mount but he doesn't manage it.
Jafar moves into full mount! Score +2 for reaching mount: Founuku (0) vs (5) Jafar
Jafar controlling the position easily from mount.
Founuku tries to lock up and control but Jafar gives him a forearm to the face and pushes him away.#T5#
Founuku is working to get back to half guard.
Jafar sitting in mount, just looking to control for the moment.
Founuku is trying to escape the mount.
Founuku sneaks a leg back under and regains half guard and is working straight away to try and get back to guard. He hasn't managed just yet though.
Still in half guard, Jafar seems content to control.
Jafar passes the half guard and he's now in mount! Big trouble for Founuku! Score +3 for passing guard: Founuku (0) vs (8) Jafar
Jafar controlling from mount. #T6#
Let's hope that Jafar has the urge to step up the pace any second now because for the last 15 or 20 seconds he's just been holding on tight.
Founuku is in all sorts of trouble here.
Jafar sitting in mount, just looking to control for the moment.
Founuku is writhing around trying to get back to his feet.
Jafar looking to control and managing it successfully.
Founuku is trying to escape the mount.
#T7#
Founuku is trying to escape the mount but Jafar keeps good control and instead manages to take Founuku's back.
Score +3 for taking back: Founuku (0) vs (11) Jafar
Jafar is controlling his opponent, waiting for an opportunity to finish.
Jafar keeps control of the position as Founuku tries to break free.
Jafar keeps control of the position easily here as Founuku tries to buck him off.
Founuku trying to control the position but Jafar manages to sink in the hooks.
Founuku can't escape the position.
Jafar doesn't have the hooks in and Founuku manages to turn into his guard.
Score +2 for sweep to guard / half guard: Founuku (2) vs (11) Jafar
Founuku tries to free his leg and advance position but Jafar is retaining full guard.
Jafar bucks up whilst keeping hold of a body lock, managing to reverse the position. Now he's in top in Founuku's guard. Score +2 for sweep to guard / half guard: Founuku (2) vs (13) Jafar
Jafar looking to control the position here, rather than advance. #T8#
Founuku is working from a closed guard but he's struggling to control his opponent.
Jafar trying to pass the guard but can't manage it just yet.
Jafar controls from within his opponent's guard. #SUB#
Founuku is looking for a guillotine. You can't force these things though and Jafar defends well.
Jafar is stalling in the full guard. #T9##SUB#
Founuku is active off his back here, looking for submissions.
Jafar forces his way into half guard.
Jafar content to control rather than advance. #SUB2#
Jafar is working for submissions here but there's nothing on.
Well, if Jafar is going to just lie there, perhaps we should talk about what we're having for dinner tonight
I'm having a ham and pineapple pizza
Yum. Can't wait.
#T10#
Founuku tries to roll over but Jafar keeps him under control.
Jafar performing his best blanket impression for a moment.
It looks like Jafar might be adopting somewhat of a lay and pray gameplan here, which I'm sure won't go down too well with the paying fans in attendance... Or the ring announcers come to think of it.
Jafar's corner are shouting for him to control the position and he seems happy to oblige.#T11#
Founuku is trying to maintain the position but Jafar is very close to passing his half guard.
Jafar trying to control the pace.
Founuku trying to control but Jafar postures up.
Jafar uses his free foot to push down on Founuku's thigh. Eventually he works his other foot free and he's advanced to mount - this is trouble for Founuku. Score +3 for passing guard: Founuku (2) vs (16) Jafar
Founuku is controlling an arm, preventing Jafar from taking his back. Although keeping him in mount is no better to be honest.
#T12#
Jafar content just to control the position here.
Founuku is looking to improve his position but Jafar isn't that keen on the idea.
Jafar tucks in and makes sure he doesn't lose the dominant position.
Jafar wants to take Founuku's back but he can't do it this time.
Jafar sitting in mount, just looking to control for the moment.
Founuku slips a leg in and gets back to half guard.#T13#
Jafar controlling the pace.
Jafar is looking to pass the guard... He's managed it - he's now in full mount! Score +3 for passing guard: Founuku (2) vs (19) Jafar
Founuku is wriggling around trying to escape.
Jafar controlling his opponent.
Jafar moves to take his opponent's back. Score +3 for taking back: Founuku (2) vs (22) Jafar
Jafar controls the action.#T14#
Founuku is defending well here and trying to improve his position.
Jafar is riding his opponent, not letting Founuku buck him off.
Jafar is continuing to stall.
Boooooooooooooooooooo!!! God, this has been a terrible round. Come on you two, sort yourselves out!
Founuku is defending well here and trying to improve his position.
So, who will make the next big move? In this position it could be crucial.
And that's the end of the fight!
Jafar wins on points by 22 to 2.
Nuri Jafar made sure to mention his sponsor, Core Combat in his post fight interview. |
|
|
|
Event:
LOM Lightweight Final
Date: May 22, 2021 |
#R1#
Dangerous throws a big shot that misses.
Dangerous scores with a punch to the head.#CUT#It looks like Etimoni Founuku has been cut.
Founuku is looking to clinch but Dangerous is avoiding it.
Dangerous was looking to counter that move with a punch but didn't quite pull the trigger.
Dangerous slaps away a takedown attempt from Founuku, before circling back to the center of the mat.
Truly Dangerous seems to be the more aggressive standup fighter in this bout.
Dangerous scores with a jab to the jaw.
Dangerous misses the shot to the body.
Dangerous lands a vicious shot with the stealth of a sniper and the strength of a viper. Are vipers that strong? I can think of lots of things that are stronger than a viper - not many rhyme with sniper though.
#ROC#Founuku is rocked!
Founuku tries to clinch up.
Dangerous cracks Founuku with a hook to the temple - Founuku is on wobbly legs here! Dangerous swarms him with hook after hook, landing with each one! Founuku falls to the canvas face first and the referee dives in to stop the fight! Dangerous wins by TKO!
Ladies and gentlemen, after 0:44 of round 1, we have a winner by way of TKO (Punches). Truly Dangerous!
Truly Dangerous tried to hype himself up post fight but didn't word it too well and it ended up with him sounding like a bit of a tool. |
|
|
|
Event:
LOM Lightweight Semi final
Date: Apr 17, 2021 |
#R1#
Maestro thuds his right hand into Founuku's forehead from close range. That could be painful for both fighters.
Maestro scores with a nice head shot.
Founuku takes one on the button.
Founuku throws a hook to the body but it doesn't connect.
Founuku moves out of range of the strikes.
Maestro jabs at Founuku's body.
Founuku fails with a rather predictable takedown attempt.
Maestro with a nice cross.
Maestro keeping a good distance there, avoiding the body shot.
Founuku misses the body punch
and Maestro counters with a nice jab to the body that keeps Founuku thinking.
Maestro swings wildly with a right hand that was never going to find it's target.
Founuku takes one on the button.#CUT#It looks like Etimoni Founuku has been cut.#T1#
Founuku misses with an uppercut
letting Maestro counter with a right hand.
Maestro fakes high and swings low for a body shot but Founuku manages to avoid it.
Founuku goes for a double leg but Maestro avoids the attempt and the two fighters end up clinched against the cage as Maestro continues to drive forward.
Founuku throws a shot from downtown. Maestro moves away and avoids it.
Maestro ducks down and throws a hook to the body but Founuku moves away.
Founuku misses with a body shot
and Maestro counters with a crisp hook to the side of the head.
Maestro scores with a jab. Founuku acknowledges it with a nod of the head.
Maestro throws a hard body shot but it just misses.
Maestro slips a jab from Founuku.
Founuku looks to land a right hand but Maestro moved out of range.
Maestro throws a lazy right hand but Founuku sees it coming a mile off and sidesteps it easily.#T2#
Founuku misses the shot to the body.
Founuku throws a hard body shot but it just misses.
Founuku takes a body punch but keeps moving.
Founuku shoots in but no luck this time.
Matija Maestro has stuffed three takedown attempts in the round now. That's going to take a lot out of Etimoni Founuku.
Founuku misses with a telegraphed body shot
enabling Maestro to counter with a crisp jab.
This is a great period of action - very entertaining stuff!
Maestro keeping a good distance there, avoiding the body shot.
Founuku takes a swing at Maestro's ribcage but misses.
Nice shot lands for Maestro.
A slow jab from Founuku misses its intended target.
Maestro throws a shot from downtown. Founuku moves away and avoids it.
Maestro is really peppering his opponent's head with punches.
Founuku swings and misses with a shot to the body
and Maestro counters with a quick right hand to the jaw.
Maestro cracks Founuku with a hook to the jaw. Both fighters smile at eachother and high-five before getting back down to business.#T3#
Maestro fails in his attempt to clinch.
Founuku ducks down and throws a hook to the body but Maestro moves away.
Good standup being displayed there by Maestro as he connects with a hook.
Maestro lands a nice hook to Founuku's body. Founuku takes it in his stride and looks to land his own strikes.
Founuku uses some good footwork to avoid the body shot by Maestro.
Founuku takes a jab right on the kisser.
Maestro connects with a good right hand that stumbles Founuku. Founuku circles away out of range and recomposes himself.
Founuku throws a hook to the side of Maestro's head but Maestro sees it coming and ducks under it beautifully.
It looks like Maestro has been trying to sharpen up his punching technique, as it looks crisper than last time we saw him.
Founuku steps to the side to avoid the strikes from Maestro.
Founuku drops down looking to force a counter takedown but Maestro defends it well.
Maestro avoids the body shot from Founuku.
Maestro ducks down and throws a hook to the body but Founuku moves away.
Founuku changes levels for a counter takedown but doesn't follow through with his attempt.
Maestro throws a lazy right hand but Founuku sees it coming a mile off and sidesteps it easily.#T4#
Founuku with a lazy takedown attempt
and Maestro counters with a lovely straight right hand!#CL#
Maestro closes the distance and clinches.
Founuku blocks a body shot from Maestro.
The crowd are loving this. Great action here.
Founuku blocks a punch to the side of the head.
Founuku tries to land a shot to the body but it's blocked.
Founuku tries to throw a body punch but Maestro avoids it by throwing Founuku back against the cage.
Founuku blocks a body shot from Maestro.
Maestro lands a left hand.
Maestro blocks a body shot from Founuku.
Maestro blocking some punches.
Maestro prevents a body shot from Founuku.
Founuku misses with a hook from the clinch.
Founuku drops down looking for an ankle pick but Maestro pulls his leg out and moves away.
Founuku has his hands up protecting his head but a hook from Maestro finds it's way round the side to connect with Founuku's head.
And that is the end of the round. The fighters go back to their corners.
Matija Maestro dominated that round.
The cut man is working on Etimoni Founuku's cut.
That's the end of the interval. I'm sure that seemed a lot quicker than a minute for our two fighters! Back to the action.#R2#
Founuku keeping a good distance there, avoiding the body shot.
Founuku is throwing a lot of body shots here, looking to wear down Maestro rather than just go for the knockout.
Founuku ducks under a wild hook from Maestro.
Founuku swings and misses with a shot to the body
letting Maestro counter with a right hand.
Maestro lands the left hand.
Founuku takes a swing at Maestro's ribcage but misses.
Maestro misses with a looping right.
Founuku drops down looking to force a counter takedown but Maestro defends it well.
Maestro is really dominating this fight. Is there anything that Founuku can do to turn this around?
Founuku swings and misses with a hook to the body.
Maestro swung with a counter right hand that didn't connect.
Founuku shoots in with a takedown attempt and he has Maestro pinned against the cage. Maestro gets the underhooks and manages to circle away.
We've had a slow start to the round here - hopefully the action picks up.
Maestro keeping a good distance there, avoiding the body shot.
Maestro just misses with a punch to the body.
#T1#
Maestro just misses with a punch to the body.
Founuku misses with a body shot.
Founuku slips a jab from Maestro.
Founuku throws a body shot but no joy.
Founuku swings wildly with a right hand that was never going to find it's target.
Maestro swings and misses with a hook to the body.
Founuku throws a body punch but Maestro moves out of range.
Maestro appears to be looking for a counter punch to the body.
Maestro throws out a token jab with nothing on it.
Founuku keeping his hands up high there, blocking the jab from Maestro.
Matija Maestro is looking to keep the fight on the feet at all costs.
Maestro connects nicely with a jab. Noted by the judges no doubt.
Nice sprawl there from Maestro as Founuku shoots in.
Maestro is looking to counter punch.
Maestro lands with a shot to the body. #T2#
Maestro throws a lazy right hand but Founuku sees it coming a mile off and sidesteps it easily.
Maestro throws a lazy right hand but Founuku sees it coming a mile off and sidesteps it easily.
Maestro slips a jab from Founuku.
Founuku takes a body punch that cleary hurt but he's trying not to show any weakness.
Founuku looks to score with a jab to the body but Maestro is just out of range.
Founuku looks to score with a jab to the body but Maestro is just out of range.
Founuku throws a body shot but no joy.
Founuku throws out a token jab with nothing on it.
Maestro swung with a counter right hand that didn't connect.
Maestro lands a slapping body shot.
We've seen a great period of action over the last minute or so - credit to both fighters for going all out!
Maestro dips down and scores with a jab to the body.
Founuku shoots for a double leg takedown but Maestro sprawls well. He's pushed Founuku's face into the mat and manages to get back to his feet relatively easily.
Matija Maestro has stuffed three takedown attempts in the round now. That's going to take a lot out of Etimoni Founuku.#T3#
Founuku ducks under an overhand right and circles away with a smile on his face.
Founuku throws a body shot but no joy.
Maestro is the aggressor but that punch slipped nicely by Founuku.
Founuku fakes a head punch and goes low to the body. Nicely done.
Maestro throws a body shot but no joy.
Founuku tries to land with a swinging hook to the body but Maestro was well out of range. Poor timing from Founuku.
Founuku slips under a jab.
Boom, another hit is landed. "You're gunna get knocked out" taunts Maestro, as that shot connected.
Founuku has done a lot of speed work in the buildup to this fight.
Nice takedown defense from Maestro. No joy for Founuku on that attempt.
Maestro scores with a jab to the body.
Maestro thows a left - swing and a miss! #T4#
Maestro looks to score with a jab to the body but Founuku is just out of range.
Founuku tries a counter takedown but it's more of a dummy move, and he uses it to push himself away.
Maestro misses with a looping right.
Maestro uses some good footwork to avoid the body shot by Founuku.
Founuku misses the shot to the body.
Founuku tries for a takedown but Maestro circles away easily
and Maestro counters with a right hand to the body.
Maestro looks to land a left hand but Founuku moved out of range nicely.
Founuku is definitely looking for the counter takedowns here.
Maestro keeping a good distance there, avoiding the body shot.
Maestro pushing out the jab but it's not landing.
Founuku with the counter takedown but Maestro avoids it easily.
The crowd cheering loudly, showing their appreciation for the quality fight we're seeing here.
Founuku shoots in for a takedown. "Ole!" shouts Maestro as he jumps to the side.
Founuku has a pretty nasty looking mouse under his right eye.
Founuku drops his hands and takes a jab to the jaw for his troubles.
And that is the end of the round. The fighters go back to their corners.
Matija Maestro dominated that second round.
The cut man is working on Etimoni Founuku's cut.
That's time! Maestro's corner gives him a slap on the ass as he gets ready to fight. So, we enter the final round. Let's see if either fighter can bring us a finish, or whether we're going to the judges scorecards.#R3#
Maestro swings and misses with a hook to the body.
Founuku drops down looking to force a counter takedown but Maestro defends it well.
Matija Maestro is winning the standup battle so far.
Maestro moves out of range of the strikes.
Maestro sizes up Founuku with a pawing jab and scores with a straight right down the middle.
Maestro misses with an uppercut.
A jab from Maestro finds it's way through Founuku's defenses.
Founuku misses with a body shot
and Maestro cracks him with a counter punch right on the button.
Founuku fails with a takedown attempt.
Maestro is looking to counter punch.
We've had a slow start to the round here - hopefully the action picks up.
Nice defenses there by Founuku.
Maestro looks to score with a jab to the body but Founuku is just out of range.
Maestro misses with a looping right.
Founuku is trying desperately to land a takedown but Maestro is having absolutely none of it. This is turning into a bit of a nightmare for Founuku.
Founuku steps to the side to avoid the strikes from Maestro.#T1#
Founuku swings and misses with a hook to the body.
Maestro misses with a body shot. Nice footwork from Founuku.
Founuku shoots in for a double leg but Maestro sprawls well. That's going to sap some energy.
Maestro scores with a jab.
Maestro throws a jab to the body, straight down the pipe. Boom. That sent Founuku stumbling backwards but he manages to regain his composure quickly.
Founuku goes for a double leg but Maestro avoids the attempt and the two fighters end up clinched against the cage as Maestro continues to drive forward.
Matija Maestro has stuffed three takedown attempts in the round now. That's going to take a lot out of Etimoni Founuku.
Founuku slips under a jab from Maestro.
Maestro cracks Founuku with a good jab.
Maestro lands a pitter patter jab to the forehead of his opponent.
Maestro jabbing away but nothing is landing.
Founuku misses with a body shot.
Etimoni Founuku has stepped it up - he knows he needs a finish here!#T2#
Maestro ducks down and throws a hook to the body but Founuku moves away.
Founuku throws a hook to the body but it doesn't connect.
Founuku thuds his right hand into Maestro's forehead from close range. That could be painful for both fighters.
Founuku scores with a jab to the body.
This is a great period of action - very entertaining stuff!
Maestro throws a body shot but no joy.
Founuku throws a body shot but no joy.
It looked like Maestro wanted to counter with a hook but didn't fully commit.
A big left from Founuku misses.
The fighters circling - Maestro throws out the jab but it was never going to land.
Maestro fakes a head shot and lands one to the body.
Maestro bobs and weaves and throws out a fast jab that snaps Founuku's head backwards.
Maestro bobs and weaves and throws out a fast jab that snaps Founuku's head backwards.#T3#
Maestro uses some good footwork to avoid the body shot by Founuku.
Founuku misses with a hook.
It looked like Maestro wanted to counter with a hook but didn't fully commit.
Maestro scores with a jab to the jaw of his opponent.
Maestro's jab looks to have found its range, popping Founuku under the eye.
Maestro thows a left - swing and a miss!
Matija Maestro is fighting for a decision here - he's started to take the cautious approach.
Founuku swings and misses with a hook to the body.
Founuku takes one to the side of the head.
Maestro throws a shot from downtown. Founuku moves away and avoids it.
Founuku ducks down and throws a hook to the body but Maestro moves away.
Founuku tries to land with a swinging hook to the body but Maestro was well out of range. Poor timing from Founuku.
Founuku throws a hard body shot but it just misses.
#T4#
Maestro tries to land with a swinging hook to the body but Founuku was well out of range. Poor timing from Maestro.
Founuku shoots in looking for a double leg takedown. Maestro defends it nicely.
Maestro lands a straight punch to the body, keeping Founuku at a distance.
Maestro connects with a body shot that sends Founuku's belly button to the back.
Nice uppercut lands for Maestro. That snapped Founuku's head back.
This is a great period of action - very entertaining stuff!
Founuku lands with an overhand left.
Maestro ducks down and throws a hook to the body but Founuku moves away.
And that's the end of the fight!
Matija Maestro showed his dominance in that final round.
Well Maestro has outscored his opponent in every aspect of the fight today. Only a scarily incompetent judge or two will keep him from a well deserved win... Over to the ring announcer for the scorecards.
Ladies and gentlemen, after 3 rounds of action, we go to the scorecards for a decision.
Judge Trevor Gratis scores the fight 30:27
Judge Dillan Fox scores the fight 30:27
Judge Robert Douchet scores the fight 30:27
In favor of your winner, by unanimous decision... Matija Maestro!
During a confident post fight interview, Matija Maestro thanked all his fans. He seemed very genuine when describing how motivated his fans keep him. |
|
|
|
Event:
LOM Lightweight Quarter Finals
Date: Mar 28, 2021 |
#R1##TD#
Damnation shoots in from a long way out. He's driving through with the takedown attempt and he eventually gets it, landing in Founuku's guard.
The ref warns both fighters not to hold the cage as they work up against the meshing.
Damnation trying to control the position from guard on top but Founuku is wriggling around, looking for whatever he can.
Founuku looking to sweep here. No luck so far.
Damnation stays in close to Founuku's body and controls the position.
Founuku looking for a sweep. Not yet Founuku, not yet.
Damnation trying to pass the guard. He's being very persistent here but Founuku manages to land a sweep and now he's on top! #REVB##SUB#
Damnation looking for submissions from the bottom here. Moving his hips around, possibly looking for an armbar.
The fighters are pressed up against the cage, both looking to find a bit of space to work.
Founuku trying to control but Damnation is working from the bottom.
We've had a slow start to the round here - hopefully the action picks up.
Founuku trying to move into half guard but instead Damnation has managed to sweep!#REVR##SUB2#
Founuku looking for submissions from the bottom here. Moving his hips around, possibly looking for an armbar.
#T1##SUB2#
Founuku working away from the bottom but not quite defensive enough there because Damnation has passed into half guard!
Founuku has been taking part in the yoga sessions down at Xtreme Black House. Presumably he's going to look for a slick submission... Or maybe he's looking to avoid one.#SUB2#
Founuku looking to work for a kimura from the bottom.#SUB#
Damnation is trying a forearm choke
I don't think that's going to do much at this level of the game.
#SUB#
Damnation is looking for an arm triangle, whilst trying to pass to side control. Founuku doesn't seem that keen to cooperate though. No luck this time Damnation.
Founuku gets full guard.#T2#
Neither fighter has done anything of merit for a good minute or two here and the crowd are not happy about it.
Damnation trying to pass the guard but can't manage it just yet. #SUB2#
Founuku looking for submissions from the bottom here. Moving his hips around, possibly looking for an armbar.
Damnation trying to control the position from guard on top but Founuku is wriggling around, looking for whatever he can. #SUB2#
Founuku is throwing his legs up, looking for submissions. Damnation is aware though and is defending well.
Damnation knows he needs to get back to his feet asap. He's simply no match for Founuku on the ground.
Founuku working a defensive guard here.
#SUB2#
Founuku had isolated an arm as going for a kimura. Damnation defends it easily.#T3#
Damnation's corner is telling him to maintain position.
Damnation is pushing down on Founuku's leg trying to pass to half guard. Founuku is fighting to maintain full guard but Damnation has managed to sneak the leg through.
Damnation trying to control the action but Founuku is working from the bottom.
Damnation content to sit in half guard and control for a moment.
Founuku is not content to let Damnation control the position.
Founuku is trying to control but can't.
Founuku is working for an escape here. He's hooked one of Damnation's legs and he's managed to sneak out and take Damnation's back!#T4#
You can see the frustration on Damnation's face
He knows he is in trouble unless he improves his position sooner rather than later.
Founuku is trying to stick to Damnation's back but Damnation is turning into Founuku. He's managed to reverse the position - now he's in Founuku's guard. Polite applause from the crowd in appreciation of some nice Jiu Jitsu by Damnation.
Damnation wants to pass the guard but Founuku is keeping the position.#SUB2#
Founuku is looking for a guillotine. You can't force these things though and Damnation defends well.
Founuku wants to sweep but no luck.
Damnation trying to pass the guard. He's being very persistent here but Founuku manages to land a sweep and now he's on top! #REVB#
Damnation can't keep his opponent in guard - Founuku advances to half guard, no doubt looking to mount.
The crowd thankful this round is nearly over.#SUB2#
Founuku is looking for a kimura here.
And that is the end of the round. The fighters go back to their corners.
A close round but Etimoni Founuku will probably get the nod.
That's the end of the round. The referee orders the cornermen out of the cage so we can get back down to business.#R2##TD2#
Founuku gets the takedown into side control. #SUB2#
Founuku is looking for a kimura. He might have it! No, Damnation has escaped the position, nice work there.
Founuku working away.
Damnation has improved his flexibility recently so we will have to see if he can use that to his advantage.
Founuku throwing shots but missing, from side control.
We've had a slow start to the round here - hopefully the action picks up.
Founuku trying to control the position but Damnation is working away.
Damnation manages to get one leg in to regain half guard. #SUB2#
Founuku is looking for a kimura. It's going to be difficult to finish that from half guard though and Damnation defends it well.
Damnation is looking to improve his position.
#T1##SUB#
Damnation is looking to sinch up a guillotine here but Founuku pulls his head out easily.
Founuku is keen to just control but Damnation is a slippery customer.
Founuku moves nicely into side control.
Damnation manages to land a sweep and he's now on top! Lovely Jiu Jitsu!
Founuku wants to improve his position but Damnation is controlling well.
Founuku is working for an escape here. He's hooked one of Damnation's legs and he's managed to sneak out and take Damnation's back!#T2##SUB2#
Damnation is displaying good submission defense - not really looking in danger of submitting to the rear naked choke at the moment. That could change in an instant of course if Founuku gets his way!
Damnation is defending well here and trying to improve his position.
Founuku thows a huge left but connects with the canvas and not his opponent. #SUB2#
Founuku working for a RNC but it's not happening just yet.
Founuku not allowing Damnation to control his hands.
Well, with Founuku on his back, surely it's only a matter of time before Damnation is tapping out... Can he escape the position?
Damnation is really stuck here.
Founuku has been the more effective fighter overall so far.#T3##SUB2#
Founuku is looking to finish the fight by rear naked choke. Damnation knows exactly what he's got planned though, so he's defending well. Maybe a few strikes would soften Damnation for a finish. #SUB2#
Damnation is staying cool under pressure, defending well against the rear naked choke attempt from his opponent.
Damnation is trying to break free.
Will Founuku go for the finish here or will he try and keep control of the position?
#SUB2#
Founuku working for a choke but Damnation is defending well.
Damnation manages to reverse the position and now he's in Founuku's guard. Nice work there by Damnation.
#T4#
Damnation trying to pass the guard but can't manage it just yet.
Founuku looking to sweep here. No luck so far. #SUB2#
Founuku looks to be working for a triangle here. Oh, it looks like he might have it! Damnation has picked Founuku up and slammed him! Founuku can't keep hold of the triangle and Damnation manages to pass to side control!
Damnation tries to move to mount but Founuku blocks the move with his legs.
You can see the frustration on Founuku's face, being in this tough position on the bottom.
The crowd thankful this round is nearly over.
Damnation is looking to take a break and control but Founuku is keeping him honest, looking to work from the bottom. #SUB#
Damnation wants to work for a kimura but he's foiled early by Founuku, who protects the arm well.
And that is the end of the round. The fighters go back to their corners.
Etimoni Founuku showed his class in that round. I'd imagine he'll take it on all the scorecards.
Well, the break between rounds is over. Let's get back to the scrappin! This is the final round!#R3##TD2#
Founuku closes the distance and gets a trip takedown into side control. Damnation quickly recovers to half guard.#SUB2#
Founuku is trying to work for a kimura but Damnation is defending well.
Founuku is looking to advance position but Damnation won't allow it.
Damnation trying to control but Founuku postures up.
We've had a slow start to the round here - hopefully the action picks up.
Founuku works his foot free and advances to mount.
Damnation tries to hold on but Founuku postures up.#T1#
Damnation is in all sorts of trouble here.
Damnation is working hard here to advance position.#SUB2#
Founuku is in full mount, looking to secure a guillotine but Damnation is surviving well by controlling Founuku's body position as best he can.
Etimoni Founuku has got the better of the ground game so far.
Founuku prevents Damnation from getting the reversal.
Founuku landing shots from mount.
Damnation is desperately trying to improve his position but Founuku has a good base and remains in mount.
Damnation manages to regain half guard. Good work.
Founuku lands a big shot. The thud that echoes around the arena is like music to the fans' ears. #T2#
Founuku tries to pass the half guard into mount. Damnation knows what he's doing though and prevents the attempt. #SUB#
Damnation is looking to sinch up a guillotine here but Founuku pulls his head out easily.
Damnation wants to control the action here but instead Founuku manages to pass to full mount!
Damnation avoids a series of strikes thrown by Founuku.
Founuku can't quite control the action as he would like just now, as Damnation is looking to escape.
Damnation taking shots to the head.
Damnation regains half guard.#SUB2#
Founuku is trying to work for a kimura but Damnation is defending well.
#T3##SUB2#
Founuku is looking for a kimura. It's going to be difficult to finish that from half guard though and Damnation defends it well.
Founuku stalling.
Jimmy Damnation has stepped it up - he knows he needs a finish here!
Etimoni Founuku is fighting for a decision - hopefully he's judged it right and he's actually winning the fight.
Damnation wants to improve his position but Founuku is controlling well.
Founuku performing his best blanket impression for a moment. #T4#
Neither fighter has done anything of merit for a good minute or two here and the crowd are not happy about it.
Damnation is looking for a sweep. Founuku is wise to his cunning plan and keeps the top position.
Founuku is looking to take a break and control but Damnation is keeping him honest, looking to work from the bottom.
Founuku is pressing down on Damnation's thigh, looking to free his foot. Damnation is holding on for now.
Boooooooooooooooooooo!!! God, this has been a terrible round. Come on you two, sort yourselves out!
Damnation tries to get to full guard but Founuku has control of the leg.
And that's the end of the fight!
Etimoni Founuku comfortably won the final round on my scorecard.
Well Founuku has outworked and out performed his opponent in all aspects of the game today. He was simply too good and the decision should be no more than a formality. Over to the ring announcer for the scorecards.
Ladies and gentlemen, after 3 rounds of action, we go to the scorecards for a decision.
Judge Daniel Franklin scores the fight 27:30
Judge Wesley Smith scores the fight 27:30
Judge George Francis scores the fight 28:30
In favor of your winner, by unanimous decision... Etimoni Founuku! |
|
|
|
Event:
LOM Week 3
Date: Feb 28, 2021 |
#R1#
Founuku fails with a takedown attempt. #CL2#
Tessin drives through and clinches with Founuku against the cage.
Founuku is pushing Tessin up against the cage, for a bit of lean and pray action. Action being used the in the loosest possible sense of the word.
Founuku misses with a hook to the ribs.
Founuku has Tessin pressed against the cage, preventing Tessin from circling away and getting back to striking at range.
Founuku has a couple of punches blocked by Tessin.
Tessin is trying to force a seperation but Founuku has the dominant position.
I was talking to Founuku's coach per-fight and he was telling me that they'd been working on the clinch in the runup to this fight.#BC2#
Tessin breaks the clinch.
Tessin tries to land with a swinging hook to the body but Founuku was well out of range. Poor timing from Tessin.
We've had a slow start to the round here - hopefully the action picks up.
Tessin takes a really solid shot there but just smiles back and shrugs his shoulders.
Founuku keeping a good distance there, avoiding the body shot.
Tessin swings for the body but Founuku moves out of range.
Founuku tries to counter by moving into the clinch but Tessin manages to circle out of the way.
Tessin looks to land a left hand but Founuku moved out of range nicely.
Founuku is trying to close the distance and clinch up, after that failed offence from Tessin.#CL2#
Tessin drives through and clinches with Founuku against the cage.
#T1#
Founuku lands a short shot on the inside that snaps the head of Tessin backwards.
An uppercut on the inside fails to land for Founuku.
A head punch on the inside from Founuku fails to land. #TD#
Founuku gets control of Tessin's arms and successfully pulls guard. Founuku will no doubt be looking for submissions off his back.
Tessin scoring with some ground and pound.
Tessin lands a couple of decent looking shots.
Tessin stands up and looks to throw the legs aside to pass to side control. Founuku swivels though and keeps the full guard.
Tessin really doesn't want to stay on the ground with Founuku. If he can't get it back to his feet, it's only a matter of time before he'll be tapping out.
Tessin is sitting in guard, working some ground and pound. #SUB#
Founuku looking for a guillotine here but Tessin defends easily.
Tessin throwing elbows and punches but not connecting, as Founuku works some decent striking defense from the bottom.
Tessin landing with the ground and pound.
Tessin working in close now, lands a nice elbow to the side of Founuku's head.
Founuku avoiding any damage from the ground and pound.
Tessin chips away with some ground and pound.#T2#
Tessin throwing elbows and punches but not connecting, as Founuku works some decent striking defense from the bottom.
Tessin scoring with punches to the head and body. #SUB#
Founuku has thrown up a leg looking for a triangle. Tessin doesn't defend quickly enough and Founuku has managed to lock this one up! Can Tessin escape?! NO! He's tapping out! Damn, that was a quick submission - congrats to Founuku on a fantastic submission victory.
Ladies and gentlemen, after 2:26 of round 1, we have a winner by way of Submission (Triangle). Etimoni Founuku! |
|
|
|
Event:
Quick Fight Championship
Date: Dec 28, 2020 |
#R1#
Founuku avoids a lazy jab quite easily.
Founuku slips a jab and a cross from Dvorak.
Dvorak shuffles to his left behind two crisp jabs. Founuku eats them both and turns towards Dvorak to reposition himself and eats a stinging right hand-left hook combo.
Founuku blocks a head kick by Dvorak.
Founuku fails in his attempt to clinch.
A swing and a miss from Dvorak.
Dvorak throws a good cross that connects.
Founuku shoots in but doesn't get the takedown #CL2#
and Dvorak counters by moving into the clinch.
Founuku tries to pull guard but can't drag his opponent to the mat. Dvorak just stands there and leans against the cage.#BC2#
Dvorak escapes the clinch and we're back to striking.
Nice sprawl there from Dvorak as Founuku shoots in.
That's three failed takedown attempts in the round for Etimoni Founuku. That's going to take a lot out of him.
Founuku falls off balance throwing a combination
#TD2#
so Dvorak counters with a double leg into guard. Good agility.
Dvorak must be cautious of submissions here, given that his opponent has the superior Jiu Jitsu.
We've seen a great period of action over the last minute or so - credit to both fighters for going all out!
Founuku keeping full guard, as Dvorak tries to pass. #T1#
Dvorak wanted to stand there but Founuku had control of the position.
Founuku is trying to control the position but Dvorak postures up. #SU2#
Dvorak stands and steps away. Founuku gets to his feet too and we're back to the striking game.
Founuku checks a leg kick nicely.
Founuku changes levels looking for a counter takedown but doesn't commit.
Jakub Dvorak seems to be the more aggressive standup fighter in this bout.
Founuku shoots in for a takedown - he's clinched up with Dvorak but Dvorak pushes him off and we're back to square one.
Founuku slips a jab and a cross from Dvorak.
Dvorak avoids the head kick by Founuku.
Founuku avoids the head kick by Dvorak.
Founuku seemed to be looking to counter by closing the distance.
Dvorak swings away but doesn't land with a series of punches.
Founuku tries to counter by clinching up but Dvorak breaks away and moves out of range.
Dvorak connects with a lovely jab that went straight through the gap between Founuku's hands.#T2#
Founuku throws a leg kick #TD2#
and Dvorak counters with a single leg into guard. Founuku didn't expect that.
The ref warns both fighters not to hold the cage as they work up against the meshing.
Dvorak engaging in some classic timewasting tactics.
Founuku has a closed guard, preventing Dvorak from standing up.
Founuku wants to sweep here but Dvorak controlling him for the moment.
Founuku throwing strikes off his back to little effect.
Dvorak has decided he wants to stand but the closed guard of Founuku is proving hard to escape from.
The fighters are pressed up against the cage, both looking to find a bit of space to work.#T3#
Founuku trying to keep a closed guard but Dvorak is proving a slippery customer.
The referee claps his hands together and tells the fighters to work.
Dvorak is sitting in guard, working some ground and pound.
Founuku tries to land a sweep but no joy. #SUB#
Founuku has his foot on Dvorak's thigh. He's trying to push off and get in position for a triangle, I think. Dvorak works his way back into a safe position though.
Dvorak really doesn't want to stay on the ground with Founuku. If he can't get it back to his feet, it's only a matter of time before he'll be tapping out.
Dvorak would like to get this fight back to the feet but can't get free from the closed guard.
Dvorak won't allow Founuku to sweep him here.
The fighters are starting to get a bit slippery now, which will make submissions a bit more difficult.
Dvorak tries to free his leg and advance position but Founuku is retaining full guard. #SUB#
Founuku throwing his legs up looking for a triangle.
#T4#
Founuku wants to sweep but no luck.
Founuku keeping full guard, as Dvorak tries to pass. #SU2#
Dvorak decides to stand up and beckons his opponent to follow.
Dvorak swinging wildly here.
Horrible takedown attempt by Founuku or perhaps it was just good defense by Dvorak, which made it look bad.
Dvorak swings away but doesn't land with a series of punches.
Dvorak misses with a wild combination.
And that is the end of the round. The fighters go back to their corners.
Jakub Dvorak dominated that round.
That's the end of the interval. I'm sure that seemed a lot quicker than a minute for our two fighters! Back to the action.#R2#
Dvorak looks to land a combination but Founuku avoids it well.
Dvorak has been the more effective fighter overall so far.
Dvorak throws a shot from downtown. Founuku moves away and avoids it.
Dvorak moves into range and throws a lovely three punch combination.
No joy there for Dvorak, who threw a few shots but didn't land.
Dvorak misses with a body shot.
Founuku looks for a takedown but Dvorak sprawls well.
Dvorak throws a leg kick but Founuku checks it.
Dvorak pushes forward with a 1-2 combination that forces Founuku back to the cage. Dvorak follows up with a solid lead hook to the liver.#CUT2#It looks like Etimoni Founuku has been cut.
Dvorak misses with a series of wild punches.
Dvorak tries to score with an inside leg kick but telegraphs it and Founuku is able to avoid easily.
Founuku misses with a half-hearted attempt at a head kick.
Etimoni Founuku is looking to throw some combinations by the looks of things.
Dvorak leaves Founuku with his face pressed against the mat as he sprawls beautifully, defending against a solid takedown attempt.#T1#
Dvorak throws a series of strikes that have Founuku backpedaling.
Dvorak tries a low kick but Founuku avoids it.
Founuku shoots in for a takedown. He's persisting with it as Dvorak sprawls well. Dvorak wins this battle and keeps the fight standing. Founuku gets slowly back to his feet.
That's three failed takedown attempts in the round for Etimoni Founuku. That's going to take a lot out of him.
Founuku shoots in and drives through. Dvorak sprawls well.
Founuku tries to close the distance and clinch up but Dvorak swats him away and circles back towards the center.
Dvorak throws out a counter right but Founuku avoids it with no problem.
Jakub Dvorak seems to be getting the better of the standup.
Founuku looks frustrated there after his takedown attempt is stuffed easily.
Founuku dives in for a single leg takedown but Dvorak sprawls and the fighters end up clinched against the cage.#BC2#
Dvorak pushes off and circles away, back to the middle of the mat.#T2#
No joy there for Dvorak, who threw a few shots but didn't land.
A punch combination from Dvorak misses.
Founuku checks the leg kick nicely there.
Dvorak throws an uppercut from half a mile away. Founuku sees it coming and avoids it easily.
Dvorak is breathing heavily.
Founuku dives in for a single leg takedown but Dvorak sprawls and the fighters end up clinched against the cage.
It seemed like Dvorak was going to counter with the hook but didn't fully commit to it.#BC2#
Dvorak breaks from the clinch.
Dvorak just misses with a punch to the body.
Founuku seemed to be looking to counter by closing the distance.
Founuku shoots in for a takedown - he's clinched up with Dvorak but Dvorak pushes him off and we're back to square one.
A punch combination from Dvorak misses.
This is a great period of action - very entertaining stuff!
Founuku has his takedown stuffed#CL2#
and Dvorak counters by moving into the clinch. Good anticipation by Dvorak.
Dvorak wants to push off and get back to the center of the mat but Founuku has him pressed against the cage.#T3##BC#
Founuku pushes off and circles away, back to the middle of the mat.
Dvorak swings wildly with a right hand that was never going to find it's target.
Founuku shoots in but no luck this time.
Founuku uses good footwork to avoid the strikes from Dvorak.
Founuku shoots for a double leg takedown but Dvorak sprawls well. He's pushed Founuku's face into the mat and manages to get back to his feet relatively easily.
Dvorak throws a right hand that Founuku ducks under and follows up with a left that Founuku also avoids with ease.
Founuku looks frustrated there after his takedown attempt is stuffed easily.
Dvorak defends well against a solid takedown attempt from Founuku.
Dvorak throws a series of punches but Founuku moves out of range.
Founuku is looking for a counter combo.
Dvorak jabbing away but nothing is landing.
Jakub Dvorak is looking to keep the fight on the feet at all costs.
Founuku blocks a leg kick.#T4#
Dvorak throws a right and a left that Founuku avoids nicely.
It looked like Founuku wanted to counter with a hook but didn't fully commit.
Founuku tries to bum rush Dvorak with a series of wild strikes but Dvorak uses good footwork to avoid the assault.
Dvorak swings away with a counter right hand but no contact made.
Founuku looks for a takedown but Dvorak sprawls well.
Dvorak wants to counter with a clinch but Founuku pushes him away.
Dvorak throws a hook to the body but it doesn't connect.
Dvorak moves out of range of the body kick from Founuku.
Founuku throws a right and a left that both miss.
Dvorak takes a swing at Founuku's ribcage but misses.
Founuku fails with a takedown attempt from distance.
Dvorak swats away the attempt to clinch by Founuku.
Dvorak will need to tighten up his combinations if he doesn't want to gas himself out, swinging at thin air.
And that is the end of the round. The fighters go back to their corners.
Jakub Dvorak showed his class in that round. I'd imagine he'll take it on all the scorecards.
The cut man is working on Etimoni Founuku's cut.
Well, the break between rounds is over. Let's get back to the scrappin! This is the final round!#R3#
Dvorak avoids the clinch attempt nicely.
Founuku doesn't succeed with the takedown#CL2#
and Dvorak holds on and brings the fighters into a clinch. #BC2#
Dvorak breaks the clinch and we're back to striking at distance.
Dvorak ducks down and throws a hook to the body but Founuku moves away.
Dvorak just manages to avoid a counter high kick fromFounuku.
Dvorak ducks down and throws a hook to the body but Founuku moves away.
Dvorak misses with a hook. Founuku ducked under it nicely.
Dvorak listening to his corner there, landing a nice uppercut.
No joy there for Dvorak, who threw a few shots but didn't land.
We've had a slow start to the round here - hopefully the action picks up.
Dvorak lands a lovely overhand right.
Founuku pulls out of a head kick attempt.
A head kick misses from Founuku.
Founuku is looking to clinch. #T1#
Dvorak misses with a double jab.
Dvorak misses with a series of wild punches.
Dvorak takes a big intake of breath there - he's definitely tired.
Dvorak leaves Founuku with his face pressed against the mat as he sprawls beautifully, defending against a solid takedown attempt.
Dvorak looks to land a combination but Founuku avoids it well.
Founuku shoots for a double leg takedown but Dvorak sprawls well. He's pushed Founuku's face into the mat and manages to get back to his feet relatively easily.
That's three failed takedown attempts in the round for Etimoni Founuku. That's going to take a lot out of him.
Founuku steps to the side to avoid the strikes from Dvorak.
Dvorak throws out a token jab with nothing on it.
Dvorak misses with a wild combination.
A swing and a miss from Dvorak.
Founuku fails with the takedown.#T2#
Founuku lunges in with swinging rights and lefts but Dvorak circles away quickly and effectively.
And an attempted straight right on the counter from Dvorak! But no joy.
Dvorak misses with a looping right.
It looked like Founuku was trying to counter with a body shot coming off that last attack from Dvorak.
Dvorak throws a jab to the body, straight down the pipe. Boom. That sent Founuku stumbling backwards but he manages to regain his composure quickly.
Dvorak fakes high and swings low for a body shot but Founuku manages to avoid it.
Founuku has a takedown stuffed.
Dvorak throws a low kick but it's checked well by Founuku.
Founuku is looking to clinch.
Founuku will have to do better than that with his takedown attempts.
Founuku misses with a body shot. Nice footwork from Dvorak.
Despite the aggression on Dvorak's face he doesn't fully commit to the counter.
Fantastic stuff here - a very entertaining period of action, which has drawn cheers from the crowd.
Founuku fails with an attempt to clinch.
#T3#
Founuku checks the leg kick nicely there.
Horrible takedown attempt by Founuku or perhaps it was just good defense by Dvorak, which made it look bad.
Founuku wants to clinch.
This is turning into a torrid day at the office for Founuku. He's trying desperately to land a takedown but he's failing miserably and getting slapped silly on the feet to compound his misery.
Dvorak throws a wild combination but nothing lands.
Founuku misses with a double jab
and Dvorak counters with a straight right hand.
Founuku has his head slapped from side to side by a 3 punch combination. That must have hurt him.
Dvorak tries a head kick but it misses.
Founuku seem to be loading up, looking for a big counter.
Dvorak throws a hook to the body but it doesn't connect.
#T4#
Founuku shoots in looking for a takedown but Dvorak manages to keep the fight standing, pushing Founuku's face into the canvas for good measure before circling away.
Founuku slips under a jab from Dvorak.
Founuku throws a right and a left that Dvorak avoids nicely.
Founuku tries to clinch but is not successful on this occasion.
No joy there for Dvorak, who threw a few shots but didn't land.
Founuku swings for the body but Dvorak moves out of range.
Founuku defending well as Dvorak loads up on a big left hand.
Founuku throws a series of punches but Dvorak moves out of range.
The crowd are loving this. Great action here.#CL#
Founuku darts in and clinches Dvorak up against the cage.#BC2#
Dvorak escapes the clinch and we're back to striking.
Dvorak misses with a straight right.
Etimoni Founuku has stepped it up - he knows he needs a finish here!
Jakub Dvorak is fighting for a decision - hopefully he's judged it right and he's actually winning the fight.
Dvorak throws a big shot that misses.
And that's the end of the fight!
Jakub Dvorak comfortably won the final round on my scorecard.
Well Dvorak has outworked and out performed his opponent in all aspects of the game today. He was simply too good and the decision should be no more than a formality. Over to the ring announcer for the scorecards.
Ladies and gentlemen, after 3 rounds of action, we go to the scorecards for a decision.
Judge Gwen Towbar scores the fight 27:30
Judge Robert Twigg scores the fight 26:30
Judge Daniel Franklin scores the fight 26:30
In favor of your winner, by unanimous decision... Jakub Dvorak!
During a confident post fight interview, Jakub Dvorak thanked all his fans. He seemed very genuine when describing how motivated his fans keep him. |
|
|
|
|
|
|