|
Play
by Play - Fighter's Fight Commentary
|
Event:
HFC Fight Night 13
Date: Oct 10, 2023 |
#R1#
Zhitkov lands an overhand left. A wild punch that just about connected.
Zhitkov fails to land with the punch combination there - jab, cross, hook, miss, miss, miss.
Doumergos looks to have improved his striking defense since last time we saw him fight.
Doumergos shoots in but doesn't get the takedown
and Zhitkov counters with a good right hand that lands right on the jaw.
Doumergos shoots in looking for a double leg takedown. Zhitkov defends it nicely.
Zhitkov throws a hook to the side of Doumergos's head but Doumergos sees it coming and ducks under it beautifully.
Zhitkov swings for the body but Doumergos moves out of range.
Gaston Doumergos seems to be the more aggressive standup fighter in this bout.
Doumergos doesn't succeed with the takedown
and Zhitkov counters with a two punch combo.
That's three failed takedown attempts in the round for Gaston Doumergos. That's going to take a lot out of him.
Doumergos darts in looking for a takedown but Zhitkov gets double underhooks and turns Doumergos into the cage.
Doumergos's head jolts backwards as he takes an uppercut right on the button!#TD#
Doumergos has clasped his hands together around Zhitkov's back... aaand, he's got a takedown into side control. Nicely done.
Fantastic stuff here - a very entertaining period of action, which has drawn cheers from the crowd.#SU#
Doumergos decides to stand back up.
Doumergos doesn't react quick enough there as he takes a shot to the body.
Zhitkov lands an overhand left. A wild punch that just about connected.
Doumergos misses with a takedown attempt. He shot from a bit too far out.
Zhitkov looked like he wanted to counter with a punch but didn't throw it.#T1#
Left hook, right uppercut from Zhitkov.
Zhitkov connects with a lovely jab that went straight through the gap between Doumergos's hands.#ROC2#Doumergos is rocked!#CL2#
Zhitkov fakes with an overhand right and moves in to clinch with Doumergos, pushing him back against the cage.
Oh Doumergos is still all over the place! His legs are completely gone! Will he be able to recover?!!
Zhitkov scores with an uppercut up the middle.
With the fighters clinched against the cage, Zhitkov creates a bit of distance for himself and scores with a nice uppercut.
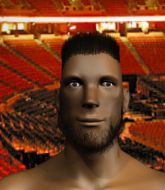
Zhitkov lands a big right hand that drops Doumergos! The killer instinct kicks in and Zhitkov finishes his opponent with a series of strikes from mount. A dominating finish by Zhitkov!
Ladies and gentlemen, after 1:26 of round 1, we have a winner by way of TKO (Strikes). Zakhar Zhitkov! |
|
|
|
Event:
TWGC 40 (185lbs, D2): Los Angeles Qualifier - Round 2
Date: Sep 03, 2023 |
This TWGC bout is 1 fifteen minute round in the middleweight division. Introducing today's competitors. In the red corner, competing out of New York, with a TWGC record of 1 wins and 0 losses; Luan Mesquita! And in the blue corner, fighting out of Los Angeles, with a TWGC record of 1 wins and 0 losses; Gaston Doumergos!
The judges for this bout are Jack Bonds, Don Winkell and Frank Antenori.
The fighters bow as they face eachother in the middle of the mat and we are under way.#TD#
Doumergos gets caught napping as Mesquita dives in and scores a takedown. Doumergos manages to retain guard. Score +2 for takedown into guard / half guard: Mesquita (2) vs (0) Doumergos#SUB2#
Doumergos is active off his back here, looking for submissions.
The ref warns both fighters not to hold the cage as they work up against the meshing.
Mesquita stopping the sweep attempt from Doumergos.#SUB#
Mesquita drops back for a leg! It's a sloppy attempt though and Mesquita jumps back into guard quickly, to retain the dominant position.
Doumergos is trying to control the position but Mesquita postures up. #SUB2#
Doumergos had isolated an arm as going for a kimura. Mesquita defends it easily.
Doumergos tries to land a sweep but no joy. #SUB2#
Doumergos is throwing his legs up, looking for submissions. Mesquita is aware though and is defending well.
We've had a slow start to the round here - hopefully the action picks up.
Mesquita works a leg free and moves into half guard.
Mesquita trying to mount his opponent but Doumergos defends it.
Doumergos tries to get to full guard but Mesquita has control of the leg.
Doumergos is still trying to improve position.#T1#
Well, if Mesquita is going to just lie there, perhaps we should talk about what we're having for dinner tonight
I'm having a ham and pineapple pizza
Yum. Can't wait.
Mesquita passes to full mount! Score +3 for passing guard: Mesquita (5) vs (0) Doumergos
Mesquita looking to control and managing it successfully.
Doumergos is trying desperately to improve position.#SUB#
Mesquita has hold of Doumergos's left arm, perhaps looking for a submission. The two fighters tussle over control of the isolated limb and Doumergos manages to get his arm back to his side and away from danger.
Doumergos is looking to improve his position but Mesquita isn't that keen on the idea.#SUB#
Doumergos defends a decent attempt at a guillotine from Mesquita. #T2#
Mesquita content just to control the position here.
Mesquita tries to control but Doumergos wriggling away.
Doumergos regains half guard.
Mesquita passes to side control. Score +3 for passing guard: Mesquita (8) vs (0) Doumergos
Doumergos tries to bench press Mesquita off him but Mesquita keeps the position.
Doumergos keeps trying to improve his position.
Doumergos gives up the full mount - oops, sloppy defensive grappling there! Score +2 for reaching mount: Mesquita (10) vs (0) Doumergos
Mesquita can't quite control the action as he would like just now, as Doumergos is looking to escape.
Doumergos has found himself in a tricky position here. He's been working his transitions in training so let's see if he can work his way out of it.#T3#
Doumergos wants to improve position but instead he's given up his back. Score +3 for taking back: Mesquita (13) vs (0) Doumergos
Mesquita is not going to allow Doumergos to sit and survive in this position. #SUB#
Mesquita patiently working for the choke. Which fighter will keep their nerve here?
Mesquita keeps control of the position as Doumergos tries to break free.
#SUB#
Mesquita is looking to finish the fight by rear naked choke. Doumergos knows exactly what he's got planned though, so he's defending well. Maybe a few strikes would soften Doumergos for a finish.
Mesquita controlling well, preventing Doumergos from escaping the position.
Doumergos manages to reverse the position and now he's in Mesquita's guard. Nice work there by Doumergos.
Score +2 for sweep to guard / half guard: Mesquita (13) vs (2) Doumergos
Doumergos wants to control from the top but Mesquita keeps moving.
Mesquita is working from a closed guard but he's struggling to control his opponent.#T4#
Doumergos wants to control from the top but Mesquita keeps moving.
The fighters are pressed up against the cage, both looking to find a bit of space to work.
Doumergos wants to pass the guard but Mesquita is keeping the position.
Doumergos must be cautious of submissions here, given that his opponent has the superior Jiu Jitsu.
Doumergos is looking to pass into half guard but Mesquita pushes him away with his feet and jumps on top - now Mesquita is in guard. Score +2 for sweep to guard / half guard: Mesquita (15) vs (2) Doumergos#SUB2#
Doumergos escapes his hips to the side and looks to be working for an armbar. Mesquita gives him a little smile and shakes his head. No chance.
Mesquita trying to control but Doumergos is working from the bottom.
Mesquita is really struggling to control Doumergos but he's trying to hold on to the position.
Doumergos looking to sweep here. No luck so far. #T5#
Mesquita is intent on slowing down the pace of the fight, simply looking to control.#SUB2#
Doumergos escapes his hips to the side and looks to be working for an armbar. Mesquita gives him a little smile and shakes his head. No chance. #SUB2#
Doumergos working for a triangle but Mesquita defends it easily.
Mesquita wants to control from the top but Doumergos keeps moving. #SUB2#
Doumergos working away from the bottom but not quite defensive enough there because Mesquita has passed into half guard!
#SUB2#
Doumergos looking to work for a kimura from the bottom.
Doumergos moves his hips nicely and gets into full guard.#T6#
Mesquita sneaks a leg through and gets to half guard. That was like a knife through butter how easily he passed Doumergos's guard. #SUB#
Mesquita looking for a kimura but he'll have to free his other leg if he wants to finish that. Perhaps he's just using it as a distraction technique.
Mesquita wants to control but Doumergos is keeping him busy.
Doumergos wants to improve his position but Mesquita is controlling well.
Mesquita wants to take a breather but Doumergos is having none of it.
Doumergos is looking to improve his position.
#SUB2#
Doumergos looking for submissions from an awkward position here.#T7#
Mesquita frees up his trapped foot and advances to mount. Score +3 for passing guard: Mesquita (18) vs (2) Doumergos
Doumergos is wriggling around trying to escape.
#SUB#
Mesquita has control of Doumergos's right arm, working for a kimura. It's a bit of a token attempt though and Doumergos regains control of the situation pretty easily.
Mesquita wants to control the pace but Doumergos is squirming around nicely.
Doumergos bucks up and manages to get a nice reversal! He's in guard on the top - nicely done! Score +2 for sweep to guard / half guard: Mesquita (18) vs (4) Doumergos#SUB#
Mesquita working for a triangle but Doumergos defends it easily.
Doumergos wants to pass the guard but Mesquita is keeping the position.#T8#
Mesquita wants to sweep here but Doumergos controlling him for the moment. #SUB#
Mesquita is looking for a guillotine. You can't force these things though and Doumergos defends well.
Doumergos trying to control the position from guard on top but Mesquita is wriggling around, looking for whatever he can.
Doumergos pressing down on his opponent's thigh, looking to pass guard. Mesquita is keeping the position for now. #T9#
Doumergos trying to control but Mesquita is working from the bottom. #SUB#
Mesquita is looking for a triangle but Doumergos pushes his legs off easily.
Doumergos looking to pass the guard.
Doumergos trying to control but Mesquita is working from the bottom.
Mesquita is trying to control the position from the bottom.
#SUB#
Mesquita has his foot on Doumergos's thigh. He's trying to push off and get in position for a triangle, I think. Doumergos works his way back into a safe position though.#T10#
Mesquita manages to sweep nicely, so he's now on top. Doumergos manages to get himself to full guard.
Score +2 for sweep to guard / half guard: Mesquita (20) vs (4) Doumergos
Mesquita wants to pass the guard but Doumergos is keeping the position.
There's a bit of a scramble here and now Doumergos is on top in guard.
Score +2 for sweep to guard / half guard: Mesquita (20) vs (6) Doumergos
Doumergos stands up and looks to throw the legs aside to pass to side control. Mesquita swivels though and keeps the full guard.
Mesquita is doing well to control the posture of his opponent and prevent any damage.
Doumergos trying to control the position from guard on top but Mesquita is wriggling around, looking for whatever he can.
Mesquita trying to control the position.
Mesquita keeping full guard, as Doumergos tries to pass. #T11#
Doumergos passes Mesquita's left leg - he's now in half guard.
Mesquita is looking to improve his position.
Mesquita gets back to full guard.
#SUB#
Mesquita is looking for a guillotine. You can't force these things though and Doumergos defends well.
Mesquita can't keep his opponent in guard - Doumergos advances to half guard, no doubt looking to mount. #SUB2#
Doumergos is looking for a kimura. It's pretty deep but Mesquita still has the half guard so he's probably OK. Oh, Mesquita has exploded into a beautiful escape there and after a quick scramble, he's ended up in side control on top! Nice work! Score +4 for clean sweep to past guard: Mesquita (24) vs (6) Doumergos#T12#
Doumergos is trying to improve his position.
A bit of a lull in the action. I'm sure it will pick up again soon... even if the ref has to physically pick them up and put them back on their feet.
Doumergos is looking for a sweep.
Mesquita trying to control the action but Doumergos is working from the bottom.
Doumergos tries to work a leg under to get back to half guard but Mesquita wriggles his own leg back out and remains in side control. #SUB#
Mesquita tries for a kimura but Doumergos is defending well.
Doumergos is looking to regain half guard here but Mesquita keeps moving and retains side control. #T13#
Mesquita trying to control the action but Doumergos is working from the bottom.
Doumergos tries to bench press Mesquita off him but Mesquita keeps the position.
Mesquita controlling the position.
Mesquita trying to control the position but Doumergos is working away.
Doumergos is looking to regain half guard here but Mesquita keeps moving and retains side control.
A bit of a lull in the action. I'm sure it will pick up again soon... even if the ref has to physically pick them up and put them back on their feet. #T14##SUB#
Mesquita tries for an arm triangle. That looks pretty tight to me. Is this one over!?! Possibly, maybe, no Mesquita has let go of the choke. Obviously it wasn't as tight as we thought!
Doumergos tries to work a leg under to get back to half guard but Mesquita wriggles his own leg back out and remains in side control.
A bit of a lull in the action. I'm sure it will pick up again soon... even if the ref has to physically pick them up and put them back on their feet.
Doumergos is trying to control Mesquita's posture but Mesquita avoids it.
Doumergos tries to get back to half guard but can't.
Boooooooooooooooooooo!!! God, this has been a terrible round. Come on you two, sort yourselves out!
Doumergos looking for a sweep but Mesquita has passed into full mount! Oh no! Score +2 for reaching mount: Mesquita (26) vs (6) Doumergos
Doumergos working to try and regain half guard.
And that's the end of the fight!
Mesquita takes the fight on points by 26 to 6. |
|
|
|
Event:
TWGC 40 (185lbs, D2): Los Angeles Qualifier - Round 1
Date: Sep 02, 2023 |
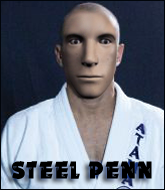
This TWGC bout is 1 fifteen minute round in the middleweight division. Introducing today's competitors. In the red corner, competing out of Hilo, with a TWGC record of 3 wins and 1 losses; Mr Penn! And in the blue corner, fighting out of Los Angeles, with a TWGC record of 0 wins and 0 losses; Gaston Doumergos!
The judges for this bout are Timothy Bukovac, Frank Antenori and Percy O'Donnell.
The fighters connect hands in the middle of the mat and we are under way.#CL#
Penn closes the distance and clinches.
We can't be sure of the tactics at this early stage but we have heard that Doumergos has been working on his takedowns a lot in the buildup to the fight and we can only assume he's going to look to take this to the mat.#TD2#
Doumergos turns his back and goes for a hip toss. It's a bit messy but it gets the job done and Doumergos manages to end up in side control. Score +4 for clean takedown past guard: Penn (0) vs (4) Doumergos#SUB2#
Doumergos tries for a kimura but Penn is defending well.
Penn is looking to regain half guard here but Doumergos keeps moving and retains side control.
Doumergos is looking to take a break and control but Penn is keeping him honest, looking to work from the bottom. #SUB2#
Doumergos tries for a kimura. Not really close to a finish though.
Penn tries to bench press Doumergos off him but Doumergos keeps the position.
We've had a slow start to the round here - hopefully the action picks up.
You can see the frustration on Penn's face, being in this tough position on the bottom.#SUB2#
Doumergos is trying to land an Americana. He has the arm isolated but Penn is keeping cool and he's avoided the danger for now.
The fighters are pressed up against the cage, both looking to find a bit of space to work.#T1#
Penn has one of Doumergos's arms on lockdown, trying to prevent him from doing any damage.
Penn is looking to regain half guard here but Doumergos keeps moving and retains side control. #SUB2#
Doumergos tries for a kimura. Not really close to a finish though.
Doumergos trying to control the action but Penn is working from the bottom. #SUB2#
Doumergos working hard here to secure a kimura but he's not really in the right position for it. #T2#
Penn manages to work his way to half guard, despite Doumergos's best efforts.
Doumergos trying to control the action but Penn is working from the bottom.
Penn is looking for a sweep. Doumergos is wise to his cunning plan and keeps the top position.#SUB2#
Doumergos is looking for a kimura but he's never going to get it from there.
Doumergos wants to take a breather but Penn is having none of it.
Penn wants to improve his position but Doumergos is controlling well.
Penn trying to hold on to Doumergos's head to control him but Doumergos postures up.
#T3#
Doumergos is working hard to pass the guard. He's done it - he's now in full mount! Trouble for Penn! Score +3 for passing guard: Penn (0) vs (7) Doumergos
Doumergos sitting in mount, just looking to control for the moment.
Penn keeping his composure momentarily, calmly looking to get back to half guard.
Doumergos looking to control but Penn is working nicely, looking to advance position himself.
Penn is in all sorts of trouble here.
Penn is squirming around, avoiding Doumergos's attempts to control the action.
Penn tries to hold on but Doumergos postures up.#SUB2#
Doumergos goes for an armbar but Penn turns quickly into his guard - lovely anticipation from Penn. Score +2 for sweep to guard / half guard: Penn (2) vs (7) Doumergos#T4#
Doumergos trying to keep a closed guard but Penn is proving a slippery customer.
#SUB2#
Doumergos had isolated an arm as going for a kimura. Penn defends it easily.#SUB2#
Doumergos escapes his hips to the side and looks to be working for an armbar. Penn gives him a little smile and shakes his head. No chance.
Penn trying to control the position from guard on top but Doumergos is wriggling around, looking for whatever he can. #SUB2#
Doumergos has his foot on Penn's thigh. He's trying to push off and get in position for a triangle, I think. Penn works his way back into a safe position though.
Penn trying to control but Doumergos is working from the bottom.
Penn won't allow Doumergos to sweep him here. #T5#
Penn trying to control the position from guard on top but Doumergos is wriggling around, looking for whatever he can.
Penn controls the pace of the fight for a moment.
Doumergos wants to sweep but no luck. #SUB2#
Doumergos working for a triangle but Penn defends it easily.
Doumergos looking to sweep here. No luck so far.
Doumergos bucks up whilst keeping hold of a body lock, managing to reverse the position. Now he's in top in Penn's guard. Score +2 for sweep to guard / half guard: Penn (2) vs (9) Doumergos
Penn is trying to keep Doumergos in close.
#SUB2#
Doumergos drops back looking for a leg! Penn is in trouble here! The fighters roll with the hold and Penn manages to kick Doumergos off! Doumergos jumps back into Penn's guard.
Penn wants to hit a sweep here but Doumergos passes into full mount! Oh no, disaster for Penn there! Score +3 for passing guard: Penn (2) vs (12) Doumergos#T6#
Penn just holding on.#SUB2#
Doumergos is working on an americana here. Ooh, that looks pretty nasty! Nope, Penn has managed to escape the submission attempt.
Doumergos with some aggressive grappling here, looking for the finish.
Penn has given up his back - I dont know if this is a deliberate ploy to try and escape or if he is just struggling down there.
Score +3 for taking back: Penn (2) vs (15) Doumergos#SUB2#
Doumergos is persistently looking for the submission but Penn is defending it well.
Penn trying to control the hands but Doumergos breaks the grip. #T7##SUB2#
Doumergos working for a RNC but it's not happening just yet. #SUB2#
Doumergos is working really hard to secure the rear naked choke. Penn defends successfully for a significant amount of time. Both fighters are looking very determined.
Doumergos gets his hands free as Penn looks to control. #SUB2#
Doumergos has his hand under the chin of his opponent looking for the choke. He's nearly got it! This one could be all over! But no, Penn has freed his hand and lives to survive another
well, another couple of seconds at least!
#SUB2#
Penn is displaying good submission defense - not really looking in danger of submitting to the rear naked choke at the moment. That could change in an instant of course if Doumergos gets his way!
#SUB2#
Doumergos looking to break Penn's wrist control so he can sink in the choke. Penn remaining controlled and patient though - he really has to keep calm otherwise Doumergos will wrap this one up with the rear naked choke!#T8##SUB2#
Doumergos is working hard for the rear naked choke here.
Penn rolls and manages to get back to half guard. Nicely done.
Penn trying to hold on to Doumergos's head to control him but Doumergos postures up.
Doumergos trying to pass the guard but Penn defending well. #SUB2#
Doumergos is looking for a kimura here.
#SUB2#
Doumergos is trying to work for a kimura but Penn is defending well.
Penn wants to get back to full guard.#T9#
Penn trying to control here.
#SUB2#
Doumergos is thinking about going for an arm triangle but he can't free his leg.
#SUB2#
Doumergos is sneakily working for an arm triangle but Penn sees it coming and defends easily.
Penn wants to control but Doumergos is keeping busy and won't allow it.
The ref warns both fighters not to hold the cage as they work up against the meshing.
Penn moves into full guard.
Doumergos forces his way into half guard.#SUB2#
Doumergos is looking for an arm triangle, whilst trying to pass to side control. Penn doesn't seem that keen to cooperate though. No luck this time Doumergos. #SUB2#
Penn is defending against the submission attempts here by Doumergos.
#T10#
Penn is staying active underneath Doumergos, who seems content to just control the action from this position.
Penn is trying to control but can't.
Penn won't allow Doumergos to pass to mount. #SUB2#
Doumergos is thinking about going for an arm triangle but he can't free his leg.
Penn is looking to regain full guard. Not this time though. #T11#
Penn moves his hips nicely and gets into full guard.
Doumergos slips nicely into half guard.
Penn might be looking to lock onto one of his opponent's long limbs for a submission, whilst we're on the ground.
Doumergos trying to control from half guard but Penn is working away.
Penn is trying to maintain the position but Doumergos is very close to passing his half guard.
Doumergos seems very keen to just sit and control from half guard but Penn does not like that idea so much and is remaining active off his back.
Penn wants to improve his position but Doumergos is controlling well.
Doumergos tries to pass to full mount but Penn defends it.
Penn has no desire to be mounted, so is trying to control. Doumergos is working away from the top position though.#T12#
Penn makes his way to full guard. A much better position for Penn.
Doumergos is looking to advance position but Penn has hit a scissor sweep - now he's on top in mount! Score +4 for clean sweep to past guard: Penn (6) vs (15) Doumergos
Doumergos is trying to escape the mount.
Doumergos has given up his back.
Score +3 for taking back: Penn (9) vs (15) Doumergos
Doumergos tries to roll but Penn sticks to his back.
Penn has good solid back control here.
Doumergos tries to escape the position.
#T13#
A lull in the action here.
Penn keeps control of the position as Doumergos tries to break free.
Penn just keeping the dominant position. He can't wait too long though, otherwise the referee will stand them back up.
Doumergos is trying to break free.
Doumergos is persisting with the attempt to improve his position.
Doumergos manages to reverse the position and now he's in Penn's guard. Nice work there by Doumergos.
Score +2 for sweep to guard / half guard: Penn (9) vs (17) Doumergos
Doumergos pushes down on Penn's leg and manages to get into half guard.
Doumergos wants to lay and pray for a moment but Penn keeps working. #T14#
Doumergos trying to mount his opponent but Penn defends it.
Penn regains full guard. Nicely done.
Penn controlling the position.
Penn looking to hit a scissor sweep but Doumergos is one step ahead there.
Doumergos looking to pass the guard.
Boooooooooooooooooooo!!! God, this has been a terrible round. Come on you two, sort yourselves out!
Penn trying to control the position.
Doumergos wants to control from the top but Penn keeps moving.
And that's the end of the fight!
Doumergos wins on points by 17 to 9.
A relieved looking Gaston Doumergos thanked the fans for their support and gave the usual line about them being amazing. They seemed to believe that he actually meant it. |
|
|
|
Event:
NYF Fight Night 7
Date: Aug 04, 2023 |
#R1#
Dawson lands with an uppercut that bounces Doumergos off the cage and back into range.
Dawson stuffs the takedown.#TD2#
Doumergos shoots in for a takedown! He's got it and he's managed to land in side control! That's better than Doumergos was expecting from the takedown attempt, I'm sure!
Doumergos wants to lay and pray for a moment but Dawson keeps working. #SUB2#
Doumergos is trying to land an Americana. He has the arm isolated but Dawson is keeping cool and he's avoided the danger for now. #SUB2#
Doumergos working hard here to secure a kimura but he's not really in the right position for it.
Dawson gives up the full mount - oops, sloppy defensive grappling there!
Dawson is trying desperately to improve position.#T1#
Doumergos looking to control but Dawson is working nicely, looking to advance position himself. #SUB2#
Doumergos with some aggressive grappling here. He's looking for submissions here, rather than waiting for the opportunity to counter.
#SUB2#
Doumergos looks like he's working for a submission but he's not found anything just yet.
Doumergos can't quite control the action as he would like just now, as Dawson is looking to escape.
Dawson tries to hold on but Doumergos pushes him away. #SUB2#
Doumergos wants to finish this one by submission but Dawson is holding onto his waist, trying to prevent any attacks from Doumergos.
Dawson knows he needs to get back to his feet asap. He's simply no match for Doumergos on the ground.#T2##SUB2#
Doumergos goes for an armbar but Dawson turns quickly into his guard - lovely anticipation from Dawson. #SUB2#
Doumergos escapes his hips to the side and looks to be working for an armbar. Dawson gives him a little smile and shakes his head. No chance. #SU#
Dawson stands up from guard. Let's bang!
Dawson lands a jab-cross combination.
Doumergos shoots for a double leg takedown but Dawson sprawls well. He's pushed Doumergos's face into the mat and manages to get back to his feet relatively easily.
Doumergos is trying hard to land a takedown here. Dawson sprawls well and keeps this one on the feet.
Michael Dawson has stuffed three takedown attempts in the round now. That's going to take a lot out of Gaston Doumergos.
Nice shot lands for Dawson.
We've been told by Dawson's head coaches at California Top Team that he's been working on his takedown defense in preparation for this fight.
The fans in attendance giving it up for the two fighters, who have really let it all hang out in the last minute or so!
Doumergos has his takedown stuffed
and Dawson counters with an inside leg kick.
Dawson looking to take his opponent's legs away with the low kicks.
Dawson lands with a nice low kick. That'll leave a bruise.#T3#
Doumergos misses with a takedown attempt. He shot from a bit too far out.
Dawson throws a big counter combination but Doumergos scrambles out of danger and avoids any damage.
Dawson with a jab.
Doumergos on the wrong end of a nice hook.
Wow, both these guys are really going for it!
Doumergos with a lazy takedown attempt
and Dawson counters with a good right hand that lands right on the jaw.
A left and a right from Dawson both land. Nice combination. #ROC#Doumergos is rocked!
Dawson is stalking Doumergos. Doumergos circles to his left. Keeps circling left. Bam! Straight right from Dawson, and it's lights out! Doumergos really payed the price for that rookie mistake.
Ladies and gentlemen, after 3:30 of round 1, we have a winner by way of KO (Punch). Michael Dawson! |
|
|
|
Event:
NYF 27: Tonioli vs Williams 2
Date: Jul 22, 2023 |
#R1#
Case throws a hard body shot but it just misses.
Doumergos changes levels looking for a counter takedown but doesn't commit.#TD#
Doumergos shoots in and gets a takedown into Case's guard.
Case is doing well to control the posture of his opponent and prevent any damage.
Our spies down at at Dangerous Fight Academy inform us that Case has really been working on his submissions in the buildup to this fight. Will it pay off?
Doumergos passes into half guard.
Case trying to control here.
The fighters are pressed up against the cage, both looking to find a bit of space to work.
Case is refusing to be controlled, as Doumergos sits in half guard.
Doumergos passes the half guard and he's now in mount! Big trouble for Case!
The ref warns both fighters not to hold the cage as they work up against the meshing.
Case is squirming around, avoiding Doumergos's attempts to control the action.
We've had a slow start to the round here - hopefully the action picks up.
Case is in all sorts of trouble here.
#T1#
Doumergos trying to control but Case is having none of it. #SUB#
Doumergos is in full mount, looking to secure a guillotine but Case is surviving well by controlling Doumergos's body position as best he can.
Case is flailing around like a fish out of water, trying to land strikes.#SUB#
Doumergos wants to finish this one by submission but Case is holding onto his waist, trying to prevent any attacks from Doumergos.
Case wants to hold on but Doumergos pushes him away.
Doumergos has been talking about how he's improved his wrestling in the run up to the fight so let's see if that's enough to sway the balance.
Case is looking to improve his position but Doumergos isn't that keen on the idea.
Doumergos sends his fist crashing into the mat - the crowd let out a collective ooooooh. Let's hope he's not broken it!#T2##SUB#
Doumergos wants to finish this one by submission but Case is holding onto his waist, trying to prevent any attacks from Doumergos.
Case regains half guard.
Doumergos trying to control from half guard but Case is working away.
Case trying to control but Doumergos postures up.
#SUB#
Doumergos is sneakily working for an arm triangle but Case sees it coming and defends easily.#SUB2#
Case looking to work for a kimura from the bottom.
The fighters are battling for position here. Case manages to regain full guard. Nice work.
Case looking for a sweep. Not yet Case, not yet. #SUB2#
Case escapes his hips to the side and looks to be working for an armbar. Doumergos gives him a little smile and shakes his head. No chance.
Case is working from a closed guard but he's struggling to control his opponent.#T3#
Doumergos wants to control from the top but Case keeps moving.
Doumergos looking to pass the guard. #SUB2#
Case looking for submissions from the bottom here. Moving his hips around, possibly looking for an armbar.
#SUB#
Doumergos thinks about going for a leg but decides against it, in order to maintain the position.
Doumergos trying to control the position from guard on top but Case is wriggling around, looking for whatever he can. #SUB2#
Case looking for a guillotine here but Doumergos defends easily.
Doumergos passes Case's right leg, so he's now in half guard. #T4#
A few boos can be heard. I'm sure they will multiply if the fighters don't pick up the pace.
Doumergos is looking to take a break and control but Case is keeping him honest, looking to work from the bottom.
Case has no desire to be mounted, so is trying to control. Doumergos is working away from the top position though.
Doumergos looking to pass the half guard. Not this time.
Case slips a foot under and gets full guard. Nice work.
Case keeping full guard, as Doumergos tries to pass. #SUB2#
Case has his foot on Doumergos's thigh. He's trying to push off and get in position for a triangle, I think. Doumergos works his way back into a safe position though.
Doumergos tries to free his leg and advance position but Case is retaining full guard. #SUB2#
Doumergos is posturing up here but Case has hold of an arm and he's gone for an armbar! Doumergos tries to roll out but it's too tight and Doumergos has to tap! Slick submission there by Case!
Ladies and gentlemen, after 4:58 of round 1, we have a winner by way of Submission (Armbar). Justin Case!
Justin Case seemed lost for words in his post fight interview but he remembered to thank his fans and directed everyone to his website. |
|
|
|
Event:
NYF 24: Mendez vs Ferguson
Date: Jun 24, 2023 |
#R1#
Doumergos gets his head snapped back by a nice shot there.
Doumergos fails with a rather predictable takedown attempt.
A really sloppy takedown attempt there from Doumergos.
It looked like Traumen was trying to counter with a body shot coming off that last attack from Doumergos.
Wow, both these guys are really going for it!
Traumen fakes a jab and then connects with a hook.
Doumergos fails with a takedown attempt.
Lucas Traumen has stuffed three takedown attempts in the round now. That's going to take a lot out of Gaston Doumergos.
A low kick lands for Traumen.
Traumen connects with a leg kick.
Traumen with a nice looking leg kick. You could hear that one land in a back row.
Traumen looks to have improved his striking defense since last time we saw him fight.
We've had a slow start to the round here - hopefully the action picks up.
Doumergos misses with a takedown attempt. He shot from a bit too far out.
Horrible takedown attempt by Doumergos or perhaps it was just good defense by Traumen, which made it look bad.
Doumergos shoots in looking for a takedown. Traumen tries to sprawl out of it but Doumergos keeps driving through. The fighters are pinned against the cage. Traumen manages to get underhooks and after a bit of a struggle, circles away and we're back to standing. #T1#
Doumergos fails with the takedown
and Traumen counters with a right hand to the body.
Doumergos looks winded!
Traumen lands with a kick to the ribs.
Doumergos has done a lot of speed work in the buildup to this fight.
Traumen fakes a head punch and goes low to the body. Nicely done.
A shot to the liver by Traumen. Beautiful body shot.
Traumen lands a big head kick that sends Doumergos to the canvas! Traumen follows up with strikes from the mount that forces the ref to step in and stop the fight!
Ladies and gentlemen, after 1:21 of round 1, we have a winner by way of TKO (Strikes). Lucas Traumen!
Lucas Traumen decided to go for the less than humble approach in his post fight interview, telling everyone how he is going to conquer the world. The crowd seemed to like it when really that sort of approach could have gone either way. |
|
|
|
Event:
NYF 20: St. Claire vs Ferguson
Date: May 27, 2023 |
#R1#
Casteel lands with an overhand left.#TD2#
Doumergos shoots in for a takedown and gets it.#SUB2#
Casteel is defending against the submission attempts here by Doumergos.
Doumergos is pressing down on Casteel's thigh, looking to free his foot. Casteel is holding on for now.
The fighters are pressed up against the cage, both looking to find a bit of space to work.#SUB2#
Doumergos is looking for a kimura. It's going to be difficult to finish that from half guard though and Casteel defends it well.
We've had a slow start to the round here - hopefully the action picks up.
Casteel slips a foot under and gets full guard. Nice work.
Doumergos trying to control but Casteel is working from the bottom. #T1##SUB2#
Doumergos drops back looking for a leg! Casteel is in trouble here! The fighters roll with the hold and Casteel manages to kick Doumergos off! Doumergos jumps back into Casteel's guard.
Casteel might be looking to lock onto one of his opponent's long limbs for a submission, whilst we're on the ground.
Doumergos passes easily into side control. Nice work.
Casteel is trying to get back to his feet.
Doumergos trying to control the action but Casteel is working from the bottom.
Doumergos is maintaining the dominant position - no doubt Casteel will start to get frustrated soon if he's not already.
Casteel is trying to get back to half guard.
Casteel on his back here. We all know that wrestlers don't like being on their back so let's see if Casteel tries to get out of the position.
Casteel prevents Doumergos from improving position.
Doumergos creates some space and throws a big elbow, but Casteel sees it coming and moves his head just enough to avoid the strike. #T2#
You can see the frustration on Casteel's face as Doumergos controls the position.
Casteel knows he needs to get back to his feet asap. He's simply no match for Doumergos on the ground.#SUB2#
Doumergos has hold of Casteel's arm. He's looking for a kimura. Casteel seems comfortable defending it but Doumergos has shifted his position slighty and is cranking on the arm! Casteel is real pain and he's forced to tap out! Casteel is disgusted with himself for not defending it better but Doumergos couldn't care less - he's delighted!
Ladies and gentlemen, after 2:15 of round 1, we have a winner by way of Submission (Kimura). Gaston Doumergos!
A very excited looking Gaston Doumergos made sure he remembered to thank all the fans both in the arena and on the internet. He said all the coolest people spend all day on MMA websites, which got a big reaction. |
|
|
|
Event:
NYF 17: Donal vs Williamson
Date: Apr 29, 2023 |
#R1#
Nice uppercut lands for Oleman. That snapped Doumergos's head back.
Doumergos looks frustrated there after his takedown attempt is stuffed easily.
Doumergos gets his takedown attempt stuffed easily
letting Oleman counter with a right hand.
Oleman wants to clinch up but Doumergos keeps it at a distance.
Doumergos dives in and grabs Oleman's left leg, looking for a takedown. Oleman pushes down on Doumergos's head and hops out.
Oleman unleashes a big counter combination but Doumergos bobs and weaves and avoids any damage.
That's three failed takedown attempts in the round for Gaston Doumergos. That's going to take a lot out of him.
Doumergos fakes high and shoots in for a takedown but Oleman avoids it really well and circles away.
Oleman lets it all go there with a big combo counter but none of the punches connected.#CL2#
Doumergos tries to keep at a distance but Oleman has taken the fight into the clinch.
Oleman lands a left hand that snaps the head of Doumergos backwards.
We've had a slow start to the round here - hopefully the action picks up.
Doumergos has Oleman pressed up against the cage and is working for takedown. Oleman manages to improve position though and keeps the fight standing.
Doumergos is looking for a takedown up against the cage. Oleman gets underhooks though and prevents the takedown attempt.
Oleman stops a takedown attempt from Doumergos.
Doumergos can't get the takedown.
#T1#
Oleman lands a nice uppercut.
Oleman lands a right uppercut that snaps the head of Doumergos backwards.
Doumergos tries to pull guard but Oleman forces him back to his feet, against the cage.
Doumergos has hold of a leg and is looking for a trip takedown. Oleman avoids it nicely though and we remain in the clinch.
Doumergos tries for a takedown. No joy.
Oleman lands a hook that snaps the head of Doumergos backwards.
Doumergos has been talking about how he's improved his wrestling in the run up to the fight so let's see if that's enough to sway the balance.
Doumergos drops down looking for an ankle pick but Oleman pulls his leg out and moves away.
Oleman uses good footwork to get in and out, landing a nice hook.#ROC2#Doumergos is rocked!#CL2#
Oleman gets in close and instigates a clinch.
Oh Doumergos is still all over the place! His legs are completely gone! Will he be able to recover?!!
Oleman misses with the head strike.
Doumergos blocks a couple of punches on the inside.
Oleman misses with a hook from the clinch.
A head punch blocked on the inside by Doumergos.
Oleman throws a head punch that misses.
Doumergos letting Oleman take a breather here.
Oleman throws a head punch that misses.
A head punch on the inside from Oleman fails to land.
Doumergos wants a takedown but no success here.
Oleman fails to land with a short punch on the inside.
Oleman tries a shoulder strike but it doesn't do any damage.
The fans in attendance giving it up for the two fighters, who have really let it all hang out in the last minute or so!
Doumergos tries to pull guard but Oleman forces him back to his feet, against the cage.
Oleman gets underhooks to prevent Doumergos's takedown attempt.
Oleman misses with a short punch on the inside.
Oleman misses with a punch on the inside.
#T2#
Doumergos blocks a punch to the side of the head.
Oleman throws a punch but it's blocked by Doumergos.
Oleman swings wildly with an uppercut but Doumergos uses good head movement to avoid it.
Oleman working aggressively here.
Doumergos blocks a couple of punches on the inside.
A head punch on the inside from Oleman fails to land.
Oleman has a couple of punches blocked by Doumergos.
Doumergos blocks a couple of punches on the inside.
Oleman misses with the head strike.
Oleman fails to land with a short punch on the inside.
Oleman tries a shoulder strike but it doesn't do any damage.
Oleman tries a shoulder strike but it doesn't do any damage.
Oleman misses with a hook from the clinch.
Doumergos is looking for a takedown.
Oleman misses with the head strike.
Doumergos blocks an uppercut.
Oleman throws a head punch that misses.
Doumergos blocking some punches.
Doumergos blocks an uppercut.
Oleman has been looking to improve his clinch game in recent weeks. Doumergos seems to have the measure of him in the clinch so far, so let's see if Oleman can turn it around.
Oleman swings away with an uppercut that misses.
Oleman working aggressively here.
Oleman misses with a hook from the clinch.
Oleman misses with a hook from the clinch.
Oleman tries a shoulder strike but it doesn't do any damage.
An uppercut on the inside fails to land for Oleman.
Oleman throws a head punch that misses.
Oleman working aggressively here.
A head punch on the inside from Oleman fails to land.
Oleman misses with a hook from the clinch.
Oleman misses with a hook from the clinch.
Oleman leaning his opponent against the cage.
Doumergos blocking some punches.
Oleman fails to land with a short punch on the inside.
Oleman misses with a short punch on the inside.
Oleman throws a punch but it's blocked by Doumergos.
Oleman is defending well against a takedown attempt.
A head punch blocked on the inside by Doumergos.
Oleman tries a shoulder strike but it doesn't do any damage.
Doumergos tries to pull guard but Oleman forces him back to his feet, against the cage.
Doumergos blocks a punch to the side of the head.
Oleman misses with a short punch on the inside.
A head punch blocked on the inside by Doumergos.
An uppercut on the inside fails to land for Oleman.
Doumergos blocks an uppercut.
Oleman swings wildly with an uppercut but Doumergos uses good head movement to avoid it.
An uppercut on the inside fails to land for Oleman. #T3#
Doumergos blocking some punches.
Oleman throws a punch but it's blocked by Doumergos.
Oleman tries a shoulder strike but it doesn't do any damage.
Doumergos seems to have got his legs back now.
Oleman lands a hook to the body. It's hard to tell if that hurt Doumergos or not.
Doumergos tries for a takedown but Oleman manages to get underhooks.
Oleman lands a big right hand that drops Doumergos! The killer instinct kicks in and Oleman finishes his opponent with a series of strikes from mount. A dominating finish by Oleman!
Ladies and gentlemen, after 3:21 of round 1, we have a winner by way of TKO (Strikes). Homas Oleman! |
|
|
|
Event:
NYF 14: Ferguson vs Donal
Date: Apr 01, 2023 |
Gaston Doumergos had a terrible time trying to make weight. After initially coming in at 165.7, he had two hours to make the official fight weight. Stepping on the scales for a second time, he still failed to make the required weight and after much deliberation, his fight with Homas Oleman was cancelled. |
|
|
|
Event:
NYF 10: Mendez vs Kuznecov
Date: Mar 04, 2023 |
#R1#
Doumergos has his takedown stuffed
and Olatunji counters with a quick right hand to the jaw.
Olatunji lands three nice shots there - that looked like it hurt!
Doumergos shoots in for a takedown but Olatunji shows good takedown defense.
Doumergos backing away here, and Olatunji unleashes a leg kick that just misses.#TD#
Doumergos decides to change it up a bit and drives through with a nice takedown into half guard.
Doumergos looks over to his corner - he wants some instructions but his corner are not responding. #SUB#
Doumergos looking for a kimura but he'll have to free his other leg if he wants to finish that. Perhaps he's just using it as a distraction technique.
Doumergos content to sit in half guard and control for a moment.
The fighters are pressed up against the cage, both looking to find a bit of space to work.#T1#
Doumergos passes the half guard and he's now in mount! Big trouble for Olatunji! #SUB#
Doumergos with some aggressive grappling here. He's looking for submissions here, rather than waiting for the opportunity to counter.
#SUB#
Doumergos quickly switches position and commits to an armbar! It's a big risk for Doumergos but it's paid off an Olatunji is forced to tap! Nice work by Doumergos.
Ladies and gentlemen, after 1:53 of round 1, we have a winner by way of Submission (Armbar). Gaston Doumergos!
Deji Olatunji was interviewed post fight and said 'guys... this is my last fight'. |
|
|
|
Event:
NYF 6: Kuznecov vs St Claire
Date: Jan 27, 2023 |
#R1#
Doumergos with poor footwork there. He got himself in a bit of a tangle, enabling Johnson to score with a decent uppercut.
Doumergos looks more muscular than last time we saw him. He must have been on the weights.
Johnson with a jab.
Doumergos shoots in but no luck this time.
It looked like Johnson was looking amped, ready to throw a big counter but didn't commit.
Johnson defends well against a solid takedown attempt from Doumergos.
Johnson is looking to counter punch.
A telegraphed takedown attempt from Doumergos is defended easily by Johnson.
Jason Johnson has stuffed three takedown attempts in the round now. That's going to take a lot out of Gaston Doumergos.
Johnson stuffs the takedown attempt from Doumergos. Doumergos gets slowly back to his feet. #KD#
Johnson drops Doumergos with a hook right on the temple. He thinks about going to the ground but Doumergos looks back up at him and smiles so Johnson waves him back to his feet - he obviously thinks he can knock him out after that shot landed.
#ROC#Doumergos is rocked!
Fantastic stuff here - a very entertaining period of action, which has drawn cheers from the crowd.
Crack! Johnson connects with the perfect overhand right and Doumergos falls face first to the canvas. Timbeeeeeeeer! Beautiful knockout for Johnson!
Ladies and gentlemen, after 0:38 of round 1, we have a winner by way of KO (Punch). Jason Johnson!
Jason Johnson is the new welterweight champion!
Jason Johnson spent the whole post fight interview bigging himself up. It didn't go down that well with the fans after a while as they thought it was a bit arrogant. |
|
|
|
Event:
NYF 2: Tank vs Kuznecov
Date: Dec 17, 2022 |
#R1##TD2#
A momentary lapse in concentration from Doumergos enables Blades to shoot in and score with a neat double leg. Doumergos manages to secure a closed guard as the fighters hit the mat.#SUB#
Blades throws a sloppy strike and Doumergos has hooked up an armbar on the loose arm! He's turned and extended fully! Blades is forced to tap! Great BJJ from Doumergos!
Ladies and gentlemen, after 0:18 of round 1, we have a winner by way of Submission (Armbar). Gaston Doumergos! |
|
|
|
Event:
Quick Fight Championship
Date: Oct 21, 2022 |
#R1##TD#
Amiga gets caught on his heels momentarily as he allows Doumergos to score an easy takedown into full guard.
Doumergos tries to free his leg and advance position but Amiga is retaining full guard.
The fighters are pressed up against the cage, both looking to find a bit of space to work.
Doumergos throwing strikes from guard but Amiga blocks nicely.
Doumergos controls from within his opponent's guard.
Doumergos cracks Amiga with a solid left hand.
We've had a slow start to the round here - hopefully the action picks up.
Doumergos is intent on slowing down the pace of the fight, simply looking to control.
Doumergos slips nicely into half guard.#T1#
Amiga trying to control here.
Doumergos has been looking to land a fair amount of strikes on the ground. He might be looking to soften his opponent up in order to work for a submission.
Doumergos looks over to his corner - he wants some instructions but his corner are not responding.
Amiga keeping his head moving to avoid the ground and pound.
Doumergos performing his best blanket impression for a moment. #T2#
Neither fighter has done anything of merit for a good minute or two here and the crowd are not happy about it.
We must be close to a standup if these guys don't pick up the pace.#SUB#
Doumergos is trying for a kimura here. Amiga looks like he's in a lot of pain... and he's tapping out! Doumergos wins by kimura!
Ladies and gentlemen, after 2:31 of round 1, we have a winner by way of Submission (Kimura). Gaston Doumergos! |
|
|
|
|
|
|