|
Play
by Play - Fighter's Fight Commentary
|
Event:
SMASH: Khan vs Mukunzi
Date: Dec 31, 2023 |
#R1#
Mad Mike tries for a takedown but Chai circles away easily
and Chai counters with a slapping leg kick.
Mad Mike fails with a takedown attempt.
Chai scores with a hook.
Chai jabs Mad Mike to the body, keeping him at a distance.
Mad Mike has done a lot of speed work in the buildup to this fight.
Mad Mike with a lazy takedown attempt
enabling Chai to counter with a crisp jab.
Dragon Li Chai has stuffed three takedown attempts in the round now. That's going to take a lot out of Mike Mad Mike.
Chai throws a head kick that looked like it stung.
Mad Mike shoots in for a takedown - he's clinched up with Chai but Chai pushes him off and we're back to square one.
Mad Mike on the wrong end of an overhand right that came out of nowhere.
A kick lands to the mid section there for Chai.
The crowd cheering loudly, showing their appreciation for the quality fight we're seeing here.
Chai fakes a couple of low kicks, before throwing one on the third attempt. It connects and Mad Mike has to reset his feet before getting ready to engage.
Mad Mike closes the distance and clinches up with Chai, looking for a takedown. Mad Mike pushes Chai against the cage but Chai circles to the side and manages to break the clinch.#T1#
Mad Mike has his takedown stuffed
and Chai counters nicely by changing levels and landing a hook to the body.
Chai darts in and out, connecting with a jab.
Mike Mad Mike seems to be the more aggressive standup fighter in this bout.
Chai lands a kick to the ribs of his opponent. Nice work there - in and out in a flash.
Mad Mike looks for a takedown here. Will he get it? Chai is fending him off so far but Mad Mike persists. Nope, Chai circles away and we're back to standing.
Chai throws a nasty head kick that just misses. He throws another kick to the head of his opponent and almost takes it off! Mad Mike crumples to the floor and the fight is over!
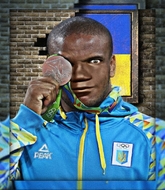
Ladies and gentlemen, after 1:25 of round 1, we have a winner by way of KO (Head Kick). Dragon Li Chai!
Dragon Li Chai decided to thank the fans in attendance for making a great atmosphere. It seemed to go down pretty well. |
|
|
|
Event:
TWGC 40 (145lbs, D2): Finals - Round 1
Date: Sep 11, 2023 |
This TWGC bout is 1 fifteen minute round in the featherweight division. Introducing today's competitors. In the red corner, competing out of Las Vegas, with a TWGC record of 5 wins and 0 losses; Igor Lomachenko! And in the blue corner, fighting out of Las Vegas, with a TWGC record of 1 wins and 0 losses; Mike Mad Mike!
The judges for this bout are Sam Margolis, Phil Schofield and Daniel Bishop.
Let's get this grappling contest under way! Who will be victorious?
Mad Mike gets his takedown attempt stuffed easily #CL#
and Lomachenko counters into the clinch. Nicely done.
Lomachenko has hold of a leg and is looking for a trip takedown. Mad Mike avoids it nicely though and we remain in the clinch.
Lomachenko tries for a takedown but Mad Mike manages to get underhooks.
Lomachenko tries to score a body lock takedown but Mad Mike shows good agility there to stay on his feet.
Lomachenko has been talking about how he's improved his wrestling in the run up to the fight so let's see if that's enough to sway the balance.
That's three failed takedown attempts in the round for Igor Lomachenko. That's going to take a lot out of him.
Lomachenko wants to take the fight to the mat but Mad Mike manages to get underhooks and keep the fight in the clinch.#TD2#
Mad Mike gets control of Lomachenko's arms and successfully pulls guard. Mad Mike will no doubt be looking for submissions off his back.#SUB2#
Mad Mike working from the bottom, still in full guard. He's managed to get a loose triangle. Lomachenko doesn't seem to be doing much to defend here, obviously he feels comfortable in the position. Lomachenko manages to throw the legs off his shoulder and he's back into guard - no problem.
Lomachenko stopping the sweep attempt from Mad Mike.
We've had a slow start to the round here - hopefully the action picks up.#SUB2#
Mad Mike is working actively off his back, looking to secure an arm or perhaps work for a triangle.
Lomachenko tries to free his leg and advance position but Mad Mike is retaining full guard.
Mad Mike controls Lomachenko momentarily but Lomachenko frees himself. #T1#
Lomachenko slows down the pace of the fight for a moment. He'll need to remain active if he doesn't want to see the fight stood back up.
Lomachenko continues to stall.
Lomachenko looking to pass the guard. #SUB2#
Mad Mike isolates an arm and boxes in a triangle. Lomachenko stacks Mad Mike on his neck as he steps over and passes to the side. He's now in a much more dominant position where he can look to do some serious damage. Nice move by Lomachenko! Score +3 for passing guard: Lomachenko (3) vs (0) Mad Mike#T2#
Mad Mike is positioning himself to get back to half guard.
The referee asks Lomachenko politely if he wouldn't mind getting on with it and actually doing something. Lomachenko prefers to stall for the moment though.
Lomachenko's ground tactics aren't going to win him many fans. Let's hope he's got fireworks for us if he gets back to his feet because he's not doing much on the ground.
The ref warns both fighters not to hold the cage as they work up against the meshing.
Mad Mike gets one leg under and gets the fight to half guard.
Lomachenko with a momentary lay and pray from half guard. #T3#
Mad Mike is looking to regain full guard. Not this time though. #SUB2#
Mad Mike looking for submissions off his back.
Lomachenko is pressing down on Mad Mike's thigh, looking to free his foot. Mad Mike is holding on for now. #SUB2#
Mad Mike looking to work for a kimura from the bottom.
Mad Mike gets back to full guard.
#T4##SUB2#
Mad Mike escapes his hips to the side and looks to be working for an armbar. Lomachenko gives him a little smile and shakes his head. No chance.
The fighters are pressed up against the cage, both looking to find a bit of space to work.
Mad Mike working a defensive guard but Lomachenko manages to pass into side control anyway.
Score +3 for passing guard: Lomachenko (6) vs (0) Mad Mike
A lull in the action here.
Mad Mike tries to improve position but can't. #T5#
Lomachenko is maintaining the dominant position - no doubt Mad Mike will start to get frustrated soon if he's not already.
Lomachenko trying to control the action but Mad Mike is working from the bottom.
Mad Mike tries to get back to half guard but can't.
Lomachenko is maintaining the dominant position - no doubt Mad Mike will start to get frustrated soon if he's not already.
Lomachenko working away.
Mad Mike is looking to regain half guard here but Lomachenko keeps moving and retains side control.
Lomachenko slows the pace down. #T6#
Mad Mike is trying to get back to half guard.
Lomachenko taking a breather here.
Mad Mike is looking for a sweep.
Mad Mike is still trying to improve position.#T7#
Lomachenko is pausing for a moment. What's he doing? It looks like he's clearing his nose. Oh dude! He's shot a load of snot all down Mad Mike's shoulder. That is not cool.
Lomachenko working away.
A lull in the action here as Lomachenko stalls from top position.
Mad Mike gets back to half guard.
Lomachenko is figuring out what he wants to do next.
Lomachenko has controlled the position for a good 20 seconds, which will no doubt be starting to frustrate his opponent.
Mad Mike is working for an escape here. He's hooked one of Lomachenko's legs and he's managed to sneak out and take Lomachenko's back! Score +4 for clean sweep to past guard: Lomachenko (6) vs (4) Mad Mike
Lomachenko breaks Mad Mike's hooks off and manages to turn into his guard.
Score +2 for sweep to guard / half guard: Lomachenko (8) vs (4) Mad Mike#T8##SUB2#
Mad Mike working for a triangle but Lomachenko defends it easily.
#SUB2#
Mad Mike had isolated an arm as going for a kimura. Lomachenko defends it easily.
Lomachenko showing good wrestling skills to control the position.
Further stalling from Lomachenko.
Mad Mike wants to sweep here but Lomachenko controlling him for the moment. #T9#
Mad Mike is looking to sweep but instead, Lomachenko has passed into half guard.
Mad Mike is trying to maintain the position but Lomachenko is very close to passing his half guard.#SUB2#
Mad Mike actively working from the bottom here.
Lomachenko is taking a breather. Mad Mike says something to him but it's hard to make out. Perhaps he's telling him to get on with it and actually do something.
Mad Mike is trying to maintain the position but Lomachenko is very close to passing his half guard.
Lomachenko frees up his trapped foot and advances to mount. Score +3 for passing guard: Lomachenko (11) vs (4) Mad Mike#T10#
Lomachenko controlling from mount.
Lomachenko is looking to work his way around to Mad Mike's back. He needs to be careful though, as he's in danger of losing this dominant position.
Mad Mike can't escape the position.
Lomachenko looking to control and managing it successfully.
More hug and hope from Lomachenko.
Mad Mike gets back to half guard.#T11#
Well, if Lomachenko is going to just lie there, perhaps we should talk about what we're having for dinner tonight
I'm having a ham and pineapple pizza
Yum. Can't wait.
Mad Mike is looking to improve his position.
Lomachenko is taking a breather. Mad Mike says something to him but it's hard to make out. Perhaps he's telling him to get on with it and actually do something.
This is a sustained period of stalling by Lomachenko.#T12#
Lomachenko frees up his trapped foot and advances to mount. Score +3 for passing guard: Lomachenko (14) vs (4) Mad Mike
Lomachenko avoids the attempt from Mad Mike to control.
Lomachenko sitting in mount, just looking to control for the moment.
Mad Mike is trying desperately to improve position.#T13#
Lomachenko content just to control the position here. #T14#
Lomachenko wants to take his opponent's back but Mad Mike doesn't allow it.
Mad Mike wants to improve position but instead he's given up his back. Score +3 for taking back: Lomachenko (17) vs (4) Mad Mike
Mad Mike tries to break free.
Lomachenko keeps control of the position easily here as Mad Mike tries to buck him off.
Boooooooooooooooooooo!!! God, this has been a terrible round. Come on you two, sort yourselves out!
Lomachenko controlling well, preventing Mad Mike from escaping the position.
And that's the end of the fight!
Lomachenko takes the fight on points by 17 to 4. |
|
|
|
Event:
TWGC 40 (145lbs, D2): Los Angeles Qualifier - Round 1
Date: Sep 02, 2023 |
This TWGC bout is 1 fifteen minute round in the featherweight division. Introducing today's competitors. In the red corner, competing out of Las Vegas, with a TWGC record of 0 wins and 0 losses; Mike Mad Mike! And in the blue corner, fighting out of Las Vegas, with a TWGC record of 0 wins and 0 losses; Gordon Masten!
The judges for this bout are Frank Antenori, Don Winkell and Timothy Bukovac.
Let's get this grappling contest under way! Who will be victorious?
No luck for Mad Mike with that takedown attempt.
Mad Mike looks to have improved his striking defense since last time we saw him fight.
Masten slaps away a takedown attempt from Mad Mike, before circling back to the center of the mat.
Mad Mike fails with a takedown attempt from distance.
That's three failed takedown attempts in the round for Mike Mad Mike. That's going to take a lot out of him.
Mad Mike shoots for a takedown but Masten saw that one coming a mile off and avoided it easily.#CL2#
Masten moves into range and clinches up with Mad Mike.#TD#
Mad Mike lands a nice trip takedown into half guard.
Score +2 for takedown into guard / half guard: Mad Mike (2) vs (0) Masten
Masten wants to improve his position but Mad Mike is controlling well.
Masten keeps trying to improve his position.
We've had a slow start to the round here - hopefully the action picks up.#SUB#
Mad Mike is looking for a kimura but he's never going to get it from there.
Masten is looking to regain full guard. Not this time though. #T1##SUB#
Mad Mike is looking for a kimura. It's going to be difficult to finish that from half guard though and Masten defends it well.
Masten is looking for a sweep. Mad Mike is wise to his cunning plan and keeps the top position.
Masten really doesn't want to stay on the ground with Mad Mike. If he can't get it back to his feet, it's only a matter of time before he'll be tapping out.#SUB#
Mad Mike is looking for a kimura but Masten is holding onto that half guard position, so it's hard for Mad Mike to get the leverage. #SUB#
Mad Mike seems to be looking for submissions.
The ref warns both fighters not to hold the cage as they work up against the meshing.
Masten is looking to improve his position.
#SUB#
Mad Mike is working for a kimura but Masten is defending it quite comfortably.
#T2#
Masten trying to control here.
Masten is trying to get back to full guard.
Masten trying to control here.
Masten tries to roll over but Mad Mike keeps him under control.
Masten is persisting with the attempt to improve his position.
The fighters are pressed up against the cage, both looking to find a bit of space to work.#T3#
Masten wants to control but Mad Mike is keeping busy.
Mad Mike wants to take a breather but Masten is having none of it.
Masten wants to sweep but Mad Mike has passed to side control! Score +3 for passing guard: Mad Mike (5) vs (0) Masten
Masten sneaks a leg under to get back to half guard.#SUB2#
Masten with the active half guard here but Mad Mike passes nicely into side control. Score +3 for passing guard: Mad Mike (8) vs (0) Masten
Mad Mike trying to control the action but Masten is working from the bottom.
Masten sneaks back into half guard.#T4#
Masten gets full guard.
Mad Mike preventing the sweep. #SUB2#
Masten is working actively off his back, looking to secure an arm or perhaps work for a triangle.
Mad Mike stopping the sweep attempt from Masten.
Masten keeping moving, preventing Mad Mike from controlling successfully.
Masten looking to sweep here. No luck so far. #T5#
Mad Mike is taking a break and basically stalling. The referee will not allow him to do that for long.
Mad Mike trying to control but Masten is working from the bottom.
Masten wants to hit a sweep here but Mad Mike passes into full mount! Oh no, disaster for Masten there! Score +3 for passing guard: Mad Mike (11) vs (0) Masten#SUB#
Mad Mike goes for an armbar but Masten turns quickly into his guard - lovely anticipation from Masten. Score +2 for sweep to guard / half guard: Mad Mike (11) vs (2) Masten#T6#
Masten wants to pass the guard but Mad Mike is keeping the position.
Mad Mike lands a beautiful sweep and he's now moved into his opponent's guard. Score +2 for sweep to guard / half guard: Mad Mike (13) vs (2) Masten#SUB2#
Masten looking for submissions off his back, moving his hips, looking for an opening.
Masten looking to hit a scissor sweep but Mad Mike is one step ahead there. #T7##SUB2#
Masten looking for subs off his back but Mad Mike has passed one foot through into half guard.
Masten tries to get to full guard but Mad Mike has control of the leg. #SUB#
Mad Mike seems like he's working for an arm triangle here. He's freed his trapped foot and he's rotating nicely. Masten is in big trouble! He's tapping out! This one is aaaaaaaaaaaall over!
Ladies and gentlemen, after 7:51 of round 1, we have a winner by way of Submission (Arm Triangle). Mike Mad Mike!
Mike Mad Mike really struggled to get his t-shirt on before his hand was raised. Making sure that Shadow Realm Apparel logo gets some air time is pretty tricky when you're all sweaty. |
|
|
|
Event:
AVKT 26: Silence Your Foes
Date: Jun 10, 2023 |
#R1#
Mad Mike has a takedown stuffed.
Dias lands a nice looking body kick.#CL#
Mad Mike moves into the clinch.
Dias tries to land a knee to the body but he is off balance and Mad Mike avoids it.
Mad Mike blocks an uppercut.
Mad Mike goes for a takedown in the clinch but Dias prevents it.
Mad Mike lands with a good tight uppercut to the head.
Dias throws a knee to the head but misses.
Mad Mike misses with an elbow strike.
#TD#
Mad Mike has double underhooks and is working for a body lock takedown. He's got it. The fighters land in half guard but Dias regains guard immediately.
Mad Mike trying to control the position from guard on top but Dias is wriggling around, looking for whatever he can.
Dias trying to keep a closed guard but Mad Mike is proving a slippery customer.
Mad Mike might be looking to lock onto one of his opponent's long limbs for a submission, whilst we're on the ground.
Dias being controlled here, momentarily. #T1##SUB2#
Dias escapes his hips to the side and looks to be working for an armbar. Mad Mike gives him a little smile and shakes his head. No chance.
Mad Mike sneaks a leg through and gets to half guard. That was like a knife through butter how easily he passed Dias's guard.
Mad Mike has freed up his trapped foot and advances to mount.
Mad Mike forces the positional change into back control.
Mad Mike not allowing Dias to control his hands. #SUB#
Mad Mike is looking to finish the fight by rear naked choke. Dias knows exactly what he's got planned though, so he's defending well. Maybe a few strikes would soften Dias for a finish.
Dias is defending well here and trying to improve his position.
#SUB#
Mad Mike is remaining active here, looking for the choke. The more discerning members of the crowd will appreciate his efforts.
Mad Mike not allowing Dias to control his hands.
Dias really doesn't want to stay on the ground with Mad Mike. If he can't get it back to his feet, it's only a matter of time before he'll be tapping out.#T2#
Dias manages to reverse the position and now he's in Mad Mike's guard. Nice work there by Dias.
#SUB#
Mad Mike looking to try and escape his hips here, looking for a submission. It looks like he's going for a triangle but Dias is defending well. Mad Mike quickly switches to an armbar and extends the arm! Dias has no choice but to tap, to a very quick submission! Wow, that was lightning fast! Mad Mike celebrates on the cage, with the crowd.
Ladies and gentlemen, after 2:35 of round 1, we have a winner by way of Submission (Armbar). Mike Mad Mike!
Mike Mad Mike retains his bantamweight title!
Mike Mad Mike took to the microphone after his victory and thanked his sponsors, Shadow Realm Apparel for their support in the buildup to the fight. |
|
|
|
Event:
AVKT 22: The End is Near…
Date: May 13, 2023 |
#R1#
Varo scores with a punch to the gut of his opponent.
Varo moving in and out of range nicely, whilst landing the scoring shot.#CL2#
Mad Mike has Varo up against the cage in a clinch.
Mad Mike takes a shot to the head.
Mad Mike blocking some punches.
#TD#
Varo pulls guard successfully.
Varo is working an open guard here, looking to improve his position. No doubt that will leave him open to counters but at least he's being more offensive.
The ref warns both fighters not to hold the cage as they work up against the meshing.
Mad Mike trying to control but Varo is working from the bottom.
Mad Mike trying to pass the guard but can't manage it just yet.
Varo trying to control the position.
We've had a slow start to the round here - hopefully the action picks up.
Varo is working an open guard here, looking to improve his position. No doubt that will leave him open to counters but at least he's being more offensive.
Varo working a defensive guard here.
Mad Mike passes into half guard. #T1#
Varo manages to get to full guard.
Mad Mike pressing down on his opponent's thigh, looking to pass guard. Varo is keeping the position for now.
Varo trying to control the position.
Varo keeping moving, preventing Mad Mike from controlling successfully.
Mad Mike tries to free his leg and advance position but Varo is retaining full guard.
Varo has Mad Mike pulled in close to control his posture. #T2#
There's not a lot going on here and the crowd are letting the fighters know they're not willing to tolerate a lack of action.#SUB2#
Mad Mike is trying to work a guillotine from the top, or something like that? Don't know how he thinks he's going to get a finish from there. #SUB2#
Mad Mike postures up as if he's going to throw some strikes but drops back for an ankle! Varo is in big trouble! He looks ready to tap! But no, he's escaped and dives on top of Mad Mike, into his guard. #REVR#
Mad Mike looking to control.
Varo with a couple of shots to the head there. Not particularly brutal.#SUB2#
Mad Mike looking for submissions from the bottom here. Moving his hips around, possibly looking for an armbar.
#SUB2#
Mad Mike throwing his legs up looking for a triangle.
Varo throwing elbows and punches but not connecting, as Mad Mike works some decent striking defense from the bottom. #T3##SUB2#
Mad Mike working from the bottom, still in full guard. He's managed to get a loose triangle. Varo doesn't seem to be doing much to defend here, obviously he feels comfortable in the position. Varo manages to throw the legs off his shoulder and he's back into guard - no problem. #SUB2#
Mad Mike has a loose triangle. He'll be looking to tighten that up but Varo can see exactly what he's planning and manages to posture up and free himself.
Varo trying to control but Mad Mike is working from the bottom.
Mad Mike bucks up whilst keeping hold of a body lock, managing to reverse the position. Now he's in top in Varo's guard. #REVB#
Mad Mike trying to control the position from guard on top but Varo is wriggling around, looking for whatever he can.
Varo is trying to keep Mad Mike in close.
#T4#
Varo looking for a sweep. Not yet Varo, not yet.
Varo keeping moving, preventing Mad Mike from controlling successfully.
Varo looking to hit a scissor sweep but Mad Mike is one step ahead there.
Mad Mike looking to pass the guard.
Boooooooooooooooooooo!!! God, this has been a terrible round. Come on you two, sort yourselves out!
Mad Mike is persisting with the attempt to improve his position.
There's a bit of a scramble here and now Varo is on top in guard.
#REVR#
Varo postures up in Mad Mike's guard and throws a big left but Mad Mike blocks it.
And that is the end of the round. The fighters go back to their corners.
Leonardo Varo dominated that round.
The minute break is over - no more time for sponges and pep talks - back to the action!#R2##CL2#
Mad Mike pushes Varo up against the cage in a clinch.
Varo lands a right hand that snaps the head of Mad Mike backwards.
Varo blocks a knee to the body. He'll have a nicely bruised forearm in the morning.#TD2#
Mad Mike gets the body lock takedown. After a quick scramble, Varo regains guard.
Varo looking to sweep here. No luck so far.
Mad Mike passes easily into side control. Nice work.
Varo is in a tricky position but he's been working on his transitions down at Invictus MMA, so we'll see if he gets out of it.
Varo is looking to regain half guard here but Mad Mike keeps moving and retains side control.
Varo is working hard here to advance position.#SUB2#
Mad Mike thinks about going for a far side armbar but bails out and retains the dominant position instead.
We've had a slow start to the round here - hopefully the action picks up.
Varo struggling a bit here.#T1#
Varo gives up the full mount - oops, sloppy defensive grappling there!
Varo is squirming around, avoiding Mad Mike's attempts to control the action.
Varo tries to get back to half guard but can't.
Mad Mike can't quite control the action as he would like just now, as Varo is looking to escape.
The fighters are pressed up against the cage, both looking to find a bit of space to work.
Mad Mike is stalling here but it's allowed Varo to get half guard.
Varo tries to get to full guard but Mad Mike has control of the leg. #T2#
Varo wants to control the action here but instead Mad Mike manages to pass to full mount!
Mad Mike looking to control and managing it successfully.
Mike Mad Mike has got the better of the ground game so far.
Varo bucks up and manages to get a nice reversal! He's in guard on the top - nicely done!
Varo throws an elbow that misses. Mad Mike uses the momentum to reverse the position. He's now in Varo's guard. Nice move by Mad Mike!#REVB#
Varo is controlling Mad Mike's posture.
Varo is working from a closed guard but he's struggling to control his opponent.
Mad Mike looking to sit in guard and control but Varo gets the butterfly guard and sweeps. He's now in the guard on the top. #REVR##T3#
Mad Mike keeping moving, preventing Varo from controlling successfully. #SUB2#
Mad Mike has a loose triangle. He'll be looking to tighten that up but Varo can see exactly what he's planning and manages to posture up and free himself. #SUB2#
Varo avoids a guillotine attempt easily.
Varo scoring with punches to the head and body.
Varo won't allow Mad Mike to sweep him here.
Varo keeps in close for a moment and lands a decent shot to the side of Mad Mike's head.
Mad Mike keeping moving, preventing Varo from controlling successfully. #T4#
Varo is sitting in guard, working some ground and pound.
Mad Mike is working an open guard here, looking to improve his position. No doubt that will leave him open to counters but at least he's being more offensive.
Varo has to be careful here, sitting in the guard of a superior BJJ player.
Varo is working the ground and pound from guard. He might want to try advancing position though to get more of an impact.
Varo lands a couple of digs.
Mad Mike is trying to control the position from the bottom.
Varo preventing the sweep.
The crowd thankful this round is nearly over.
Varo working in close now, lands a nice elbow to the side of Mad Mike's head.
Mad Mike keeping moving, preventing Varo from controlling successfully.
And that is the end of the round. The fighters go back to their corners.
A close second round but Mike Mad Mike will probably get the nod - 10:9.
OK. That's time! The bell goes and we're back to the action.#R3##CL2#
Mad Mike gets a clinch.
Varo lands with a left to the head.
Mad Mike has Varo pressed against the cage.
Varo scores with a shot to the side of Mad Mike's head.
Mad Mike misses with the head strike.
Varo lands with a good tight uppercut to the head.
Mad Mike tries to land a shot to the body but it's blocked. #TD2#
Mad Mike has Varo pressed up against the cage. He's trying to work for a single leg takedown. Mad Mike pulls back from the cage and twists to the side, sending Varo tumbling to the mat - Mad Mike dives into Varo's guard.#SUB#
Varo is throwing his legs up, looking for submissions. Mad Mike is aware though and is defending well.
Varo keeping moving, preventing Mad Mike from controlling successfully.
Varo tries to land a sweep but no joy.
Varo trying to control the position here. #T1#
Mad Mike trying to control the position from guard on top but Varo is wriggling around, looking for whatever he can.
Varo is working an open guard here, looking to improve his position. No doubt that will leave him open to counters but at least he's being more offensive.
Mad Mike passes into half guard. #SUB2#
Mad Mike wants to work for an arm triangle but Varo is really keeping half guard well and defending the submission attempt.
#SUB2#
Mad Mike is sneakily working for an arm triangle but Varo sees it coming and defends easily.
Mad Mike stalling. #T2#
There's not a lot going on here and the crowd are letting the fighters know they're not willing to tolerate a lack of action.
Varo is not content to let Mad Mike control the position.#SUB2#
Varo is looking to regain full guard. He's left an arm up in the air though and Mad Mike has latched onto it... Big trouble! Mad Mike pivots for an armbar - it's in tight and it Varo is tapping in no time flat! Great counter grappling there from Mad Mike!
Ladies and gentlemen, after 2:39 of round 3, we have a winner by way of Submission (Armbar). Mike Mad Mike!
Mike Mad Mike is the new bantamweight champion!
A loyal slave to those sponsorship dollars, Mike Mad Mike made sure he mentioned Shadow Realm Apparel, along with how happy he was to win his fight. |
|
|
|
Event:
AVKT 18: Through The Wall
Date: Apr 15, 2023 |
#R1##CL#
Mad Mike clinches up against the cage.
Mad Mike looking for a takedown.
Ocelot can't break the clinch.
Ocelot has had enough of the clinch and is looking to separate.#TD#
Ocelot is fighting off a takedown attempt but Mad Mike is just too persistent for him and manages to trip Ocelot to the mat. Ocelot regains guard as soon as the fighters hit the mat.
Mad Mike sneaks a leg through and gets to half guard. That was like a knife through butter how easily he passed Ocelot's guard.
Mad Mike passes the guard and advances to mount!
Ocelot wants to get back to his feet.
We've had a slow start to the round here - hopefully the action picks up.#SUB#
Mad Mike is going oldschool here, as he tries to force Ocelot to tap using a forearm choke. This isn't 1993 though, so Ocelot shrugs it off.
Mad Mike fails to advance to Ocelot's back. #T1##SUB#
Mad Mike looking for a guillotine from mount but Ocelot is having none of it. #SUB#
Mad Mike wants to finish this one by submission but Ocelot is holding onto his waist, trying to prevent any attacks from Mad Mike.
Mad Mike controlling from mount. #SUB#
Mad Mike working for a guillotine from mount but Ocelot is in no mood to give up.
Mad Mike controlling from mount.
We've been hearing good reports from Mad Mike's training camp. Apparently he has been rolling around with some good quality BJJ practitioners and has been sharpening his skills. Let's see if that has an impact on the fight today.
We get told so often about how wrestlers don't like to be on their backs. Let's see if Ocelot can do anything to dispel that myth.#SUB#
Ocelot has left one of his arms exposed and Mad Mike doesn't need a second invitation. He's isolated it and locked on a tight armbar. Ocelot screams and taps out, obviously in a lot of pain. Hopefully there isn't permanent damage to that arm.
Ladies and gentlemen, after 2:18 of round 1, we have a winner by way of Submission (Armbar). Mike Mad Mike!
Mike Mad Mike managed to slip a mention for his sponsors, Shadow Realm Apparel, into his post fight interview. |
|
|
|
Event:
Quick Fight Championship
Date: Feb 02, 2023 |
#R1#
Mad Mike wants to clinch.
Mad Mike tries to close the distance and clinch up but Hughes swats him away and circles back towards the center.
A head kick misses from Hughes.
And an attempted straight right on the counter from Mad Mike! But no joy.
Mad Mike uses some good footwork to avoid the body shot by Hughes.
Hughes jabs at Mad Mike's body.
Hughes throws a head kick that misses and slips in the process. He scrambles back to his feet and the fighters circle.
Hughes dodges the punch combination from Mad Mike.
We've had a slow start to the round here - hopefully the action picks up.
Hughes swings for the body but Mad Mike moves out of range.
#CL2#
Mad Mike closes the distance and pushes Hughes back into the cage.#BC#
Hughes's corner calls for him to break the clinch, which he does.
Mad Mike has done a lot of speed work in the buildup to this fight.#CL2#
Mad Mike moves into the clinch.
Mad Mike fails to pull guard.
#T1##TD2#
Mad Mike gets control of Hughes's arms and successfully pulls guard. Mad Mike will no doubt be looking for submissions off his back.#SUB2#
Mad Mike working for a triangle but Hughes defends it easily.
#SUB2#
Mad Mike working from the bottom, still in full guard. He's managed to get a loose triangle. Hughes doesn't seem to be doing much to defend here, obviously he feels comfortable in the position. Hughes manages to throw the legs off his shoulder and he's back into guard - no problem. #SU#
Mad Mike is working an open guard so Hughes takes the opportunity to get back to his feet.
Hughes lands a jab to the nose.
Hughes lands an overhand right.
Hughes tries to close the distance and clinch but Mad Mike swats him to one side with an open hand palm strike and circles away. #CL#
Hughes clinches.
Mad Mike is trying to drag Hughes to the mat but Hughes just about manages to keep his footing. He used the cage to his advantage there.
Hughes trying to land knees to the body.
#T2#
Hughes blocking some punches.
Mad Mike blocks a knee to the body. He'll have a nicely bruised forearm in the morning.#TD2#
Mad Mike decides to pull guard.
Mad Mike looking to sweep here. No luck so far. #SUB2#
Mad Mike is looking for a triangle but Hughes pushes his legs off easily.
Hughes wants to get up but he can't break Mad Mike's closed guard. He needs to be careful trying to break the legs open, as he's open to submissions here. #SU#
Hughes gets to his feet. Mad Mike looking to butt scoot but the ref puts an end to that. On your feet son!
Hughes works Mad Mike's body with a nice hook.
Wooooo! Give it up for these two warriors! They are putting on a show!
Hughes lands a lovely overhand right.
Hughes scores with a three punch combo!
Hughes throws a sloppy head kick and Mad Mike moves out of range easily.
Mad Mike wants to counter with a clinch but Hughes pushes him away.
Sirus Hughes is looking to keep the fight on the feet at all costs.
Hughes connects with a lovely jab that went straight through the gap between Mad Mike's hands.#ROC#Mad Mike is rocked!#T3#
Hughes lands with a good body shot.
Mad Mike is still on wobbly legs! Can Hughes finish him?
Mad Mike looks winded!
Hughes lands a nice hook to Mad Mike's body. Mad Mike takes it in his stride and looks to land his own strikes. #CL#
Hughes has taken the fight to the clinch.
#TD#
Hughes pulls Mad Mike into guard.
#SUB#
Hughes has thrown up a leg looking for a triangle. Mad Mike doesn't defend quickly enough and Hughes has managed to lock this one up! Can Mad Mike escape?! NO! He's tapping out! Damn, that was a quick submission - congrats to Hughes on a fantastic submission victory.
Ladies and gentlemen, after 3:27 of round 1, we have a winner by way of Submission (Triangle). Sirus Hughes! |
|
|
|
Event:
LOM Trials 1
Date: Nov 10, 2022 |
#R1#
Decent striking displayed by Harris there.
Mad Mike walks into a left hand.
Harris fakes and then throws a beautiful body shot. Mad Mike looks a bit winded and takes a step backwards to take a breath.
Harris lands a jab to the nose.
William Harris seems to be the more aggressive standup fighter in this bout.
Mad Mike takes a shot to the nose. Hopefully that hasn't broken it.
Harris lands with a nice combination. Mad Mike backs away looking to recover.#CL2#
Mad Mike closes the distance and clinches.
Harris lands a shoulder strike.
The fans in attendance giving it up for the two fighters, who have really let it all hang out in the last minute or so!#TD2#
Mad Mike gets control of Harris's arms and successfully pulls guard. Mad Mike will no doubt be looking for submissions off his back.#SUB2#
Harris is sitting in close to Mad Mike's body. Mad Mike has gone for a guillotine from the bottom. Oh damn, that looks pretty tight! Harris is panicking - it looks like this one could be all over! Yes, Harris is tapping! That was a very nice submission by Mad Mike.
Ladies and gentlemen, after 0:56 of round 1, we have a winner by way of Submission (Guillotine). Mike Mad Mike! |
|
|
|
|
|
|