|
Play
by Play - Fighter's Fight Commentary
|
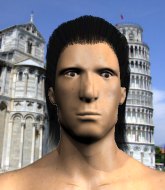
Event:
MMAH 96
Date: Dec 10, 2023 |
#R1##TD#
Bateman throws a loose over hand right and dives in with a double leg takedown. Devaney tries to sprawl but it's too late and the fighters hit the mat. Bateman is in Devaney's guard.
Bateman working some ground and pound from guard but it's not doing any damage.
Bateman postures up and lands some nice ground and pound.
Devaney looks more muscular than last time we saw him. He must have been on the weights.
Devaney is trying to stand up but he's not managed so far. #SU#
Bateman stands up from Devaney's guard - Bateman perhaps looking for a knockout.
Bateman throws out a loose jab but Devaney uses good head movement to avoid it.
This fight brought to you by 5M nutrition - it's mmmmm tasty. Nice jab by Devaney.
Patrick Bateman seems to be the more aggressive standup fighter in this bout.
Bateman tries to clinch up.
Bateman scores with a body shot.
Bateman closes this distance looking for a takedown but Devaney circles away.#TD#
Bateman shoots in and scores a nice double leg takedown into half guard.
Bateman has been looking to land a fair amount of strikes on the ground. He might be looking to soften his opponent up in order to work for a submission.
The fans in attendance giving it up for the two fighters, who have really let it all hang out in the last minute or so!
Devaney is looking to get back to full guard here but Bateman has managed to pass to side control instead.#T1#
Sloppy strikes there by Bateman.
Bateman advances nicely into full mount.
Devaney tries to lock up and control but Bateman gives him a forearm to the face and pushes him away.
Devaney is trying to stand.
Devaney is desperately trying to get back to half guard.
Bateman wants to control the pace but Devaney is squirming around nicely.
The ref warns both fighters not to hold the cage as they work up against the meshing.#SU#
Bateman is standing up out of mount! Strange tactic there - he must really want this one on the feet!
Bateman fails to land with a series of punches.
Bateman shoots in for a takedown. He's persisting with it as Devaney sprawls well. Devaney wins this battle and keeps the fight standing. Bateman gets slowly back to his feet.#T2##CL#
Bateman clinches with his opponent.
Bateman has a body lock and is looking for a takedown. Devaney is bouncing around trying to prevent the takedown and somehow he has indeed managed to stay on his feet.
That's three failed takedown attempts in the round for Patrick Bateman. That's going to take a lot out of him.#BC#
Bateman pushes off and circles away, back to the middle of the mat.
Bateman misses with a series of wild punches.
#CL2#
Devaney clinches with his opponent.
Devaney prevents the takedown attempt.
#BC2#
Devaney's corner calls for him to break the clinch, which he does.
Devaney connects with a slap. Keep your fist closed son.
Bateman takes one to the side of the head.
#T3##CL2#
Devaney moves into the clinch successfully.
#BC#
Bateman's corner calls for him to break the clinch, which he does.
Bateman lands with a nice combination. Devaney backs away looking to recover.
Bateman avoids a punch combination nicely.
Bateman dodges the punch combination from Devaney.
Bateman has been working on his balance at , so perhaps that has help him stuff some of the takedown attempts by Devaney.
Bateman goes to the watering hole and comes back with a big thumbs up from the judges as he scores a three punch combo.
Devaney misses with a wild combination.
Devaney lands a jab-cross combination.
This is a great period of action - very entertaining stuff!#TD#
Bateman scores with a nice takedown into half guard. Let's see what he's got on the ground.
Devaney wants to control but Bateman is keeping busy.
#T4#
Devaney gets back to full guard.
Bateman scoring with some ground and pound.
Bateman wants to control from the top but Devaney keeps moving.
Devaney not looking particularly offensive just at the moment.
The fighters are pressed up against the cage, both looking to find a bit of space to work.
And that is the end of the round. The fighters go back to their corners.
That was a close round but I would say that Patrick Bateman will probably get the nod.
OK. That's time! The bell goes and we're back to the action.#R2#
Devaney feints a jab promting Bateman to slip. Devaney then demonstrates his capabilities by jabbing again. Bateman slips again and ducks right into an uppercut.
Devaney tries to close the distance and clinch but Bateman swats him to one side with an open hand palm strike and circles away.
Bateman throws a looping left and ducks down for a takedown. He's got his arms around Devaney's waist but Devaney gets an underhook and avoids the takedown by throwing Bateman off to one side.
Devaney throws a sloppy head kick and Bateman moves out of range easily.
Devaney tries to clinch there but Bateman circles away.
Devaney keeps the fight on the outside.
Despite the aggression on Devaney's face he doesn't fully commit to the counter.#TD#
Bateman decides to change it up a bit and drives through with a nice takedown into half guard.

Devaney manages to escape and get back to his feet!
The crowd cheering loudly, showing their appreciation for the quality fight we're seeing here.
Devaney throws a wild combination but nothing lands.
This fight brought to you by 5M nutrition - it's mmmmm tasty. Nice jab by Devaney.#CL2#
Devaney has managed to clinch.
A head punch blocked on the inside by Devaney.
Devaney tries to stall but Bateman uses the opportunity to gain a better position.
Bateman blocks a body shot from Devaney.
Bateman misses with a shot to the kidneys.
#T1#
Devaney wants to push off and get back to the center of the mat but Bateman has him pressed against the cage.
Devaney trying to control the position but instead, Bateman has worked for underhooks and has pushed Devaney into the cage.
Bateman drops to a knee looking for a takedown but Devaney gets the underhooks and prevents it.
#BC#
Bateman escapes the clinch and we're back to striking.
#TD#
Bateman gets a double leg takedown into Devaney's guard.
Devaney is edging up against the cage. He's using the cage to get back to his feet. Nice work there - the fighters are clinched. #TD#
Bateman drags the fight down to the ground.
Patrick Bateman overall seems to be getting the better of the ground position in the fight so far.#T2#
Devaney trying to control but Bateman is working from the bottom.
Devaney wanted to stand there but Bateman had control of the position. #SUB#
Devaney got a little sloppy there for a moment and Bateman has worked his way into a loose triangle - can he finish it?! No, Devaney has managed to get both his arms back between Bateman's legs - danger averted.
Devaney trying to control but Bateman is working from the bottom. #SU2#
Devaney stands up from Bateman's guard - Devaney perhaps looking for a knockout.
Devaney pivots, looking for a leg kick but Bateman is out of range and Devaney settles back down.
Bateman tries to counter with a takedown but Devaney is quick to defend against it.
Bateman keeps the fight on the outside.
Bateman tries to counter by clinching up but Devaney breaks away and moves out of range.#T3#
Devaney misses with a body shot. Nice footwork from Bateman.
Devaney looks to score with a jab to the body but Bateman is just out of range.
Devaney looks to land a combination but Bateman avoids it well.
Devaney misses with the combination.
Bateman avoids a punch combination nicely.
A shot to the liver by Devaney. Beautiful body shot.
Devaney throws a body shot but no joy.
Sloppy strikes from Devaney. Those never looked like landing. #TD#
Bateman throws the overhand right but ducks down into a quick takedown attempt. Devaney was covering up waiting for the punch and Bateman finishes the takedown easily into guard.
Bateman trying to control but Devaney is working from the bottom. #T4#
Bateman won't allow Devaney to sweep him here. #ES2#
Devaney pushes Bateman off for just long enough to get back to his feet. Very athletic spring there.
The crowd are loving this. Great action here.
Bateman slips under a jab.
Patrick Bateman is looking to throw some combinations by the looks of things.
Devaney throws a right and a left that both miss.
Devaney throws a wild body kick that Bateman sees coming a mile off.
Bateman misses with a wild combination.
Bateman throws a one two combo.
Devaney displaying good standup as he scores with a three punch combination.
Bateman takes a shot right to the liver - Bas would have been proud of that punch.
And that is the end of the round. The fighters go back to their corners.
Rory Devaney showed his class in that round. I'd imagine he'll take it on all the scorecards.
The minute break is over - no more time for sponges and pep talks - back to the action! This is the final round!#R3##TD#
Bateman darts in and lands a nice takedown into half guard.
Devaney is trying to escape back to his feet but Bateman uses the scramble to pass into side control.
#SUB#
Bateman wants to work for a kimura but he's foiled early by Devaney, who protects the arm well.
Devaney tries to escape but Bateman is in control.
We've had a slow start to the round here - hopefully the action picks up.
Devaney is positioning himself to get back to half guard.
Bateman creates a bit of distance and throws down some hard shots.#T1##SU#
Bateman stands up and we're back to a striking position.
Rory Devaney is looking to keep the fight on the feet at all costs.
Devaney throws out a powerful jab.
A head kick misses from Bateman.
Devaney throws a one two combo.
#TD#
Bateman throws a loose over hand right and dives in with a double leg takedown. Devaney tries to sprawl but it's too late and the fighters hit the mat. Bateman is in Devaney's guard.
Bateman wants to control from the top but Devaney keeps moving. #ES2#
Devaney pushes Bateman off and scrambles back to his feet.
#T2#
This is a great period of action - very entertaining stuff!
Bateman misses with a takedown attempt - Devaney sprawls well and throws a nice strike on the way out which just misses.
Both fighters are breathing heavily.
Bateman shoots in for a takedown but Devaney shows good takedown defense.
Some wild striking there from Devaney.
Devaney tries to close the distance and clinch but Bateman swats him to one side with an open hand palm strike and circles away. #CL2#
Devaney moves into the clinch.#BC2#
Devaney manages to break the clinch.
Devaney has been the more effective fighter overall so far.
Bateman throws a head kick that misses.
Devaney fails to land with a series of punches.
Bateman half commits to a counter takedown before pushing away, out of range.
A telegraphed takedown attempt from Bateman is defended easily by Devaney.
That's three failed takedown attempts in the round for Patrick Bateman. That's going to take a lot out of him.#T3#
Devaney throws a series of strikes that have Bateman backpedaling.
A clash of legs there as Bateman blocks the low kick.
Devaney moves in looking to clinch but Bateman pushes him off.
Devaney looks for the body kick but Bateman saw that one coming. #TD#
Bateman manages to get an easy takedown there - catching Devaney on his heels. He'll look to pass Devaney's guard now, I'm sure.
Devaney is trying to stand up but he's not managed so far. #SU#
Bateman stands and steps away. Devaney gets to his feet too and we're back to the striking game.
Devaney looks to throw a body kick#TD#
and Bateman counters with a shoot takedown into half guard.
Bateman winds up and cracks Devaney with a swinging punch to the side of the head.
Devaney really doesn't want to stay on the ground with Bateman. If he can't get it back to his feet, it's only a matter of time before he'll be tapping out.
Wooooo! Give it up for these two warriors! They are putting on a show!#SUB#
Bateman is trying a forearm choke
I don't think that's going to do much at this level of the game.
#T4#
Devaney is looking to regain full guard. Not this time though.
Devaney avoiding damage under a succession of punches from Bateman.
Bateman missing with the ground and pound from half guard.
Bateman scoring with strikes to the body and head.
Bateman drops an elbow to the side of Devaney's head.
Devaney is looking to control Bateman's leg but it's slowly edging free. Can Devaney avoid being mounted?
And that's the end of the fight!
I would just about give that final round to Rory Devaney.
I think Devaney has won this one but let's see whether the judges agree with me. Over to the ring announcer for the scorecards.
Ladies and gentlemen, after 3 rounds of action, we go to the scorecards for a decision.
Judge Matti Vanhoillinen scores the fight 29:28
Judge Roosa Järviläinen scores the fight 29:29
Judge Marco Blurström scores the fight 28:29
The fight is ruled a draw! |
|
|
|
Event:
MMAH 82
Date: Oct 14, 2023 |
#R1##CL2#
Reynolds forces Bateman back against the cage and clinches.
Bateman looks exhausted already! Oh dear, he should have come in in better shape than this!
Reynolds lands with a right to the head.
Bateman tries to take the fight to the ground by pulling guard but can't manage it.
Stalling in the clinch from Reynolds.
Reynolds lands a knee to the head there! That was nasty!
Bateman is trying to work out of this bad position, with his back against the cage.
Reynolds lands a body punch.
Bateman has been working on his balance at Rabid Dog , so perhaps that has help him stuff some of the takedown attempts by Reynolds.
Reynolds on the defensive, avoiding the knees to the body.
Reynolds tries to land a knee to the head but Bateman blocks with his arms.
Reynolds lands with a short head shot on the inside.
Reynolds working on landing some head shots here - that one got through nicely.
Reynolds stalling in the clinch.
The pace really dropping off here, momentarily.
Reynolds lands a right hand that snaps the head of Bateman backwards.
Reynolds lands a short shot on the inside that snaps the head of Bateman backwards.
Wooooo! Give it up for these two warriors! They are putting on a show!
Reynolds lands with a quick shot inside that doesn't really do much damage.
Reynolds lands a right hand. #T1#
Reynolds lands a knee to the body.
Reynolds working on landing some head shots here - that one got through nicely.
A left hand lands to the body for Reynolds.
Reynolds lands with a short head shot on the inside.
Reynolds lands on the inside with an uppercut.
A short right hand to the side of the head by Reynolds.
Reynolds makes some space for himself and lands an uppercut.
A nice right hand lands inside from Reynolds.
Reynolds lands a knee to the head.
Reynolds lands a good knee to the midsection. Bateman won't want to take too many of those.
Fantastic stuff here - a very entertaining period of action, which has drawn cheers from the crowd.
Reynolds lands with a light punch inside.
A knee to the head by Reynolds.
Reynolds lands with a quick shot inside that doesn't really do much damage.
Reynolds misses with a knee to the head.
Knees to the body from Reynolds.
Reynolds lands with a quick shot inside that doesn't really do much damage.
Reynolds lands a right hand. #T2#
Reynolds manages to get underhooks and slows down the pace for a moment.
Reynolds lands a hook that snaps the head of Bateman backwards.
Reynolds lands with a good tight uppercut to the head.
Reynolds working some nice short punches in the clinch.
Reynolds scores with a shot to the side of Bateman's head.
Reynolds unloads a knee to the mid-section.
Bateman tries to work over Reynolds's body with a swooping hook but it only glances the target.
Reynolds unloads a knee to the mid-section. Bateman lets out a prehistoric sounding urrrrgh.
An uppercut to the body lands inside from Reynolds.
Reynolds lands a hook to the side of the head.#ROC2#Bateman is rocked!
Reynolds pushes Bateman back against the cage and lands a hook to the side of the head.
Oh Bateman is still all over the place! His legs are completely gone! Will he be able to recover?!!
Reynolds softening up his opponent with strikes, against the cage.
Reynolds creates some distance for himself and unleashes a massive uppercut that sends Bateman's eyes rolling into the back of his head! Bateman drops to his knees and Reynolds pours it on with more strikes until the referee steps in to end the bout!
Ladies and gentlemen, after 2:57 of round 1, we have a winner by way of TKO (Strikes). Argus Reynolds! |
|
|
|
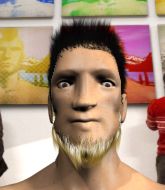
Event:
MMAH 76
Date: Sep 22, 2023 |
#R1#
Sangroon fails miserably with a takedown attempt.
Sangroon tries to clinch up against the cage, rushing in to close the distance. Bateman manages to break the clinch and circles back to the middle of the mat.
Bateman misses with a leg kick #TD2#
and Sangroon counters with a takedown into side control! That could mean trouble for Bateman!
Sloppy strikes there by Sangroon.
Sangroon trying to control the position but Bateman is working away.
Bateman is trying to get back to half guard. He's pushing on Sangroon's leg. He's managed it. Nice work.
Bateman throws a strike from the bottom that misses.
We've had a slow start to the round here - hopefully the action picks up.
Sangroon wants to control but Bateman is keeping him busy. #T1##SUB#
Bateman looking to work for a kimura from the bottom.
Bateman works his way to full guard. Good work.
Bateman controlling Sangroon's posture. #SUB2#
Sangroon drops back for a leg here. A bit of a high risk move... He's looking for a kneebar by the looks of things. Now both of them are looking for submissions. Sangroon seems to have locked his on tight now - Bateman screams in pain and taps out furiously! It certainly was a high risk move but it's paid off for Sangroon, as he picks up the win!
Ladies and gentlemen, after 1:50 of round 1, we have a winner by way of Submission (Kneebar). Yohan Sangroon! |
|
|
|
Event:
TWGC 40 (185lbs, D4): Helsinki Qualifier - Round 1
Date: Sep 02, 2023 |
This TWGC bout is 1 fifteen minute round in the middleweight division. Introducing today's competitors. In the red corner, competing out of Las Vegas, with a TWGC record of 0 wins and 0 losses; Patrick Bateman! And in the blue corner, fighting out of New York, with a TWGC record of 0 wins and 0 losses; Doug Wayne!
The judges for this bout are Marco Blurström, Matti Vanhoillinen and Anni Minnemäki.
The fighters bow as they face eachother in the middle of the mat and we are under way.#CL2#
Wayne drives through and clinches with Bateman against the cage.
#TD2#
Wayne has managed to pull guard. Let's see whether he can work an aggressive guard. It will also be interesting to see what tactics Bateman uses from the top position.
Bateman wants to control from the top but Wayne keeps moving.
A real slowdown in the pace of the fight for a moment, as Wayne holds on and takes a little breather.
Bateman trying to control but Wayne is working from the bottom.
Bateman looking to sit in guard and control but Wayne gets the butterfly guard and sweeps. He's now in the guard on the top. Score +2 for sweep to guard / half guard: Bateman (0) vs (2) Wayne
Bateman wants to sweep but no luck.
We've had a slow start to the round here - hopefully the action picks up.#SUB#
Bateman has his foot on Wayne's thigh. He's trying to push off and get in position for a triangle, I think. Wayne works his way back into a safe position though.
Bateman keeping full guard, as Wayne tries to pass.
Wayne advances position into side control! Score +3 for passing guard: Bateman (0) vs (5) Wayne#T1#
Wayne staying calm.
Wayne's corner are shouting for him to control the position and he seems happy to oblige.
More stalling from Wayne.#T2##SUB2#
Wayne tries for an arm triangle. That looks pretty tight to me. Is this one over!?! Possibly, maybe, no Wayne has let go of the choke. Obviously it wasn't as tight as we thought!
A lull in the action here.#SUB2#
Wayne working hard here to secure a kimura but he's not really in the right position for it.
Bateman is trying to get back to half guard.
Wayne moves into full mount! Score +2 for reaching mount: Bateman (0) vs (7) Wayne
The fighters are pressed up against the cage, both looking to find a bit of space to work.#T3#
Bateman tries to lock up and control but Wayne gives him a forearm to the face and pushes him away.
Wayne takes Bateman's back. Could be looking for a rear naked choke here - either way, Bateman is in trouble. Score +3 for taking back: Bateman (0) vs (10) Wayne#SUB2#
Wayne is working for a rear naked choke. Bateman is not defending it well and Wayne has tightened it up quickly! This could be all over! Bateman refuses to tap and goes to sleep, forcing the referee to intervene. A little trickle of blood came out of Bateman's nose as his head slumped to the floor. That is naaaasty!
Ladies and gentlemen, after 3:45 of round 1, we have a winner by way of Submission (RNC). Doug Wayne! |
|
|
|
|
|
|