 |
UKMMA 15 PBP Commentary |
Undercard bout
|
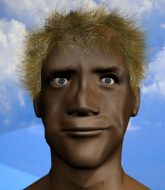
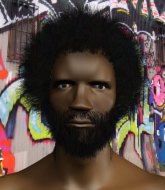
Coming up we have a middleweight MMA rules bout between Mr Chrome (ranked 0 p4p, 0 weight class) and Dai Hard (ranked 0 p4p, 0 weight class). Dai Hard is the more experienced fighter, so let's see if that makes a difference tonight.
 |
|
 |
| 182 cm
20
193 lbs
2 - 0 - 0 |
|
180 cm
20
185 lbs
4 - 1 - 0 |
Good wrestling
Excellent boxer
Cardio machine |
|
BJJ Purple Belt
Basic striking
Knockout power |
|
| |
|
Ladies and gentlemen. This fight is 3 rounds, in the middleweight division.
Introducing the fighter to my left, fighting out of the red corner.
With a record of
2 - 0 - 0, fighting out of London, Mr Chrome!
And introducing the fighter to my right, fighting out of the blue corner.
With a record of
4 - 1 - 0, fighting out of London, Dai Hard!
The judges for this bout are James Ackerman, Daniel Bishop and Richard Clark.

The bell rings for round one and we are underway!
Chrome avoids the clinch attempt nicely.
The fight stays on the outside here - Hard looks like he's thinking about clinching though.
Hard is looking to clinch but Chrome is avoiding it.
Dai Hard seems to be the more aggressive standup fighter in this bout.
Hard throws a right and a left that Chrome avoids nicely.
Chrome blocks a head kick by Hard.
Jab by Chrome.
Hard attempts a leg kick but it's missed by a good margin.
Hard tries to score with a leg kick but it misses it's target.
Hard wants to clinch up but Chrome keeps it at a distance.
Chrome keeping his hands up high there, blocking the jab from Hard.
Chrome slips a jab and a cross from Hard.
Hard tries to clinch but is not successful on this occasion.
We've had a slow start to the round here - hopefully the action picks up.
Chrome avoids a punch combination nicely.
Chrome avoids a lazy jab quite easily.
Chrome misses with a two punch combination.
A punch lands to the side of Hard 's head but he takes it in his stride.

That's one minute gone in the round.
Chrome connects with a right hand. Hard shakes it off.
No joy there for Chrome, who threw a few shots but didn't land.
Hard tries to clinch up against the cage, rushing in the close the distance. Chrome manages to break the clinch and circles back to the middle of the mat.
Chrome displays good takedown defense there as he swats away a double leg from Hard.
Hard misses the shot to the body.
Chrome cracks Hard with an open hand slap.
Hard tries to clinch up but Chrome circles away and keeps his distance.
Donk. Chrome catches Hard right on the button with a cross.
Chrome misses with a series of wild punches.
Chrome throws a hook to the side of Hard's head but Hard sees it coming and ducks under it beautifully.
A right-left combo lands from Chrome.
Chrome takes a step back and watches a body kick go sailing past his mid section.
Hard takes an uppercut right on the button but keeps his composure.
Hard fails to land the takedown.
Hard looks to land a left hand but Chrome moved out of range nicely.

That's two minutes gone in the round.
Chrome keeps the fight on the outside.
Chrome lands a powerful looking uppercut that connected with his opponent's jaw.

Hard is rocked!
Chrome lands with a big right hook that stumbles Hard - he's out on his feet here! Chrome follows up with another monster hook that separates Hard from consciousness! Hard falls, almost in slow motion to the canvas! Chrome stands and admires his work as the crowd go wild.
Ladies and gentlemen, after 2:20 of round 1, we have a winner by way of KO (Punches). Mr Chrome!
|
|
|
|
|
|
|
|
|
|
|
|
|
|
|
|
|
|
|
|
|
|
|
| S |
C
A |
G |
S |
C
B |
G |
|
S |
C |
G |
|
energy
A | B |
|
hype
A | B |
|
pop
A | B |
|
mgr
A | B |
|
FIGHT
RATING
57% |
|
|
|
|
|
|
|
Undercard bout
|
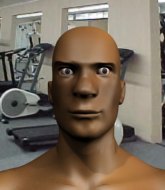
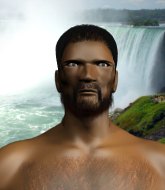
Coming up we have a welterweight MMA rules bout between Dario Mancinelli (ranked 0 p4p, 0 weight class) and Kami Kaze (ranked 0 p4p, 0 weight class). Mancinelli kept the crowd waiting but all that was forgotten when his ring entrance music started. The incomparable musical genius that is Captain Jack - Captain Jack. Dario Mancinelli has the edge in experience - let's see if he can make that count tonight.
 |
|
 |
| 185 cm
22
183 lbs
6 - 3 - 0 |
|
190 cm
19
185 lbs
2 - 1 - 0 |
Abu Dhabi Champ
Counter striker
Very strong |
|
BJJ White Belt
Excellent boxer
Prefers standup |
|
| |
|
Ladies and gentlemen. This fight is 3 rounds, in the welterweight division.
Introducing the fighter to my left, fighting out of the red corner.
With a record of
6 - 3 - 0, fighting out of London, Dario Mancinelli!
And introducing the fighter to my right, fighting out of the blue corner.
With a record of
2 - 1 - 0, fighting out of London, Kami Kaze!
The judges for this bout are Chris Edwards, James Atkins and James Ackerman.
The bell rings for round one and we are underway!
Kaze misses with a wild combination.
Mancinelli avoids a punch combination nicely.
Kaze swings away but doesn't land with a series of punches.
A punch combination from Kaze misses.
A punch combination from Kaze misses.
Kaze rushes forward with a series of wild hooks but Mancinelli moves out of range and avoids them all easily.

Mancinelli darts in and lands a nice takedown into half guard.
Mancinelli wants to pass to mount but Kaze is defending the position.
We've had a slow start to the round here - hopefully the action picks up.
Kaze is looking for a sweep. Mancinelli is wise to his cunning plan and keeps the top position.
Kaze avoiding damage under a succession of punches from Mancinelli.
Mancinelli throwing punches and elbows but they're not doing any damage.
That's one minute gone in the round.

Kaze is defending against the submission attempts here by Mancinelli.
Kaze avoiding damage under a succession of punches from Mancinelli.
Mancinelli is looking for a kimura. It's going to be difficult to finish that from half guard though and Kaze defends it well.
Mancinelli is looking for an arm triangle, whilst trying to pass to side control. Kaze doesn't seem that keen to cooperate though. No luck this time Mancinelli.
Mancinelli has been looking to land a fair amount of strikes on the ground. He might be looking to soften his opponent up in order to work for a submission.
Mancinelli thumps the canvas. Not on purpose obviously - he just missed Kaze's head.
That's two minutes gone in the round.
Mancinelli works his foot free and advances to mount.
Mancinelli working Kaze over with strikes here.
Mancinelli postures up and cracks his opponent a couple of times before moving back into close ground control. Kaze looks a forlorn figure.
Kaze avoids a series of strikes thrown by Mancinelli.
We get told so often about how wrestlers don't like to be on their backs. Let's see if Kaze can do anything to dispel that myth.
Mancinelli looking for a guillotine from mount but Kaze is having none of it.
Kaze is squirming around, avoiding Mancinelli's attempts to control the action.

That's three minutes gone in the round.
Mancinelli punching from mount but Kaze doing a good job of avoiding damage.
Mancinelli throwing sloppy strikes, which aren't doing any damage.
Mancinelli is working on an americana here. Ooh, that looks pretty nasty! Nope, Kaze has managed to escape the submission attempt.
Mancinelli lands a nice shot to the head.
Mancinelli throws some wild stikes that Kaze manages to avoid easily.
Mancinelli is still in mount, landing shots to his trapped opponent. Kaze can't stay in a position like this for much longer.
Kaze takes a big shot to the dome and his eyes have rolled back in his head! Mancinelli's killer instinct has kicked in as he finishes the fight with more strikes. Impressive finish.
Ladies and gentlemen, after 4:05 of round 1, we have a winner by way of TKO (Strikes). Dario Mancinelli!
|
|
|
|
|
|
|
|
|
|
|
|
|
|
|
|
|
|
|
|
|
|
|
| S |
C
A |
G |
S |
C
B |
G |
|
S |
C |
G |
|
energy
A | B |
|
hype
A | B |
|
pop
A | B |
|
mgr
A | B |
|
FIGHT
RATING
43% |
|
|
|
|
|
|
|
Undercard bout
|
Coming up we have a middleweight MMA rules bout between Sassy Pants (ranked 0 p4p, 0 weight class) and David Haye (ranked 0 p4p, 0 weight class). Over to our ring announcer for the fighter introductions!
 |
|
 |
| 189 cm
19
172 lbs
0 - 1 - 0 |
|
191 cm
18
197 lbs
0 - 0 - 0 |
Powerful takedowns
Counter striker
Very strong |
|
BJJ White Belt
Decent boxing
Powerful |
|
| |
|
Ladies and gentlemen. This fight is 3 rounds, in the middleweight division.
Introducing the fighter to my left, fighting out of the red corner.
With a record of
0 - 1 - 0, fighting out of London, Sassy Pants!
And introducing the fighter to my right, fighting out of the blue corner.
With a record of
0 - 0 - 0, fighting out of London, David Haye!
The judges for this bout are Steven Brown, James Ackerman and Richard Clark.
The bell rings for round one and we are underway!
No joy there for Haye, who threw a few shots but didn't land.
Haye smiles there as he lands a nice right hand right on the button.
A telegraphed takedown attempt from Pants is defended easily by Haye.
A jab from Haye finds it's way through Pants's defenses.
Pants slips a jab and a cross from Haye.
Haye rushes forward with a series of wild hooks but Pants moves out of range and avoids them all easily.
Pants shoots in looking for a single leg takedown. Haye is trying to defend but Pants finishes it well and ends up in half guard. Let's see if he can advance position further.
Pants throwing punches and elbows but they're not doing any damage.
The ref warns both fighters not to hold the cage as they work up against the meshing.
Haye regains full guard, whilst avoiding punches from Pants.
That's one minute gone in the round.
Pants throwing strikes from guard but Haye blocks nicely.
Haye working the defensive guard well to avoid strikes from Pants.
Pants prevents Haye from getting back to his feet.
Pants throwing elbows and punches but not connecting, as Haye works some decent striking defense from the bottom.
Pants lands a couple of elbows.
Haye working the defensive guard well to avoid strikes from Pants.
Pants content to strike from guard, landing some decent shots.
Haye keeping full guard, as Pants tries to pass.
Pants thows a big elbow that misses.
That's two minutes gone in the round.
The crowd are hurling abuse towards the fighters... You can hardly blame them though because there isn't a lot going on in the fight.
Pants is working the ground and pound from guard. He might want to try advancing position though to get more of an impact.
Haye working the defensive guard well to avoid strikes from Pants.
Pants is looking to work some ground and pound but Haye has wrist control.
Pants throwing elbows and punches but not connecting, as Haye works some decent striking defense from the bottom.
Pantsis looking to pass into half guard but Haye pushes him away with his feet and jumps on top - now Haye is in guard.
Haye stops Pants from standing up.

Pants scrambles and gets back to his feet.
Haye lets the fists fly and connects with a left straight followed by a right hook.
David Haye seems to be the more aggressive standup fighter in this bout.
That's three minutes gone in the round.
Pants has a takedown stuffed.
Pants closes the distance and gets a trip takedown into side control. Haye quickly recovers to half guard.
Pants missing with some ground and pound from the half guard.
Haye pushes Pants off looking to stand but Pants dives back in and keeps control.
Pants missing with some ground and pound from the half guard.
Pants lands with a punch from half guard.
Pants takes advantage of the dominant position to land a couple of big hammer fists.
Pants sitting in half guard, looking to land shots. Haye defending well though.
Haye is trying to defend against the ground and pound but Pants scores with a couple of nice shots.

That's four minutes gone in the round.
Pants is nestled in close to Haye, controlling him well. He's worked in a nice elbow to the side of the head as well, for good measure.
Haye looks like he's trying to stand up.
Pants is looking to pass Haye's guard but actually Haye recovers to full guard.
Pants postures up to throw the ground and pound strikes but they don't connect.
Pants keeps in close for a moment and lands a decent shot to the side of Haye's head.
Haye is trying to stand up but he's not managed so far.
And that�s the end of the round � the fighters go back to their corners.
Sassy Pants dominated that round.
The fighters get back to their feet, the hooter sounds and we're back to the action!

Haye stuffs a takedown. It's all about dictating where the fight takes place and Haye wants it to stay on the feet.
Haye lands a two punch combo.
A combination from Haye does no damage.
Pants drives through with a takedown into guard.
Pants throwing strikes but missing.
Haye wants to get back to his feet but Pants is in a dominant position and won't allow it.
Pants in full guard, throwing the ground and pound. No damage this time.
That's one minute gone in the round.
Pants is looking to work some ground and pound but Haye has wrist control.
Haye has butterfly guard. He's looking to stand up here. He pushes Pants off him and springs to his feet nicely. The crowd applauds.
Pants throws a jab, cross combination which is slipped
letting Haye counter with a right hand.
Haye looks to score with a jab to the body but Pants is just out of range.
Pants is looking to take this fight into the clinch.
Pants shoots in looking for a takedown but Haye manages to keep the fight standing, pushing Pants's face into the canvas for good measure before circling away.
Pants with a poor takedown
and Haye counters with a two punch combo.
That's three failed takedown attempts in the round for Sassy Pants. That's going to take a lot out of him.
Haye lands with a two punch combination before moving back out of range.
Pants is rocked!
Haye throws a big shot that misses.
Oh Pants is still all over the place! His legs are completely gone! Will he be able to recover?!!
That's two minutes gone in the round.
A telegraphed right hand from Haye misses the target.
Haye throws a right and a left that Pants avoids nicely.
The fighters circling - Haye throws out the jab but it was never going to land.
Haye will need to tighten up his combinations if he doesn't want to gas himself out, swinging at thin air.
Pants uses good footwork to avoid the strikes from Haye.
Pants slips a jab and a cross from Haye.
Pants steps to the side to avoid the strikes from Haye.
Pants seems to have got his legs back now.
Haye lands with a right hand.
Haye throws a nice hook to the body that draws an oooh from the crowd.
That's three minutes gone in the round.
Haye throws a wild combination but nothing lands.
Haye throws a 1-2 combo that connects squarely on Pants's jaw, knocking him onto his back! Haye dives in looking to finish as Pants flails his arms in a desperate attempt to block Haye's strikes! Haye is raining down hammerfists and the ref stops it! Pants's desperate flailing just didn't constitute intelligent defence. Some people will probably question the ref's decision but Pants was definitely hurt and the ref saved him from taking unnecessary punishment. A fighter's safety is paramount in this sport.
Ladies and gentlemen, after 3:12 of round 2, we have a winner by way of TKO (Strikes). David Haye!
|
|
|
|
|
|
|
|
|
|
|
|
|
|
|
|
|
|
|
|
|
|
|
| S |
C
A |
G |
S |
C
B |
G |
|
S |
C |
G |
|
energy
A | B |
|
hype
A | B |
|
pop
A | B |
|
mgr
A | B |
|
FIGHT
RATING
43% |
|
|
|
|
|
|
|
Undercard bout
|
|
|
|
Undercard bout
|
|
|
|
Undercard bout
|
Coming up we have a middleweight MMA rules bout between Jonny Flame (ranked 0 p4p, 0 weight class) and Mark Kennen (ranked 0 p4p, 0 weight class). Over to our ring announcer for the fighter introductions!
 |
|
 |
| 188 cm
20
195 lbs
2 - 0 - 0 |
|
185 cm
20
196 lbs
3 - 1 - 0 |
BJJ Blue Belt
Solid boxing
KO power |
|
BJJ Purple Belt
Counter striker
Powerful |
|
| |
|
Ladies and gentlemen. This fight is 3 rounds, in the middleweight division.
Introducing the fighter to my left, fighting out of the red corner.
With a record of
2 - 0 - 0, fighting out of London, Jonny Flame!
And introducing the fighter to my right, fighting out of the blue corner.
With a record of
3 - 1 - 0, fighting out of London, Mark Kennen!
The judges for this bout are William Gold, Colin Fotheringham and Paul Tew.
The bell rings for round one and we are underway!
Kennen scores with a nice head shot.
Flame throws a combination but it was largely blocked by Kennen.
Flame shoots in looking for a takedown. Kennen tries to sprawl out of it but Flame keeps driving through. The fighters are pinned against the cage. Kennen manages to get underhooks and after a bit of a struggle, circles away and we're back to standing.
Kennen tries to clinch but is not successful on this occasion.
Kennen misses with a takedown attempt
and Flame counters with a takedown into full mount! That could mean trouble for Kennen!
Flame raining down shots from the mount!
Kennen keeping his composure momentarily, calmly looking to get back to half guard.
Kennen is writhing around trying to get back to his feet.
That's one minute gone in the round.
Flame with the ground and pound from mount.
Flame postures up and cracks his opponent a couple of times before moving back into close ground control. Kennen looks a forlorn figure.
Flame controlling the position easily from mount.
Flame fakes a shot to the body and cracks his opponent in the head. Nice ground and pound there!
Kennen tries to lock up and control but Flame gives him a forearm to the face and pushes him away.
Kennen tries to reverse the position but Flame maintains control.
Kennen tries to lock up and control but Flame gives him a forearm to the face and pushes him away.
That's two minutes gone in the round.
Kennen is trying desperately to improve position.
Flame landing punches.
Kennen working to try and regain half guard.
Kennen is persisting with the attempt to improve his position.
The ref warns both fighters not to hold the cage as they work up against the meshing.
BOOM! Flame connects with a massive shot to the dome!
Flame controlling his opponent.
Flame is in the full mount, landing strikes.
Kennen is rocked!
That's three minutes gone in the round.
Flame controlling his opponent.
Oooooh, big shot lands for Flame! Kennen is hurt baaadly! Flame is firing away with more strikes - Kennen is covering up... the ref is warning him to do something. He's just covering up though still and the ref has to step in to end the fight! This one is all over!
Ladies and gentlemen, after 3:26 of round 1, we have a winner by way of TKO (Strikes). Jonny Flame!
|
|
|
|
|
|
|
|
|
|
|
|
|
|
|
|
|
|
|
|
|
|
|
| S |
C
A |
G |
S |
C
B |
G |
|
S |
C |
G |
|
energy
A | B |
|
hype
A | B |
|
pop
A | B |
|
mgr
A | B |
|
FIGHT
RATING
62% |
|
|
|
|
|
|
|
Undercard bout
|
Coming up we have a light heavyweight MMA rules bout between Neil Noguira (ranked 0 p4p, 0 weight class) and Jure Pavlovic (ranked 0 p4p, 0 weight class). The crowd giving both fighters a great reception on their way into the arena. That's good to see.
 |
|
 |
| 190 cm
25
206 lbs
2 - 0 - 0 |
|
188 cm
25
215 lbs
3 - 0 - 0 |
BJJ Purple Belt
Brawler
Big heart |
|
Good wrestler
Dangerous knees
Powerful |
|
| |
|
Ladies and gentlemen. This fight is 3 rounds, in the light heavyweight division.
Introducing the fighter to my left, fighting out of the red corner.
With a record of
2 - 0 - 0, fighting out of London, Neil Noguira!
And introducing the fighter to my right, fighting out of the blue corner.
With a record of
3 - 0 - 0, fighting out of London, Jure Pavlovic!
The judges for this bout are Richard Clark, James Glass and Daniel Bishop.
The bell rings for round one and we are underway!
Noguira fails miserably with a takedown attempt.

Pavlovic rushes Noguira and presses him up against the cage.
Noguira blocks a punch to the side of the head.
Pavlovic landing knees to the head.

It looks like Neil Noguira has been cut.
Noguira tries to break free but Pavlovic pushes him back against the cage.
Pavlovic lands a good knee to the midsection. Noguira won't want to take too many of those.
Noguira is breathing heavily.
We've seen a great period of action over the last minute or so - credit to both fighters for going all out!
Pavlovic landing knees to the head.
Pavlovic using the Thai clinch to land knees to the body.
Knees in the clinch landing for Pavlovic.
Pavlovic crunches a lovely knee into Noguira's ribcage.
Pavlovic lands a knee to the head there! That was nasty!
Pavlovic with a knee to the head.
Pavlovic landing knees to the head.
Pavlovic with a knee to the head.
Noguira is rocked!
Pavlovic lands a knee to the head.
Oh Noguira is still all over the place! His legs are completely gone! Will he be able to recover?!!
Pavlovic lands a glancing elbow in the clinch.
Pavlovic lands a big knee to the head and Noguira goes down! Pavlovic pounces and finishes the fight with strikes! He jumps to his feet and celebrates with the crowd!
Ladies and gentlemen, after 0:45 of round 1, we have a winner by way of TKO (Strikes). Jure Pavlovic!
|
|
|
|
|
|
|
|
|
|
|
|
|
|
|
|
|
|
|
|
|
|
|
| S |
C
A |
G |
S |
C
B |
G |
|
S |
C |
G |
|
energy
A | B |
|
hype
A | B |
|
pop
A | B |
|
mgr
A | B |
|
FIGHT
RATING
100% |
|
|
|
|
|
|
|
Undercard bout
|
Coming up we have a heavyweight MMA rules bout between Tong Poo (ranked 0 p4p, 0 weight class) and Andrew Johnson (ranked 0 p4p, 0 weight class). These two fighters really are very evenly matched on the feet - it will be fascinating to see who can assert themselves in that aspect of the fight.
 |
|
 |
| 190 cm
25
238 lbs
2 - 1 - 0 |
|
193 cm
25
276 lbs
2 - 3 - 0 |
BJJ White Belt
Great elbows
Granite chin |
|
BJJ Blue Belt
Excellent boxer
Heavy handed |
|
| |
|
Ladies and gentlemen. This fight is 3 rounds, in the heavyweight division.
Introducing the fighter to my left, fighting out of the red corner.
With a record of
2 - 1 - 0, fighting out of London, Tong Poo!
And introducing the fighter to my right, fighting out of the blue corner.
With a record of
2 - 3 - 0, fighting out of London, Andrew Johnson!
The judges for this bout are James Atkins, William Gold and Sam Margolis.
The bell rings for round one and we are underway!
Johnson closes the distance, clinches up and gets a nice trip takedown into side control. Very smooth.
Poo parries the strikes from Johnson easily there. Johnson is wary of posturing up too much because it might enable Poo to escape.
Johnson in side control lands a decent elbow.
Poo managing to avoid any damage from the strikes thrown by Johnson.
Johnson throws a knee to the body but it doesn't do much damage.
Johnson throwing strikes but missing, from side control.
Johnson throws a knee to the body but it doesn't do much damage.
Check out the look on Johnson's face as he threw that strike - that's one determined fighter!
The crowd cheering loudly, showing their appreciation for the quality fight we're seeing here.
Johnson in side control, trying to ground and pound but not landing this time.
Poo takes an elbow right on the bridge of the nose and winces in pain.
Poo knows he needs to get back to his feet asap. He's simply no match for Johnson on the ground.
Johnson working the head and body with strikes.
Johnson throwing shots but missing, from side control.
Johnson has the superior BJJ but he's also working some ground strikes into his gameplan.
That's one minute gone in the round.
Johnson working the head with strikes.
Poo on the wrong end of some ground and pound.
Poo takes a couple of big shots there - the referee warns him that he has to defend himself better.
Poo is breathing heavily.
Johnson throwing strikes but missing, from side control.
Johnson scoring with punches and elbows.
Johnson throws a knee to the body but it doesn't do much damage.
The fighters are pressed up against the cage, both looking to find a bit of space to work.
Johnson looks up at the clock and then as Poo takes his cue and looks up at the clock too, Johnson smacks him right in the chops with a big elbow! How rude!
Wooooo! Give it up for these two warriors! They are putting on a show!
Johnson landing with strikes to the head and body from side control.
Johnson has knee on belly and moves into mount.
Johnson looking to finish here with some ground and pound. He lands one big shot that has Poo covering up... and two more big strikes land, forcing the referee to step in and put and end to proceedings! This fight is all over!
Ladies and gentlemen, after 2:03 of round 1, we have a winner by way of TKO (Strikes). Andrew Johnson!
|
|
|
|
|
|
|
|
|
|
|
|
|
|
|
|
|
|
|
|
|
|
|
| S |
C
A |
G |
S |
C
B |
G |
|
S |
C |
G |
|
energy
A | B |
|
hype
A | B |
|
pop
A | B |
|
mgr
A | B |
|
FIGHT
RATING
100% |
|
|
|
|
|
|
|
Co-main event
|
Coming up we have a welterweight MMA rules bout between Remy Bonjasky (ranked 0 p4p, 0 weight class) and Marcus Hawthorn (ranked 0 p4p, 0 weight class). Hawthorn is bouncing up and down as he enters the arena, backed by Sam & Dave - Soul Man. Both fighters look fresh as a daisy as they make their way towards the cage.
 |
|
 |
| 178 cm
25
176 lbs
3 - 0 - 0 |
|
175 cm
19
170 lbs
3 - 0 - 0 |
BJJ White Belt
Dangerous knees
Very strong |
|
BJJ Blue Belt
Basic striking
Powerful |
|
| |
|
Ladies and gentlemen. This fight is 3 rounds, in the welterweight division.
Introducing the fighter to my left, fighting out of the red corner.
With a record of
3 - 0 - 0, fighting out of London, Remy Bonjasky!
And introducing the fighter to my right, fighting out of the blue corner.
With a record of
3 - 0 - 0, fighting out of London, Marcus Hawthorn!
The judges for this bout are James Atkins, Donald Grub and Paul Tew.
The bell rings for round one and we are underway!
Bonjasky tries to clinch but Hawthorn moves out of range.
Bonjasky wants to clinch up but Hawthorn keeps it at a distance.
Bonjasky throws a low kick but his opponent is out of range.
Bonjasky darts in and clinches Hawthorn up against the cage.

Bonjasky breaks from the clinch.
Remy Bonjasky seems to be the more aggressive standup fighter in this bout.
Bonjasky stuffs the takedown attempt from Hawthorn. Hawthorn gets slowly back to his feet.
Bonjasky pulls out of a head kick attempt.
Hawthorn goes to the watering hole and comes back with a big thumbs up from the judges as he scores a three punch combo.
Hawthorn shoots in for a takedown! He's got it and he's managed to land in full mount! That's better than Hawthorn was expecting from the takedown attempt, I'm sure!
Hawthorn lands an elbow that was bordering on illegal but the referee lets it go with a warning.
Hawthorn raining down shots from the mount!
Hawthorn scoring with some good ground and pound from mount here. Will he manage to finish Bonjasky?
Hawthorn in mount throwing good strikes here, bouncing his opponent's head off the canvas.
That's one minute gone in the round.
Hawthorn lands with some vicious ground and pound - can Bonjasky hang on?
BOOM! Hawthorn connects with a massive shot to the dome!
Bonjasky is trying to escape but when you're mounted that's not too easy.
Hawthorn landing shots from mount.
Hawthorn has his opponent pinned against the cage, landing some nasty ground and pound that is really making a bit of a mess out of Bonjasky's face.
Hawthorn postures up and cracks his opponent a couple of times before moving back into close ground control. Bonjasky looks a forlorn figure.
Bonjasky is rocked!
The fans in attendance giving it up for the two fighters, who have really let it all hang out in the last minute or so!
Hawthorn with good strikes from the mount here!
Oh Bonjasky is still in real trouble! Will he be able to recover?!!
That's two minutes gone in the round.
Bonjasky is flailing around, obviously not happy about being mounted. Hawthorn locks hold of one of his arms and spins for an armbar. He's got it! Bonjasky is forced to tap!
Ladies and gentlemen, after 2:20 of round 1, we have a winner by way of Submission (Armbar). Marcus Hawthorn!
|
|
|
|
|
|
|
|
|
|
|
|
|
|
|
|
|
|
|
|
|
|
|
| S |
C
A |
G |
S |
C
B |
G |
|
S |
C |
G |
|
energy
A | B |
|
hype
A | B |
|
pop
A | B |
|
mgr
A | B |
|
FIGHT
RATING
83% |
|
|
|
|
|
|
|
Main event
|
Coming up we have a heavyweight MMA rules bout between Arnold Palmer (ranked 0 p4p, 0 weight class) and Simon Adebisi (ranked 0 p4p, 0 weight class). Over to our ring announcer for the fighter introductions!
 |
|
 |
| 192 cm
26
254 lbs
9 - 0 - 0 |
|
202 cm
26
273 lbs
9 - 8 - 0 |
BJJ Blue Belt
Solid boxing
Granite chin |
|
BJJ Purple Belt
Decent boxing
Determined |
|
| |
|
Ladies and gentlemen. This fight is 5 rounds, for the heavyweight championship of the world!
Introducing the champion to my left, fighting out of the red corner.
With a record of
9 - 0 - 0, fighting out of London, Arnold Palmer!
And introducing the challenger to my right, fighting out of the blue corner.
With a record of
9 - 8 - 0, fighting out of London, Simon Adebisi!
The judges for this bout are William Gold, Richard Clark and Colin Fotheringham.
The bell rings for round one and we are underway!
Adebisi keeps the fight on the outside.
Palmer tries to close the distance and clinch up but Adebisi swats him away and circles back towards the center.
Palmer tries to close the distance and clinch but Adebisi swats him to one side with an open hand palm strike and circles away.
Adebisi keeps the fight on the outside.
Palmer moves in looking to clinch but Adebisi pushes him off.
Palmer tries to close the distance and clinch up but Adebisi swats him away and circles back towards the center.
No luck with that takedown attempt from Adebisi.
Palmer tries to clinch but Adebisi moves out of range.
Palmer throws a right and a left that Adebisi avoids nicely.
Palmer closes the distance and clinches.
A nice left hand lands by Palmer.
It looks like Simon Adebisi has been cut.
A nice right hand lands inside from Palmer.
Palmer lands a nice looking hook to the body, against the cage.
Palmer softening up his opponent with strikes, against the cage.

Palmer drops Adebisi onto one knee with a big uppercut from the clinch! Adebisi is propped up by the cage and works his way back to his feet!
Adebisi is rocked!
A right handed body shot lands from Palmer.
Adebisi looks gassed!
Wooooo! Give it up for these two warriors! They are putting on a show!
Palmer digs a right hand into Adebisi's ribs. Those have got to be taking their toll on Adebisi's gas tank.
Palmer lands a body punch in the clinch.
Palmer lands a short shot on the inside that snaps the head of Adebisi backwards.
Adebisi is still on wobbly legs! Can Palmer finish him?
Adebisi avoiding damage as Palmer throws knees to the body.
Adebisi blocks a knee to the body. He'll have a nicely bruised forearm in the morning.
Adebisi seems to have recovered his senses.
Palmer slowing the pace effectively.
Palmer is working Adebisi over against the cage.
Palmer is leaning against Adebisi and scores with a nice uppercut to the body.
That's one minute gone in the round.
Adebisi takes an elbow to the forehead.
Palmer is leaning against Adebisi and scores with a nice uppercut to the body.
Palmer working some nice short punches in the clinch.
That has opened up Simon Adebisi's cut even more.
A short body shot lands from Palmer as the two fighters clinch.
Palmer lands an uppercut.
An uppercut to the body lands inside from Palmer.
A knee to the head by Palmer.
Palmer lands a body punch - he's looking to wear down Adebisi.
Palmer missing with knees to the body.
Palmer lands a body punch.
Palmer working on landing some head shots here - that one got through nicely.
Palmer working on landing some head shots here - that one got through nicely.
Adebisi is trying to drag Palmer to the mat but Palmer just about manages to keep his footing. He used the cage to his advantage there.
This is a great period of action - very entertaining stuff!
Palmer breaks the clinch and we're back to striking at distance.
Palmer moves in looking to clinch but Adebisi pushes him off.
Palmer clinches with his opponent.
Palmer lands a nice uppercut.
Palmer is working Adebisi over against the cage.
Palmer lands a right hand that snaps the head of Adebisi backwards.
Palmer lands a body punch in the clinch.
Adebisi being controlled against the cage.
Palmer with the Thai clinch. He's looking to land a big knee but he's not managed it this time.
That's two minutes gone in the round.
Palmer softening up his opponent with strikes, against the cage.
Palmer digs a right hand underneath Adebisi's ribcage. Adebisi let out a lung full of air as it connected.
A hook to the body from Palmer.
Palmer lands a body shot in the clinch.
Palmer lands with a short punch from the clinch.
An uppercut to the body lands inside from Palmer.
Nice body punch from Palmer.
Palmer lands a shot to the body.
Palmer lands a left hand.
Palmer pushes Adebisi back against the cage and unloads with a body punch.
Palmer comes over the top with an elbow. That landed flush.
Palmer lands a body punch - he's looking to wear down Adebisi.
Adebisi drops to a knee looking for a takedown but Palmer gets the underhooks and prevents it.
Arnold Palmer has stuffed three takedown attempts in the round now. That's going to take a lot out of Simon Adebisi.
Adebisi letting Palmer take a breather here.
A hook to the body from Palmer.
Palmer throws a blind hook that connects with the side of Adebisis head.
Palmer pushes Adebisi back against the cage and unloads with a body punch.
Palmer lands a nice elbow.
A hook to the body from Palmer.
That's three minutes gone in the round.
Palmer is working Adebisi over against the cage.
Palmer softening up his opponent with strikes, against the cage.
A right hook to the body lands for Palmer.
Palmer dictating the pace here, as the fighters clinch against the cage.
Palmer lands punches inside but they're not really causing much damage.
Adebisi takes a shot to the head.
Palmer working some nice short punches in the clinch.
Palmer lands a hook to the side of the head.
Adebisi is working for a takedown up against the cage. He can't get it on this occasion though.
Palmer's corner calls for him to break the clinch, which he does.
Palmer fails in his attempt to clinch.
Palmer throws a two punch combo that lands nicely.
Palmer tries to clinch up.
Palmer fails in his attempt to clinch.
Palmer wants to clinch.
Adebisi blocks a head kick by Palmer.
That's four minutes gone in the round.
Palmer tries to close the distance and clinch but Adebisi swats him to one side with an open hand palm strike and circles away.
Palmer wants to clinch.
Palmer fakes a head punch and goes low to the body. Nicely done.
Adebisi looks frustrated there after his takedown attempt is stuffed easily.
Palmer tries to clinch but Adebisi moves out of range.
Palmer has Adebisi up against the cage in a clinch.
Palmer with the Thai clinch. He's looking to land a big knee but he's not managed it this time.
The crowd are going absolutely nuts as the round comes to an end - what a fantastic round of action!
Adebisi can't get the takedown.
Palmer breaks from the clinch.
Arnold Palmer seems to be the more aggressive standup fighter in this bout.
Palmer doesn't manage to clinch there - Adebisi circles away.
Palmer tries to clinch up against the cage, rushing in the close the distance. Adebisi manages to break the clinch and circles back to the middle of the mat.
Palmer fakes with an overhand right and moves in to clinch with Adebisi, pushing him back against the cage.
And that�s the end of the round � the fighters go back to their corners.
Arnold Palmer dominated that round.
The cut man is working on Simon Adebisi's cut.
The minute break is over - no more time for sponges and pep talks - back to the action!
Palmer moves in looking to clinch but Adebisi pushes him off.
Adebisi swats away the attempt to clinch by Palmer.
Palmer tries to close the distance and clinch up but Adebisi swats him away and circles back towards the center.
Palmer tries to close the distance and clinch but Adebisi swats him to one side with an open hand palm strike and circles away.
Palmer fails with an attempt to clinch.
Palmer rushes Adebisi and pushes him back against the cage in a clinch.
Palmer lands a nice shot to the body.
Palmer digs a right hand underneath Adebisi's ribcage. Adebisi let out a lung full of air as it connected.
Palmer is looking to score with knees to the body. Maybe he'll change it up and go body then head. Adebisi is defending well for now.
A right hook to the body lands for Palmer.
Palmer lands with a short shot to the head.
Palmer breaks the clinch and we return to the middle of the mat.
Palmer tries to clinch up but Adebisi circles away and keeps his distance.
Palmer fails with an attempt to clinch.
A punch combination from Palmer misses.
Both fighters are absolutely exhausted here.
Palmer moves in looking to clinch but Adebisi pushes him off.
That's one minute gone in the round.
Adebisi swats away the attempt to clinch by Palmer.
It really doesn't seem like the step up in weight is hurting Palmer here at all. He's more than holding his own against the bigger man.
Adebisi swats away the attempt to clinch by Palmer.
Arnold Palmer is looking to throw some combinations by the looks of things.
Palmer wants to clinch.
Arnold Palmer is looking to keep the fight on the feet at all costs.
Adebisi swats away the attempt to clinch by Palmer.
Palmer tries to close the distance and clinch up but Adebisi swats him away and circles back towards the center.
Palmer is really dominating this fight. Is there anything that Adebisi can do to turn this around?
Adebisi shoots in for a takedown but Palmer shows good takedown defense.
Palmer clinches.
A short right hand to the side of the head by Palmer.
Palmer breaks the clinch and we return to the middle of the mat.
Adebisi swats away the attempt to clinch by Palmer.
Palmer has Adebisi up against the cage in a clinch.
That's two minutes gone in the round.
My god... these two guys really need to pick up the pace or everyone will leave to go get a beer.
Palmer missing with knees to the body.
Palmer gets underhooks to prevent Adebisi's takedown attempt.
Palmer lands a right uppercut that snaps the head of Adebisi backwards.
Palmer tries to land a knee to the head but misses.
Palmer works on Adebisi's body with a couple of short punches.
Palmer lands with a quick shot inside that doesn't really do much damage.
Palmer is working Adebisi over against the cage.
Palmer lands an uppercut.
Palmer lands a damaging elbow.
Palmer scores with a shot to the side of Adebisi's head.
Palmer creates a bit of space for himself and sneaks an elbow through Adebisi's defenses.
The cut above Simon Adebisi's eye is starting to cause him problems now.
Palmer digs a right hand into Adebisi's ribs. Those have got to be taking their toll on Adebisi's gas tank.
Palmer is leaning against Adebisi and scores with a nice uppercut to the body.
Palmer lands a hook to the body. It's hard to tell if that hurt Adebisi or not.
Palmer lands a body punch in the clinch.
A short uppercut from Palmer.
Palmer softening up his opponent with strikes, against the cage.
A left hand lands to the body for Palmer.
A right handed body shot lands from Palmer.
Palmer lands a shot to the body.
A right hand to the body from Palmer.
That's three minutes gone in the round.
Palmer makes some space for himself and lands an uppercut.
A short right hand to the side of the head by Palmer.
Palmer works for underhooks and lands a body shot in the process.
Palmer lands a nice uppercut.
Nice body punch from Palmer.
An uppercut to the body lands inside from Palmer.
Palmer lands a hook that snaps the head of Adebisi backwards.
Adebisi is trying to work for a single leg takedown but Palmer pulls him back up using the underhooks.
Arnold Palmer has stuffed three takedown attempts in the round now. That's going to take a lot out of Simon Adebisi.
Palmer lands punches inside but they're not really causing much damage.
A short left from Palmer.
Palmer lands an elbow inside that Adebisi shrugs off.
Palmer manages to break the clinch.
Palmer tries to clinch up against the cage, rushing in the close the distance. Adebisi manages to break the clinch and circles back to the middle of the mat.
Palmer moves into the clinch successfully.
Come on Palmer - let's have some action - none of this stalling nonsense.
Arnold Palmer has scored more points in the clinch so far.
Palmer scores with a hook to the body.
Palmer misses the knee to the body. Nice hip positioning from Adebisi.
Palmer throws a blind hook that connects with the side of Adebisis head.
A short right from Palmer on the inside.
A short body shot lands from Palmer as the two fighters clinch.
Palmer lands a hook to the side of the head.
That's four minutes gone in the round.
A quick uppercut on the inside from Palmer.
Palmer digs a right hand into Adebisi's ribs. Those have got to be taking their toll on Adebisi's gas tank.
Palmer gets double underhooks to prevent a takedown attempt from Adebisi.
Palmer stalling in the clinch.
Palmer stays in close to his opponent and throws a right hand to the body.
A body shot lands from Palmer.
A hook to the body from Palmer.
Palmer lands with a short head shot on the inside.
Palmer has Adebisi pressed against the cage.
A short right hand to the side of the head by Palmer.
Palmer escapes the clinch and we're back to striking.
Adebisi circles away from the clinch attempt.
Nice takedown defense from Palmer. No joy for Adebisi on that attempt.
Palmer is looking to clinch.
As the round comes to an end the crowd are showing their appreciation for a great round of action.
Adebisi circles away from the clinch attempt.
Palmer tries to clinch but Adebisi moves out of range.
The fight stays on the outside here - Palmer looks like he's thinking about clinching though.
And that�s the end of the round � the fighters go back to their corners.
Arnold Palmer dominated that second round.
The cut man is working on Simon Adebisi's cut.
The minute break is over - no more time for sponges and pep talks - back to the action!

Palmer just misses with a punch to the body.
Palmer clinches up against the cage.
A body shot lands from Palmer.
Palmer lands a shoulder strike.
A short body shot lands from Palmer as the two fighters clinch.
Palmer lands a nice shot to the body.
Palmer tries a knee to the head but Adebisi blocks it.
Palmer gets through Adebisi's defenses to land a nice punch to the side of the head.
Palmer makes some space for himself and lands an uppercut.
Palmer throws a blind hook that connects with the side of Adebisis head.
Nice body punch from Palmer.
Palmer lands a right hand that snaps the head of Adebisi backwards.
Palmer misses the knee to the body. Nice hip positioning from Adebisi.
Palmer scores with a shot to the side of Adebisi's head.
Palmer leaning against his opponent.
Palmer pushes Adebisi back against the cage and lands a hook to the side of the head.
Palmer lands with a right to the head.
Palmer lands a body punch.
Both fighters are breathing heavily.
Palmer is leaning against Adebisi and scores with a nice uppercut to the body.
Palmer stays in close to his opponent and throws a right hand to the body.
This has been an exciting period of action!
Palmer lands a right uppercut that snaps the head of Adebisi backwards.
Palmer lands a body shot in the clinch.
That's one minute gone in the round.
Palmer lands a hook to the body. It's hard to tell if that hurt Adebisi or not.
A nice right hand lands inside from Palmer.
Palmer has Adebisi pushed against the cage.
Palmer lands with a short head shot on the inside.
Palmer stays in close to his opponent and throws a right hand to the body.
Palmer digs a right hand underneath Adebisi's ribcage. Adebisi let out a lung full of air as it connected.
A short uppercut from Palmer.
Palmer stalls.
Palmer lands a right uppercut that snaps the head of Adebisi backwards.
A short right from Palmer.
Palmer works on Adebisi's body with a couple of short punches.
Palmer lands an uppercut.
Palmer pushes Adebisi back against the cage and lands a hook to the side of the head.
Palmer creates a bit of space for himself and sneaks an elbow through Adebisi's defenses.
Palmer cracks Adebisi with a nice body shot.
Palmer pushes Adebisi back against the cage and lands a hook to the side of the head.
Nice body punch from Palmer - that landed with a thud.
Palmer lands a short shot on the inside that snaps the head of Adebisi backwards.
Palmer lands with a right to the head.
Palmer pushes Adebisi back against the cage and lands a hook to the side of the head.
Palmer breaks the clinch and we're back to striking at distance.
That's two minutes gone in the round.
Palmer tries to clinch up.
Palmer tries to close the distance and clinch but Adebisi swats him to one side with an open hand palm strike and circles away.
Palmer tries to clinch there but Adebisi circles away.
Adebisi dives in and grabs Palmer's left leg, looking for a takedown. Palmer pushes down on Adebisi's head and hops out.
Palmer moves into range and clinches up with Adebisi.
Palmer digs a right hand underneath Adebisi's ribcage. Adebisi let out a lung full of air as it connected.
Palmer lands a body shot in the clinch.
Palmer slows down the pace here.
Adebisi is working for takedown but Palmer is calmly controlling the position for now.
Palmer with an attempt at a knee that misses.
Nice body punch from Palmer.
Palmer tries to land a knee to the body but he is off balance and Adebisi avoids it.
Adebisi's head jolts backwards as he takes an uppercut right on the button!
Palmer makes some space for himself and lands an uppercut.
Palmer stalling.
Adebisi wants a takedown.
Arnold Palmer has stuffed three takedown attempts in the round now. That's going to take a lot out of Simon Adebisi.
A nice right hand lands inside from Palmer.
A shot in the inside from Palmer.
That's three minutes gone in the round.
Palmer stays in close to his opponent and throws a right hand to the body.
Palmer lands with a short shot to the head.
Palmer digs a right hand underneath Adebisi's ribcage. Adebisi let out a lung full of air as it connected.
Palmer scores with an uppercut up the middle.
Palmer lands with a right to the head.
Palmer scores with an uppercut up the middle.
Palmer lands a hook to the body. It's hard to tell if that hurt Adebisi or not.
With the fighters clinched against the cage, Palmer creates a bit of distance for himself and scores with a nice uppercut.
Palmer scores with a shot to the side of Adebisi's head.
Palmer stays in close to his opponent and throws a right hand to the body.
Palmer just leaning against Adebisi, taking a breather.
Palmer lands a shot to the body.
Adebisi's head jolts backwards as he takes an uppercut right on the button!
Palmer softening up his opponent with strikes, against the cage.
Palmer landing some nice looking knees to the body.
Palmer works on Adebisi's body with a couple of short punches.
Adebisi has Palmer pressed up against the cage and is working for takedown. Palmer manages to improve position though and keeps the fight standing.
A shot in the inside from Palmer.
Palmer lands a body punch.
Adebisi managing to block the knees to the body from Palmer.
Adebisi is trying to work for a single leg takedown but Palmer pulls him back up using the underhooks.
Palmer is leaning against Adebisi and scores with a nice uppercut to the body.
Palmer pushes Adebisi back against the cage and lands a hook to the side of the head.
That's four minutes gone in the round.
Palmer lands a nice uppercut.
Palmer lands a body shot in the clinch.
Palmer's corner calls for him to break the clinch, which he does.
Adebisi circles away from the clinch attempt.
Adebisi walks into a jab.
Palmer fails with an attempt to clinch.
Palmer wants to clinch.
Palmer tries to clinch but is not successful on this occasion.
Adebisi fails with the takedown.
Palmer fails with an attempt to clinch.
The crowd applaud the fighters efforts here as the round comes to an end.
Palmer drives through and clinches with Adebisi against the cage.
Palmer breaks the clinch and we're back to striking at distance.
Palmer tries to close the distance and clinch up against the cage but Adebisi paws at him with a jab and circles away.
And that�s the end of the round � the fighters go back to their corners.
Arnold Palmer clearly takes that round.
The cut man is working on Simon Adebisi's cut.
The minute break is over - no more time for sponges and pep talks - back to the action!

Palmer tries to clinch but Adebisi moves out of range.
Palmer tries to close the distance and clinch up against the cage but Adebisi paws at him with a jab and circles away.
Palmer tries to clinch but is not successful on this occasion.
Palmer leaves Adebisi with his face pressed against the mat as he sprawls beautifully, defending against a solid takedown attempt.
Palmer clinches up with Adebisi and pushes him back against the cage.
Palmer lands a body shot.
Palmer digs a right hand underneath Adebisi's ribcage. Adebisi let out a lung full of air as it connected.
Palmer scores with a nice hook to the head.
Adebisi is trying to drag Palmer to the mat but Palmer just about manages to keep his footing. He used the cage to his advantage there.
A right handed body shot lands from Palmer.
A short right hand to the side of the head by Palmer.
A short right from Palmer on the inside.
Palmer lands on the inside with an uppercut.
Adebisi is absolutely dripping with sweat - he looks exhausted.
A short uppercut from Palmer.
Palmer lands on the inside with an uppercut.
Palmer lands a right hand.
Palmer lands a body punch - he's looking to wear down Adebisi.
Palmer throws a hook to the body. More of an arm punch but it's all scoring with the judges.
That's one minute gone in the round.
A right handed body shot lands from Palmer.
Palmer breaks the clinch and we return to the middle of the mat.
Palmer tries to clinch up.
Adebisi avoids the clinch attempt nicely.
Palmer tries to clinch there but Adebisi circles away.
Adebisi avoids the clinch attempt nicely.
Palmer fails with an attempt to clinch.
Adebisi circles away from the clinch attempt.
Nice sprawl there from Palmer as Adebisi shoots in.
Arnold Palmer has stuffed three takedown attempts in the round now. That's going to take a lot out of Simon Adebisi.
Adebisi avoids the clinch attempt nicely.
Palmer tries to clinch there but Adebisi circles away.
Adebisi keeps the fight on the outside.
Adebisi keeps the fight on the outside.
Palmer fails to land with the punch combination there - jab, cross, hook, miss, miss, miss.
Adebisi avoids the clinch attempt nicely.
Palmer is looking to take this fight into the clinch.
That's two minutes gone in the round.
Palmer wants to clinch.
Palmer tries to clinch but is not successful on this occasion.
Palmer tries to clinch but Adebisi moves out of range.
Palmer stuffs the takedown.
Palmer tries to close the distance and clinch up but Adebisi swats him away and circles back towards the center.
Palmer tries to clinch up but Adebisi circles away and keeps his distance.
Palmer tries to clinch but Adebisi moves out of range.
Adebisi shoots in but Palmer avoids the takedown attempt easily.
Palmer moves in looking to clinch but Adebisi pushes him off.
Adebisi avoids the clinch attempt nicely.
That's three minutes gone in the round.
Palmer tries to close the distance and clinch up against the cage but Adebisi paws at him with a jab and circles away.
Palmer is looking to take this fight into the clinch.
Adebisi avoids the clinch attempt nicely.
Palmer tries to clinch up but Adebisi circles away and keeps his distance.
Palmer fails with an attempt to clinch.
The fight stays on the outside here - Palmer looks like he's thinking about clinching though.
Palmer is looking to clinch.
Adebisi avoids the clinch attempt nicely.
Palmer tries to clinch there but Adebisi circles away.
Palmer tries to clinch but Adebisi is having none of it.
Palmer wants to clinch up but Adebisi keeps it at a distance.
Palmer tries to close the distance and clinch up against the cage but Adebisi paws at him with a jab and circles away.
Adebisi fails with a rather predictable takedown attempt.
That's four minutes gone in the round.
Neither fighter has done anything of merit for a good minute or two here and the crowd are not happy about it.
Palmer clinches with his opponent.
Adebisi is working for a takedown up against the cage. He can't get it on this occasion though.
Palmer breaks the clinch and we're back to striking at distance.
Adebisi circles away from the clinch attempt.
Palmer is looking to clinch.
Palmer is looking to take this fight into the clinch.
Palmer fails in his attempt to clinch.
Palmer is looking to clinch.
Adebisi tries to score a power double leg takedown but Palmer sees that one coming and sprawls well. That will dishearten Adebisi somewhat.
Palmer tries to clinch up but Adebisi circles away and keeps his distance.
Adebisi circles away from the clinch attempt.
And that�s the end of the round � the fighters go back to their corners.
Arnold Palmer had his way with Simon Adebisi in that round.
The cut man is working on Simon Adebisi's cut.
That's time! Palmer's corner gives him a slap on the ass as he gets ready to fight. This is the final round!

Palmer fails in his attempt to clinch.
Adebisi swats away the attempt to clinch by Palmer.
Adebisi keeps the fight on the outside.
Palmer defends well against a solid takedown attempt from Adebisi.
Palmer wants to clinch up but Adebisi keeps it at a distance.
Palmer tries to close the distance and clinch up against the cage but Adebisi paws at him with a jab and circles away.
Palmer fails with an attempt to clinch.
Palmer tries to clinch there but Adebisi circles away.
Adebisi will have to do better than that with his takedown attempts.
We've had a slow start to the round here - hopefully the action picks up.
Palmer doesn't manage to clinch there - Adebisi circles away.
Palmer is looking to take this fight into the clinch.
Palmer tries to clinch but Adebisi is having none of it.
Palmer tries to clinch up.
That's one minute gone in the round.
Palmer tries to clinch but Adebisi is having none of it.
Adebisi ducks under a wild hook from Palmer.
Palmer tries to clinch there but Adebisi circles away.
Palmer doesn't manage to clinch there - Adebisi circles away.
Adebisi closes this distance looking for a takedown but Palmer circles away.
Arnold Palmer has stuffed three takedown attempts in the round now. That's going to take a lot out of Simon Adebisi.
Palmer wants to clinch up but Adebisi keeps it at a distance.
Palmer is looking to take this fight into the clinch.
Adebisi shoots in looking for a double leg takedown. Palmer defends it nicely.
Adebisi is wobbling all over the place through exhaustion. Will he make it to the final bell?
Adebisi swats away the attempt to clinch by Palmer.
Palmer tries to close the distance and clinch up but Adebisi swats him away and circles back towards the center.
Palmer misses with a few strikes there.
That's two minutes gone in the round.
The crowd are hurling abuse towards the fighters... You can hardly blame them though because there isn't a lot going on in the fight.
Adebisi closes the distance and clinches up with Palmer, looking for a takedown. Adebisi pushes Palmer against the cage but Palmer circles to the side and manages to break the clinch.
Palmer tries to clinch but Adebisi moves out of range.
Palmer darts in and clinches Adebisi up against the cage.
Palmer gets through Adebisi's defenses to land a nice punch to the side of the head.
Palmer scores with an uppercut up the middle.
Palmer lands a nice looking hook to the body, against the cage.
Palmer scores with an uppercut up the middle.
Palmer lands a right hand.
A short body shot lands from Palmer as the two fighters clinch.
Palmer lands an elbow just above Adebisi 's eye.
Palmer scores with a shot to the side of Adebisi's head.
Palmer lands a body punch - he's looking to wear down Adebisi.
Palmer pushes off and circles away, back to the middle of the mat.
Palmer wants to clinch.
Adebisi swats away the attempt to clinch by Palmer.
Palmer tries to clinch but is not successful on this occasion.
That's three minutes gone in the round.
Adebisi avoids the clinch attempt nicely.
Palmer doesn't manage to clinch there - Adebisi circles away.
Palmer tries to clinch up against the cage, rushing in the close the distance. Adebisi manages to break the clinch and circles back to the middle of the mat.
The fight stays on the outside here - Palmer looks like he's thinking about clinching though.
Palmer tries to close the distance and clinch up against the cage but Adebisi paws at him with a jab and circles away.
Palmer tries to close the distance and clinch but Adebisi swats him to one side with an open hand palm strike and circles away.
Arnold Palmer is fighting for a decision here - he's started to take the cautious approach.
Adebisi keeps the fight on the outside.
Adebisi keeps the fight on the outside.
Palmer doesn't manage to clinch there - Adebisi circles away.
Palmer tries to close the distance and clinch but Adebisi swats him to one side with an open hand palm strike and circles away.
Palmer moves in looking to clinch but Adebisi pushes him off.
Palmer moves in looking to clinch but Adebisi pushes him off.
Palmer throws a body kick but he was well out of range there.
That's four minutes gone in the round.
The crowd are getting on the fighters' backs, as the pace has dropped off in the last minute or so.
Adebisi shoots in but Palmer avoids the takedown attempt easily.
Adebisi swats away the attempt to clinch by Palmer.
Palmer looks to land a body kick but Adebisi moved away.
Palmer lands a jab.
Palmer moves in looking to clinch but Adebisi pushes him off.
Palmer wants to clinch up but Adebisi keeps it at a distance.
Palmer gets in close and instigates a clinch.
Simon Adebisi has stepped it up - he knows he needs a finish here!
Palmer lands a body punch.
Adebisi has hold of a leg and is looking for a trip takedown. Palmer avoids it nicely though and we remain in the clinch.
Adebisi has Palmer pressed up against the cage and is working for takedown. Palmer manages to improve position though and keeps the fight standing.
Palmer lands a shot to the body.
Palmer lands a right uppercut that snaps the head of Adebisi backwards.
Palmer lands a nice shot to the body.
And that's the end of the fight!
Arnold Palmer showed his dominance in that final round.
Well Palmer has outscored his opponent in every aspect of the fight today. Only a scarily incompetent judge or two will keep him from a well deserved win... Over to the ring announcer for the scorecards.
Ladies and gentlemen, after 5 rounds of action, we go to the scorecards for a decision.
Judge William Gold scores the fight 50:42
Judge Richard Clark scores the fight 50:40
Judge Colin Fotheringham scores the fight 50:40
In favor of your winner, by unanimous decision... Arnold Palmer!
Arnold Palmer retains his heavyweight title!
|
|
|
|
|
|
|
|
|
|
|
|
|
|
|
|
|
|
|
|
|
|
|
| S |
C
A |
G |
S |
C
B |
G |
|
S |
C |
G |
|
energy
A | B |
|
hype
A | B |
|
pop
A | B |
|
mgr
A | B |
|
FIGHT
RATING
100% |
|
|
|
|
|
|
|
|
|
|
