 |
SFL Ignite PBP Commentary |
Undercard bout
|
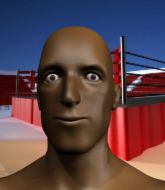
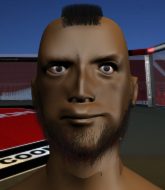
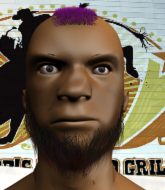
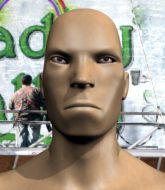
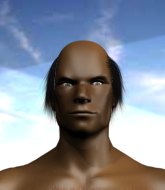
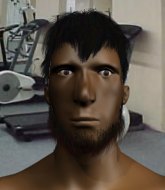
Coming up we have a light heavyweight MMA rules bout between Deuce Dillenger (ranked 0 p4p, 0 weight class) and Peter Hawk (ranked 0 p4p, 0 weight class). Peter Hawk is the more experienced fighter, so let's see if that makes a difference tonight.
 |
|
 |
| 188 cm
22
205 lbs
0 - 0 - 0 |
|
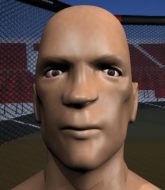
195 cm
22
215 lbs
0 - 2 - 0 |
BJJ Blue Belt
Brawler
Good chin |
|
Good takedowns
Brawler
Determined |
|
| |
|
Ladies and gentlemen. This fight is 3 rounds, in the light heavyweight division.
Introducing the fighter to my left, fighting out of the red corner.
With a record of
0 - 0 - 0, fighting out of Tokyo, Deuce Dillenger!
And introducing the fighter to my right, fighting out of the blue corner.
With a record of
0 - 2 - 0, fighting out of Tokyo, Peter Hawk!
The judges for this bout are Tatsuya Matsuyama, Ren Mimura and Hirohito Nitta.

The bell rings for round one and we are underway!
Hawk misses with a takedown attempt. He shot from a bit too far out.
Hawk throws a lazy right hand but Dillenger sees it coming a mile off and sidesteps it easily.
Dillenger swings and misses with a hook to the body.
Dillenger keeps the fight standing with a nice sprawl.
Dillenger lands a leg kick. The shin dug right into the meat of the thigh.
Dillenger cracks the inside of Hawk's front leg.

Dillenger scores with a nice takedown into half guard. Let's see what he's got on the ground.
Hawk wants to get back to full guard but Dillenger has mounted him!
Hawk looks gassed!
Dillenger controlling the pace for now.
Dillenger's ground tactics aren't going to win him many fans. Let's hope he's got fireworks for us if he gets back to his feet because he's not doing much on the ground.

Dillenger stands up from the dominant position. He obviously fancies his chances standing.

That's one minute gone in the round.
Dillenger checks the leg kick nicely there.
Hawk takes a jab right on the kisser.
Dillenger lands a jab to the head.

Hawk is rocked!

It looks like Peter Hawk has been cut.
Hawk throws a low kick, looking for Dillenger's leg but Dillenger calmly moves out of range.
Hawk is still on wobbly legs! Can Dillenger finish him?
Dillenger throws a sloppy head kick and Hawk moves out of range easily.
Dillenger connects with a stiff jab that staggers Hawk - oh and he follows up with a huge uppercut that knocks him out cold! Man, that was brutal!
Ladies and gentlemen, after 1:28 of round 1, we have a winner by way of KO (Punches). Deuce Dillenger!
|
|
|
|
|
|
|
|
|
|
|
|
|
|
|
|
|
|
|
|
|
|
|
| S |
C
A |
G |
S |
C
B |
G |
|
S |
C |
G |
|
energy
A | B |
|
hype
A | B |
|
pop
A | B |
|
mgr
A | B |
|
FIGHT
RATING
84% |
|
|
|
|
|
|
|
Undercard bout
|
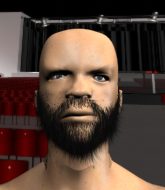
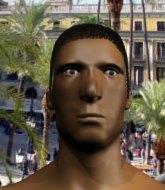
Coming up we have a middleweight MMA rules bout between Yuji Yamohara (ranked 0 p4p, 0 weight class) and Milos Obilic (ranked 0 p4p, 0 weight class). Yamohara comes to the cage accompanied by Enter Sandman by Metallica. Milos Obilic has the power to score a knockout today if he connects clean with Yuji Yamohara's chin.
 |
|
 |
| 178 cm
19
190 lbs
1 - 2 - 0 |
|
188 cm
18
192 lbs
0 - 2 - 0 |
BJJ Blue Belt
Brawler
KO power |
|
BJJ White Belt
Basic striking
Solid chin |
|
| |
|
Ladies and gentlemen. This fight is 3 rounds, in the middleweight division.
Introducing the fighter to my left, fighting out of the red corner.
With a record of
1 - 2 - 0, fighting out of Tokyo, Yuji Yamohara!
And introducing the fighter to my right, fighting out of the blue corner.
With a record of
0 - 2 - 0, fighting out of Tokyo, Milos Obilic!
The judges for this bout are Yukihiro Yamamoto, Shigeki Sano and Yuuki Gou.
The bell rings for round one and we are underway!
A head kick misses from Obilic.
Yamohara fails with a takedown attempt from distance.
Yamohara shoots for a double leg takedown but Obilic sprawls well. He's pushed Yamohara's face into the mat and manages to get back to his feet relatively easily.
Obilic is looking to clinch.
Yamohara has a takedown stuffed.
That's three failed takedown attempts in the round for Yuji Yamohara. That's going to take a lot out of him.
Yamohara tries to shoot in for a takedown. He's got hold of a leg but Obilic swivels and escapes.
Yamohara moves in looking to clinch but Obilic pushes him off.
Yamohara shoots in for a takedown. "I don't think so" says Obilic as he avoids it easily.
Yamohara shoots for a takedown but Obilic saw that one coming a mile off and avoided it easily.
Yamohara shoots in for a takedown but doesn't get it.
Jab, cross, leg kick. Nice combination by Obilic!

Yamohara gets in close and instigates a clinch.
Obilic drops to a knee looking for a takedown but Yamohara gets the underhooks and prevents it.
Obilic wants to break free. God knows he wants to breaaaak freeee.
Obilic stalling in the clinch but Yamohara improves position.
Obilic is looking to break free of the clinch but Yamohara has double underhooks.
Yamohara taking a break, stalling in the clinch.
Obilic wants to break the clinch but can't.
That's one minute gone in the round.
Yamohara successfully pulls guard.
Yamohara striking off his back but it's not causing Obilic any problems.
Yamohara is breathing heavily.

Yamohara looking for submissions from the bottom here. Moving his hips around, possibly looking for an armbar.
Obilic wants to control from the top but Yamohara keeps moving.
Obilic has decided he wants to stand but the closed guard of Yamohara is proving hard to escape from.
Yamohara keeping full guard, as Obilic tries to pass.
Obilic stands and steps away. Yamohara gets to his feet too and we're back to the striking game.
Obilic tries to clinch there but Yamohara circles away.
Yamohara fails with an attempt to clinch.
Obilic keeps the fight on the outside.
Yamohara misses with a body shot.

That's two minutes gone in the round.
A lull in the action here being met with boos from the crowd.
Obilic clinches up with Yamohara and pushes him back against the cage.
Obilic wants to break free. God knows he wants to breaaaak freeee.
Yamohara keeps control of Obilic as he tries to wriggle out of the double underhooks.
Obilic manages to pull guard. Let's see whether he can land a sub off his back.
Obilic is trying to control the position but Yamohara postures up.
Yamohara thinks about going for a leg but decides against it, in order to maintain the position.
Obilic not looking particularly offensive just at the moment.
The fighters are pressed up against the cage, both looking to find a bit of space to work.
Obilic keeping moving, preventing Yamohara from controlling successfully.
Yamohara passes Obilic's left leg - he's now in half guard.
Yamohara working over Obilic with some ground and pound. Obilic looks like he wants out of this position, which is understandable.
Yamohara missing with some ground and pound from the half guard.
Yamohara wants to take a breather but Obilic is having none of it.
Obilic is in trouble now - Yamohara has advanced to mount!
Yamohara lands a big shot there that rocks Obilic but he's holding on and managing to survive for now.

That's three minutes gone in the round.
Yamohara connects with a couple of good shots from mount.
Yamohara dominating with strikes here.
Yamohara fakes a shot to the body and cracks his opponent in the head. Nice ground and pound there!
Obilic is rocked!
Yamohara raining down shots from the mount!
Obilic is still in real trouble! Can Yamohara finish him?
The crowd cheering loudly, showing their appreciation for the quality fight we're seeing here.
Yamohara wants to get back to his feet but Obilic is holding on tight.

That's four minutes gone in the round.
Yamohara trying desperately to get back to his feet here but he's not having any joy at all. He's going to tire himself out if he's not careful.
Obilic seems to have recovered his senses.
Yamohara landing punches.
Yamohara with shots to the head and body - Obilic looks very uncomfortable down there.
Yamohara looking to secure an arm triangle but Obilic defends it well.
Yamohara landing shots from mount.
Yamohara is working on an americana here. Ooh, that looks pretty nasty! Nope, Obilic has managed to escape the submission attempt.
Yamohara lands a nice shot to the head.
As the round comes to an end the crowd are showing their appreciation for a great round of action.
Yamohara is thinking about an arm triangle here, looking to tighten it up before moving to side control. Obilic can see it coming though and defends well with a couple of strikes to the head and some good arm positioning.
Obilic is in a horrible position here. Yamohara smacks him with another shot as he tries to escape the position.
And thats the end of the round the fighters go back to their corners.
Yuji Yamohara dominated that round.
The fighters get back to their feet, the hooter sounds and we're back to the action!

A head kick misses from Yamohara.
Yamohara stalks Obilic and leaps in with a furious combination of punches. Uppercuts and crosses smash into Obilic's face. Obilic staggers backwards, shaken.
Yamohara stuffs the takedown.
A head kick by Yamohara misses
and Obilic counters with a nice low kick that buckles Yamohara's knee momentarily.
Obilic shoots and misses
and Yamohara counters with a takedown into side control.
Obilic sneaks a leg under to get back to half guard.
Yamohara is looking to take a break and control but Obilic is keeping him honest, looking to work from the bottom.
Obilic tries to kick Yamohara off but Yamohara keeps his base steady and stays in half guard.
The ref warns both fighters not to hold the cage as they work up against the meshing.
Obilic wants to control but Yamohara is keeping busy.
Yamohara misses with a head shot. Obilic uses the momentum to regain guard.
Both fighters are absolutely exhausted here.
We've had a slow start to the round here - hopefully the action picks up.
Obilic is looking to get back to his feet but can't, whilst Yamohara is controlling him.
Obilic keeping full guard, as Yamohara tries to pass.
That's one minute gone in the round.
Yamohara passes Obilic's left leg - he's now in half guard.
Yamohara is trying to work for a kimura. He's got his hands clasped together - this could be trouble! No, Obilic has managed to free his arm - good work.
Yamohara stops Obilic from getting back to his feet.
Yamohara wants to lay and pray for a moment but Obilic keeps working.
Obilic wants to control but Yamohara is keeping busy.
The two fighters exchange a few words. I couldn't hear what they were saying but maybe it's more fun if you make it up yourself. Yamohara connects with a nice short shot to Obilic's temple.
Yamohara prevents Obilic from improving his position.
Obilic trying to control here.
Yamohara uses his free foot to push down on Obilic's thigh. Eventually he works his other foot free and he's advanced to mount - this is trouble for Obilic.
That's two minutes gone in the round.
Yamohara landing shots from mount.
Yamohara looking to control and managing it successfully.
Wooooo! Give it up for these two warriors! They are putting on a show!
The referee warns Obilic that he has to improve his position here as he takes two more clean shots to the head.
Yamohara raining down shots from the mount!
Yamohara looking to finish Obilic with some ground and pound. This is bad for Obilic!
Yamohara content just to control the position here.
Yamohara looking to ground and pound his opponent to a finish here.
Yamohara has been looking to land a fair amount of strikes on the ground. He might be looking to soften his opponent up in order to work for a submission.
Yamohara fakes a shot to the body and cracks his opponent in the head. Nice ground and pound there!
Obilic really trying hard to get back to half guard here.
Obilic wants to hold on but Yamohara pushes him away.
Yuji Yamohara overall seems to be getting the better of the ground position in the fight so far.
That's three minutes gone in the round.
Obilic is desperately trying to improve his position but Yamohara has a good base and remains in mount.
The referee warns Obilic that he has to improve his position here as he takes two more clean shots to the head.
Yamohara looking to control but Obilic is working nicely, looking to advance position himself.
Obilic is looking to improve his position but Yamohara isn't that keen on the idea.
Yamohara postures up and cracks his opponent a couple of times before moving back into close ground control. Obilic looks a forlorn figure.
The crowd growing excited in anticipation of a finish here! Right on cue, Yamohara cracks his opponent with a massive right hand that draws loud cheers!
Obilic wants to use the cage to get back to his feet here.
Obilic tries to lock up and control but Yamohara gives him a forearm to the face and pushes him away.
Yamohara moves into side control, trying to work for a kimura. That looks painful! Will he finish!!?? No, Obilic has worked his arm free - good work by Obilic!
Obilic tries to escape but Yamohara is in control.
Yamohara wants to lay and pray for a moment but Obilic keeps working.
That's four minutes gone in the round.
Yamohara tries to advance to mount but can't.
Yamohara wants to control but Obilic is keeping him busy.
Yamohara sitting in side control, looking to soften his opponent up with elbows and hammerfists but Obilic is avoiding damage well and looking to escape the position.
Yamohara trying to control the action but Obilic is working from the bottom.
Obilic is putting a lot of effort into getting back to his feet here.

The referee has ruled that neither fighter is active enough on the ground and has stood them back up.
Obilic dances in quickly and lands a nice inside leg kick on Yamohara. That did some damage!
As the round comes to an end the crowd are showing their appreciation for a great round of action.
Yamohara tries to clinch but Obilic moves out of range.
Obilic tries to clinch but Yamohara moves out of range.
Yamohara shoots in for a takedown. "I don't think so" says Obilic as he avoids it easily.
And thats the end of the round the fighters go back to their corners.
Yuji Yamohara dominated that second round.
Well, the break between rounds is over. Let's get back to the scrappin! This is the final round!

Obilic avoids a punch combination nicely.
Yamohara lands with a big right hook that stumbles Obilic - he's out on his feet here! Yamohara follows up with another monster hook that separates Obilic from consciousness! Obilic falls, almost in slow motion to the canvas! Yamohara stands and admires his work as the crowd go wild.
Ladies and gentlemen, after 0:09 of round 3, we have a winner by way of KO (Punches). Yuji Yamohara!
|
|
|
|
|
|
|
|
|
|
|
|
|
|
|
|
|
|
|
|
|
|
|
| S |
C
A |
G |
S |
C
B |
G |
|
S |
C |
G |
|
energy
A | B |
|
hype
A | B |
|
pop
A | B |
|
mgr
A | B |
|
FIGHT
RATING
100% |
|
|
|
|
|
|
|
Undercard bout
|
|
|
|
Undercard bout
|
Coming up we have a light heavyweight MMA rules bout between Ryo Habanapa (ranked 0 p4p, 0 weight class) and Satoru Sakurai (ranked 0 p4p, 0 weight class). Satoru Sakurai has the power to score a knockout today if he connects clean with Ryo Habanapa's chin.
 |
|
 |
| 178 cm
19
205 lbs
1 - 2 - 0 |
|
192 cm
20
205 lbs
2 - 1 - 0 |
BJJ White Belt
Basic striking
Intelligent |
|
BJJ Blue Belt
Brawler
Granite chin |
|
| |
|
Ladies and gentlemen. This fight is 3 rounds, in the light heavyweight division.
Introducing the fighter to my left, fighting out of the red corner.
With a record of
1 - 2 - 0, fighting out of Tokyo, Ryo Habanapa!
And introducing the fighter to my right, fighting out of the blue corner.
With a record of
2 - 1 - 0, fighting out of Tokyo, Satoru Sakurai!
The judges for this bout are Shigeki Fujiwara, Yukihiro Yamamoto and Hirohito Nitta.
The bell rings for round one and we are underway!
Habanapa misses with a few strikes there.
Habanapa scores with a sloppy punch to the body. Not much technique there but it did the business.
The fight stays on the outside here - Sakurai looks like he's thinking about clinching though.
Sakurai ducks down and throws a hook to the body but Habanapa moves away.
Habanapa avoids the clinch attempt nicely.
Habanapa could do with loosing a few pounds - he looks very soft around the mid section, to put it politely.
Habanapa connects with a looping right hand.
Sakurai takes an uppercut right on the jaw but it doesn't phase him.
Habanapa throws a series of punches but Sakurai moves out of range.
Habanapa uses good head movement to avoid the hook from Sakurai.
Habanapa walks forward, straight into a front kick from Sakurai.
Sakurai looks for a takedown but Habanapa sprawls well.
Habanapa has Sakurai up against the cage in a clinch.
Habanapa can't break the clinch.
Habanapa's head jolts backwards as he takes an uppercut right on the button!
Sakurai jumps guard but Habanapa stands there with Sakurai around his waist. Sakurai gives up and drops back to his feet. We remain in the clinch.
That's one minute gone in the round.
Sakurai is pressed up against the cage. Habanapa has hold of a leg and is looking to drag Sakurai down to the mat. Sakurai avoids the attempt though and has circled away. We're back to striking at a distance.
Sakurai shoots in with a takedown attempt and he has Habanapa pinned against the cage. Habanapa gets the underhooks and manages to circle away.
Ryo Habanapa has stuffed three takedown attempts in the round now. That's going to take a lot out of Satoru Sakurai.
Habanapa misses with a wild combination.
A jab from Habanapa does it's job there.
Sakurai avoids a punch combination nicely.
Habanapa fails with an attempt to clinch.
Habanapa throws a combination but it was largely blocked by Sakurai.
Habanapa scores with a punch to the gut of his opponent.
Habanapa moves out of range of the body kick from Sakurai.
Jab, jab by Habanapa - just one landing.
Habanapa scores to the head and body with a nice combination!
Habanapa misses with a low kick as Sakurai jumps back.
That's two minutes gone in the round.
Sakurai slips a straight right by Habanapa.
The fight moves into the clinch position.
Habanapa wants to strike at distance but he can't break free of the clinch.

Habanapa breaks from the clinch.
Habanapa misses with a telegraphed body shot
and Sakurai counters with an outside leg kick.
Sakurai wants to clinch
and Habanapa counters with a crisp hook to the side of the head.
Sakurai looks to clinch
and Habanapa counters with a straight punch to the midsection.
Sakurai shoots in with a takedown attempt and he has Habanapa pinned against the cage. Habanapa gets the underhooks and manages to circle away.
Habanapa misses with a combination
and Sakurai connects with a straight left hand counter down the middle.
Sakurai shoots for a takedown but Habanapa saw that one coming a mile off and avoided it easily.
Sakurai doesn't manage to clinch there - Habanapa circles away.
Sakurai looks gassed!
Sakurai is on the wrong end of a nice combination from Habanapa.
Sakurai shoots in for a takedown - he's clinched up with Habanapa but Habanapa pushes him off and we're back to square one.
Sakurai doesn't succeed with the takedown
and Habanapa counters with a right hand to the body.
That's three minutes gone in the round.
No joy there for Habanapa, who threw a few shots but didn't land.
Habanapa looks to score with a combo but nothing lands.
The fight stays on the outside here - Sakurai looks like he's thinking about clinching though.
Habanapa misses with a few strikes there.
Sakurai gets his takedown attempt stuffed easily
and Habanapa counters with a straight punch to the midsection.
Habanapa fails to land with the punch combination there - jab, cross, hook, miss, miss, miss.
Sakurai misses with a takedown attempt
and Habanapa counters with a lovely shot to the body.
Habanapa tries to close the distance and clinch up but Sakurai swats him away and circles back towards the center.
Ohhhhh! A huge head kick from Sakurai! Habanapa is out on his feet! Sakurai rushes in and throws more strikes. The ref is looking closely - Habanapa is covering up but the punishment is just too much and the ref steps in to stop the fight! Habanapa is staring into space, just thankful that the beatdown has ended. Brutal finish.
Ladies and gentlemen, after 3:47 of round 1, we have a winner by way of TKO (Strikes). Satoru Sakurai!
|
|
|
|
|
|
|
|
|
|
|
|
|
|
|
|
|
|
|
|
|
|
|
| S |
C
A |
G |
S |
C
B |
G |
|
S |
C |
G |
|
energy
A | B |
|
hype
A | B |
|
pop
A | B |
|
mgr
A | B |
|
FIGHT
RATING
45% |
|
|
|
|
|
|
|
Undercard bout
|
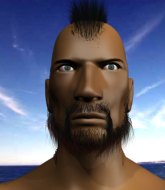
Coming up we have a light heavyweight MMA rules bout between Hevos Naama (ranked 0 p4p, 0 weight class) and Jason Mok (ranked 0 p4p, 0 weight class). Chooooooooon! I think Naama might be my favorite fighter, now he's come out to Slayer - Bloodline. Man, I cannot wait for this one!
 |
|
 |
| 185 cm
22
215 lbs
2 - 0 - 0 |
|
188 cm
22
211 lbs
3 - 2 - 0 |
BJJ White Belt
Basic striking
Granite chin |
|
BJJ White Belt
Excellent MT
Prefers standup |
|
| |
|
Ladies and gentlemen. This fight is 3 rounds, in the light heavyweight division.
Introducing the fighter to my left, fighting out of the red corner.
With a record of
2 - 0 - 0, fighting out of Tokyo, Hevos Naama!
And introducing the fighter to my right, fighting out of the blue corner.
With a record of
3 - 2 - 0, fighting out of Tokyo, Jason Mok!
The judges for this bout are Yukihiro Yamamoto, Ren Mimura and Shigeki Fujiwara.
The bell rings for round one and we are underway!
Naama throws a head kick that misses and slips in the process. He scrambles back to his feet and the fighters circle.
Naama swats away the attempt to clinch by Mok.
Naama connects with a leg kick. He turned his hip over nicely there.
Naama fakes low and throws an overhand right that catches Mok on the side of the head.
Naama tries a switch kick but it misses it's target.
Hevos Naama seems to be the more aggressive standup fighter in this bout.
Mok is looking to clinch.
Naama throws a head kick that looked like it stung.
Naama lands with an uppercut that bounces Mok off the cage and back into rage.
Mok fails in his attempt to clinch.
Mok clinches.
Naama wants to push off and get back to the center of the mat but Mok has him pressed against the cage.
Mok looking to stall.
Naama wants to push off and get back to the center of the mat but Mok has him pressed against the cage.
Mok takes an elbow to the forehead.
Mok using the Thai clinch to land knees to the body.
Naama wants to strike at distance but he can't break free of the clinch.
Mok tries a knee to the head but Naama blocks it.
Naama is trying to work out of this bad position, with his back against the cage.
Naama is trying to break free.
Naama wants to push off and get back to the center of the mat but Mok has him pressed against the cage.
Mok taking a breather.
Mok tries to land a knee to the head but Naama blocks with his arms.
Mok breaks the clinch and we're back to striking at distance.
Naama tries a head kick but it misses.
Naama chopping away at his opponent's legs.
Mok takes one on the chin but keeps coming.
That's one minute gone in the round.
Naama buckles his opponent's knee momentarily with a nice leg kick.
Jab, cross, leg kick. Nice combination by Naama!
Mok slips a jab and a cross from Naama.
Jab from Naama.
Naama fails to land with a series of punches.
Mok tries to clinch but Naama moves out of range.
Naama throws a series of punches but Mok moves out of range.
Naama works over Mok's head and body with a nice combination.
Mok is rocked!
Mok looks up at the clock. Bad move! Naama lands a right hand from hell, dropping Mok. Naama pounces and finishes the fight with a flurry of punches and elbows.
Ladies and gentlemen, after 1:28 of round 1, we have a winner by way of TKO (Strikes). Hevos Naama!
|
|
|
|
|
|
|
|
|
|
|
|
|
|
|
|
|
|
|
|
|
|
|
| S |
C
A |
G |
S |
C
B |
G |
|
S |
C |
G |
|
energy
A | B |
|
hype
A | B |
|
pop
A | B |
|
mgr
A | B |
|
FIGHT
RATING
94% |
|
|
|
|
|
|
|
Undercard bout
|
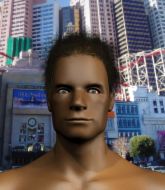
Coming up we have a heavyweight MMA rules bout between Kyle Lundy (ranked 0 p4p, 0 weight class) and Big T (ranked 0 p4p, 0 weight class). T has chosen Hip Hop! as his entrance music, which hasn't gone down very well with the crowd. Kyle Lundy could well score a knockout today. He has the power to get to Big T's chin.
 |
|
 |
| 185 cm
22
223 lbs
1 - 1 - 0 |
|
200 cm
22
240 lbs
1 - 1 - 0 |
BJJ White Belt
Improved boxing
Big right hand |
|
BJJ Blue Belt
Good kicks
Intelligent |
|
| |
|
Ladies and gentlemen. This fight is 3 rounds, in the heavyweight division.
Introducing the fighter to my left, fighting out of the red corner.
With a record of
1 - 1 - 0, fighting out of Tokyo, Kyle Lundy!
And introducing the fighter to my right, fighting out of the blue corner.
With a record of
1 - 1 - 0, fighting out of Tokyo, Big T!
The judges for this bout are Ren Mimura, Yasuomi Hirokawa and Taro Takaoka.
The bell rings for round one and we are underway!
T seems to be stalking Lundy here. He circles momentarily and then unleashes a devastatic head kick! Lundy drops like a stone, out cold! WOW! Are you kidding me!? What a knockout!
Ladies and gentlemen, after 0:05 of round 1, we have a winner by way of KO (Head Kick). Big T!
|
|
|
|
|
|
|
|
|
|
|
|
|
|
|
|
|
|
|
|
|
|
|
| S |
C
A |
G |
S |
C
B |
G |
|
S |
C |
G |
|
energy
A | B |
|
hype
A | B |
|
pop
A | B |
|
mgr
A | B |
|
FIGHT
RATING
13% |
|
|
|
|
|
|
|
Undercard bout
|
Coming up we have a middleweight MMA rules bout between Yoto Haramushi (ranked 0 p4p, 0 weight class) and Maximo Hammer (ranked 0 p4p, 0 weight class). Yoto Haramushi could well score a knockout today. He has the power to get to Maximo Hammer's chin.
 |
|
 |
| 180 cm
22
190 lbs
3 - 2 - 0 |
|
195 cm
19
190 lbs
1 - 1 - 0 |
BJJ Blue Belt
Brawler
Good chin |
|
BJJ Blue Belt
Brawler
Determined |
|
| |
|
Ladies and gentlemen. This fight is 3 rounds, in the middleweight division.
Introducing the fighter to my left, fighting out of the red corner.
With a record of
3 - 2 - 0, fighting out of Tokyo, Yoto Haramushi!
And introducing the fighter to my right, fighting out of the blue corner.
With a record of
1 - 1 - 0, fighting out of Tokyo, Maximo Hammer!
The judges for this bout are Shigeki Fujiwara, Ren Mimura and Hirohito Nitta.
The bell rings for round one and we are underway!
Haramushi fails with the takedown.
Hammer is looking to clinch.
Hammer connects with a slap. Keep your fist closed son.
Hammer fails to land with the punch combination there - jab, cross, hook, miss, miss, miss.
Hammer throws a series of punches but Haramushi moves out of range.
Haramushi is looking to take this fight into the clinch.
Haramushi has managed to clinch.
Hammer can't break the clinch.
Hammer breaks the clinch and we return to the middle of the mat.
Haramushi drives through with a takedown into guard.
Haramushi is just sitting in guard, looking to avoid any submissions.
Hammer thows some rabbit punches from the bottom but they don't do any damage.
Hammer keeping moving, preventing Haramushi from controlling successfully.
Hammer wants to get back to his feet but he's too absorbed in his own little project and Haramushi manages to pass to side control.
Hammer tries to strike from the bottom but it doesn't land.
Hammer has hold of Haramushi's hands but Haramushi slips his arm to the side and lands an elbow.
Haramushi is keen to just control but Hammer is a slippery customer.
Haramushi missing with some ground and pound from the half guard.
Haramushi is breathing heavily.
That's one minute gone in the round.
Hammer is looking to improve his position.
Haramushi is nestled in close to Hammer, controlling him well. He's worked in a nice elbow to the side of the head as well, for good measure.
Hammer works his way to full guard. Good work.
Haramushi might be looking to lock onto one of his opponent's long limbs for a submission, whilst we're on the ground.
Haramushi prevents Hammer from getting back to his feet.
Hammer will have to put a bit more behind his punches if he's going to do any damage from this position.
Haramushi looking to pass the guard.
Haramushi is working hard here to advance position.
Hammer keeping moving, preventing Haramushi from controlling successfully.
Hammer is working an open guard here, looking to improve his position. No doubt that will leave him open to counters but at least he's being more offensive.
Neither fighter is doing enough for the referee's liking and he's decided to stand them back up.
Hammer stuffs the takedown attempt from Haramushi. Haramushi gets slowly back to his feet.
Haramushi walks into a stiff left hand from Hammer.
Haramushi takes a solid shot to the body. That one hurt him but he's trying not to show it.
Haramushi darts in and clinches Hammer up against the cage.
Haramushi tightens his grip and picks Hammer up, before dumping him to the ground. Hammer manages to land in guard.
The ref warns both fighters not to hold the cage as they work up against the meshing.
Haramushi stays in close to Hammer's body and controls the position.
That's two minutes gone in the round.
Haramushi stopping the sweep attempt from Hammer.
Haramushi passes Hammer's right leg, so he's now in half guard.
Haramushi passes to side control.
Hammer is looking to slip a leg under and get half guard but Haramushi is one step ahead and moves to full mount!
Haramushi looking to control and managing it successfully.
Hammer is flailing around, obviously not happy about being mounted. Haramushi locks hold of one of his arms and spins for an armbar. He's got it! Hammer is forced to tap!
Ladies and gentlemen, after 2:45 of round 1, we have a winner by way of Submission (Armbar). Yoto Haramushi!
|
|
|
|
|
|
|
|
|
|
|
|
|
|
|
|
|
|
|
|
|
|
|
| S |
C
A |
G |
S |
C
B |
G |
|
S |
C |
G |
|
energy
A | B |
|
hype
A | B |
|
pop
A | B |
|
mgr
A | B |
|
FIGHT
RATING
71% |
|
|
|
|
|
|
|
Undercard bout
|
Coming up we have a middleweight MMA rules bout between Nick Rayez (ranked 0 p4p, 0 weight class) and Dave Silva (ranked 0 p4p, 0 weight class). Over to our ring announcer for the fighter introductions!
 |
|
 |
| 183 cm
21
192 lbs
2 - 0 - 0 |
|
186 cm
18
193 lbs
2 - 1 - 0 |
BJJ Purple Belt
Brawler
Prefers ground |
|
BJJ Blue Belt
Brawler
Likes ground |
|
| |
|
Ladies and gentlemen. This fight is 3 rounds, in the middleweight division.
Introducing the fighter to my left, fighting out of the red corner.
With a record of
2 - 0 - 0, fighting out of Tokyo, Nick Rayez!
And introducing the fighter to my right, fighting out of the blue corner.
With a record of
2 - 1 - 0, fighting out of Tokyo, Dave Silva!
The judges for this bout are Hirohito Nitta, Yuuki Gou and Tatsuya Matsuyama.
The bell rings for round one and we are underway!
Silva works over Rayez's head and body with a nice combination.
Silva works Rayez's body with a nice hook.
Rayez feints and as Silva raises his hands in defense, Rayez changes levels and drives through with a takedown into guard.
Silva throwing his legs up looking for a triangle.
Rayez sitting in guard here, content to control.
Rayez wants to pass the guard but Silva is keeping the position.
Silva is working from a closed guard but he's struggling to control his opponent.
Rayez is looking to work some ground and pound but Silva has wrist control.
Rayez trying to control but Silva is working from the bottom.
Rayez passes easily into side control. Nice work.
Rayez tries for an arm triangle. That looks pretty tight to me. Is this one over!?! Possibly, maybe, no Rayez has let go of the choke. Obviously it wasn't as tight as we thought!
Silva stops Rayez from passing to mount.
That's one minute gone in the round.
Silva tries to work a leg under to get back to half guard but Rayez wriggles his own leg back out and remains in side control.
You can see the frustration on Silva's face, being in this tough position on the bottom.
The ref warns both fighters not to hold the cage as they work up against the meshing.
Rayez wants to control but Silva is keeping him busy.
Silva is trying to get back to half guard. He's pushing on Rayez's leg. He's managed it. Nice work.
Rayez lands with a punch from half guard.
Rayez is working hard to pass the guard. He's done it - he's now in full mount! Trouble for Silva!
Rayez is working for a guillotine from mount but Silva frees his head quite easily.
Rayez working for a submission but Silva is keeping him at bay.
Rayez is breathing heavily.
That's two minutes gone in the round.
Silva is working to get back to half guard.
Rayez manages to capitalize on a mistake by Silva to take his back!
Silva can't escape the position.
Rayez is working for the rear naked choke. He has one arm under the chin but Silva has hold of the other arm. A bit of a stalemate here.
Silva covering up well under a barage of strikes.
The fighters are pressed up against the cage, both looking to find a bit of space to work.
Rayez trying to control.
Rayez doesn't have the hooks in and Silva manages to turn into his guard.
Rayez looking for submissions off his back, moving his hips, looking for an opening.
Silva wants to stand but Rayez has a closed guard, so he can't escape.
Rayez bucks up whilst keeping hold of a body lock, managing to reverse the position. Now he's in top in Silva's guard.
That's three minutes gone in the round.
Rayez stands up and looks to throw the legs aside to pass to side control. Silva swivels though and keeps the full guard.
Rayez forces his way into half guard.
Rayez is controlling the pace.
Rayez seems to be working for a kimura but Silva defends the submission attempt.
Rayez winds up and cracks Silva with a swinging punch to the side of the head.
Rayez seems to be looking for submissions.
Silva tries to roll over but Rayez keeps him under control.
Silva looking for submissions off his back.
That's four minutes gone in the round.
Rayez has freed up his trapped foot and advances to mount.
Rayez with some aggressive grappling here. He's looking for submissions here, rather than waiting for the opportunity to counter.
Rayez is controlling this nicely and is looking to make no mistakes. Silva is trying to wiggle out of this horrible position. Silva flips to his side and attempts to get a leg in for half guard. Rayez anticipates the leg and manages to get behind Silva and secures both hooks! This could be bad! Rayez slips an arm under Silva chin and tries to position for a rear naked choke. Rayez has worked the choke in now and it looks tight. Rayez is squeezing on Silva like an anaconda would it's prey. Silva fails to tap and has fallen unconscious! We've got ourselves a winner by way of a rear naked choke!
Ladies and gentlemen, after 4:44 of round 1, we have a winner by way of Submission (RNC). Nick Rayez!
|
|
|
|
|
|
|
|
|
|
|
|
|
|
|
|
|
|
|
|
|
|
|
| S |
C
A |
G |
S |
C
B |
G |
|
S |
C |
G |
|
energy
A | B |
|
hype
A | B |
|
pop
A | B |
|
mgr
A | B |
|
FIGHT
RATING
57% |
|
|
|
|
|
|
|
Co-main event
|
Coming up we have a middleweight MMA rules bout between Leon Pasquale (ranked 0 p4p, 0 weight class) and Wade Foley (ranked 0 p4p, 0 weight class). Pasquale comes to the cage accompanied by Fight Like A Brave. Wade Foley will no doubt be trying to keep this one on the feet, where he has a distinct advantage.
 |
|
 |
| 185 cm
22
192 lbs
3 - 0 - 0 |
|
185 cm
18
180 lbs
2 - 0 - 0 |
BJJ Blue Belt
Brawler
KO power |
|
BJJ Blue Belt
Basic striking
Determined |
|
| |
|
Ladies and gentlemen. This fight is 3 rounds, in the middleweight division.
Introducing the fighter to my left, fighting out of the red corner.
With a record of
3 - 0 - 0, fighting out of Tokyo, Leon Pasquale!
And introducing the fighter to my right, fighting out of the blue corner.
With a record of
2 - 0 - 0, fighting out of Tokyo, Wade Foley!
The judges for this bout are Sosuke Kotani, Ren Mimura and Tatsuya Matsuyama.
The bell rings for round one and we are underway!
Nice sprawl there from Foley as Pasquale shoots in.
Foley darts in and lands a nice takedown into half guard.
Pasquale pushes Foley off and gets back to his feet.
Pasquale fails with the takedown.
Good shot there by Foley.
Foley changes levels and scores with a jab to the body.
Pasquale takes a jab on the nose. He smiles like he loves it and keeps coming.
Pasquale shoots in and drives through. Foley sprawls well.
That's three failed takedown attempts in the round for Leon Pasquale. That's going to take a lot out of him.
Pasquale gets cracked there but stands up to it.
Pasquale is rocked!
Pasquale shoots in but doesn't get the takedown
and Foley counters with a series of strikes that practically lifts Pasquale off his feet! He tumbles backwards, his head bouncing off the mat - Foley follows up with more strikes before the ref can step in but Pasquale was out before he hit the floor.
Ladies and gentlemen, after 0:38 of round 1, we have a winner by way of KO (Strikes). Wade Foley!
|
|
|
|
|
|
|
|
|
|
|
|
|
|
|
|
|
|
|
|
|
|
|
| S |
C
A |
G |
S |
C
B |
G |
|
S |
C |
G |
|
energy
A | B |
|
hype
A | B |
|
pop
A | B |
|
mgr
A | B |
|
FIGHT
RATING
100% |
|
|
|
|
|
|
|
Main event
|
Coming up we have a light heavyweight MMA rules bout between Tyson Trinidad (ranked 0 p4p, 0 weight class) and Fleegle bananasplits (ranked 0 p4p, 0 weight class). Both fighters really staring eachother down here, as Fleegle bananasplits enters the cage!
 |
|
 |
| 190 cm
21
212 lbs
4 - 0 - 0 |
|
188 cm
20
213 lbs
3 - 0 - 0 |
BJJ Purple Belt
Basic striking
Granite chin |
|
BJJ Blue Belt
Basic striking
Determined |
|
| |
|
Ladies and gentlemen. This fight is 5 rounds, for the light heavyweight championship of the world!
Introducing the champion to my left, fighting out of the red corner.
With a record of
4 - 0 - 0, fighting out of Tokyo, Tyson Trinidad!
And introducing the challenger to my right, fighting out of the blue corner.
With a record of
3 - 0 - 0, fighting out of Tokyo, Fleegle bananasplits!
The judges for this bout are Yuuki Gou, Yukihiro Shimada and Yasuomi Hirokawa.
The bell rings for round one and we are underway!
Trinidad shoots in and bounces bananasplits off the cage to secure the takedown into guard.
Trinidad avoids a guillotine attempt easily.
Trinidad postures up as if he's going to throw some strikes but drops back for an ankle! bananasplits is in big trouble! He looks ready to tap! But no, he's escaped and dives on top of Trinidad, into his guard.
Trinidad escapes his hips to the side and looks to be working for an armbar. bananasplits gives him a little smile and shakes his head. No chance.
Trinidad pushes a forearm under bananasplits's chin to create some space. He's escaped his hips and pivoted quickly for an armbar! Can he extend the arm? Yes, bananasplits is tapping out! Damn, that was fast!
Ladies and gentlemen, after 0:45 of round 1, we have a winner by way of Submission (Armbar). Tyson Trinidad!
Tyson Trinidad retains his light heavyweight title!
|
|
|
|
|
|
|
|
|
|
|
|
|
|
|
|
|
|
|
|
|
|
|
| S |
C
A |
G |
S |
C
B |
G |
|
S |
C |
G |
|
energy
A | B |
|
hype
A | B |
|
pop
A | B |
|
mgr
A | B |
|
FIGHT
RATING
80% |
|
|
|
|
|
|
|
|
|
|
