 |
WCC III - 3 Kings PBP Commentary |
Undercard bout
|
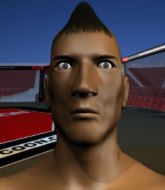
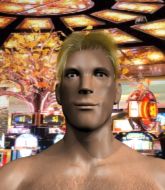
Coming up we have a light heavyweight MMA rules bout between David Valentine (ranked 0 p4p, 0 weight class) and Fabio Almeida (ranked 0 p4p, 0 weight class). I can't wait for this one - let's get the fighter introductions out of the way and get this one started!
 |
|
 |
| 190 cm
21
212 lbs
0 - 1 - 0 |
|
183 cm
22
215 lbs
0 - 1 - 0 |
BJJ Blue Belt
Good kicks
Cuts easily |
|
BJJ Blue Belt
Brawler
Granite chin |
|
| |
|
Ladies and gentlemen. This fight is 3 rounds, in the light heavyweight division.
Introducing the fighter to my left, fighting out of the red corner.
With a record of
0 - 1 - 0, fighting out of Los Angeles, David Valentine!
And introducing the fighter to my right, fighting out of the blue corner.
With a record of
0 - 1 - 0, fighting out of Los Angeles, Fabio Almeida!
The judges for this bout are Frank Antenori, and .

The bell rings for round one and we are underway!
Valentine connects with a vicious head kick that knocks Almeida to the floor! Valentine dives in looking for the finish!

Almeida is rocked!

It looks like Fabio Almeida has been cut.
Valentine wants to take a breather but Almeida is having none of it.
Almeida is still in real trouble! Can Valentine finish him?
Almeida manages to get to full guard.
Valentine trying to stand up but can't free himself from Almeida's guard.
Almeida seems to have recovered his senses.
Almeida looking to hit a scissor sweep but Valentine is one step ahead there.

Almeida is working for submissions here. He's thrown up his legs looking for a tringle but Valentine frees his head nicely. Oh but Almeida has switched to an armbar! Valentine is tapping furiously! Lovely submission there!
Ladies and gentlemen, after 0:38 of round 1, we have a winner by way of Submission (Triangle Armbar). Fabio Almeida!
|
|
|
|
|
|
|
|
|
|
|
|
|
|
|
|
|
|
|
|
|
|
|
| S |
C
A |
G |
S |
C
B |
G |
|
S |
C |
G |
|
energy
A | B |
|
hype
A | B |
|
pop
A | B |
|
mgr
A | B |
|
FIGHT
RATING
100% |
|
|
|
|
|
|
|
Undercard bout
|
|
|
|
Undercard bout
|
Coming up we have a lightweight MMA rules bout between Stan DiUpmon (ranked 0 p4p, 0 weight class) and Willie Nuxhall (ranked 0 p4p, 0 weight class). Nuxhall is bobbing his head along to his entrance song: The Final Countdown. I'm sure you'll be fascinated to know that I was talking to some pointless Z list celebrity before the fight and he thought that Willie Nuxhall was going to win. Let's see if he was right.
 |
|
 |
| 180 cm
22
163 lbs
1 - 3 - 0 |
|
178 cm
18
155 lbs
2 - 3 - 0 |
BJJ White Belt
Solid Muay Thai
Self confident |
|
BJJ Blue Belt
Counter striker
Determined |
|
| |
|
Ladies and gentlemen. This fight is 3 rounds, in the lightweight division.
Introducing the fighter to my left, fighting out of the red corner.
With a record of
1 - 3 - 0, fighting out of Los Angeles, Stan DiUpmon!
And introducing the fighter to my right, fighting out of the blue corner.
With a record of
2 - 3 - 0, fighting out of Los Angeles, Willie Nuxhall!
The judges for this bout are Frank Antenori, Timothy Bukovac and Jack Bonds.
The bell rings for round one and we are underway!
DiUpmon fails with an attempt to clinch.

DiUpmon clinches up with Nuxhall and pushes him back against the cage.
DiUpmon lands a nice elbow from the clinch.
DiUpmon misses with a knee to the head.
DiUpmon throws a vicious knee straight up the middle but Nuxhall blocks it with crossed arms.
DiUpmon lands a nice elbow from the clinch.
It looks like Willie Nuxhall has been cut.
DiUpmon lands a shoulder strike that jolts his opponent's head backwards.
DiUpmon stalling in the clinch but Nuxhall improves position.
DiUpmon misses with a knee to the head.
DiUpmon with the Thai clinch. He's looking to land a big knee but he's not managed it this time.
DiUpmon drops to a knee looking for a takedown but Nuxhall gets the underhooks and prevents it.
DiUpmon lands a shoulder strike that jolts his opponent's head backwards.
DiUpmon with a knee to the head.
DiUpmon pushes off an throws an elbow but Nuxhall leans to the side and avoids it. We're back to clinching against the cage.
DiUpmon fails to pull the fight into his guard.
Nuxhall has DiUpmon pressed up against the cage and is working for takedown. DiUpmon manages to improve position though and keeps the fight standing.
DiUpmon misses with a knee strike.
DiUpmon tries a knee to the head but he's missed.
DiUpmon with a knee to the head.
DiUpmon wants a takedown but no success here.
That's three failed takedown attempts in the round for Stan DiUpmon. That's going to take a lot out of him.
A right hand to the body from DiUpmon.
DiUpmon prevents the takedown attempt.
DiUpmon misses with a knee to the head.
DiUpmon is breathing heavily.
DiUpmon misses the knee to the body. Nice hip positioning from Nuxhall.

That's one minute gone in the round.
DiUpmon looking to stall.
Nuxhall goes for a takedown attempt but DiUpmon pushes him away and we're back to fighting at a distance.
Nuxhall keeps the fight on the outside.

DiUpmon gets caught flat footed, as Nuxhall shoots in with a quick takedown into guard.
Nuxhall trying to control but DiUpmon is working from the bottom.
Nuxhall is in a good position here but he's just trying to control... And he's not even managing to do that successfully.
Nuxhall sitting in guard here, content to control.
Nuxhall stands and throws DiUpmon's legs to the side, diving into side control.
DiUpmon is not content to let Nuxhall control the position.

That's two minutes gone in the round.
Nuxhall might have to switch it up a bit here because his efforts to control DiUpmon kaven't been going to plan, at least at the current moment in time.
Nuxhall in side control, working for a kimura. He's got hold of an arm and he's torquing it... DiUpmon is tapping! That's the end of the fight!
Ladies and gentlemen, after 2:42 of round 1, we have a winner by way of Submission (Kimura). Willie Nuxhall!
|
|
|
|
|
|
|
|
|
|
|
|
|
|
|
|
|
|
|
|
|
|
|
| S |
C
A |
G |
S |
C
B |
G |
|
S |
C |
G |
|
energy
A | B |
|
hype
A | B |
|
pop
A | B |
|
mgr
A | B |
|
FIGHT
RATING
43% |
|
|
|
|
|
|
|
Undercard bout
|
|
|
|
Undercard bout
|
|
|
|
Undercard bout
|
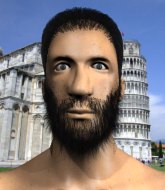
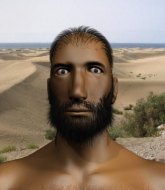
Coming up we have a heavyweight MMA rules bout between Timothy Defunce (ranked 0 p4p, 0 weight class) and Jabba Hut (ranked 0 p4p, 0 weight class). Defunce comes to the cage accompanied by Cochise. Jabba Hut has the better chin. Will he look to stand and bang today?
 |
|
 |
| 196 cm
20
246 lbs
2 - 5 - 0 |
|
197 cm
18
265 lbs
1 - 2 - 0 |
BJJ Blue Belt
Brawler
Experienced |
|
BJJ Blue Belt
Counter striker
Determined |
|
| |
|
Ladies and gentlemen. This fight is 3 rounds, in the heavyweight division.
Introducing the fighter to my left, fighting out of the red corner.
With a record of
2 - 5 - 0, fighting out of Los Angeles, Timothy Defunce!
And introducing the fighter to my right, fighting out of the blue corner.
With a record of
1 - 2 - 0, fighting out of Los Angeles, Jabba Hut!
The judges for this bout are Timothy Bukovac, Frank Antenori and .
The bell rings for round one and we are underway!
Defunce misses with a takedown attempt - Hut sprawls well and throws a nice strike on the way out which just misses.
Hut pulls out of a head kick attempt.
Defunce shoots in for a double leg but Hut sprawls well. That's going to sap some energy.
Hut throws a low kick, looking for Defunce's leg but Defunce calmly moves out of range.
Hut misses with a hook.
Defunce will have to do better than that with his takedown attempts.
That's three failed takedown attempts in the round for Timothy Defunce. That's going to take a lot out of him.
Hut moves into the clinch.
Defunce has Hut pressed up against the cage and is working for takedown. Hut manages to improve position though and keeps the fight standing.
Hut throws a head punch that misses.
Hut misses with a short punch on the inside.

Hut breaks the clinch and we're back to striking at distance.
Defunce misses with a few strikes there.
Donk. Defunce catches Hut right on the button with a cross.
Timothy Defunce seems to be the more aggressive standup fighter in this bout.
Defunce feints and then dives in with a takedown. That was a long way out but the feint bought him enough time to close the distance and complete the takedown. Now we'll play guard for a bit and see who can get the better of that position.
Hut seems keen to control Defunce's posture.
Hut is trying to stand up but he's not managed so far.
The fighters are pressed up against the cage, both looking to find a bit of space to work.
Hut manages to land a sweep and now he's in mount on top!
That's one minute gone in the round.
Defunce is trying desperately to improve position.
Hut controlling the position easily from mount.
Defunce is writhing around trying to get back to his feet.
Defunce is trying desperately to improve position.
Hut looking to control but Defunce is working nicely, looking to advance position himself.
That's two minutes gone in the round.
Well. There's a bit of a lull in the action here and the crowd are starting to get restless.
Hut pausing momentarily but resumes with a couple of decent strikes that do a bit of damage.
Hut content just to control the position here.
Defunce tries to get back to half guard but can't.
Defunce is breathing heavily.
A nice elbow there by Hut.
Hut content just to control the position here.
Hut's corner are shouting for him to control the position and he seems happy to oblige.

That's three minutes gone in the round.
The fighters are starting to perspire pretty heavily.
Hut working for a guillotine from mount but Defunce is in no mood to give up.
Hut controlling the pace for now.
Hut landing strikes from the mount.
The ref warns both fighters not to hold the cage as they work up against the meshing.
Defunce is looking to get to half guard.
Hut sitting in mount, just looking to control for the moment.
Defunce wants to control but Hut is having none of it.

That's four minutes gone in the round.
A few boos can be heard. I'm sure they will multiply if the fighters don't pick up the pace.
Hut wants to control the pace but Defunce is squirming around nicely.
Defunce is in all sorts of trouble here.
Hut content just to control the position here.

Despite being in the dominant position, Jabba Hut just isn't active enough and the referee decides to stand the fighters back up.
Defunce gets caught flat footed, as Hut shoots in with a quick takedown into guard.
Hut trying to pass the guard but can't manage it just yet.
Defunce wants to stand up but Hut is controlling him.
And that�s the end of the round � the fighters go back to their corners.
Jabba Hut dominated that round.
The referee calls time. The cornermen exit stage left and we're back to business.

Hut instigates a clinch.
Hut has a couple of punches blocked by Defunce.
Hut can't break the clinch.
Defunce has Hut pressed up against the cage and is working for takedown. Hut manages to improve position though and keeps the fight standing.
Hut gets underhooks to prevent Defunce's takedown attempt.
Defunce tries for a takedown but Hut manages to get underhooks.
That's three failed takedown attempts in the round for Timothy Defunce. That's going to take a lot out of him.
Defunce has a body lock and is looking for a takedown. Hut is bouncing around trying to prevent the takedown and somehow he has indeed managed to stay on his feet.
Hut tries a body shot but Defunce blocks it.
Defunce manages to break the clinch.
Timothy Defunce is looking to throw some combinations by the looks of things.
Defunce has his takedown stuffed
and Hut counters by clinching up.
Defunce breaks the clinch and we're back to striking at distance.
Defunce misses with a takedown
and Hut counters with a shoot takedown into half guard.
Hut wants to lay and pray for a moment but Defunce keeps working.
The referee walks around the fighters to get a better view of the action. Hut lands a nice short elbow.
That's one minute gone in the round.
Defunce is not content to let Hut control the position.
Defunce is trying to maintain the position but Hut is very close to passing his half guard.
Hut misses with a head shot. Defunce uses the momentum to regain guard.
Defunce wants to sweep here but Hut controlling him for the moment.
Defunce is working the butterfly guard. He manages to land a nice scissor sweep and is now in half guard on the top. Nice move.
Hut avoiding damage under a succession of punches from Defunce.
Hut blocking the ground and pound attempt from Defunce.
Defunce scores with a couple of good hammerfists.
Hut trying to control but Defunce postures up.
Hut is breathing heavily.
That's two minutes gone in the round.
Well. There's a bit of a lull in the action here and the crowd are starting to get restless.
The fighters are battling for position here. Hut manages to regain full guard. Nice work.
Defunce loading up with the ground and pound but he's missing more than he's landing in this flurry.
Hut tries to land a sweep but no joy.
Defunce throwing shots from guard but he's hitting more mat than opponent.
Defunce has decided he wants to stand but the closed guard of Hut is proving hard to escape from.
The referee decides to stand the fighters back up.
Defunce misses with a takedown attempt
and Hut counters with a good low kick that Defunce was not able to check.
Defunce misses with a takedown attempt
and Hut counters with a shoot takedown into half guard.
Defunce is looking to improve his position.
Defunce slips a foot under and gets full guard. Nice work.
That's three minutes gone in the round.
Defunce manages to land a sweep and now he's in mount on top!
Defunce is still in mount, landing shots to his trapped opponent. Hut can't stay in a position like this for much longer.
Defunce avoids the attempt from Hut to control.
Defunce scoring with strikes but Hut is staying in there.
Hut bucks up and manages to get a nice reversal! He's in guard on the top - nicely done!
Hut preventing the sweep.
Defunce bucks up whilst keeping hold of a body lock, managing to reverse the position. Now he's in top in Hut's guard.
Jabba Hut has got the better of the ground game so far.
Hut seems keen to control rather than go for a submission, at least for now.
That's four minutes gone in the round.
Hut is trying to control the position from the bottom.
Defunce thows a big elbow that misses.
Defunce avoids a guillotine attempt easily.
Hut looking to control the pace of the fight rather than finish it.
The crowd applaud the fighters efforts here as the round comes to an end.
Hut is looking for a triangle but Defunce pushes his legs off easily.
Defunce would like to get this fight back to the feet but can't get free from the closed guard.
And that�s the end of the round � the fighters go back to their corners.
Jabba Hut showed his class in that round. I'd imagine he'll take it on all the scorecards.
That's the end of the round. The referee orders the cornermen out of the cage so we can get back down to business. This is the final round!

Hut keeping a good distance there, avoiding the body shot.
Defunce misses with a takedown
and Hut counters with a single leg into guard. Defunce didn't expect that.
Hut wants to control from the top but Defunce keeps moving.
Hut is in a good position here but he's just trying to control... And he's not even managing to do that successfully.
Hut won't allow Defunce to sweep him here.
Defunce keeping full guard, as Hut tries to pass.
Defunce wants to hit a switch here but Hut passes into full mount! Oh no, disaster for Defunce there!
Both fighters are breathing heavily.
Hut looking to control but Defunce is working nicely, looking to advance position himself.
That's one minute gone in the round.
Defunce is looking to improve his position but Hut isn't that keen on the idea.
Defunce is working hard here to advance position.
Hut controlling from mount.
Hut trying to control but Defunce is having none of it.
Defunce is bucking up trying to escape but Hut cracks him with another couple of good strikes.
Defunce is in all sorts of trouble here.
That's two minutes gone in the round.
Well. There's a bit of a lull in the action here and the crowd are starting to get restless.
Hut wants to finish this one by submission but Defunce is holding onto his waist, trying to prevent any attacks from Hut.
Defunce is looking to get to half guard.
Hut tucks in and makes sure he doesn't lose the dominant position.
Defunce is working to get back to half guard.
That's three minutes gone in the round.
Defunce regains half guard.
Defunce is refusing to be controlled, as Hut sits in half guard.
Hut working the head and body with strikes.
Hut works his foot free and advances to mount.
Defunce working to try and regain half guard.
Hut looking to control but Defunce is working nicely, looking to advance position himself.
Defunce is trying desperately to improve position.
Defunce is writhing around trying to get back to his feet.
That's four minutes gone in the round.
Defunce is desperately trying to get back to half guard.
Timothy Defunce has stepped it up - he knows he needs a finish here!
Hut content just to control the position here.
Defunce tries to lock up and control but Hut gives him a forearm to the face and pushes him away.
The crowd thankful this round is nearly over.
Hut controlling from mount.
Defunce working to try and regain half guard.
And that's the end of the fight!
Jabba Hut comfortably won the final round on my scorecard.
Well Hut has outworked and out performed his opponent in all aspects of the game today. He was simply too good and the decision should be no more than a formality. Over to the ring announcer for the scorecards.
Ladies and gentlemen, after 3 rounds of action, we go to the scorecards for a decision.
Judge Timothy Bukovac scores the fight 27:30
Judge Frank Antenori scores the fight 27:30
Judge Percy O'Donnell scores the fight 27:30
In favor of your winner, by unanimous decision... Jabba Hut!
|
|
|
|
|
|
|
|
|
|
|
|
|
|
|
|
|
|
|
|
|
|
|
| S |
C
A |
G |
S |
C
B |
G |
|
S |
C |
G |
|
energy
A | B |
|
hype
A | B |
|
pop
A | B |
|
mgr
A | B |
|
FIGHT
RATING
42% |
|
|
|
|
|
|
|
Undercard bout
|
Coming up we have a light heavyweight MMA rules bout between John Henry Irons (ranked 0 p4p, 0 weight class) and John Sully (ranked 0 p4p, 0 weight class). There are an array of beautiful celebrities at ringside tonight! I wonder if any of them paid for their tickets.
 |
|
 |
| 189 cm
20
210 lbs
1 - 0 - 0 |
|
190 cm
22
215 lbs
1 - 0 - 0 |
BJJ Blue Belt
Counter striker
KO power |
|
BJJ White Belt
Excellent boxer
Determined |
|
| |
|
Ladies and gentlemen. This fight is 3 rounds, in the light heavyweight division.
Introducing the fighter to my left, fighting out of the red corner.
With a record of
1 - 0 - 0, fighting out of Los Angeles, John Henry Irons!
And introducing the fighter to my right, fighting out of the blue corner.
With a record of
1 - 0 - 0, fighting out of Los Angeles, John Sully!
The judges for this bout are Timothy Bukovac, Frank Antenori and .
The bell rings for round one and we are underway!
Irons closes this distance looking for a takedown but Sully circles away.
Danga de danga de dang - Sully scores with a four punch combination!
Sully drives through and clinches with Irons against the cage.
Irons looks to throw an elbow but misses.
Irons tries for a takedown. No joy.
Sully wants to push off and get back to the center of the mat but Irons has him pressed against the cage.
An uppercut on the inside fails to land for Irons.
A right handed body shot lands from Sully.
Sully breaks the clinch and we're back to striking at distance.
Sully tries to bum rush Irons with a series of wild strikes but Irons uses good footwork to avoid the assault.
Sully's corner calls for a 1,2 combination and Sully duly obliges.
Irons looks for a takedown but Sully sprawls well.
That's three failed takedown attempts in the round for John Henry Irons. That's going to take a lot out of him.
Sully looks to land a combination. Irons sees it coming but can only parry a couple of the shots.
Sully lands a right hook to the body.
Irons shoots in and bounces Sully off the cage to secure the takedown into guard.
Sully keeping moving, preventing Irons from controlling successfully.
That's one minute gone in the round.
Irons sitting in guard here, content to control.
Irons trying to control but Sully is working from the bottom.
Irons advances position into side control!
Irons prevents Sully from escaping the position.
Irons fails to land a wild elbow strike.
That's two minutes gone in the round.
The crowd are getting on the fighters' backs, as the pace has dropped off in the last minute or so.
Irons wants to work for a kimura but he's foiled early by Sully, who protects the arm well.
Irons is looking for a kimura. He might have it! No, Sully has escaped the position, nice work there.
Irons swings around for an armbar but Sully sees it coming a mile off and turns beautifully into Irons's guard.
The fighters are pressed up against the cage, both looking to find a bit of space to work.
Irons had isolated an arm as going for an omaplata. Sully is defending the submission well but is in a very vulnerable position. Irons Is leaning forward trying to finish the omaplata but decides to abandon it, and take Sully's back instead.
Sully fending off the submission attempt from Irons.
Irons is breathing heavily.
That's three minutes gone in the round.
Sully is trying to get back to his feet but he's not managed it yet.
Irons looking for the choke from the back.
Irons trying desperately to keep hold of the dominant position.
Sully really doesn't want to stay on the ground with Irons. If he can't get it back to his feet, it's only a matter of time before he'll be tapping out.
Sully is trying to stand back up.
That's four minutes gone in the round.
There's not a lot going on here and the crowd are letting the fighters know they're not willing to tolerate a lack of action.
Sully looking very determined here, making life difficult for Irons.
Irons controlling from the back.
Irons is looking for the choke from the back position but Sully is controlling his hands well.
Sully has the hand control, trying to stop the rear naked choke.
Irons looking to break Sully's wrist control so he can sink in the choke. Sully remaining controlled and patient though - he really has to keep calm otherwise Irons will wrap this one up with the rear naked choke!
And that�s the end of the round � the fighters go back to their corners.
John Henry Irons dominated that round.
The corners get their ten second warning. Both fighters stand from their stools and stare eachother down, ready to get back to the action.
No luck for Irons with that takedown attempt.
Sully darts in and clinches Irons up against the cage.
Irons scores a nice knee to the body.
Sully gets underhooks to prevent Irons's takedown attempt.
A nice right hand lands inside from Sully.
Irons misses with a punch on the inside.
A right hook to the body lands for Sully.
Irons has hold of a leg and is looking for a trip takedown. Sully avoids it nicely though and we remain in the clinch.
That's three failed takedown attempts in the round for John Henry Irons. That's going to take a lot out of him.
Sully pushes Irons back against the cage and lands a hook to the side of the head.
Sully is fighting off a takedown attempt but Irons is just too persistent for him and manages to trip Sully to the mat. Sully regains guard as soon as the fighters hit the mat.
Irons wants to control from the top but Sully keeps moving.
Irons is really struggling to control Sully but he's trying to hold on to the position.
The ref warns both fighters not to hold the cage as they work up against the meshing.
Irons is going to have to think about doing something other than just controlling because Sully is managing to avoid having the position dictated to him.
Sully is breathing heavily.
That's one minute gone in the round.

Irons decides he's had enough of playing guard and decides to stand. Come on Sully, up you get!
Irons shoots in for a takedown but doesn't get it.
Irons shoots for a takedown but Sully saw that one coming a mile off and avoided it easily.
Sully takes the fight into the clinch.
Irons can't get the takedown.
Sully wants to get back to striking at distance but Irons won't allow it.
With the two fighters working up against the cage, Irons just misses with a elbow thrown towards Sully's brow.
Sully digs a right hand into Irons's ribs. Those have got to be taking their toll on Irons's gas tank.
Sully is pressed up against the cage. Irons has hold of a leg and is looking to drag Sully down to the mat. Sully avoids the attempt though and has circled away. We're back to striking at a distance.
Sully tries to clinch but Irons moves out of range.
Sully works over Irons's head and body with a nice combination.
Sully tries to clinch but is not successful on this occasion.
That's two minutes gone in the round.
Sully will need to tighten up his combinations if he doesn't want to gas himself out, swinging at thin air.
Irons throws a looping left and ducks down for a takedown. He's got his arms around Sully's waist but Sully gets an underhook and avoids the takedown by throwing Irons off to one side.
Irons misses with a takedown attempt - Sully sprawls well and throws a nice strike on the way out which just misses.
Irons avoids the clinch attempt nicely.
Sully stuffs the takedown attempt from Irons. Irons gets slowly back to his feet.
Sully rushes Irons and presses him up against the cage.
Sully lands a body shot.
Irons tries to pull guard but Sully won't allow it.
Sully scores with an uppercut up the middle.
Sully is looking to break free of the clinch but Irons has double underhooks.
Irons breaks from the clinch.
Sully scores with a nice one two combo and darts back out of range to avoid anything coming in the opposite direction.
Sully tries to bum rush Irons with a series of wild strikes but Irons uses good footwork to avoid the assault.
That's three minutes gone in the round.
Irons darts in and lands a nice takedown into half guard.
Sully won't allow Irons to pass to mount.
Irons passes to full mount!
Irons throws some shoulder strikes here and then postures up. Oh, he's gone for an armbar! Sully has his hands clasped together but Irons breaks the hold and Sully is forced to tap! This one is aaaaaaaaaaall over! That was lightning fast by Irons!
Ladies and gentlemen, after 3:49 of round 2, we have a winner by way of Submission (Armbar). John Henry Irons!
|
|
|
|
|
|
|
|
|
|
|
|
|
|
|
|
|
|
|
|
|
|
|
| S |
C
A |
G |
S |
C
B |
G |
|
S |
C |
G |
|
energy
A | B |
|
hype
A | B |
|
pop
A | B |
|
mgr
A | B |
|
FIGHT
RATING
35% |
|
|
|
|
|
|
|
Undercard bout
|
Coming up we have a heavyweight MMA rules bout between Ash Ketchum (ranked 0 p4p, 0 weight class) and General Zod (ranked 0 p4p, 0 weight class). Zod has chosen Kneel Before Zod as his entrance music. Both fighters will be looking to make this an exciting fight for the fans, I'm sure!
|
|
 |
| 197 cm
22
270 lbs
2 - 0 - 0 |
|
205 cm
22
260 lbs
2 - 0 - 0 |
Good takedowns
Brawler
Big heart |
|
BJJ Purple Belt
Decent boxing
Solid chin |
|
| |
|
Ladies and gentlemen. This fight is 5 rounds, for the heavyweight championship of the world!
Introducing the champion to my left, fighting out of the red corner.
With a record of
2 - 0 - 0, fighting out of Los Angeles, Ash Ketchum!
And introducing the challenger to my right, fighting out of the blue corner.
With a record of
2 - 0 - 0, fighting out of Los Angeles, General Zod!
The judges for this bout are , and Frank Antenori.
The bell rings for round one and we are underway!
Ketchum fails with a takedown attempt from distance.
Ketchum feints and as Zod raises his hands in defense, Ketchum changes levels and drives through with a takedown into guard.
The fighters are pressed up against the cage, both looking to find a bit of space to work.
Ketchum with a flurry of punches that miss.
Ketchum lands a couple of decent looking shots.
Ketchum postures up as if he's going to throw some strikes but drops back for an ankle! Zod is in big trouble! He looks ready to tap! But no, he's escaped and dives on top of Ketchum, into his guard.
The ref warns both fighters not to hold the cage as they work up against the meshing.
Zod thinks about going for a leg but decides against it, in order to maintain the position.
Zod stopping the sweep attempt from Ketchum.
Zod trying to control but Ketchum is working from the bottom.
Zod lands a couple of elbows.
Zod wants to pass the guard but Ketchum is keeping the position.
That's one minute gone in the round.
Ketchum keeping moving, preventing Zod from controlling successfully.
Zod is in a good position here but he's just trying to control... And he's not even managing to do that successfully.
Zod pressing down on his opponent's thigh, looking to pass guard. Ketchum is keeping the position for now.
Neither fighter is doing enough for the referee's liking and he's decided to stand them back up.
Ketchum shoots in for a takedown and gets it. Let's see what he's got on the mat.
Zod wants to stand up but Ketchum is controlling him.
Ketchum working some ground and pound from guard but it's not doing any damage.
Ketchum throws a big right hand that misses.
Ketchum is breathing heavily.
Zod is working an open guard here, looking to improve his position. No doubt that will leave him open to counters but at least he's being more offensive.
Zod looking to control.
That's two minutes gone in the round.
Ketchum throws a big right hand that misses.
Ketchum throws and elbow that misses. Zod uses the momentum to reverse the position. He's now in Ketchum's guard. Nice move by Zod!
Zod stopping the sweep attempt from Ketchum.
The referee has ruled that neither fighter is active enough on the ground and has stood them back up.
Horrible takedown by Ketchum or perhaps it was just good defense by Zod which made him look bad.
Zod tries to clinch up.
Ketchum misses with a takedown attempt - Zod sprawls well and throws a nice strike on the way out which just misses.
That's three failed takedown attempts in the round for Ash Ketchum. That's going to take a lot out of him.
Good shot there by Zod.
Ketchum will have to do better than that with his takedown attempts.
Zod shoots and misses
and Ketchum counters with a nice double leg into half guard.
This has been an exciting period of action!
Ketchum throwing shots but they're hitting the canvas more than the man.
Ketchum passes the guard and advances to mount!
That's three minutes gone in the round.
Ketchum lands a couple of nice shots there from mount.
Ketchum thuds his fist into the canvas! Oooouch!
Zod holding onto his opponent's waist for dear life, as Ketchum tries to land some strikes to get him to release his grip.
Ketchum is looking to secure an arm. He's managed it! He's pivoting for an armbar - that looks tight! But Zod has managed to get out of it and now he's in a dominant position. Nice work from Zod!
Zod trying to stand up but can't free himself from Ketchum's guard.
Ketchum trying to control the position.
Zod stopping the sweep attempt from Ketchum.
Ketchum is striking but Zod is not phased and passes to half guard.
That's four minutes gone in the round.
Zod is keen to just control but Ketchum is a slippery customer.
Ketchum actively working from the bottom here.
Zod wants to take a breather but Ketchum is having none of it.
Zod lands a big shot. The thud that echoes around the arena is like music to the fans' ears.
Well, the referee has seen enough. Neither fighter is active enough on the ground so he's stood them back up.
Ketchum has his takedown stuffed
and Zod counters with a nice uppercut.
Zod smiles there as he lands a nice right hand right on the button.
Zod circles away from the clinch attempt
and Zod counters with a huge left! Ketchum is in big trouble! He's backing up but Zod isn't giving him chance to recover. Under a barage of punches the ref has to step in to save Ketchum from any more damage. A dominating finish by Zod!
Ladies and gentlemen, after 4:50 of round 1, we have a winner by way of TKO (Strikes). General Zod!
General Zod is the new heavyweight champion!
|
|
|
|
|
|
|
|
|
|
|
|
|
|
|
|
|
|
|
|
|
|
|
| S |
C
A |
G |
S |
C
B |
G |
|
S |
C |
G |
|
energy
A | B |
|
hype
A | B |
|
pop
A | B |
|
mgr
A | B |
|
FIGHT
RATING
56% |
|
|
|
|
|
|
|
Co-main event
|
Coming up we have a lightweight MMA rules bout between Juan Escobar (ranked 0 p4p, 0 weight class) and Lady Penitent (ranked 0 p4p, 0 weight class). Over to our ring announcer for the fighter introductions!
 |
|
 |
| 175 cm
22
155 lbs
2 - 1 - 0 |
|
170 cm
22
155 lbs
2 - 1 - 0 |
BJJ Brown Belt
Basic striking
Big heart |
|
BJJ Blue Belt
Basic striking
Determined |
|
| |
|
Ladies and gentlemen. This fight is 5 rounds, for the lightweight championship of the world!
Introducing the champion to my left, fighting out of the red corner.
With a record of
2 - 1 - 0, fighting out of Los Angeles, Juan Escobar!
And introducing the challenger to my right, fighting out of the blue corner.
With a record of
2 - 1 - 0, fighting out of Los Angeles, Lady Penitent!
The judges for this bout are Timothy Bukovac, and Frank Antenori.
The bell rings for round one and we are underway!
Escobar scores with a jab to the jaw.
Escobar throws a jab when Penitent was well out of range.
Wow, both these guys are really going for it!
Penitent takes a body punch but keeps moving.
Penitent has his head snapped back a nice jab. A little nod from Penitent there as he acknowledges the shot.
Penitent shoots in and drives through. Escobar sprawls well.
Penitent uses some good footwork to avoid the body shot by Escobar.
Escobar thows a body shot but no joy.
Escobar misses with an uppercut. Penitent saw that one coming.
Escobar stuns Penitent with a nice body shot, before stepping back out of range.
Penitent steps to the side to avoid the strikes from Escobar.
Escobar connects with a crisp jab.
Escobar changes levels and drives through with a really nice takedown into side control. Penitent looks really pissed at himself for not defending that better.
Escobar is looking to take a break and control but Penitent is keeping him honest, looking to work from the bottom.
Penitent is looking for a sweep.
Penitent can't do much from the bottom here.
Escobar is looking for a kimura. He might have it! No, Penitent has escaped the position, nice work there.
Penitent tries to get back to half guard but can't.
The fighters are pressed up against the cage, both looking to find a bit of space to work.
That's one minute gone in the round.
Penitent keeping his opponent close.
Escobar has worked his way into a potential kimura here. Penitent is trying to get out of the position but his squirming has just got him deeper into trouble. Escobar yanks on the arm and Penitent is forced to tap due to a very painful looking submission! Nice work by Escobar.
Ladies and gentlemen, after 1:26 of round 1, we have a winner by way of Submission (Kimura). Juan Escobar!
Juan Escobar is the new lightweight champion!
|
|
|
|
|
|
|
|
|
|
|
|
|
|
|
|
|
|
|
|
|
|
|
| S |
C
A |
G |
S |
C
B |
G |
|
S |
C |
G |
|
energy
A | B |
|
hype
A | B |
|
pop
A | B |
|
mgr
A | B |
|
FIGHT
RATING
47% |
|
|
|
|
|
|
|
Main event
|
Coming up we have a light heavyweight MMA rules bout between Lee Mtagwa (ranked 0 p4p, 0 weight class) and sam preston (ranked 0 p4p, 0 weight class). Lee Mtagwa has a significant reach advantage - let's see if he can make it count.
 |
|
 |
| 193 cm
22
205 lbs
1 - 0 - 0 |
|
175 cm
22
205 lbs
2 - 0 - 0 |
BJJ White Belt
Improved boxing
KO power |
|
Good takedowns
Counter striker
Tends to cut |
|
| |
|
Ladies and gentlemen. This fight is 5 rounds, for the light heavyweight championship of the world!
Introducing the champion to my left, fighting out of the red corner.
With a record of
1 - 0 - 0, fighting out of Los Angeles, Lee Mtagwa!
And introducing the challenger to my right, fighting out of the blue corner.
With a record of
2 - 0 - 0, fighting out of Los Angeles, sam preston!
The judges for this bout are , Frank Antenori and .
The bell rings for round one and we are underway!
preston avoids a punch combination nicely.
Mtagwa swings wildly with a right hand that was never going to find it's target.
Mtagwa lands an overhand left. A wild punch that just about connected.
It looks like sam preston has been cut.
Mtagwa moves into range and connects with a jab.
Mtagwa is the aggressor but that punch slipped nicely by preston.
preston takes a shot right to the liver - Bas would have been proud of that punch.
Mtagwa misses with a series of wild punches.
preston showing good head movement there, avoiding the strikes from Mtagwa.
Mtagwa throws a wild combination but nothing lands.
Mtagwa misses with a jab, cross combination.
Mtagwa misses with a wild body shot.
Lee Mtagwa seems to be the more aggressive standup fighter in this bout.
Mtagwa with a body punch. A glancing blow.
Mtagwa throws a hook to the side of preston's head but preston sees it coming and ducks under it beautifully.
A big right from Mtagwa misses.
Mtagwa tries to bum rush preston with a series of wild strikes but preston uses good footwork to avoid the assault.
That's one minute gone in the round.
Mtagwa thuds his right hand into preston's forehead from close range. That could be painful for both fighters.
preston is rocked!
Mtagwa misses with a wild combination.
A shot to de liver by Mtagwa. Beautiful body shot.
Mtagwa is using his reach advantage well here, landing the more effective single shots from range.
Mtagwa fails to land with a series of punches.
preston steps to the side to avoid the strikes from Mtagwa.
Mtagwa swings away but doesn't land with a series of punches.
Mtagwa lands with a nice combination. preston backs away looking to recover.
preston is still on wobbly legs! Can Mtagwa finish him?
preston showing good head movement there, avoiding the strikes from Mtagwa.
Mtagwa is breathing heavily.
preston showing good head movement there, avoiding the strikes from Mtagwa.
Mtagwa swings away but doesn't land with a series of punches.
preston seems to have recovered his senses.
Mtagwa misses with a jab, cross combination.
preston shoots in for a takedown. "Ole!" shouts Mtagwa as he jumps to the side.
preston shoots for a takedown but Mtagwa saw that one coming a mile off and avoided it easily.
That's two minutes gone in the round.
Mtagwa throws a hook but preston avoids it easily.
preston takes a jab right on the nose. That must have hurt but he shrugs his shoulders and looks to return the favor.
Horrible takedown by preston or perhaps it was just good defense by Mtagwa which made him look bad.
Lee Mtagwa has stuffed three takedown attempts in the round now. That's going to take a lot out of sam preston.
Nice takedown defense from Mtagwa. No joy for preston on that attempt.
Mtagwa jabs away that one connects to the head of his opponent.
Mtagwa misses with a two punch combination.
Some wild striking there from Mtagwa.
preston shoots in with a takedown attempt and he has Mtagwa pinned against the cage. Mtagwa gets the underhooks and manages to circle away.
preston shoots in but Mtagwa avoids the takedown attempt easily.
Mtagwa comes forward and lands a shot to the body, then darts back out of range.
That's three minutes gone in the round.
Mtagwa misses with a hook.
Mtagwa misses with a wild combination.
Mtagwa looks to score with a combo but nothing lands.
preston shoots in but no luck this time.
Mtagwa rushes forward with a series of wild hooks but preston moves out of range and avoids them all easily.
preston slips under a jab.
Mtagwa throws a right and a left that preston avoids nicely.
Mtagwa throws out a token jab with nothing on it.
Mtagwa lands a big uppercut and preston crumbles to the floor! The ref thinks about stopping the fight but preston looks OK.
Mtagwa wants to stand but preston has hold of a leg and an arm, so he's trapped for now.
Mtagwa trying desperately to get back to his feet here but he's not having any joy at all. He's going to tire himself out if he's not careful.
preston is looking to regain full guard. Not this time though.
That's four minutes gone in the round.
Mtagwa tries to stand but can't do so whilst preston controls his leg.
preston makes his way to full guard. A much better position for preston.
preston throwing some rather feeble looking strikes off his back.
Neither fighter is doing enough for the referee's liking and he's decided to stand them back up.
Mtagwa throws a right and a left that preston avoids nicely.
And that�s the end of the round � the fighters go back to their corners.
Lee Mtagwa dominated that round.
The cut man is working on sam preston's cut.
That's time! Back to the action!
Mtagwa will need to tighten up his combinations if he doesn't want to gas himself out, swinging at thin air.
A left and a right from Mtagwa both land. Nice combination.
Mtagwa misses with a jab, cross combination.
Mtagwa throws out a token jab with nothing on it.
Mtagwa lands with a big left! preston is wobbled badly! Mtagwa comes in with a flurry of punches and drops preston to the floor. The ref jumps in to save him from unneccessary punishment.
Ladies and gentlemen, after 0:24 of round 2, we have a winner by way of TKO (Punches). Lee Mtagwa!
Lee Mtagwa is the new light heavyweight champion!
|
|
|
|
|
|
|
|
|
|
|
|
|
|
|
|
|
|
|
|
|
|
|
| S |
C
A |
G |
S |
C
B |
G |
|
S |
C |
G |
|
energy
A | B |
|
hype
A | B |
|
pop
A | B |
|
mgr
A | B |
|
FIGHT
RATING
100% |
|
|
|
|
|
|
|
|
|
|
