 |
XFC: 1 PBP Commentary |
Undercard bout
|
|
|
|
Undercard bout
|
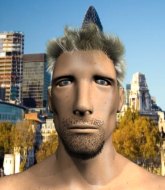
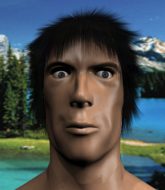
Coming up we have a bantamweight MMA rules bout between Chance Walters (ranked 0 p4p, 0 weight class) and Jamie Greywar (ranked 0 p4p, 0 weight class). Both fighters will be looking to make this an exciting fight for the fans, I'm sure!
 |
|
 |
| 170 cm
18
137 lbs
2 - 4 - 0 |
|
150 cm
18
130 lbs
0 - 0 - 0 |
BJJ Blue Belt
Counter striker
Good chin |
|
Good wrestler
Basic striking
Experienced |
|
| |
|
Ladies and gentlemen. This fight is 3 rounds, in the bantamweight division.
Introducing the fighter to my left, fighting out of the red corner.
With a record of
2 - 4 - 0, fighting out of Sydney, Chance Walters!
And introducing the fighter to my right, fighting out of the blue corner.
With a record of
0 - 0 - 0, fighting out of Sydney, Jamie Greywar!
The judges for this bout are Hugh Johnson, Summer Carpenter and Skip Squint.

The bell rings for round one and we are underway!

Greywar shoots in for a takedown! He's got it and he's managed to land in full mount! That's better than Greywar was expecting from the takedown attempt, I'm sure!
Greywar is looking to take Walters's back but instead Walters gets back to half guard. Nice work.
Walters works his way to full guard. Good work.
Greywar trying to pass the guard but can't manage it just yet.
Greywar trying to pass the guard. He's being very persistent here but Walters manages to land a sweep and now he's on top!
Greywar looking to hit a scissor sweep but Walters is one step ahead there.

Greywar looking for submissions from the bottom here. Moving his hips around, possibly looking for an armbar.
Walters won't allow Greywar to sweep him here.

That's one minute gone in the round.
Greywar keeping moving, preventing Walters from controlling successfully.
Walters is really struggling to control Greywar but he's trying to hold on to the position.

Walters stands up and waves to Greywar to follow him.
Greywar looking to shoot here. He's gone for it and he's landed a takedown into mount! Oh, that's bad for Walters!
Walters is working to get back to half guard.
Walters tries to hold on but Greywar postures up.
Walters is looking to improve his position but Greywar isn't that keen on the idea.

That's two minutes gone in the round.
Greywar throws some wild stikes that Walters manages to avoid easily.
Walters is squirming around, avoiding Greywar's attempts to control the action.
Greywar throws an elbow from mount that misses. Lucky escape for Walters because Greywar loaded up on that one.
Walters is writhing around trying to get back to his feet.
Greywar tries to control but Walters wriggling away.
Greywar might have to switch it up a bit here because his efforts to control Walters kaven't been going to plan, at least at the current moment in time.
Greywar really doesn't want to stay on the ground with Walters. If he can't get it back to his feet, it's only a matter of time before he'll be tapping out.
Greywar looks gassed!
Walters holding onto his opponent's waist for dear life, as Greywar tries to land some strikes to get him to release his grip.
Walters keeping his composure momentarily, calmly looking to get back to half guard.

That's three minutes gone in the round.
Greywar wants to control the action but instead Walters gets a body lock and reverses into Greywar's guard! Nice work!
Greywar is working actively off his back, looking to secure an arm or perhaps work for a triangle.
Greywar should think about turning a few of those tyres round his middle into muscle if he wants people to take him seriously as an athlete.

Neither fighter is doing enough for the referee's liking and he's decided to stand them back up.
Walters doesn't manage to clinch there - Greywar circles away.
Greywar looks for a takedown here. Will he get it? Walters is fending him off so far but Greywar persists. Nope, Walters circles away and we're back to standing.
Walters changes levels and looks for a double leg takedown. Greywar tries to avoid it but Walters manages to keep hold of a leg and drag Greywar to the ground. Greywar escapes though and pops straight back up to his feet.
Greywar fakes an overhand right and shoots for a takedown. Walters sprawls well initially but Greywar persists and gets the takedown into half guard.
Walters is looking to sinch up a gullotine here but Greywar pulls his head out easily.
Greywar is figuring out what he wants to do next.

That's four minutes gone in the round.
Walters wants to control but Greywar is keeping busy.
Greywar wants to pass the guard but Walters is defending well.
The fighters are pressed up against the cage, both looking to find a bit of space to work.
Greywar is persisting with the attempt to improve his position.
Greywar is looking for an arm triangle, whilst trying to pass to side control. Walters doesn't seem that keen to cooperate though. No luck this time Greywar.
Well, the referee has seen enough. Neither fighter is active enough on the ground so he's stood them back up.
Greywar drives through with a takedown into guard.
Greywar postures up.
Greywar works over Walters with some ground and pound from guard.
And thats the end of the round the fighters go back to their corners.
Jamie Greywar dominated that round.
Well, the break between rounds is over. Let's get back to the scrappin!

Greywar shoots in and bounces Walters off the cage to secure the takedown into guard.
Walters manages to land a sweep and now he's in mount on top!
Greywar is writhing around trying to get back to his feet.
Walters swings around for an armbar but it's a sloppy attempt and Greywar is now in Walters's guard. A big mistake from Walters there, giving up the dominant position!
Walters wants to sweep but no luck.
Walters is working from a closed guard but he's struggling to control his opponent.
Greywar stands and steps away. Walters gets to his feet too and we're back to the striking game.
Walters avoids the clinch attempt nicely.
Both fighters are absolutely exhausted here.
Greywar shoots in for a takedown and gets it. Oh and he's advanced to full mount straight away.
That's one minute gone in the round.
Greywar working to secure an arm triangle but it's not happening for him just yet.
Greywar content just to control the position here.
Let's hope that Greywar has the urge to step up the pace any second now because for the last 15 or 20 seconds he's just been holding on tight.
Greywar wants to control the pace but Walters is squirming around nicely.
Walters regains half guard.
Walters wants to control but Greywar is keeping busy and won't allow it.
Greywar controlling the pace.
That's two minutes gone in the round.
The crowd are showing their displeasure at the lack of action as loud boos ring out around the arena.
Greywar wants to work for an arm triangle but Walters is really keeping half guard well and defending the submission attempt.
Greywar stalling.
Greywar is looking for a kimura but he's never going to get it from there.
Greywar sitting in half guard, looking to land shots. Walters defending well though.
Greywar perhaps working for something from half guard, or maybe not. It looks like he's just sitting there.
Greywar is looking for a kimura. It's going to be difficult to finish that from half guard though and Walters defends it well.
Greywar prevents Walters from improving his position.
The ref warns both fighters not to hold the cage as they work up against the meshing.
Greywar is pressing down on Walters's thigh, looking to free his foot. Walters is holding on for now.
That's three minutes gone in the round.
Neither fighter is doing enough for the referee's liking and he's decided to stand them back up.
Walters tries for a takedown but Greywar circles away easily
and Greywar counters with a shoot takedown. Walters fights it but they end up in guard.
Walters keeping full guard, as Greywar tries to pass.
Greywar preventing the sweep.
Walters is working from a closed guard but he's struggling to control his opponent.
Walters bucks up whilst keeping hold of a body lock, managing to reverse the position. Now he's in top in Greywar's guard.
Walters trying to control but Greywar is working from the bottom.
Greywar not looking particularly offensive just at the moment.
Walters passes Greywar's right leg, so he's now in half guard.
Walters is tying to control. Greywar wants to improve his position but can't escape this time.
Greywar is in trouble now - Walters has advanced to mount!
That's four minutes gone in the round.
Walters landing shots from mount.
Greywar holds on, trying desperately to control.
Greywar tries to lock up and control but Walters gives him a forearm to the face and pushes him away.
Walters tries to control but Greywar wriggling away.
Walters manages to capitalize on a mistake by Greywar to take his back!
Walters doesn't have the hooks in and Greywar manages to turn into his guard.
Greywar wants to control from the top but Walters keeps moving.
Jamie Greywar has got the better of the ground game so far.
Walters is active off his back here, looking for submissions.
Greywar must be cautious of submissions here, given that his opponent has the superior Jiu Jitsu.
Greywar stands up and waves to Walters to follow him.
And thats the end of the round the fighters go back to their corners.
Jamie Greywar showed his class in that round. I'd imagine he'll take it on all the scorecards.
That's the end of the round. The referee orders the cornermen out of the cage so we can get back down to business. Let's hear some noise people - this is the final round!

Greywar shoots in from a long way out. He's driving through with the takedown attempt and he eventually gets it, landing in Walters's guard.
Greywar postures up.
Greywar throwing strikes from guard but Walters blocks nicely.
Greywar showing good wrestling skills to control the position.
Walters is looking for a triangle but Greywar pushes his legs off easily.
Greywar drops back for a leg! It's a sloppy attempt though and Greywar jumps back into guard quickly, to retain the dominant position.
Greywar wants to pass the guard but Walters is keeping the position.
Greywar postures up as if he's going to throw some strikes but drops back for an ankle! Walters is in big trouble! He looks ready to tap! But no, he's escaped and dives on top of Greywar, into his guard.
Both fighters are breathing heavily.
That's one minute gone in the round.
Walters passes Greywar's left leg - he's now in half guard.
Greywar manages to get to full guard.
Walters slips nicely into half guard.
Walters wants to pass the guard but Greywar is defending well.
Greywar tries to roll over but Walters keeps him under control.
Walters sitting in half guard, looking to land shots. Greywar defending well though.
That's two minutes gone in the round.
The crowd are hurling abuse towards the fighters... You can hardly blame them though because there isn't a lot going on in the fight.
Greywar is looking to regain full guard. Not this time though.
Greywar manages to get to full guard.
Greywar looking for a guillotine here but Walters defends easily.
Walters postures up to throw the ground and pound strikes but they don't connect.
Walters stands and throws Greywar's legs to the side, diving into side control.
Walters wants to control but Greywar is keeping him busy.
We get told so often about how wrestlers don't like to be on their backs. Let's see if Greywar can do anything to dispel that myth.
Greywar tries to bench press Walters off him but Walters keeps the position.
Walters working hard here to secure a kimura but he's not really in the right position for it.
That's three minutes gone in the round.
Greywar can't do much from the bottom here.
Greywar is looking to regain half guard here but Walters keeps moving and retains side control.
Greywar is trying to control Walters's posture but Walters avoids it.
Walters trying to control the position but Greywar is working away.
Greywar is looking to regain half guard here but Walters keeps moving and retains side control.
It looks like we're going to have a standup here. Neither fight is doing enough on the ground.
Greywar closes the distance but Walters moves to the side
and Walters counters with a big head kick but Greywar shrugs it off.
Walters fails with the takedown
and Greywar counters with a nice single leg takedown and he's in Walters's guard now.
Walters will need to keep those long limbs tucked in whilst he's on the ground, to prevent any submissions.
That's four minutes gone in the round.
Greywar looking to pass the guard.
Walters being controlled here, momentarily.
Greywar looking to pass the guard.
Walters working for a triangle but Greywar defends it easily.
Walters lands a beautiful switch and he's in full mount! That could spell trouble for Greywar!
Chance Walters has stepped it up - he knows he needs a finish here!
Walters throwing sloppy strikes, which aren't doing any damage.
And that's the end of the fight!
I would just about give that final round to Jamie Greywar.
I've got Greywar winning every round here. Surely the decision will go his way and he'll pick up a well deserved decision victory. Over to the ring announcer for the scorecards.
Ladies and gentlemen, after 3 rounds of action, we go to the scorecards for a decision.
Judge Hugh Johnson scores the fight 27:30
Judge Summer Carpenter scores the fight 27:30
Judge Skip Squint scores the fight 27:30
In favor of your winner, by unanimous decision... Jamie Greywar!
|
|
|
|
|
|
|
|
|
|
|
|
|
|
|
|
|
|
|
|
|
|
|
| S |
C
A |
G |
S |
C
B |
G |
|
S |
C |
G |
|
energy
A | B |
|
hype
A | B |
|
pop
A | B |
|
mgr
A | B |
|
FIGHT
RATING
53% |
|
|
|
|
|
|
|
Undercard bout
|
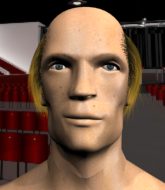
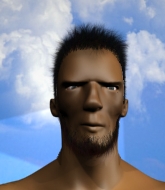
Coming up we have a light heavyweight MMA rules bout between Dante Cross (ranked 0 p4p, 0 weight class) and Mike Oxbigg (ranked 0 p4p, 0 weight class). Mike Oxbigg will no doubt be looking to use his reach advantage to good effect.
 |
|
 |
| 175 cm
22
205 lbs
1 - 0 - 0 |
|
188 cm
18
205 lbs
2 - 3 - 0 |
BJJ White Belt
Solid Muay Thai
Good in bed |
|
BJJ Blue Belt
Brawler
Determined |
|
| |
|
Ladies and gentlemen. This fight is 3 rounds, in the light heavyweight division.
Introducing the fighter to my left, fighting out of the red corner.
With a record of
1 - 0 - 0, fighting out of Sydney, Dante Cross!
And introducing the fighter to my right, fighting out of the blue corner.
With a record of
2 - 3 - 0, fighting out of Sydney, Mike Oxbigg!
The judges for this bout are Eliza Hachem, Bruno Hogan and Hugh Johnson.
The bell rings for round one and we are underway!
Oxbigg shoots in for a takedown but doesn't get it.
Cross looking for a takedown here - he's got it.
Cross wants to stand but Oxbigg has a closed guard, so he can't escape.
Oxbigg not looking particularly offensive just at the moment.
Cross wants to stand but Oxbigg has a closed guard, so he can't escape.
Oxbigg wants to stand and escape but Cross is having none of it.
Oxbigg is working the butterfly guard. He manages to land a nice scissor sweep and is now in half guard on the top. Nice move.
Cross is trying to stand.
Cross kicks off Oxbigg and gets to his feet.

Cross drives through and clinches with Oxbigg against the cage.
Cross has hold of a leg and is looking for a trip takedown. Oxbigg avoids it nicely though and we remain in the clinch.
Oxbigg tries to pull guard but Cross won't allow it.
Oxbigg wants to break the clinch but can't.
Oxbigg gets double underhooks to prevent a takedown attempt from Cross.
That's one minute gone in the round.

Cross breaks the clinch and we return to the middle of the mat.
Cross tries for a takedown but Oxbigg circles away easily
and Oxbigg counters into the clinch. Nicely done.
That's three failed takedown attempts in the round for Dante Cross. That's going to take a lot out of him.
Cross tries to pull guard but Oxbigg holds him up against the cage and eventually Cross drops back down to his feet.
Oxbigg has Cross pressed up against the cage and is working for takedown. Cross manages to improve position though and keeps the fight standing.
Oxbigg looks gassed!
Cross tries to score a body lock takedown but Oxbigg shows good agility there to stay on his feet.
Oxbigg is trying to break the clinch but Cross has him pressed against the cage.
Cross manages to break the clinch.
Oxbigg shoots in but Cross avoids the takedown attempt easily.
Cross tries a head kick but it misses.
Cross throws a head kick that misses
and Oxbigg holds on and brings the fighters into a clinch.
Cross drops down for a takedown but doesn't get it.
That's two minutes gone in the round.
Oxbigg manages to pull guard.
Oxbigg wants to sweep here but Cross controlling him for the moment.
The fighters are pressed up against the cage, both looking to find a bit of space to work.
Cross wanted to stand there but Oxbigg had control of the position.
Cross has to be careful here, sitting in the guard of a superior BJJ player.
Oxbigg lands a beautiful switch and he's in full mount! That could spell trouble for Cross!
The ref warns both fighters not to hold the cage as they work up against the meshing.
Cross is trying to stand.
Oxbigg takes a little breather and maintains the position. The referee will be looking for him to stay active from such a dominant position though.
That's three minutes gone in the round.
Oxbigg breaks from Cross's wrist control and lands an elbow.
Cross squirming around on the bottom, looking to escape.
Cross on his back here. We all know that wrestlers don't like being on their back so let's see if Cross tries to get out of the position.
Both fighters really going for it on the ground here!
Oxbigg controlling the position easily from mount.
Cross is trying to get to the cage to help him get back to his feet.
That's four minutes gone in the round.
Neither fighter has done anything of merit for a good minute or two here and the crowd are not happy about it.
Cross trying desperately to get back to his feet here but he's not having any joy at all. He's going to tire himself out if he's not careful.
Cross might be looking to lock onto one of his opponent's long limbs for a submission, whilst we're on the ground.
Oxbigg is in full mount, looking to secure a guillotine but Cross is surviving well by controlling Oxbigg's body position as best he can.
Cross is trying to get back to his feet but can't.
Oxbigg moves to the back.
Cross has the hand control, trying to stop the rear naked choke.
And thats the end of the round the fighters go back to their corners.
A close round but Mike Oxbigg will probably get the nod.
That's time! Back to the action!
Cross decides to change it up a bit and drives through with a nice takedown into half guard.
Cross wants to stand but Oxbigg has hold of a leg and an arm, so he's trapped for now.
Cross stands up from half guard... He's had enough of that ground malarky for the time being.
Cross lands a jab followed by a nice looking cross.

Oxbigg is rocked!

It looks like Mike Oxbigg has been cut.
No joy there for Cross, who threw a few shots but didn't land.
Cross throws a head kick that misses
and Oxbigg counters with a straight right hand.
Cross lands a head kick!
Oxbigg is still on wobbly legs! Can Cross finish him?
Wooooo! Give it up for these two warriors! They are putting on a show!
Cross closes the distance and clinches.
Oxbigg wants to break the clinch but can't.
Cross drops to a knee looking for a takedown but Oxbigg gets the underhooks and prevents it.
Oxbigg seems to have recovered his senses.
Oxbigg is trying to work out of this bad position, with his back against the cage.
Oxbigg is breathing heavily.
Cross escapes the clinch and we're back to striking.
Dante Cross is looking to throw some combinations by the looks of things.
That's one minute gone in the round.
A head kick misses from Cross.
Cross fakes with an overhand right and moves in to clinch with Oxbigg, pushing him back against the cage.
Knees in the clinch landing for Cross.
Cross breaks from the clinch.
Dante Cross seems to be the more aggressive standup fighter in this bout.
Cross throws a sloppy head kick and Oxbigg moves out of range easily.
Cross is looking to clinch.
Cross looks to clinch
and Oxbigg holds on and brings the fighters into a clinch.
Oxbigg looking for a takedown.
Oxbigg jumps guard but Cross stands there with Oxbigg around his waist. Oxbigg gives up and drops back to his feet. We remain in the clinch.
Cross tries for a takedown but Oxbigg manages to get underhooks.
Oxbigg tries to break the clinch but Cross is controlling the position.
Oxbigg tries for a takedown. No joy.
Dante Cross has stuffed three takedown attempts in the round now. That's going to take a lot out of Mike Oxbigg.
Cross pulls Oxbigg into guard.
That's two minutes gone in the round.
Oxbigg showing good wrestling skills to control the position.
Cross wants to stand and escape but Oxbigg is having none of it.
Oxbigg works a leg free and moves into half guard.
Cross kicks off Oxbigg and gets to his feet.
Cross throws a sloppy head kick
and Oxbigg counters with a shoot takedown. Cross fights it but they end up in guard.
Cross manages to escape and get back to his feet.
Wooooo! Give it up for these two warriors! They are putting on a show!
Cross throws a sloppy head kick and Oxbigg moves out of range easily.
Cross shoots in for a takedown but Oxbigg shows good takedown defense.
Oxbigg fails with a takedown attempt from distance.
Cross closes the distance but Oxbigg moves to the side
and Oxbigg counters with a shoot takedown. Cross fights it but they end up in guard.
Cross wants to stand but Oxbigg is controlling the position.
Oxbigg is just sitting in guard, looking to avoid any submissions.
Cross wants to get back to his feet but Oxbigg is in a dominant position and won't allow it.
Cross has butterfly guard. He's looking to stand up here. He pushes Oxbigg off him and springs to his feet nicely. The crowd applauds.
That's three minutes gone in the round.
Cross swings away but doesn't land with a series of punches.
A head kick by Cross misses
and Oxbigg counters into the clinch. Nicely done.
Cross gets double underhooks to prevent a takedown attempt from Oxbigg.
Cross trying to land knees to the body.
Cross escapes the clinch and we're back to striking.
Oxbigg has a takedown stuffed.
Cross tries a head kick but it misses.
Cross clinches up against the cage.
Cross is trying to trip Oxbigg. He has hold of a leg but Oxbigg is hopping around, keeping his balance for the moment. Cross persists though and gets the takedown into guard.
Cross wanted to stand there but Oxbigg had control of the position.
That's four minutes gone in the round.
Cross gets to his feet and steps away from his opponent.
Cross throws a head kick that misses
and Oxbigg moves into the clinch.
Cross escapes the clinch and we're back to striking.
Cross tries a switch kick but it misses it's target.
Cross moves into range and clinches up with Oxbigg.
Cross trying to land knees to the body.
Oxbigg throws a head punch that misses.
Oxbigg holding his opponent close, against the cage.
Oxbigg wants to strike at distance but he can't break free of the clinch.
Cross pulls guard.
As the round comes to an end the crowd are showing their appreciation for a great round of action.
Oxbigg won't allow Cross to get back to his feet.
Cross is looking to stand back up... there's a bit of a scramble and Oxbigg dives into side control.
Cross wants to get back to his feet.
And thats the end of the round the fighters go back to their corners.
Dante Cross dominated that second round.
The cut man is working on Mike Oxbigg's cut.
Well, the break between rounds is over. Let's get back to the scrappin! This is the final round!
Cross circles away from the clinch attempt.
Oooh a lovely combination from Cross sends Oxbigg down but not out. Cross dives into side control looking to finish.
Cross stands up and beckons Oxbigg to his feet.
Cross darts in and clinches Oxbigg up against the cage.
Cross is working for takedown but Oxbigg is calmly controlling the position for now.
Cross has managed to pull guard. Let's see whether he can work an aggressive guard. It will also be interesting to see what tactics Oxbigg uses from the top position.
Cross keeping moving, preventing Oxbigg from controlling successfully.
Cross is looking to get back to his feet but can't, whilst Oxbigg is controlling him.
Cross pushes Oxbigg off and gets back to his feet.
The crowd cheering loudly, showing their appreciation for the quality fight we're seeing here.
Ohhhhhhhhhh, brutal head kick from Cross! This one is all over!
Ladies and gentlemen, after 0:48 of round 3, we have a winner by way of KO (Head Kick). Dante Cross!
|
|
|
|
|
|
|
|
|
|
|
|
|
|
|
|
|
|
|
|
|
|
|
| S |
C
A |
G |
S |
C
B |
G |
|
S |
C |
G |
|
energy
A | B |
|
hype
A | B |
|
pop
A | B |
|
mgr
A | B |
|
FIGHT
RATING
100% |
|
|
|
|
|
|
|
Undercard bout
|
Coming up we have a heavyweight MMA rules bout between apoc twokayfour (ranked 0 p4p, 0 weight class) and Massif Dong (ranked 0 p4p, 0 weight class). Massif Dong has the eye of the tiger tonight.
 |
|
 |
| 188 cm
22
265 lbs
2 - 2 - 0 |
|
198 cm
22
270 lbs
3 - 2 - 0 |
BJJ White Belt
Excellent boxer
Granite chin |
|
BJJ White Belt
Excellent boxer
Solid chin |
|
| |
|
Ladies and gentlemen. This fight is 3 rounds, in the heavyweight division.
Introducing the fighter to my left, fighting out of the red corner.
With a record of
2 - 2 - 0, fighting out of Sydney, apoc twokayfour!
And introducing the fighter to my right, fighting out of the blue corner.
With a record of
3 - 2 - 0, fighting out of Sydney, Massif Dong!
The judges for this bout are Donatello Bradman, Skip Squint and Steve Erwin.
The bell rings for round one and we are underway!
twokayfour swings away but doesn't land with a series of punches.
Dong throws a combination but it was largely blocked by twokayfour.
twokayfour avoids a punch combination nicely.
Dong misses with a series of wild punches.
Dong missing with a left hand there. twokayfour was out of range so wasted energy throwing that one.
Dong lands a hook that stumbles twokayfour back into the cage. Dong follows up with a straight and another hook that land right on the button, dropping twokayfour to the canvas! Dong pounces and lands several unanswered shots - twokayfour has had enough and taps out! This one is all over!
Ladies and gentlemen, after 0:18 of round 1, we have a winner by way of Submission (Strikes). Massif Dong!
|
|
|
|
|
|
|
|
|
|
|
|
|
|
|
|
|
|
|
|
|
|
|
| S |
C
A |
G |
S |
C
B |
G |
|
S |
C |
G |
|
energy
A | B |
|
hype
A | B |
|
pop
A | B |
|
mgr
A | B |
|
FIGHT
RATING
36% |
|
|
|
|
|
|
|
Co-main event
|
Coming up we have a heavyweight MMA rules bout between Jim Beam (ranked 0 p4p, 0 weight class) and Fred Ramon (ranked 0 p4p, 0 weight class). Both fighters look fresh as a daisy as they make their way towards the cage.
 |
|
 |
| 194 cm
22
245 lbs
4 - 1 - 0 |
|
196 cm
22
245 lbs
4 - 2 - 0 |
BJJ Blue Belt
Counter striker
Experienced |
|
BJJ Blue Belt
Brawler
Solid chin |
|
| |
|
Ladies and gentlemen. This fight is 3 rounds, in the heavyweight division.
Introducing the fighter to my left, fighting out of the red corner.
With a record of
4 - 1 - 0, fighting out of Sydney, Jim Beam!
And introducing the fighter to my right, fighting out of the blue corner.
With a record of
4 - 2 - 0, fighting out of Sydney, Fred Ramon!
The judges for this bout are Summer Carpenter, Hugh Johnson and Bruno Hogan.
The bell rings for round one and we are underway!
Ramon misses with a looping left.
Ramon misses with a half-hearted attempt at a head kick.
Beam fails miserably with a takedown attempt.
Ramon is looking to clinch.
Ramon tries to clinch there but Beam circles away.
Fred Ramon seems to be the more aggressive standup fighter in this bout.
Ramon lands a really nice looking cross but Beam seems unphased.
It looks like Jim Beam has been cut.
Ramon misses with a takedown
and Beam counters with a hugh head kick that removes Ramon from consiousness! A brutal head kick knockout!
Ladies and gentlemen, after 0:25 of round 1, we have a winner by way of KO (Head Kick). Jim Beam!
|
|
|
|
|
|
|
|
|
|
|
|
|
|
|
|
|
|
|
|
|
|
|
| S |
C
A |
G |
S |
C
B |
G |
|
S |
C |
G |
|
energy
A | B |
|
hype
A | B |
|
pop
A | B |
|
mgr
A | B |
|
FIGHT
RATING
60% |
|
|
|
|
|
|
|
Main event
|
Coming up we have a middleweight MMA rules bout between Hanzov Wright (ranked 0 p4p, 0 weight class) and Kane Wade (ranked 0 p4p, 0 weight class). Wright comes to the cage accompanied by The Final Countdown by Europe. The crowd seem to be enjoying Wade's choice of entrance music: System of a down - This cocaine make me feel like I'm on this song. Both these guys have really solid chins. Will we see a standup war or will they both decide that a knockout is unlikely and try to win the fight elsewhere?
 |
|
 |
| 178 cm
21
193 lbs
5 - 0 - 0 |
|
186 cm
18
195 lbs
4 - 2 - 0 |
BJJ Blue Belt
Brawler
Good chin |
|
BJJ Blue Belt
Brawler
Solid chin |
|
| |
|
Ladies and gentlemen. This fight is 5 rounds, for the middleweight championship of the world!
Introducing the champion to my left, fighting out of the red corner.
With a record of
5 - 0 - 0, fighting out of Sydney, Hanzov Wright!
And introducing the challenger to my right, fighting out of the blue corner.
With a record of
4 - 2 - 0, fighting out of Sydney, Kane Wade!
The judges for this bout are Skip Squint, Donatello Bradman and Hugh Johnson.
The bell rings for round one and we are underway!
Wade clobbers Wright with an overhand right that has the crowd gasping. That made a horrendous noise.
Wright fakes an overhand right and shoots for a takedown. Wade sprawls well initially but Wright persists and gets the takedown into half guard.
Wright tries to pass the half guard into mount. Wade knows what he's doing though and prevents the attempt.
Wright is looking for a kimura but he's never going to get it from there.
Wright drops an elbow to the side of Wade's head.
Wright has freed up his trapped foot and advances to mount.
The ref warns both fighters not to hold the cage as they work up against the meshing.
Wade is squirming around, avoiding Wright's attempts to control the action.
Wright working to secure an arm triangle but it's not happening for him just yet.
Wright prevents Wade from getting the reversal.
Wade wants to hold on but Wright pushes him away.
That's one minute gone in the round.
Wade really trying hard to get back to half guard here.
Wade is squirming around, avoiding Wright's attempts to control the action.
Wade really trying hard to get back to half guard here.
Wright is in the full mount, landing strikes.
Wade is writhing around trying to get back to his feet.
Wade is trying to escape the mount.
Wade is not a happy chappy
he wants out of there.
Wright connects with a couple of good shots from mount.
Wright has been looking to land a fair amount of strikes on the ground. He might be looking to soften his opponent up in order to work for a submission.
Wright lands a big shot there that rocks Wade but he's holding on and managing to survive for now.
We get told so often about how wrestlers don't like to be on their backs. Let's see if Wade can do anything to dispel that myth.
Wright sitting in mount, just looking to control for the moment.
Wright tries to control but Wade wriggling away.
That's two minutes gone in the round.
Wade keeping his composure momentarily, calmly looking to get back to half guard.
Wade tries to hold on but Wright postures up.
Wright landing strikes, looking to finish!
Wright trying to control but Wade is having none of it.
Wade looks out of his depth in this position - he's holding on tight.
Wright wants to control the pace but Wade is squirming around nicely.
Wright lands with some strikes.
Wade is looking to get to half guard.
That's three minutes gone in the round.
Wright with some aggressive grappling here. He's looking for submissions here, rather than waiting for the opportunity to counter.
Wright is breathing heavily.
Wright lands with some strikes.
Wade working to try and regain half guard.
Wright in mount throwing good strikes here, bouncing his opponent's head off the canvas.
Wright prevents Wade from getting the reversal.
Wright in mount throwing good strikes here, bouncing his opponent's head off the canvas.
Wright avoids the attempt from Wade to control.
Both fighters really going for it on the ground here!
Wright landing shots from mount.
Wade regains half guard.
Wade wants to get back to his feet.
That's four minutes gone in the round.
Wade slips a foot under and gets full guard. Nice work.
Wade is working from a closed guard but he's struggling to control his opponent.
Wade throws a couple of weedy looking strikes off his back.
Wright stands up and looks to throw the legs aside to pass to side control. Wade swivels though and keeps the full guard.
Wade tries to land a sweep but no joy.
The referee decides to stand the fighters back up.
Wright throws a push kick but Wade slaps the foot to one side.
Wright shoots in but no luck this time.
Wade tries to clinch there but Wright circles away.
Wade fails in his attempt to clinch.
Wade scores with a jab to the jaw of his opponent.
Wright circles away from the clinch attempt.
Wade looking to shoot here. He's gone for it and he's landed a takedown into mount! Oh, that's bad for Wright!
The fighters are pressed up against the cage, both looking to find a bit of space to work.
Wade lands a big elbow.
And thats the end of the round the fighters go back to their corners.
A close round but Kane Wade will probably get the nod.
Well, the break between rounds is over. Let's get back to the scrappin!
Wade stuffs the takedown attempt from Wright. Wright gets slowly back to his feet.
Wade lands a beauty of a right hand that gets the crowd cheering.
Wright closes the distance and looks for a trip takedown... aaaand he's got it - Wright lands in his opponent's guard.
Wright stands up and looks to throw the legs aside to pass to side control. Wade swivels though and keeps the full guard.
Wade trying to control the position.
Wright looking to control the position here, rather than advance.
Wright passes Wade's right leg, so he's now in half guard.
That's one minute gone in the round.
Wright trying to control the action but Wade is working from the bottom.
Wade wants to improve his position but Wright is controlling well.
Wade is in trouble now - Wright has advanced to mount!
Wade keeping his composure momentarily, calmly looking to get back to half guard.
Wade is breathing heavily.
Wade is persisting with the attempt to improve his position.
Wright working for a submission here. He's tucked his head under his opponent's arm, looking for an arm triangle. He's hopped off into side control, looking to tighten the submission... is it going to work? He's given up a good position looking for it. Wade looks OK. Oh, I spoke too soon, he's out! That must have been tighter than I thought! Excellent work there by Wright! Submission of the night perhaps?
Ladies and gentlemen, after 2:05 of round 2, we have a winner by way of Submission (Arm Triangle). Hanzov Wright!
Hanzov Wright retains his middleweight title!
|
|
|
|
|
|
|
|
|
|
|
|
|
|
|
|
|
|
|
|
|
|
|
| S |
C
A |
G |
S |
C
B |
G |
|
S |
C |
G |
|
energy
A | B |
|
hype
A | B |
|
pop
A | B |
|
mgr
A | B |
|
FIGHT
RATING
61% |
|
|
|
|
|
|
|
|
|
|

