 |
50: Sunset PBP Commentary |
Undercard bout
|
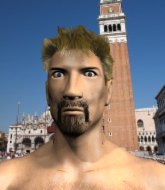
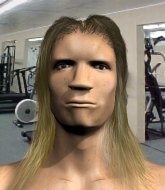
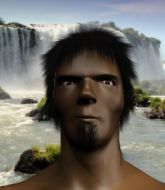
Coming up we have a middleweight MMA rules bout between Suzuki Pv (ranked 0 p4p, 0 weight class) and Tron Jones (ranked 0 p4p, 0 weight class). Jones has chosen Angry Tronny as his entrance music. Both fighters look fresh as a daisy as they make their way towards the ring.
 |
|
 |
| 175 cm
23
185 lbs
5 - 3 - 0 |
|
180 cm
23
194 lbs
9 - 5 - 0 |
Good takedowns
Brawler
Experienced |
|
BJJ Brown Belt
Counter striker
Determined |
|
| |
|
Ladies and gentlemen. This fight is 2 rounds, in the middleweight division.
Introducing the fighter to my left, fighting out of the red corner.
With a record of
5 - 3 - 0, fighting out of Tokyo, Suzuki Pv!
And introducing the fighter to my right, fighting out of the blue corner.
With a record of
9 - 5 - 0, fighting out of Tokyo, Tron Jones!
The judges for this bout are Sosuke Kotani, Yasuomi Hirokawa and Hirohito Nitta.

The bell rings for round one and we are underway!
Pv misses the shot to the body.
A combination from Pv does no damage.
Jones pulls out of a head kick attempt.
Pv fails in his attempt to clinch.

Pv darts in and lands a nice takedown into half guard.
Pv working Jones over with strikes.
The fighters are tangled up in the ropes here. We might need a restart if the fighters can't break free themselves.
Pv is keeping good posture, landing some ground and pound.
Pv trying to control from half guard but Jones is working away.
Jones has no desire to be mounted, so is trying to control. Pv is working away from the top position though.
Pv trying to control the pace.

Jones is looking to sinch up a gullotine here but Pv pulls his head out easily.
Pv trying to control the action but Jones is working from the bottom.

That's one minute gone in the round.
Pv is going to have to think about doing something other than just controlling because Jones is managing to avoid having the position dictated to him.

The referee has ruled that neither fighter is active enough on the ground and has stood them back up.
Jones throws a quick head kick that skims the top of Pv's head.
Nice defenses there by Jones.
Jones bobs and weaves well there to avoid the strikes.
Suzuki Pv seems to be the more aggressive standup fighter in this bout.
Pv ducks down and throws a hook to the body.
Jones moves forwards but Pv connects with a nice, crisp jab.
Jones looking to throw a kick but he's pulled out of it.
Jones tries to clinch up but Pv circles away and keeps his distance.
Some wild striking there from Pv.
Pv with a body punch. A glancing blow.
Jones looks gassed!
Pv throws out a loose jab but Jones uses good head movement to avoid it.
Pv thows a left - swing and a miss!
Jones staying out of range there.

That's two minutes gone in the round.
Pv thuds a left hand into Jones's body.
Jones staying out of range there.
Pv throws out a token jab with nothing on it.
Jones takes a shot to the eye socket. That's gotta hurt.

It looks like Tron Jones has been cut.
The fans in attendance giving it up for the two fighters, who have really let it all hang out in the last minute or so!
Pv lands with a big right hook that stumbles Jones - he's out on his feet here! Pv follows up with another monster hook that separates Jones from consciousness! Jones falls, almost in slow motion to the canvas! Pv stands and admires his work as the crowd go wild.
Ladies and gentlemen, after 2:23 of round 1, we have a winner by way of KO (Punches). Suzuki Pv!
|
|
|
|
|
|
|
|
|
|
|
|
|
|
|
|
|
|
|
|
|
|
|
| S |
C
A |
G |
S |
C
B |
G |
|
S |
C |
G |
|
energy
A | B |
|
hype
A | B |
|
pop
A | B |
|
mgr
A | B |
|
FIGHT
RATING
61% |
|
|
|
|
|
|
|
Undercard bout
|
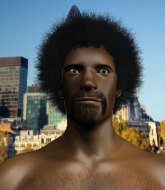
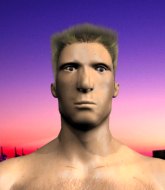
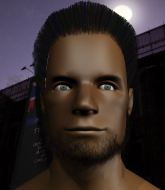
Coming up we have a middleweight MMA rules bout between Anthony Sylva (ranked 0 p4p, 0 weight class) and Akio Takada (ranked 0 p4p, 0 weight class). Takada comes into a darkened arena with his song building. Metallica - All Nightmare Long kicks in, the lights come on and the crowd goes wild! What a showman! Both fighters look fresh as a daisy as they make their way towards the ring.
 |
|
 |
| 182 cm
23
192 lbs
5 - 1 - 0 |
|
182 cm
22
192 lbs
4 - 1 - 0 |
BJJ Purple Belt
Counter striker
Experienced |
|
Good takedowns
Counter striker
Solid chin |
|
| |
|
Ladies and gentlemen. This fight is 2 rounds, in the middleweight division.
Introducing the fighter to my left, fighting out of the red corner.
With a record of
5 - 1 - 0, fighting out of Tokyo, Anthony Sylva!
And introducing the fighter to my right, fighting out of the blue corner.
With a record of
4 - 1 - 0, fighting out of Tokyo, Akio Takada!
The judges for this bout are Tatsuya Matsuyama, Yuuki Gou and Yukihiro Shimada.
The bell rings for round one and we are underway!
Sylva throws the left hand but Takada avoids the punch easily.
Takada shoots in for a takedown. "I don't think so" says Sylva as he avoids it easily.
Sylva throws a body punch but Takada moves out of range.
Sylva misses with a few strikes there.
Sylva throws the left hand but Takada avoids the punch easily.
Sylva looks to score with a jab to the body but Takada is just out of range.
We've had a slow start to the round here - hopefully the action picks up.
Takada takes an uppercut right on the button but keeps his composure.
Takada shoots for a double leg takedown but Sylva sprawls well. He's pushed Takada's face into the mat and manages to get back to his feet relatively easily.
Both fighters are looking to counter, which isn't making for the most exciting fight in the world.
That's one minute gone in the round.
Sylva swings for the body but Takada moves out of range.
Takada staying out of range there.
Nice sprawl there from Sylva as Takada shoots in.
Anthony Sylva has stuffed three takedown attempts in the round now. That's going to take a lot out of Akio Takada.
Sylva looks to land a right hand but Takada moved out of range.
Anthony Sylva seems to be the more aggressive standup fighter in this bout.
Sylva thows a body shot but no joy.
Takada fails to land the takedown.
That's two minutes gone in the round.
A lull in the action here being met with boos from the crowd.
Sylva tries to bum rush Takada with a series of wild strikes but Takada uses good footwork to avoid the assault.
Takada shoots in for a takedown. "Ole!" shouts Sylva as he jumps to the side.
Sylva fakes a head shot and lands one to the body.
Takada shoots in and drives through. Sylva sprawls well.

That's three minutes gone in the round.
Sylva throws an overhand right that lands on Takada's shoulder, as Takada tries to avoid the shot.
Takada shoots in looking for a takedown. Sylva tries to sprawl out of it but Takada keeps driving through. The fighters are pinned against the ropes. Sylva manages to get underhooks and after a bit of a struggle, circles away and we're back to standing.
Sylva misses with a body shot. Nice footwork from Takada.
Sylva misses with a hook. Takada ducked under it nicely.

That's four minutes gone in the round.
The crowd are showing their displeasure at the lack of action as loud boos ring out around the arena.
Takada changes levels and drives through with a really nice takedown into side control. Sylva looks really pissed at himself for not defending that better.
Sylva manages to work his way to half guard, despite Takada's best efforts.
Takada wants to pass to mount but Sylva is defending the position.
The fighters are tangled up in the ropes here. We might need a restart if the fighters can't break free themselves.
Sylva is looking to get back to full guard here but Takada has managed to pass to side control instead.
Takada has hold of Sylva's left arm, perhaps looking for a submission. The two fighters tussle over control of the isolated limb and Sylva manages to get his arm back to his side and away from danger.
Takada trying to control but Sylva is having none of it.
Sylva is desperately trying to improve his position but Takada has a good base and remains in mount.

That's five minutes gone in the round.
Sylva squirming around on the bottom, looking to escape.
Takada has hold of an arm here, looking to extend it. He's committed to the armbar attempt here! Will he get it?! Yes! Sylva is forced to tap!
Ladies and gentlemen, after 5:35 of round 1, we have a winner by way of Submission (Armbar). Akio Takada!
|
|
|
|
|
|
|
|
|
|
|
|
|
|
|
|
|
|
|
|
|
|
|
| S |
C
A |
G |
S |
C
B |
G |
|
S |
C |
G |
|
energy
A | B |
|
hype
A | B |
|
pop
A | B |
|
mgr
A | B |
|
FIGHT
RATING
22% |
|
|
|
|
|
|
|
Undercard bout
|
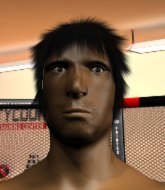
Coming up we have a light heavyweight MMA rules bout between Zaru Kayne (ranked 0 p4p, 0 weight class) and Tiko Haroshim (ranked 0 p4p, 0 weight class). Well, the cameraman is lingering on a pretty young lady for a bit too long there. Keep your eyes on the fighters buddy or you'll miss the fighter intros!
 |
|
 |
| 185 cm
22
204 lbs
9 - 4 - 0 |
|
188 cm
23
205 lbs
6 - 3 - 0 |
BJJ Purple Belt
Solid boxing
Granite chin |
|
BJJ Blue Belt
Good kicks
Knockout power |
|
| |
|
Ladies and gentlemen. This fight is 2 rounds, in the light heavyweight division.
Introducing the fighter to my left, fighting out of the red corner.
With a record of
9 - 4 - 0, fighting out of Tokyo, Zaru Kayne!
And introducing the fighter to my right, fighting out of the blue corner.
With a record of
6 - 3 - 0, fighting out of Tokyo, Tiko Haroshim!
The judges for this bout are Yukihiro Shimada, Shigeki Sano and Hirohito Nitta.
The bell rings for round one and we are underway!
Haroshim dodges the punch combination from Kayne.
Haroshim thows a left - swing and a miss!
Kayne fails to land with the punch combination there - jab, cross, hook, miss, miss, miss.
Kayne with a nice cross.
Kayne takes a shot to the nose. Hopefully that hasn't broken it.
Kayne fakes a head punch and goes low to the body. Nicely done.
Kayne tries to shoot in for a takedown. He's got hold of a leg but Haroshim swivels and escapes.
Haroshim misses with a looping left.
Kayne slips a jab and a cross from Haroshim.
Haroshim tries a head kick but it misses.
Kayne shoots in looking for a takedown. Haroshim tries to sprawl out of it but Kayne keeps driving through. The fighters are pinned against the ropes. Haroshim manages to get underhooks and after a bit of a struggle, circles away and we're back to standing.
Haroshim's corner calls for a 1,2 combination and Haroshim duly obliges.
It looks like Zaru Kayne has been cut.
Kayne throws a head kick that misses and slips in the process. He scrambles back to his feet and the fighters circle.
Kayne pulls out of a head kick attempt.
Kayne throws a right and a left that Haroshim avoids nicely.
Kayne misses with a jab, cross combination.
Kayne throws a nice outside leg kick.
The crowd cheers as Haroshim lands an impressive looking overhand right. Kayne doesn't seem phased though.
Haroshim lands with a nice combination. Kayne backs away looking to recover.
A head kick misses from Kayne.
Kayne lands three nice shots there - that looked like it hurt!
It looks like Tiko Haroshim has been cut.
The crowd are loving this. Great action here.
Kayne fakes high and swings low for a body shot but Haroshim manages to avoid it.
Kayne throws a right and a left that Haroshim avoids nicely.
Kayne feints and then cracks Haroshim's leading leg with a nice low kick. He's obviously looking to slow Haroshim down.
A telegraphed right hand from Haroshim misses the target.
That's one minute gone in the round.
Kayne connects with a single shot there.
Tiko Haroshim is looking to keep the fight on the feet at all costs.
Kayne lands a nice looking body shot.
A nice combination there by Haroshim.
Haroshim throws a nice looking combination but Kayne bobs and weaves to avoid any damage.
Kayne misses with a wild combination.
Kayne throws a hook to the body but it doesn't connect.
Kayne scores with a shot to the body.
Kayne throws a nice looking combination but Haroshim bobs and weaves to avoid any damage.
Kayne cracks Haroshim with a good jab.
A slapping body kick lands there for Kayne.
A solid body kick from Kayne.
Wow, both these guys are really going for it!
Kayne scores with a nice looking left hook and follows it up with an uppercut!
Kayne is looking to wear down Haroshim with body shots, infact he's throwing more body shots than head shots at the moment.
Kayne tries a head kick but it misses.
Kayne is breathing heavily.
Haroshim takes a jab right on the kisser.

Haroshim is rocked!
Kayne sees an opening and throws a straight punch right through Haroshim's defenses. It connects perfectly with Haroshim's jaw and knocks him out cold! Wow - that's a contender for knockout of the year - absolutely brutal!
Ladies and gentlemen, after 1:46 of round 1, we have a winner by way of KO (Punch). Zaru Kayne!
|
|
|
|
|
|
|
|
|
|
|
|
|
|
|
|
|
|
|
|
|
|
|
| S |
C
A |
G |
S |
C
B |
G |
|
S |
C |
G |
|
energy
A | B |
|
hype
A | B |
|
pop
A | B |
|
mgr
A | B |
|
FIGHT
RATING
100% |
|
|
|
|
|
|
|
Undercard bout
|
Coming up we have a lightweight MMA rules bout between Shaw Maxwell (ranked 0 p4p, 0 weight class) and Kimmo Kinnunen (ranked 0 p4p, 0 weight class). I can't wait for this one - let's get the fighter introductions out of the way and get this one started!
 |
|
 |
| 165 cm
20
155 lbs
7 - 5 - 0 |
|
183 cm
18
160 lbs
6 - 1 - 0 |
BJJ Purple Belt
Solid boxing
KO power |
|
BJJ Brown Belt
Counter striker
Solid chin |
|
| |
|
Ladies and gentlemen. This fight is 2 rounds, in the lightweight division.
Introducing the fighter to my left, fighting out of the red corner.
With a record of
7 - 5 - 0, fighting out of Tokyo, Shaw Maxwell!
And introducing the fighter to my right, fighting out of the blue corner.
With a record of
6 - 1 - 0, fighting out of Tokyo, Kimmo Kinnunen!
The judges for this bout are Ren Mimura, Shigeki Sano and Yukihiro Yamamoto.
The bell rings for round one and we are underway!
Maxwell tries a switch kick but it misses it's target.
Maxwell throws a jab but it's blocked by Kinnunen.
Kinnunen showing good head movement there, avoiding the strikes from Maxwell.
Oh, that's a big right hand from Maxwell and Kinnunen goes tumbling to the canvas! Maxwell follows him to the ground and looks to finish from half guard.
Kinnunen is rocked!
It looks like Kimmo Kinnunen has been cut.
Maxwell is trying to work for a kimura but Kinnunen is defending well.
Kinnunen is still in real trouble! Can Maxwell finish him?
Kinnunen is in trouble now - Maxwell has advanced to mount!
Oooh a big shot lands for Maxwell! Kinnunen is out! The ref dives in to save him from more punishment!
Ladies and gentlemen, after 0:43 of round 1, we have a winner by way of KO (Strikes). Shaw Maxwell!
|
|
|
|
|
|
|
|
|
|
|
|
|
|
|
|
|
|
|
|
|
|
|
| S |
C
A |
G |
S |
C
B |
G |
|
S |
C |
G |
|
energy
A | B |
|
hype
A | B |
|
pop
A | B |
|
mgr
A | B |
|
FIGHT
RATING
100% |
|
|
|
|
|
|
|
Undercard bout
|
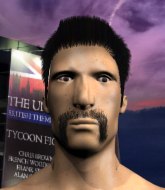
Coming up we have a bantamweight MMA rules bout between Dan Backslide (ranked 0 p4p, 0 weight class) and Mac Crawford (ranked 0 p4p, 0 weight class). Backslide's entrance music is The Dover Boys. A fine choice. The fight MMA fans around the world have waited their entire lives for!
 |
|
 |
| 174 cm
19
145 lbs
5 - 2 - 0 |
|
167 cm
21
135 lbs
4 - 0 - 0 |
BJJ White Belt
Solid boxing
Experienced |
|
BJJ Purple Belt
Counter striker
Tends to cut |
|
| |
|
Ladies and gentlemen. This fight is 2 rounds, in the bantamweight division.
Introducing the fighter to my left, fighting out of the red corner.
With a record of
5 - 2 - 0, fighting out of Tokyo, Dan Backslide!
And introducing the fighter to my right, fighting out of the blue corner.
With a record of
4 - 0 - 0, fighting out of Tokyo, Mac Crawford!
The judges for this bout are Yuuki Gou, Shigeki Fujiwara and Sosuke Kotani.
The bell rings for round one and we are underway!
Backslide tries to clinch but Crawford is having none of it.
Backslide tries to clinch but is not successful on this occasion.
A punch combination from Backslide misses.
Crawford moves out of range of the body kick.
Backslide tries to clinch but Crawford moves out of range.
Backslide throws a head kick that misses and slips in the process. He scrambles back to his feet and the fighters circle.
Crawford keeps the fight on the outside.
Backslide throws a head kick that misses and slips in the process. He scrambles back to his feet and the fighters circle.
A combination from Backslide does no damage.
We've had a slow start to the round here - hopefully the action picks up.
Crawford tries to clinch

and Backslide holds on and brings the fighters into a clinch.
Backslide prevents the takedown attempt.

Backslide breaks the clinch.
Backslide is moving around nicely and scores here with a single head shot.
Crawford tries to shoot in for a takedown. He's got hold of a leg but Backslide swivels and escapes.
That's one minute gone in the round.
Jab, cross, leg kick. Nice combination by Backslide!
Dan Backslide is looking to keep the fight on the feet at all costs.
Backslide misses with a wild combination.
Crawford misses with a takedown attempt. He shot from a bit too far out.
Dan Backslide has stuffed three takedown attempts in the round now. That's going to take a lot out of Mac Crawford.
Backslide scores with a three punch combo!
Backslide tries to clinch
and Crawford counters with a nice double leg into half guard.
Backslide is defending against the submission attempts here by Crawford.
Crawford works his way into side control.
That's two minutes gone in the round.
Crawford thinks about going for a far side armbar but bails out and retains the dominant position instead.
This is a great period of action - very entertaining stuff!
Crawford wants to work for a kimura but he's foiled early by Backslide, who protects the arm well.
Crawford is looking for a kimura. He might have it! No, Backslide has escaped the position, nice work there.
That's three minutes gone in the round.
Backslide is not content to let Crawford control the position.
Crawford thinks about going for a far side armbar but bails out and retains the dominant position instead.
Crawford trying to control the position but Backslide is working away.
Crawford tries to move to mount but Backslide blocks the move with his legs.
That's four minutes gone in the round.
There's not a lot going on here and the crowd are letting the fighters know they're not willing to tolerate a lack of action.
Crawford laying and praying for a moment but Backslide takes advantage and regains half guard.
Backslide is in trouble now - Crawford has advanced to mount!
Crawford goes for an armbar but he's fallen flat on his backside there and now Backslide is on top in guard.
Backslide avoids a guillotine attempt easily.
That's five minutes gone in the round.
Crawford wants to sweep here but Backslide controlling him for the moment.
Crawford escapes his hips to the side and looks to be working for an armbar. Backslide gives him a little smile and shakes his head. No chance.
Crawford looking for a guillotine here but Backslide defends easily.
Crawford looks gassed!
Crawford manages to land a sweep and now he's in mount on top!

That's six minutes gone in the round.
Crawford looks like he's working for a submission but he's not found anything just yet.
Crawford working to secure an arm triangle but it's not happening for him just yet.
The fighters are tangled up in the ropes here. We might need a restart if the fighters can't break free themselves.

That's seven minutes gone in the round.
Crawford has control of Backslide's right arm, working for a kimura. It's a bit of a token attempt though and Backslide regains control of the situation pretty easily.
Backslide defends a decent attempt at a guillotine from Crawford.
Crawford working for a submission but Backslide is keeping him at bay.

That's eight minutes gone in the round.
A lull in the action here being met with boos from the crowd.
Crawford looking for a guillotine from mount but Backslide is having none of it.
Backslide is trying to escape but when you're mounted that's not too easy.
Backslide defends a decent attempt at a guillotine from Crawford.
You get the feeling that Backslide really doesn't like being in this position too much.

That's nine minutes gone in the round.
Crawford jumps to side control looking for an arm triangle but Backslide manages to avoid the submission attempt.
Crawford wants to lay and pray for a moment but Backslide keeps working.
Crawford has knee on belly and moves into mount.
Crawford looking to control but Backslide is working nicely, looking to advance position himself.
And that�s the end of the round � the fighters go back to their corners.
Mac Crawford dominated that round.
The minute break is over - no more time for sponges and pep talks - back to the action! Let's hear some noise people - this is the final round!

Backslide throws a combination but comes up with nothing but fresh air.
Backslide is looking to take this fight into the clinch.
Backslide misses with the combination.
Crawford fails miserably with a takedown attempt.
We've had a slow start to the round here - hopefully the action picks up.
Backslide throws a series of punches but Crawford avoids them all with ease.
Crawford fakes an overhand right and shoots for a takedown. Backslide sprawls well initially but Crawford persists and gets the takedown into half guard.
That's one minute gone in the round.
Crawford trying to mount his opponent but Backslide defends it.
Backslide pushes Crawford off looking to stand but Crawford dives back in and keeps control.
Both fighters are absolutely exhausted here.
Crawford is looking to advance position but Backslide won't allow it.
Crawford wants to work for an arm triangle but Backslide is really keeping half guard well and defending the submission attempt.
Crawford moves nicely into side control.
That's two minutes gone in the round.
Neither fighter has done anything of merit for a good minute or two here and the crowd are not happy about it.
Crawford wants to work for a kimura but he's foiled early by Backslide, who protects the arm well.
Mac Crawford has got the better of the ground game so far.
Crawford tries to advance to mount but Backslide instead regains half guard.
Crawford missing with the ground and pound from half guard.
That's three minutes gone in the round.
Crawford wants to free his trapped foot but Backslide is holding on for dear life with his legs.
Crawford seems very keen to just sit and control from half guard but Backslide does not like that idea so much and is remaining active off his back.
Crawford is looking for a kimura here.
Crawford is trying to work for a kimura. He's got his hands clasped together - this could be trouble! No, Backslide has managed to free his arm - good work.
That's four minutes gone in the round.
Neither fighter has done anything of merit for a good minute or two here and the crowd are not happy about it.
Neither fighter is doing enough for the referee's liking and he's decided to stand them back up.
Backslide closes the distance and presses his opponent up against the ropes.
Backslide trying to land knees to the body.
Backslide breaks from the clinch.
Backslide throws a head kick but Crawford moves out of range.
Crawford tries to shoot in for a takedown. He's got hold of a leg but Backslide swivels and escapes.
Backslide tries to clinch but Crawford moves out of range.
That's five minutes gone in the round.
Backslide looks to score with a combo but nothing lands.
Crawford doesn't succeed with the takedown
and Backslide counters by clinching up.
Dan Backslide has stuffed three takedown attempts in the round now. That's going to take a lot out of Mac Crawford.
Backslide breaks from the clinch.
Backslide misses with a head kick.
Crawford tries to shoot in for a takedown. He's got hold of a leg but Backslide swivels and escapes.
Crawford shoots in but Backslide avoids the takedown attempt easily.
Backslide misses with a series of wild punches.
That's six minutes gone in the round.
A few boos can be heard. I'm sure they will multiply if the fighters don't pick up the pace.
Backslide is looking to clinch.
Backslide throws a series of punches but Crawford moves out of range.
Dan Backslide is looking to throw some combinations by the looks of things.
Crawford uses some good footwork to avoid the body shot by Backslide.
Backslide pushing out the jab but it's not landing.
Crawford shoots in but doesn't get the takedown
and Backslide counters into the clinch. Nicely done.
An uppercut to the body lands inside from Backslide.
Crawford tries to score a body lock takedown but Backslide shows good agility there to stay on his feet.
Backslide connects with a knee to the head.
That's seven minutes gone in the round.
Backslide unloads a knee to the mid-section. Crawford lets out a prehistoric sounding urrrrgh.
Backslide digs a right hand into Crawford's ribs. Those have got to be taking their toll on Crawford's gas tank.
Backslide is trying to slow down the pace in the clinch, to catch his breath.
Crawford can't get the takedown.
Backslide has had enough of the clinch but Crawford keeps him there for the moment.
Knees to the body from Backslide.
Crawford keeps control of Backslide as he tries to wriggle out of the double underhooks.
Backslide gets double underhooks to prevent a takedown attempt from Crawford.
Backslide prevents the takedown attempt.
Crawford has hold of a leg and is looking for a trip takedown. Backslide avoids it nicely though and we remain in the clinch.
Backslide lands a knee to the body.
Backslide connects with a nasty looking knee right to Crawford's face.
Crawford tries for a takedown but Backslide manages to get underhooks.
That's eight minutes gone in the round.
Backslide stalling in the clinch.
Backslide misses the knee to the body. Nice hip positioning from Crawford.
Crawford is trying to slow down the pace of the fight but Backslide is keeping busy.
Crawford tries for a takedown. No joy.
Backslide managing to block the knees to the body from Crawford.
Backslide lands an elbow inside.
Backslide lands a knee to the body.
Backslide lands a nice elbow.
The fighters are pressed against the ropes, as the pace of the fight slows.
Crawford wants a takedown.
Backslide breaks from the clinch.
Crawford changes levels and looks for a double leg takedown. Backslide tries to avoid it but Crawford manages to keep hold of a leg and drag Backslide to the ground. Backslide escapes though and pops straight back up to his feet.
That's nine minutes gone in the round.
Jab, cross, leg kick. Nice combination by Backslide!
Nice sprawl there from Backslide as Crawford shoots in.
Crawford shoots for a double leg takedown but Backslide sprawls well. He's pushed Crawford's face into the mat and manages to get back to his feet relatively easily.
Backslide closes the distance and clinches.
Backslide breaks from the clinch.
Backslide gets in close and instigates a clinch.
The crowd thankful this round is nearly over.
Crawford managing to block the knees to the body from Backslide.
Backslide with a knee to the head.
Crawford fails to pull the fight into his guard.
Crawford managing to block the knees to the body from Backslide.
And that's the end of the fight!
Dan Backslide showed his dominance in that final round.
I have no idea who won that fight. Let's wait and see whether the judges are as confused as me! Time for a split decision perhaps?!. Over to the ring announcer for the scorecards.
Ladies and gentlemen, after 2 rounds of action, we go to the scorecards for a decision.
Judge Yuuki Gou scores the fight for Dan Backslide!
Judge Shigeki Fujiwara scores the fight for Mac Crawford!
Judge Sosuke Kotani scores the fight for Mac Crawford!
Mac Crawford wins by split decision!
|
|
|
|
|
|
|
|
|
|
|
|
|
|
|
|
|
|
|
|
|
|
|
| S |
C
A |
G |
S |
C
B |
G |
|
S |
C |
G |
|
energy
A | B |
|
hype
A | B |
|
pop
A | B |
|
mgr
A | B |
|
FIGHT
RATING
17% |
|
|
|
|
|
|
|
Undercard bout
|
Coming up we have a welterweight MMA rules bout between Hulohot Yokohama (ranked 0 p4p, 0 weight class) and Nathan Swift (ranked 0 p4p, 0 weight class). Yokohama comes to the ring accompanied by Metallica - All Nightmare Long. Over to our ring announcer for the fighter introductions!
 |
|
 |
| 178 cm
19
177 lbs
7 - 1 - 0 |
|
180 cm
22
175 lbs
5 - 1 - 0 |
BJJ Purple Belt
Brawler
KO power |
|
BJJ Purple Belt
Brawler
Granite chin |
|
| |
|
Ladies and gentlemen. This fight is 2 rounds, in the welterweight division.
Introducing the fighter to my left, fighting out of the red corner.
With a record of
7 - 1 - 0, fighting out of Tokyo, Hulohot Yokohama!
And introducing the fighter to my right, fighting out of the blue corner.
With a record of
5 - 1 - 0, fighting out of Tokyo, Nathan Swift!
The judges for this bout are Yasuomi Hirokawa, Tatsuya Matsuyama and Yukihiro Shimada.
The bell rings for round one and we are underway!
Swift looking to shoot here. He's gone for it and he's landed a takedown into mount! Oh, that's bad for Yokohama!
Swift avoids the attempt from Yokohama to control.
Swift moves into side control, trying to work for a kimura. That looks painful! Will he finish!!?? No, Yokohama has worked his arm free - good work by Yokohama!
Swift looking for an arm triangle but it's way too loose to do anything.
Yokohama is sneaking out the side here. He's bucked Swift off and has taken his back!
So, who will make the next big move? In this position it could be crucial.
Swift tries to escape the position.
That's one minute gone in the round.
I would not like to be Swift right now.
Swift looking very determined here, making life difficult for Yokohama.
Yokohama controls the action.
The fighters are trapped in the ropes so we're going to have a reposition here. The ref calls for a break and repositions the fighters in the center of the ring.
Swift is defending well here and trying to improve his position.
That's two minutes gone in the round.
There's not a lot going on here and the crowd are letting the fighters know they're not willing to tolerate a lack of action.
Yokohama is staying calm and holding on to the back position, whilst working on a rear naked choke. Swift is defending well though. Yokohama let's go of the attempt for now.
Swift can't escape the position.
Yokohama working for a RNC but it's not happening just yet.
Swift trying to control the action but Yokohama just sinks the hooks in.
That's three minutes gone in the round.
Yokohama has the hooks in. Swift is trying to push off one leg but he has to do so cautiously to avoid being submitted.
A bit of a pause in the action here. Yokohama controlling the positon.
Yokohama is working hard for the rear naked choke here.
Yokohama controls the position.
That's four minutes gone in the round.
There's not a lot going on here and the crowd are letting the fighters know they're not willing to tolerate a lack of action.
Yokohama working for a choke but Swift is defending well.
Swift defending nicely against the rear naked choke attempt.
Yokohama controls the action.
Swift tries to escape the position - he's now mounted. Is that better or worse? Hard to tell!
That's five minutes gone in the round.
Yokohama controlling the position easily from mount.
Yokohama wants to control the pace but Swift is squirming around nicely.
The referee stands the fighters back up. Hulohot Yokohama just wasn't active enough from the dominant position.
Yokohama throws a sloppy head kick and Swift moves out of range easily.
Yokohama throws a monster uppercut resembling something out of street fighter but it doesn't land.
Swift shoots in for a double leg but Yokohama sprawls well. That's going to sap some energy.
Yokohama throws a low kick but his opponent is out of range.
Swift slips a straight right by Yokohama.
Yokohama looking to shoot here. He's gone for it and he's landed a takedown into mount! Oh, that's bad for Swift!
Swift looks gassed!
Yokohama controlling his opponent.
That's six minutes gone in the round.
Yokohama has controlled the position for a good 20 seconds, which will no doubt be starting to frustrate his opponent.
That's seven minutes gone in the round.
The referee stands the fighters back up. Hulohot Yokohama just wasn't active enough from the dominant position.
Swift tries to land a leg kick but Yokohama saw it coming and moves away.
Yokohama lands with an overhand left.
Swift throws a combination but comes up with nothing but fresh air.
That's eight minutes gone in the round.
Swift misses with a low kick.
Yokohama lands a big head kick that sends Swift to the canvas! Yokohama follows up with strikes from the mount that forces the ref to step in and stop the fight!
Ladies and gentlemen, after 8:10 of round 1, we have a winner by way of TKO (Strikes). Hulohot Yokohama!
|
|
|
|
|
|
|
|
|
|
|
|
|
|
|
|
|
|
|
|
|
|
|
| S |
C
A |
G |
S |
C
B |
G |
|
S |
C |
G |
|
energy
A | B |
|
hype
A | B |
|
pop
A | B |
|
mgr
A | B |
|
FIGHT
RATING
34% |
|
|
|
|
|
|
|
Undercard bout
|
Coming up we have a welterweight MMA rules bout between Hideo Nomo (ranked 0 p4p, 0 weight class) and Toki Tooth (ranked 0 p4p, 0 weight class). Nomo kept the crowd waiting but all that was forgotten when his ring entrance music started. The incomparable musical genuis that is Down Rodeo. Tooth has chosen Thunderhorse as his entrance music. Hideo Nomo has a significant reach advantage - let's see if he can make it count.
 |
|
 |
| 220 cm
19
170 lbs
9 - 5 - 0 |
|
192 cm
22
176 lbs
6 - 2 - 0 |
Good takedowns
Basic striking
Good chin |
|
BJJ Purple Belt
Brawler
Prefers standup |
|
| |
|
Ladies and gentlemen. This fight is 2 rounds, in the welterweight division.
Introducing the fighter to my left, fighting out of the red corner.
With a record of
9 - 5 - 0, fighting out of Tokyo, Hideo Nomo!
And introducing the fighter to my right, fighting out of the blue corner.
With a record of
6 - 2 - 0, fighting out of Tokyo, Toki Tooth!
The judges for this bout are Tatsuya Matsuyama, Ren Mimura and Shigeki Fujiwara.
The bell rings for round one and we are underway!
Nomo fails with a takedown attempt.
Nomo fails to land the takedown.
Nomo really does look like a pencil wearing a pair of gloves. Let's hope he has a gameplan to suit that ridiculous body shape.
Tooth scores with a jab. Nomo acknowledges it with a nod of the head.
It looks like Hideo Nomo has been cut.
Nomo is breathing heavily.
Tooth works Nomo's body with a nice hook.
Wow, both these guys are really going for it!

Tooth knocks Nomo to the floor with a head kick! Can he finish him!?
Nomo is rocked!
Fantastic stuff here - a very entertaining period of action, which has drawn cheers from the crowd.
Tooth controlling the position from side mount.

Tooth decides to stand back up. Tooth steps back and let's Nomo get back to his feet.
Tooth feints and then winds up with a huge right hand that connects perfectly and sends Nomo sprawling to the canvas! Nomo rolls over backwards and springs off the ropes and manages to regain his footing - how acrobatic! Oh, he's still wobbly - can Tooth finish him?!
Tooth tries a switch kick but it misses it's target.
Tooth scores with a shot to the body.
Tooth tries a switch kick but it misses it's target.
Nomo takes a jab right on the kisser.
Oh Nomo is still all over the place! His legs are completely gone! Will he be able to recover?!!
Tooth fakes a right and follows up with a big left that drops Nomo to one knee - oooooh, he's wobbly! Nomo looks to clinch but Tooth throws him off and pummels him into the canvas! Nomo taps out under the strikes! The fight is over!
Ladies and gentlemen, after 0:51 of round 1, we have a winner by way of Submission (Strikes). Toki Tooth!
|
|
|
|
|
|
|
|
|
|
|
|
|
|
|
|
|
|
|
|
|
|
|
| S |
C
A |
G |
S |
C
B |
G |
|
S |
C |
G |
|
energy
A | B |
|
hype
A | B |
|
pop
A | B |
|
mgr
A | B |
|
FIGHT
RATING
100% |
|
|
|
|
|
|
|
Undercard bout
|
Coming up we have a middleweight MMA rules bout between Harjan Varsi (ranked 0 p4p, 0 weight class) and Maek Houzo (ranked 0 p4p, 0 weight class). Varsi's entrance music is Hiski Salomaa - Tiskarin polkka. A fine choice. Over to our ring announcer for the fighter introductions!
 |
|
 |
| 202 cm
21
194 lbs
8 - 4 - 0 |
|
177 cm
23
192 lbs
7 - 3 - 0 |
BJJ Blue Belt
Brawler
Good chin |
|
Good wrestler
Counter striker
Knockout power |
|
| |
|
Ladies and gentlemen. This fight is 2 rounds, in the middleweight division.
Introducing the fighter to my left, fighting out of the red corner.
With a record of
8 - 4 - 0, fighting out of Tokyo, Harjan Varsi!
And introducing the fighter to my right, fighting out of the blue corner.
With a record of
7 - 3 - 0, fighting out of Tokyo, Maek Houzo!
The judges for this bout are Yasuomi Hirokawa, Shigeki Sano and Ren Mimura.
The bell rings for round one and we are underway!
Varsi misses with a wild body shot.
Varsi misses with a body shot. Nice footwork from Houzo.
Houzo fails with a takedown attempt.
Harjan Varsi seems to be the more aggressive standup fighter in this bout.
Varsi swings away but doesn't land with a series of punches.
Houzo shoots in but no luck this time.
Varsi misses the shot to the body.
A big left from Varsi misses.
Varsi slips a jab and a cross from Houzo.
Houzo fails to land with a series of punches.
Varsi really does look like a pencil wearing a pair of gloves. Let's hope he has a gameplan to suit that ridiculous body shape.
Houzo tries to keep at a distance but Varsi has taken the fight into the clinch.
Varsi digs a right hand underneath Houzo's ribcage. Houzo let out a lung full of air as it connected.
Varsi misses with the head strike.
Houzo drops down for a takedown but doesn't get it.
Harjan Varsi has stuffed three takedown attempts in the round now. That's going to take a lot out of Maek Houzo.
Still in the clinch, Varsi scores with a nice short uppercut.
A head punch on the inside from Varsi fails to land.
Houzo blocking some punches.
Houzo is trying to work for a single leg takedown but Varsi pulls him back up using the underhooks.
Varsi swings wildly with an uppercut but Houzo uses good head movement to avoid it.
Houzo tries to take the fight to the ground by pulling guard but can't manage it.
That's one minute gone in the round.
Varsi lands with a left to the head.
Houzo has a body lock and is looking for a takedown. Varsi is bouncing around trying to prevent the takedown and somehow he has indeed managed to stay on his feet.
Varsi working aggressively here.
Varsi lands a hook that snaps the head of Houzo backwards.
Houzo blocking some punches.
Houzo looking for a takedown.
Varsi throws a head punch that misses.
Houzo wants to break free. God knows he wants to breaaaak freeee.
Varsi throws a punch but it's blocked by Houzo.
Varsi digs a right hand into Houzo's ribs. Those have got to be taking their toll on Houzo's gas tank.
A head punch on the inside from Varsi fails to land.
Varsi lands with a short punch from the clinch.
With the fighters clinched against the ropes, Varsi creates a bit of distance for himself and scores with a nice uppercut.
Houzo takes a shot to the head.
Varsi lands with a good tight uppercut to the head.
Houzo is rocked!
Houzo takes a shot to the head.
Houzo is still on wobbly legs! Can Varsi finish him?
Varsi softening up his opponent with strikes, against the ropes.
Varsi creates a bit of space for himself and rocks Houzo with a big uppercut! Houzo tries to clinch up but Varsi pushes him back against the ropes and lands another moster strike that crumples Houzo to the mat! Houzo covers up and Varsi unloads with more strikes until the referee steps in to end the bout!
Ladies and gentlemen, after 1:59 of round 1, we have a winner by way of TKO (Punches). Harjan Varsi!
|
|
|
|
|
|
|
|
|
|
|
|
|
|
|
|
|
|
|
|
|
|
|
| S |
C
A |
G |
S |
C
B |
G |
|
S |
C |
G |
|
energy
A | B |
|
hype
A | B |
|
pop
A | B |
|
mgr
A | B |
|
FIGHT
RATING
56% |
|
|
|
|
|
|
|
Co-main event
|
Coming up we have a middleweight MMA rules bout between Tsuyoshi Nakayama (ranked 0 p4p, 0 weight class) and Damian Roshan (ranked 0 p4p, 0 weight class). Chooooooooon! I think Nakayama might be my favorite fighter, now he's come out to The Vapors - Turning Japanese. This should be fireworks!
 |
|
 |
| 189 cm
23
192 lbs
9 - 2 - 0 |
|
190 cm
23
195 lbs
8 - 3 - 0 |
BJJ Blue Belt
Excellent boxer
Experienced |
|
BJJ Purple Belt
Excellent boxer
Solid chin |
|
| |
|
Ladies and gentlemen. This fight is 2 rounds, in the middleweight division.
Introducing the fighter to my left, fighting out of the red corner.
With a record of
9 - 2 - 0, fighting out of Tokyo, Tsuyoshi Nakayama!
And introducing the fighter to my right, fighting out of the blue corner.
With a record of
8 - 3 - 0, fighting out of Tokyo, Damian Roshan!
The judges for this bout are Yasuomi Hirokawa, Kenichi Hosakawa and Yukihiro Shimada.
The bell rings for round one and we are underway!
Nakayama throws a right hand that Roshan ducks under and follows up with a left that Roshan also avoids with ease.
Nakayama scores with a shot to the body.
Nakayama misses with a wild combination.
Roshan scores with a sloppy punch to the body. Not much technique there but it did the business.
Nakayama is the aggressor but that punch slipped nicely by Roshan.
Roshan misses with a wild body shot.
Roshan tries a switch kick but it misses it's target.
Nakayama throws a hook but Roshan blocks it.
Nakayama throws a series of punches but Roshan avoids them all with ease.
Nakayama scores to the head and body with a nice combination!
Roshan throws a two punch combo that lands nicely.
Roshan throws a series of punches but Nakayama avoids them all with ease.
Roshan lands with a nice combination. Nakayama backs away looking to recover.
Nakayama is rocked!
This has been an exciting period of action!
A combination from Roshan does no damage.
Oh Nakayama is still all over the place! His legs are completely gone! Will he be able to recover?!!
Nakayama dips to his left and cracks Roshan with an uppercut!
Roshan lands a body shot.
Nakayama is breathing heavily.
Roshan throws an overhand right that has Nakayama reeling! Roshan follows up with more punches and Nakayama is out cold! This one is all over!
Ladies and gentlemen, after 0:46 of round 1, we have a winner by way of KO (Punches). Damian Roshan!
|
|
|
|
|
|
|
|
|
|
|
|
|
|
|
|
|
|
|
|
|
|
|
| S |
C
A |
G |
S |
C
B |
G |
|
S |
C |
G |
|
energy
A | B |
|
hype
A | B |
|
pop
A | B |
|
mgr
A | B |
|
FIGHT
RATING
100% |
|
|
|
|
|
|
|
Main event
|
Coming up we have a middleweight MMA rules bout between Fabio Lima (ranked 0 p4p, 0 weight class) and Kaz Shiroma (ranked 0 p4p, 0 weight class). Lima kept the crowd waiting but all that was forgotten when his ring entrance music started. The incomparable musical genuis that is Enter Sandman, Metallica. The crowd seem to be enjoying Shiroma's choice of entrance music: Red Warrior. Both fighters look fresh as a daisy as they make their way towards the ring.
 |
|
 |
| 187 cm
23
190 lbs
11 - 4 - 0 |
|
185 cm
23
195 lbs
8 - 0 - 0 |
BJJ Purple Belt
Solid boxing
KO power |
|
BJJ Purple Belt
Decent boxing
Heavy handed |
|
| |
|
Ladies and gentlemen. This fight is 2 rounds, in the middleweight division.
Introducing the fighter to my left, fighting out of the red corner.
With a record of
11 - 4 - 0, fighting out of Tokyo, Fabio Lima!
And introducing the fighter to my right, fighting out of the blue corner.
With a record of
8 - 0 - 0, fighting out of Tokyo, Kaz Shiroma!
The judges for this bout are Yasuomi Hirokawa, Sosuke Kotani and Yuuki Gou.
The bell rings for round one and we are underway!
Shiroma sizes up Lima with a pawing jab and scores with a straight right down the middle.
Nice shot lands for Shiroma.
Lima is rocked!
Shiroma connects with a good straight punch right through the guard and follows up with a right hook and a left hook! That last one sent Lima tumbling to the canvas! Shiroma pours on the pressure with more strikes and the referee has no hesitation diving in to stop the fight! Lima was done - good stoppage!
Ladies and gentlemen, after 0:08 of round 1, we have a winner by way of TKO (Punches). Kaz Shiroma!
|
|
|
|
|
|
|
|
|
|
|
|
|
|
|
|
|
|
|
|
|
|
|
| S |
C
A |
G |
S |
C
B |
G |
|
S |
C |
G |
|
energy
A | B |
|
hype
A | B |
|
pop
A | B |
|
mgr
A | B |
|
FIGHT
RATING
100% |
|
|
|
|
|
|
|
|
|
|
