 |
DEF II PBP Commentary |
Undercard bout
|
|
|
|
Undercard bout
|
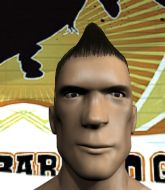
Coming up we have a light heavyweight MMA rules bout between Zico Miko (ranked 0 p4p, 0 weight class) and A Bokito (ranked 0 p4p, 0 weight class). Bokito has chosen Let the Bodies hit the floor as his entrance music. A Bokito is the more experienced fighter, so let's see if that makes a difference tonight.
 |
|
 |
| 198 cm
18
205 lbs
0 - 0 - 0 |
|
188 cm
18
210 lbs
0 - 1 - 0 |
BJJ White Belt
Brawler
Self confident |
|
BJJ Blue Belt
Basic striking
Determined |
|
| |
|
Ladies and gentlemen. This fight is 3 rounds, in the light heavyweight division.
Introducing the fighter to my left, fighting out of the red corner.
With a record of
0 - 0 - 0, fighting out of London, Zico Miko!
And introducing the fighter to my right, fighting out of the blue corner.
With a record of
0 - 1 - 0, fighting out of London, A Bokito!
The judges for this bout are William Gold, Andrew Berry and James Ackerman.

The bell rings for round one and we are underway!
Miko pulls out of a head kick attempt.
Nice body kick from Miko.
Bokito showing good head movement there, avoiding the strikes from Miko.

Bokito drops down and drives through with a powerful takedown into guard.
Bokito is just sitting in guard, looking to avoid any submissions.
Miko wants to get back to his feet but Bokito is in a dominant position and won't allow it.
Miko keeping full guard, as Bokito tries to pass.
Bokito won't allow Miko to get back to his feet.
Bokito trying to land body shots but he keeps hitting the mat.
Bokito stops Miko from standing up.
Bokito forces his way into half guard.
Miko is breathing heavily.
Bokito is controlling the pace.

That's one minute gone in the round.
Miko pushes Bokito off looking to stand but Bokito dives back in and keeps control.
Bokito wants to control but Miko is keeping him busy.
Bokito passes to full mount!

Bokito looking to isolate an arm here. Miko doesn't see it coming and as Bokito extends the arm, he's forced to tap out! Nice submission by Bokito!
Ladies and gentlemen, after 1:46 of round 1, we have a winner by way of Submission (Armbar). A Bokito!
|
|
|
|
|
|
|
|
|
|
|
|
|
|
|
|
|
|
|
|
|
|
|
| S |
C
A |
G |
S |
C
B |
G |
|
S |
C |
G |
|
energy
A | B |
|
hype
A | B |
|
pop
A | B |
|
mgr
A | B |
|
FIGHT
RATING
53% |
|
|
|
|
|
|
|
Undercard bout
|
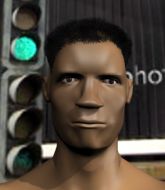
Coming up we have a welterweight MMA rules bout between Carlos Carter (ranked 0 p4p, 0 weight class) and Joseph Spry (ranked 0 p4p, 0 weight class). Spry has chosen Daruden - Sand Storm as his entrance music. These two fighters really are very evenly matched on the feet - it will be fascinating to see who can assert themselves in that aspect of the fight.
 |
|
 |
| 180 cm
23
170 lbs
2 - 0 - 0 |
|
178 cm
22
175 lbs
1 - 0 - 0 |
BJJ Blue Belt
Basic striking
Big heart |
|
BJJ Blue Belt
Basic striking
Solid chin |
|
| |
|
Ladies and gentlemen. This fight is 3 rounds, in the welterweight division.
Introducing the fighter to my left, fighting out of the red corner.
With a record of
2 - 0 - 0, fighting out of London, Carlos Carter!
And introducing the fighter to my right, fighting out of the blue corner.
With a record of
1 - 0 - 0, fighting out of London, Joseph Spry!
The judges for this bout are James Atkins, James Glass and Steven Brown.
The bell rings for round one and we are underway!
Spry fails with an attempt to clinch.
Spry misses with a hook.
Spry gets caught flat footed, as Carter shoots in with a quick takedown into guard.
Spry looking for a guillotine here but Carter defends easily.
Both fighters really going for it on the ground here!
Carter chips away with some ground and pound.
Carter avoids a guillotine attempt easily.
Carter postures up and lands a big shot to Spry's brow.
Carter trying to pass the guard but can't manage it just yet.
Spry tries to land a sweep but no joy.
Spry is persisting with the attempt to improve his position.
Spry is trying to control the position but Carter postures up.
Carter wants to control from the top but Spry keeps moving.
The fighters are pressed up against the cage, both looking to find a bit of space to work.
Carter keeps in close for a moment and lands a decent shot to the side of Spry's head.
That's one minute gone in the round.
Spry will have to put a bit more behind his punches if he's going to do any damage from this position.
Spry is looking for a triangle but Carter pushes his legs off easily.
Spry keeping moving, preventing Carter from controlling successfully.
Carter stands and throws Spry's legs to the side, diving into side control.
Carter working the ground and pound.
Spry is trying to get back to half guard. He's pushing on Carter's leg. He's managed it. Nice work.
Spry has hold of Carter's hands but Carter slips his arm to the side and lands an elbow.
Spry wants to get back to full guard.
Spry flails away from the bottom but he's not doing any damage.
Spry is looking to sinch up a gullotine here but Carter pulls his head out easily.
Spry is looking to improve his position.
The referee walks around the fighters to get a better view of the action. Carter lands a nice short elbow.

That's two minutes gone in the round.
Spry is trying to get back to full guard.
Spry looks gassed!
Carter slows the pace down in half guard.
Spry is not content to let Carter control the position.
The two fighters exchange a few words. I couldn't hear what they were saying but maybe it's more fun if you make it up yourself. Carter connects with a nice short shot to Spry's temple.
Spry is trying to get back to full guard.
Carter is trying to control the action in half guard but Spry is working away on the bottom, looking perhaps to get back to full guard.
Carter looks to score some points with some ground and pound.
Carter drops an elbow to the side of Spry's head.
Spry manages to get to full guard.
Carter with a couple of shots to the head there. Not particularly brutal.

That's three minutes gone in the round.
Carter trying to control the position from guard on top but Spry is wriggling around, looking for whatever he can.
Spry looking to hit a scissor sweep but Carter is one step ahead there.
Carter working in close now, lands a nice elbow to the side of Spry's head.
Carter trying to control but Spry is working from the bottom.
Spry tries to land a sweep but no joy.
Spry manages to land a sweep and now he's in mount on top!
Spry looking to finish Carter with some ground and pound. This is bad for Carter!
Spry looking for an armbar but decides to keep the dominant position instead.
Carter is looking to improve his position but Spry isn't that keen on the idea.
Spry blocks Carter's feeble attempts to strike from the bottom.

That's four minutes gone in the round.
Neither fighter has done anything of merit for a good minute or two here and the crowd are not happy about it.
Spry can't quite control the action as he would like just now, as Carter is looking to escape.
Carter blocking the ground and pound.
Carter really trying hard to get back to half guard here.
Carter tries to hold on but Spry pushes him away.
Spry unloads with some shots from mount but Carter bucks and avoids them well.
Carter bucks up and manages to get a nice reversal! He's in guard on the top - nicely done!

Spry kicks Carter off and gets to his feet.
Spry on the receiving end of a decent leg kick there by Carter. Carter obviously looking to wear him down.

Carter fakes with an overhand right and moves in to clinch with Spry, pushing him back against the cage.
Spry lands a damaging elbow.

Carter breaks the clinch.
Carter looks frusrated there after his takedown attempt is stuffed easily.
Spry shoots in and drives through. Carter sprawls well.
Spry shoots in from a long way out. He's driving through with the takedown attempt and he eventually gets it, landing in Carter's guard.
And that�s the end of the round � the fighters go back to their corners.
Carlos Carter dominated that round.
OK. That's time! The bell goes and we're back to the action.

Carter looks frusrated there after his takedown attempt is stuffed easily.
Spry shoots in for a takedown - he's clinched up with Carter but Carter pushes him off and we're back to square one.
Joseph Spry is looking to throw some combinations by the looks of things.
Carter lands with a straight right. Spry didn't see that one coming.
Carter keeps the fight standing with a nice sprawl.
Carter feints and as Spry raises his hands in defense, Carter changes levels and drives through with a takedown into guard.
Carter trying to control but Spry is working from the bottom.
Spry is active off his back here, looking for submissions.
Carter keeps in close for a moment and lands a decent shot to the side of Spry's head.
Carter trying to control the position from guard on top but Spry is wriggling around, looking for whatever he can.
Carter postures up and lands a big shot to Spry's brow.
Spry bucks up whilst keeping hold of a body lock, managing to reverse the position. Now he's in top in Carter's guard.
Both fighters are absolutely exhausted here.
Carter is trying to control the position but Spry postures up.
Spry cracks Carter with a solid left hand.
Spry drops back looking for a leg! Carter is in trouble here! The fighters roll with the hold and Carter manages to kick Spry off! Spry jumps back into Carter's guard.
That's one minute gone in the round.
Spry pushes down on Carter's leg and manages to get into half guard.
Spry not throwing his punches with enough precision this time.
The ref warns both fighters not to hold the cage as they work up against the meshing.
Spry thows a huge punch but Carter dodges it nicely.
Carter regains full guard. Nicely done.
Carter looking for a sweep. Not yet Carter, not yet.
Carter keeping full guard, as Spry tries to pass.
Spry stopping the sweep attempt from Carter.
Carter is working the butterfly guard. He manages to land a nice scissor sweep and is now in half guard on the top. Nice move.
Carter stalling.
Spry is looking to improve his position.
That's two minutes gone in the round.
Carter looks towards his corner to check for any instructions. The corner give him nothing to work with, so he cracks Spry with a short hammerfist. I guess that's as good as any advice he could get in this position.
Carter lands a big shot. The thud that echoes around the arena is like music to the fans' ears.
Spry tries to roll over but Carter keeps him under control.
Carter is nestled in close to Spry, controlling him well. He's worked in a nice elbow to the side of the head as well, for good measure.
Spry is looking to regain full guard. Not this time though.
Spry gets back to full guard.
Spry looking to control.
Carter advances position into side control!
Carter lands a few punches from side control.
Carter thinks about going for a far side armbar but bails out and retains the dominant position instead.
Spry is not content to let Carter control the position.
That's three minutes gone in the round.
Carter working the head with strikes.
Carter in side control, just content to control the action for now.
Carter decides to stand up, so the ref orders Spry to his feet.
Carter throws a looping left and ducks down for a takedown. He's got his arms around Spry's waist but Carter gets an underhook and avoids the takedown by throwing Carter off to one side.
Carter throws a monster uppercut resembling something out of street fighter but it doesn't land.
Carter shoots in and gets a takedown into half guard. Carter showed some decent athleticism there.
Spry is working for an escape here. He's hooked one of Carter's legs and he's managed to sneak out and take Carter's back!
Carter tries to break free.
Carter just trying to survive but Spry is wriggling into a better position, looking to finish.
That's four minutes gone in the round.
Carter breaks Spry's hooks off and manages to turn into his guard.
Carter keeps in close for a moment and lands a decent shot to the side of Spry's head.
Carter lands a couple of elbows.
Carter trying to control but Spry is working from the bottom.
Carter postures up.
Carlos Carter overall seems to be getting the better of the ground position in the fight so far.
Carter pushing down on Spry's thigh, trying to pass to half guard. He's managed it... Nice work.
Spry looking for submissions off his back.
Spry is refusing to be controlled, as Carter sits in half guard.
Ground and pound from Carter.
Carter is looking to pass the guard... He's managed it - he's now in full mount!
The crowd applaud the fighters efforts here as the round comes to an end.
Carter controlling the position easily from mount.
Carter looking to finish Spry with some ground and pound. This is bad for Spry!
And that�s the end of the round � the fighters go back to their corners.
Carlos Carter dominated that second round.
The fighters get back to their feet, the hooter sounds and we're back to the action! Let's hear some noise people - this is the final round!

Spry tries to clinch up.
Carter has closed the distance and engaged Spry in a clinch.
Spry gets double underhooks to prevent a takedown attempt from Carter.
Carter tries for a takedown but Spry manages to get underhooks.
Carter tries to land knees in the clinch but Spry avoids the damage to the body.
Carter is clearly stalling here... Pick up the pace son.
Spry prevents the takedown attempt.
That's three failed takedown attempts in the round for Carlos Carter. That's going to take a lot out of him.
Carter tries to pull guard but can't drag his opponent to the mat. Spry just stands there and leans against the cage.
Carter tries to pull guard but Spry won't allow it.
Spry is looking for a takedown up against the cage. Carter gets underhooks though and prevents the takedown attempt.
Carter tries to jump guard but he falls flat on his backside. Spry smiles and moves away.
Spry has taken the fight to the clinch.
Carter is trying to slow down the pace in the clinch, to catch his breath.
Spry drags the fight down to the ground.
Carter missing there with some ground and pound from the guard.
Spry is working actively off his back, looking to secure an arm or perhaps work for a triangle.
Spry manages to land a sweep and now he's in mount on top!
Both fighters are breathing heavily.
That's one minute gone in the round.
Spry working for a submission but Carter is keeping him at bay.
Spry wants to take Carter's back here but Carter is holding on to an arm, himself looking to escape.
Spry rolls and manages to get back to half guard. Nicely done.
Spry trying to control here.
Spry kicks Carter off and gets back to his feet.
Carter has closed the distance and engaged Spry in a clinch.
Spry jumps guard.
Spry lands a beautiful switch and he's in full mount! That could spell trouble for Carter!
Spry has his opponent pinned against the cage, landing some nasty ground and pound that is really making a bit of a mess out of Carter's face.
That's two minutes gone in the round.
Carter tries to reverse the position but Spry maintains control.
Spry won't let Carter get back to his feet... He wants to keep the fight where it is for now.
Spry controlling from mount.
Spry fakes a shot to the body and cracks his opponent in the head. Nice ground and pound there!
Carter keeping his composure momentarily, calmly looking to get back to half guard.
Carter gets back to half guard.
Spry is working for submissions here but there's nothing on.
Spry is keen to just control but Carter is a slippery customer.
Spry tries to pass to full mount but Carter defends it.
Carter is pressing down on Spry's left leg trying to get back to full guard. He's managed it.
Carter trying to keep a closed guard but Spry is proving a slippery customer.
Carter is working the butterfly guard. He manages to land a nice scissor sweep and is now in half guard on the top. Nice move.
Carter seems very keen to just sit and control from half guard but Spry does not like that idea so much and is remaining active off his back.
That's three minutes gone in the round.
Carter thows a huge punch but Spry dodges it nicely.
Spry regains full guard. Nicely done.
Spry looking for submissions off his back, moving his hips, looking for an opening.
Carter tries to free his leg and advance position but Spry is retaining full guard.
Spry avoiding any damage from the ground and pound.
Spry is looking for a triangle but Carter pushes his legs off easily.
Carter lands a nice shot whilst sitting in his opponent's guard.
Carter in full guard, throwing the ground and pound. No damage this time.
Spry looking for submissions from the bottom but instead Carter passes into side control.
Carter controls the position.
Spry tries to strike but it doesn't land.
Carter decides to stand back up.
Spry stuffs the takedown attempt from Carter. Carter gets slowly back to his feet.
That's four minutes gone in the round.
Spry shoots in for a takedown but Carter shows good takedown defense.
Carter closes the distance, clinches up and gets a nice trip takedown into side control. Very smooth.
Carter stands up and we're back to a striking position.
Spry shoots in and bounces Carter off the cage to secure the takedown into guard.
Spry pushing down on Carter's thigh, trying to pass to half guard. He's managed it... Nice work.
This is a great period of action - very entertaining stuff!
Spry lands a big shot. The thud that echoes around the arena is like music to the fans' ears.
Spry missing with some ground and pound from the half guard.
Spry is trying to work for a kimura but Carter is defending well.
Spry trying to control from half guard but Carter is working away.
The crowd applaud the fighters efforts here as the round comes to an end.
Spry throwing shots but they're hitting the canvas more than the man.
Joseph Spry has stepped it up - he knows he needs a finish here!
Carter makes some distance and scrambles quickly back to his feet. Nice work!
Carter looks frusrated there after his takedown attempt is stuffed easily.
And that's the end of the fight!
Joseph Spry comfortably won the final round on my scorecard.
Well Carter has outscored his opponent in every aspect of the fight today. Only a scarily incompetent judge or two will keep him from a well deserved win... Over to the ring announcer for the scorecards.
Ladies and gentlemen, after 3 rounds of action, we go to the scorecards for a decision.
Judge James Atkins scores the fight 29:28
Judge James Glass scores the fight 29:28
Judge Steven Brown scores the fight 29:28
In favor of your winner, by unanimous decision... Carlos Carter!
|
|
|
|
|
|
|
|
|
|
|
|
|
|
|
|
|
|
|
|
|
|
|
| S |
C
A |
G |
S |
C
B |
G |
|
S |
C |
G |
|
energy
A | B |
|
hype
A | B |
|
pop
A | B |
|
mgr
A | B |
|
FIGHT
RATING
79% |
|
|
|
|
|
|
|
Undercard bout
|
|
|
|
Undercard bout
|
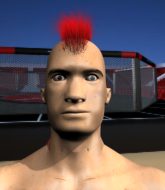
Coming up we have a middleweight MMA rules bout between Jester Head (ranked 0 p4p, 0 weight class) and Antonio Santiago (ranked 0 p4p, 0 weight class). Santiago has chosen Lord Give Me a Sign-DMX as his entrance music. Jester Head has the edge in experience - let's see if he can make that count tonight.
 |
|
 |
| 180 cm
20
185 lbs
2 - 1 - 0 |
|
188 cm
22
192 lbs
1 - 0 - 0 |
BJJ White Belt
Counter striker
Prefers ground |
|
Good takedowns
Basic striking
Solid chin |
|
| |
|
Ladies and gentlemen. This fight is 3 rounds, in the middleweight division.
Introducing the fighter to my left, fighting out of the red corner.
With a record of
2 - 1 - 0, fighting out of London, Jester Head!
And introducing the fighter to my right, fighting out of the blue corner.
With a record of
1 - 0 - 0, fighting out of London, Antonio Santiago!
The judges for this bout are Donald Grub, Andrew Berry and Colin Fotheringham.
The bell rings for round one and we are underway!
Excellent takedown into side control there by Santiago.
Both fighters really going for it on the ground here!
Head managing to avoid any damage from the strikes thrown by Santiago.
Head sneaks a leg under to get back to half guard.
Santiago is looking for an arm triangle, whilst trying to pass to side control. Head doesn't seem that keen to cooperate though. No luck this time Santiago.
Santiago has the superior BJJ but he's also working some ground strikes into his gameplan.
Head tries to roll over but Santiago keeps him under control.
Santiago is working hard to pass the guard. He's done it - he's now in full mount! Trouble for Head!
A really sloppy takedown attempt there from Santiago.
Santiago shoots in for a takedown but Head shows good takedown defense.
Santiago looking for a takedown here - he's got it.
Santiago looks gassed!
Head not looking particularly offensive just at the moment.
Head is looking to get back to his feet but can't, whilst Santiago is controlling him.
Santiago looking to pass the guard.
Head is trying to stand up but he's not managed so far.
That's one minute gone in the round.
Santiago content to strike from guard, landing some decent shots.
Head tries to land a sweep but no joy.

Neither fighter is doing enough for the referee's liking and he's decided to stand them back up.
Head feints and then dives in with a takedown. That was a long way out but the feint bought him enough time to close the distance and complete the takedown. Now we'll play guard for a bit and see who can get the better of that position.
Santiago wants to sweep but no luck.
Head avoids a guillotine attempt easily.
Head wanted to stand there but Santiago had control of the position.
A big thud reverberates around the arena there as Head accidentally thumps the mat. Hopefully he's not broken his hand.
Head connects with a couple of short punches.
Santiago throwing some rather feeble looking strikes off his back.
Head advances to half guard.
Head is tying to control. Santiago wants to improve his position but can't escape this time.
Head knows he needs to get back to his feet asap. He's simply no match for Santiago on the ground.
Santiago moves his hips nicely and gets into full guard.
Head with a nice head shot there.
That's two minutes gone in the round.
Santiago bucks up whilst keeping hold of a body lock, managing to reverse the position. Now he's in top in Head's guard.
Head is looking to get back to his feet but can't, whilst Santiago is controlling him.
Santiago pushing down on Head's thigh, trying to pass to half guard. He's managed it... Nice work.
Santiago is trying for a kimura here. Head looks like he's in a lot of pain... and he's tapping out! Santiago wins by kimura!
Ladies and gentlemen, after 2:37 of round 1, we have a winner by way of Submission (Kimura). Antonio Santiago!
|
|
|
|
|
|
|
|
|
|
|
|
|
|
|
|
|
|
|
|
|
|
|
| S |
C
A |
G |
S |
C
B |
G |
|
S |
C |
G |
|
energy
A | B |
|
hype
A | B |
|
pop
A | B |
|
mgr
A | B |
|
FIGHT
RATING
68% |
|
|
|
|
|
|
|
Undercard bout
|
|
|
|
Undercard bout
|
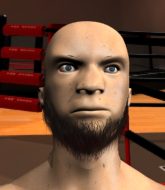
Coming up we have a light heavyweight MMA rules bout between Fucke Keith (ranked 0 p4p, 0 weight class) and Bobski Oslo (ranked 0 p4p, 0 weight class). Chooooooooon! I think Keith might be my favorite fighter, now he's come out to Tool. Bobski Oslo struggled to make weight for this fight. He only made it down to 207.0lbs at the first attempt and had to take the additional two hours to make the official bout weight. Let's see how much it's taken out of him. Man, I cannot wait for this one!
 |
|
 |
| 190 cm
22
215 lbs
2 - 1 - 0 |
|
190 cm
20
215 lbs
1 - 0 - 0 |
BJJ Blue Belt
Basic striking
Granite chin |
|
BJJ Purple Belt
Nice elbows
Prefers standup |
|
| |
|
Ladies and gentlemen. This fight is 3 rounds, in the light heavyweight division.
Introducing the fighter to my left, fighting out of the red corner.
With a record of
2 - 1 - 0, fighting out of London, Fucke Keith!
And introducing the fighter to my right, fighting out of the blue corner.
With a record of
1 - 0 - 0, fighting out of London, Bobski Oslo!
The judges for this bout are William Gold, James Atkins and Chris Edwards.
The bell rings for round one and we are underway!
Oslo throws a wild combination but nothing lands.
Keith scores with a nice takedown into half guard. Let's see what he's got on the ground.
Oslo tries to roll over but Keith keeps him under control.
Oslo actively working from the bottom here.
Oslo wants to get back to full guard but Keith has passed into side control.
Oslo looks gassed!
Oslo is trying to escape the mount.
That's one minute gone in the round.
Keith is working on an americana here. Ooh, that looks pretty nasty! Nope, Oslo has managed to escape the submission attempt.
Keith working to secure an arm triangle but it's not happening for him just yet.
Oslo is working to get back to half guard.
Keith manages to capitalize on a mistake by Oslo to take his back!
The fighters are pressed up against the cage, both looking to find a bit of space to work.
Keith is throwing strikes from the back here. Oh that last one was to the back of the head. Keith gets a warning from the referee. He throws another strike to the back of the head straight away though and the referee has seen enough. He breaks up the two fighters and stands them back up. Keith gets a real talking to here and is lucky not to get a point deducted. Keith apologises and we restart here on the feet.
Oslo throws a monster uppercut resembling something out of street fighter but it doesn't land.
Oslo gets taken down but at least he's managed to land in guard.
That's two minutes gone in the round.
Keith stands up from guard. Let's bang!
Bobski Oslo is looking to keep the fight on the feet at all costs.
Keith shoots in for a takedown! He's got it and he's managed to land in full mount! That's better than Keith was expecting from the takedown attempt, I'm sure!
Keith has hold of Oslo's left arm, perhaps looking for a submission. The two fighters tussle over control of the isolated limb and Oslo manages to get his arm back to his side and away from danger.
Oslo gets back to half guard.
The fans in attendance giving it up for the two fighters, who have really let it all hang out in the last minute or so!
Oslo wants to get back to full guard but Keith has mounted him!
Oslo keeping his composure momentarily, calmly looking to get back to half guard.
Keith is looking to secure an arm. He's managed it! He's pivoting for an armbar - that looks tight! But Oslo has managed to get out of it and now he's in a dominant position. Nice work from Oslo!
Oslo trying to control the position from guard on top but Keith is wriggling around, looking for whatever he can.
The ref warns both fighters not to hold the cage as they work up against the meshing.
That's three minutes gone in the round.
Oslo stands up and looks to throw the legs aside to pass to side control. Keith swivels though and keeps the full guard.
Oslo postures up as if he's going to throw some strikes but drops back for an ankle! Keith is in big trouble! He looks ready to tap! But no, he's escaped and dives on top of Oslo, into his guard.
Oslo is working actively off his back, looking to secure an arm or perhaps work for a triangle.
Keith passes Oslo's left leg - he's now in half guard.
Keith prevents Oslo from improving his position.
Oslo looking for submissions off his back.
That's four minutes gone in the round.
The crowd are getting on the fighters' backs, as the pace has dropped off in the last minute or so.
Keith wants to control but Oslo is keeping him busy.
Oslo is looking to sinch up a gullotine here but Keith pulls his head out easily.
Oslo looking for submissions off his back.
Keith decides to stand and escape the position.
Keith moves into the clinch.
Keith scores with a nice hook to the head.
Keith breaks the clinch and we're back to striking at distance.
Keith darts in and lands a nice takedown into half guard.
Oslo tries to get to full guard but Keith has control of the leg.
And that�s the end of the round � the fighters go back to their corners.
Fucke Keith dominated that round.
That's time! Keith's corner gives him a slap on the ass as he gets ready to fight.
Keith feints and as Oslo raises his hands in defense, Keith changes levels and drives through with a takedown into guard.
Keith stands up and looks to throw the legs aside to pass to side control. Oslo swivels though and keeps the full guard.
Oslo is trying to keep Keith in close.
Oslo is actively looking for submissions from his back. He's worked himself a little space on the bottom and seems to be going for a triangle. No, he's switched into an armbar! That was slick! Keith rolls with it to try and escape but Oslo cranks on the arm and Keith is forced to tap out! This one is aaaaaaaaall over!
Ladies and gentlemen, after 0:36 of round 2, we have a winner by way of Submission (Armbar). Bobski Oslo!
|
|
|
|
|
|
|
|
|
|
|
|
|
|
|
|
|
|
|
|
|
|
|
| S |
C
A |
G |
S |
C
B |
G |
|
S |
C |
G |
|
energy
A | B |
|
hype
A | B |
|
pop
A | B |
|
mgr
A | B |
|
FIGHT
RATING
100% |
|
|
|
|
|
|
|
Undercard bout
|
Coming up we have a heavyweight MMA rules bout between Reg Wilberforce (ranked 0 p4p, 0 weight class) and Jack Suon (ranked 0 p4p, 0 weight class). Suon is bobbing his head along to his entrance song: Seether. Jack Suon is staring across the cage at his opponent, tweaking his nipples.
 |
|
 |
| 185 cm
21
250 lbs
1 - 0 - 0 |
|
195 cm
21
270 lbs
1 - 1 - 0 |
BJJ Blue Belt
Counter striker
Good chin |
|
BJJ Blue Belt
Counter striker
Granite chin |
|
| |
|
Ladies and gentlemen. This fight is 3 rounds, in the heavyweight division.
Introducing the fighter to my left, fighting out of the red corner.
With a record of
1 - 0 - 0, fighting out of London, Reg Wilberforce!
And introducing the fighter to my right, fighting out of the blue corner.
With a record of
1 - 1 - 0, fighting out of London, Jack Suon!
The judges for this bout are Chris Edwards, Colin Fotheringham and Richard Clark.
The bell rings for round one and we are underway!
The fight stays on the outside here - Wilberforce looks like he's thinking about clinching though.
Wilberforce could do with loosing a few pounds - he looks very soft around the mid section, to put it politely.
Suon circles away from the clinch attempt.
Suon avoids the head kick by Wilberforce.
Wilberforce throws a head kick that misses.
Wilberforce throws a head kick that misses and slips in the process. He scrambles back to his feet and the fighters circle.
Suon moves out of range of the body kick from Wilberforce.
Wilberforce looks to land a combination. Suon sees it coming but can only parry a couple of the shots.

It looks like Jack Suon has been cut.
Wilberforce closes the distance, clinches up and gets a nice trip takedown into side control. Very smooth.
Wilberforce throwing shots but missing, from side control.
Wilberforce wants to work for a kimura but he's foiled early by Suon, who protects the arm well.
Suon is sneaking out the side here. He's bucked Wilberforce off and has taken his back!
That's one minute gone in the round.
Wilberforce tries to escape the position.
Wilberforce trying to get back to his feet but Suon is in full control for now.
The referee is taking a good look at Wilberforce as he is on the wrong end of some big shots from Suon!
Wilberforce tries to roll but Suon sticks to his back.
Suon has the hooks in and he's looking for a rear naked choke here. Wilberforce is defending well but eventually Suon manages to get an arm under the chin and he's locked on the RNC! Wilberforce has no choice but to tap now! He does! This one is all over!
Ladies and gentlemen, after 1:55 of round 1, we have a winner by way of Submission (RNC). Jack Suon!
|
|
|
|
|
|
|
|
|
|
|
|
|
|
|
|
|
|
|
|
|
|
|
| S |
C
A |
G |
S |
C
B |
G |
|
S |
C |
G |
|
energy
A | B |
|
hype
A | B |
|
pop
A | B |
|
mgr
A | B |
|
FIGHT
RATING
47% |
|
|
|
|
|
|
|
Co-main event
|
|
|
|
Main event
|
Coming up we have a light heavyweight MMA rules bout between Andre Price (ranked 0 p4p, 0 weight class) and Kurt Horner (ranked 0 p4p, 0 weight class). Chooooooooon! I think Price might be my favorite fighter, now he's come out to Phrase-Here Now. Horner is bobbing his head along to his entrance song: The Deftones. Andre Price has the better chin. Will he look to stand and bang today?
 |
|
 |
| 190 cm
22
205 lbs
2 - 0 - 0 |
|
186 cm
22
211 lbs
1 - 0 - 0 |
BJJ Blue Belt
Good knees
Good chin |
|
BJJ Blue Belt
Counter striker
Likes ground |
|
| |
|
Ladies and gentlemen. This fight is 3 rounds, in the light heavyweight division.
Introducing the fighter to my left, fighting out of the red corner.
With a record of
2 - 0 - 0, fighting out of London, Andre Price!
And introducing the fighter to my right, fighting out of the blue corner.
With a record of
1 - 0 - 0, fighting out of London, Kurt Horner!
The judges for this bout are Paul Tew, Chris Edwards and Donald Grub.
The bell rings for round one and we are underway!
Price throws a head kick but Horner moves out of range.
Price throws a head kick that misses and slips in the process. He scrambles back to his feet and the fighters circle.
Price throws a sloppy head kick and Horner moves out of range easily.
Horner blocks a head kick by Price.
Price throws a wild combination but nothing lands.
Price tries a head kick but it misses.
Horner avoids the head kick by Price.
A head kick misses from Price.
A head kick misses from Price.
Horner changes levels and drives through with a really nice takedown into side control. Price looks really pissed at himself for not defending that better.
Price is breathing heavily.
Horner landing a few strikes.
It looks like Andre Price has been cut.
Horner landing with strikes to the head and body from side control.
Horner happy to just control the position for now.
Horner working hard here to secure a kimura but he's not really in the right position for it.
Price tries to buck Horner off but Horner is having none of it.
That's one minute gone in the round.
Horner scoring with punches from side control.
Horner is looking to take a break and control but Price is keeping him honest, looking to work from the bottom.
Price takes a couple of big shots there - the referee warns him that he has to defend himself better.
Andre Price's cut is getting worse.
Horner passes to full mount! That's big trouble for Price!
Horner looking to control but Price is working nicely, looking to advance position himself.
Price is trying to escape the mount.
Price is working hard here to advance position.
Price wants to get back to his feet.
Price really trying hard to get back to half guard here.
Horner has the superior BJJ but he's also working some ground strikes into his gameplan.
Horner working the ground and pound effectively.
That's two minutes gone in the round.
Horner looking to control and managing it successfully.
Price is trying desperately to improve position.
Horner connects with a couple of good shots from mount.
Andre Price's cut is bleeding quite badly. He's got to try and protect it.
Price is trying to get to the cage to help him get back to his feet.
Price is working to get back to half guard.
Horner has his opponent pinned against the cage, landing some nasty ground and pound that is really making a bit of a mess out of Price's face.
Horner lands a heavy elbow.
Jeez, Andre Price's cut is really nasty now. The referee must be thinking about getting that checked.
The referee calls the doctor in to look at Andre Price's cut. Oh no, the doctor has called an end to the bout!
Ladies and gentlemen, after 3:05 of round 1, we have a winner by way of TKO (Cut). Kurt Horner!
|
|
|
|
|
|
|
|
|
|
|
|
|
|
|
|
|
|
|
|
|
|
|
| S |
C
A |
G |
S |
C
B |
G |
|
S |
C |
G |
|
energy
A | B |
|
hype
A | B |
|
pop
A | B |
|
mgr
A | B |
|
FIGHT
RATING
65% |
|
|
|
|
|
|
|
|
|
|
