 |
TBA 19th PBP Commentary |
Undercard bout
|
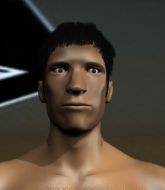
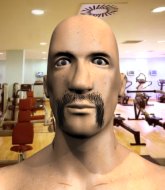
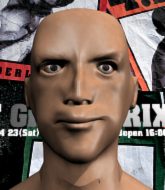
Coming up we have a middleweight MMA rules bout between Tomi Rajala (ranked 0 p4p, 0 weight class) and Chow Yun Phat (ranked 0 p4p, 0 weight class). Rajala's ring entrance music is that housewives' favourite, For Whom the Bell Tolls. Over to our ring announcer for the fighter introductions!
 |
|
 |
| 180 cm
24
195 lbs
7 - 4 - 0 |
|
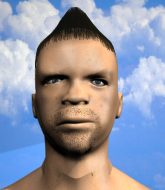
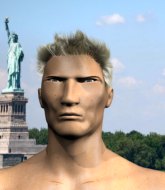
190 cm
23
197 lbs
3 - 2 - 0 |
Good wrestling
Counter striker
Experienced |
|
BJJ Blue Belt
Brawler
Solid chin |
|
| |
|
Ladies and gentlemen. This fight is 3 rounds, in the middleweight division.
Introducing the fighter to my left, fighting out of the red corner.
With a record of
7 - 4 - 0, fighting out of Tokyo, Tomi Rajala!
And introducing the fighter to my right, fighting out of the blue corner.
With a record of
3 - 2 - 0, fighting out of Tokyo, Chow Yun Phat!
The judges for this bout are Taro Takaoka, Yukihiro Yamamoto and Shirou Masuda.

The bell rings for round one and we are underway!
Rajala throws a body kick but he wasn't in range.
Yun Phat misses with a hook.
Yun Phat throws a right and a left that Rajala avoids nicely.
Yun Phat misses with a double jab.
Rajala slips a jab and a cross from Yun Phat.
Yun Phat avoids the body shot from Rajala.
Rajala tries to land with a swinging hook to the body but Yun Phat was well out of range. Poor timing from Rajala.
Yun Phat scores with a reasonable looking shot to the body. Rajala doesn't seem bothered though.
Yun Phat fails to land with a series of punches.

Yun Phat gets caught flat footed, as Rajala shoots in with a quick takedown into guard.
Yun Phat keeping full guard, as Rajala tries to pass.
Rajala postures up in Yun Phat's guard and throws a big left but Yun Phat blocks it.
Rajala trying to control the position from guard on top but Yun Phat is wriggling around, looking for whatever he can.
Rajala working some ground and pound from guard but it's not doing any damage.
The ref warns both fighters not to hold the cage as they work up against the meshing.

That's one minute gone in the round.
Rajala scoring with punches to the head and body.
Yun Phat is looking to get back to his feet but can't, whilst Rajala is controlling him.
Rajala loading up with the ground and pound but he's missing more than he's landing in this flurry.
Yun Phat throws a couple of weedy looking strikes off his back.

The referee decides to stand the fighters back up.
Rajala fails to land with the punch combination there - jab, cross, hook, miss, miss, miss.
Rajala shoots in for a double leg but Yun Phat sprawls well. That's going to sap some energy.
Yun Phat looks to land a body kick but Rajala moved away.
Yun Phat tries a head kick but it misses.
Yun Phat avoids the head kick by Rajala.
Rajala avoids the head kick by Yun Phat.

That's two minutes gone in the round.
A few boos can be heard. I'm sure they will multiply if the fighters don't pick up the pace.
Yun Phat lands with a slapping head kick.
Yun Phat lands with a cross.
Yun Phat misses with a jab and misses with a cross straight after too.
Yun Phat connects with a single shot there.
Rajala misses with a body shot.
A left and a right from Yun Phat both land. Nice combination.
Yun Phat throws a body kick but he was well out of range there.
Chow Yun Phat seems to be the more aggressive standup fighter in this bout.
Yun Phat throws a wild combination but nothing lands.
Yun Phat looks gassed!
Rajala throws a head kick but Yun Phat moves out of range.
Rajala shoots in for a takedown and gets it. Oh and he's advanced to full mount straight away.
Rajala unloading with bombs!
Rajala punishing his opponent with strikes.
Rajala tucks in and makes sure he doesn't lose the dominant position.
Rajala throws some wild stikes that Yun Phat manages to avoid easily.

That's three minutes gone in the round.
Rajala throws some wild stikes that Yun Phat manages to avoid easily.
Rajala putting on the heat here with some good ground and pound!
Rajala punishing his opponent with strikes.
Rajala with shots to the head and body - Yun Phat looks very uncomfortable down there.
Rajala with the ground and pound from mount.
Rajala working away from the top, dropping strikes.
Rajala working Yun Phat over with strikes here.

That's four minutes gone in the round.
Rajala lands a shot to the body, followed up by a shot to the exposed head of his trapped opponent.
The crowd are loving this. Great action here.
The crowd growing excited in anticipation of a finish here! Right on cue, Rajala cracks his opponent with a massive right hand that draws loud cheers!
Rajala pausing momentarily but resumes with a couple of decent strikes that do a bit of damage.
Yun Phat in a bad spot here, taking shots to the head.

Yun Phat is rocked!
A big strike lands for Rajala! That's really hurt Yun Phat and he's turned his back - Rajala keeps firing away and the ref dives in to stop the fight! Rajala Jumps to his feet to celebrate the victory!
Ladies and gentlemen, after 4:56 of round 1, we have a winner by way of TKO (Strikes). Tomi Rajala!
|
|
|
|
|
|
|
|
|
|
|
|
|
|
|
|
|
|
|
|
|
|
|
| S |
C
A |
G |
S |
C
B |
G |
|
S |
C |
G |
|
energy
A | B |
|
hype
A | B |
|
pop
A | B |
|
mgr
A | B |
|
FIGHT
RATING
69% |
|
|
|
|
|
|
|
Undercard bout
|
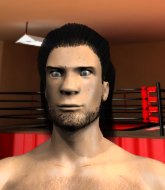
Coming up we have a welterweight MMA rules bout between Ong Bak (ranked 0 p4p, 0 weight class) and Koshi Tatsu (ranked 0 p4p, 0 weight class). Both fighters look fresh as a daisy as they make their way towards the cage.
 |
|
 |
| 180 cm
23
180 lbs
3 - 1 - 0 |
|
177 cm
24
175 lbs
8 - 6 - 0 |
BJJ Blue Belt
Excellent MT
KO power |
|
BJJ Brown Belt
Counter striker
Knockout power |
|
| |
|
Ladies and gentlemen. This fight is 3 rounds, in the welterweight division.
Introducing the fighter to my left, fighting out of the red corner.
With a record of
3 - 1 - 0, fighting out of Tokyo, Ong Bak!
And introducing the fighter to my right, fighting out of the blue corner.
With a record of
8 - 6 - 0, fighting out of Tokyo, Koshi Tatsu!
The judges for this bout are Yukihiro Shimada, Ren Mimura and Taro Takaoka.
The bell rings for round one and we are underway!
Bak tries to clinch up but Tatsu circles away and keeps his distance.

Bak has taken the fight to the clinch.
Tatsu has hold of a leg and is looking for a trip takedown. Bak avoids it nicely though and we remain in the clinch.
Bak with the Thai clinch, lands a knee to the head.
Bak with a knee to the head.
Bak lands a knee to the head.
Tatsu is trying to drag Bak to the mat but Bak just about manages to keep his footing. He used the cage to his advantage there.
Bak lands a knee to the head.
Tatsu tries for a takedown. No joy.
Ong Bak has stuffed three takedown attempts in the round now. That's going to take a lot out of Koshi Tatsu.
Kneeeeees! The crowd are calling for knees to the body. Bak obliges.
Tatsu looks gassed!
Bak ties up his opponent against the cage and manages to drag the fight down to the ground. Bak no doubt will be looking to work submissions from his guard.
Bak bucks up whilst keeping hold of a body lock, managing to reverse the position. Now he's in top in Tatsu's guard.
Tatsu is working an open guard here, looking to improve his position. No doubt that will leave him open to counters but at least he's being more offensive.
Bak trying to control but Tatsu is working from the bottom.
That's one minute gone in the round.

Tatsu looks to be working for a triangle here. Oh, it looks like he might have it! Bak has picked Tatsu up and slammed him! Tatsu can't keep hold of the triangle and Bak manages to pass to side control!
Tatsu tries to improve position but can't.
Tatsu manages to land a sweep and he's now on top! Lovely Jiu Jitsu!
Tatsu is working for a submission of some sort.
Tatsu is trying a forearm choke� I don't think that's going to do much at this level of the game.
That's two minutes gone in the round.
The crowd are hurling abuse towards the fighters... You can hardly blame them though because there isn't a lot going on in the fight.
Tatsu is sneakily working for an arm triangle but Bak sees it coming and defends easily.
Bak wants to get back to his feet.
Tatsu is trying a forearm choke� I don't think that's going to do much at this level of the game.
That's three minutes gone in the round.

Bak makes some distance and scrambles quickly back to his feet. Nice work!
Good leg kick by Bak there. It's the ones that make that thud noise that hurt and that was an almighty thud.
Bak moves in looking to clinch but Tatsu pushes him off.
Bak wants to clinch up but Tatsu keeps it at a distance.
Bak wants to clinch up but Tatsu keeps it at a distance.
That's four minutes gone in the round.
Bak doesn't manage to clinch there - Tatsu circles away.
Bak fails in his attempt to clinch.
A head kick from Bak lands but Tatsu takes it in his stride.
Tatsu keeps the fight on the outside.
Tatsu keeps the fight on the outside.
Tatsu shoots in for a takedown but Bak shows good takedown defense.
And that�s the end of the round � the fighters go back to their corners.
Ong Bak dominated that round.
That's the end of the round. The referee orders the cornermen out of the cage so we can get back down to business.

Bak tries to clinch up but Tatsu circles away and keeps his distance.
Tatsu is trying hard to land a takedown here. Bak sprawls well and keeps this one on the feet.
Ong Bak is looking to throw some combinations by the looks of things.
A low kick from Tatsu misses
and Bak counters by clinching up.
Bak gets an overhook and lands an elbow to the side of the head.
Bak creates a bit of space for himself and sneaks an elbow through Tatsu's defenses.

It looks like Koshi Tatsu has been cut.
Bak lands an elbow just above Tatsu 's eye.
Bak lands a knee to the head there! That was nasty!
Tatsu is rocked!
Bak looking to throw knees to the head but Tatsu is blocking nicely.
Tatsu is still on wobbly legs! Can Bak finish him?
Bak lands an elbow just above Tatsu 's eye.
Nice elbow from Bak.
Bak connects with a knee right up the middle there - that's rocked Tatsu badly! Tatsu tumbles to the floor and Bak stands over him, dominant and satisfied with his glorious KO victory!
Ladies and gentlemen, after 0:52 of round 2, we have a winner by way of TKO (Strikes). Ong Bak!
|
|
|
|
|
|
|
|
|
|
|
|
|
|
|
|
|
|
|
|
|
|
|
| S |
C
A |
G |
S |
C
B |
G |
|
S |
C |
G |
|
energy
A | B |
|
hype
A | B |
|
pop
A | B |
|
mgr
A | B |
|
FIGHT
RATING
86% |
|
|
|
|
|
|
|
Undercard bout
|
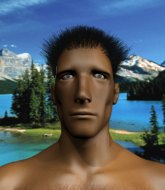
Coming up we have a light heavyweight MMA rules bout between Ken Severn (ranked 0 p4p, 0 weight class) and Joe West (ranked 0 p4p, 0 weight class). Severn comes to the cage accompanied by Pride FC Theme. West has chosen . as his entrance music. Over to our ring announcer for the fighter introductions!
 |
|
 |
| 184 cm
22
220 lbs
8 - 7 - 0 |
|
190 cm
24
210 lbs
6 - 4 - 0 |
BJJ Purple Belt
Solid boxing
Granite chin |
|
BJJ Purple Belt
Decent boxing
Knockout power |
|
| |
|
Ladies and gentlemen. This fight is 3 rounds, in the light heavyweight division.
Introducing the fighter to my left, fighting out of the red corner.
With a record of
8 - 7 - 0, fighting out of Tokyo, Ken Severn!
And introducing the fighter to my right, fighting out of the blue corner.
With a record of
6 - 4 - 0, fighting out of Tokyo, Joe West!
The judges for this bout are Yasuomi Hirokawa, Sosuke Kotani and Yuuki Gou.
The bell rings for round one and we are underway!
West takes a body punch but keeps moving.
West rushes forward with a series of wild hooks but Severn moves out of range and avoids them all easily.
West throws a body punch but Severn moves out of range.
Severn is pinned up against the cage taking some big shots here. The referee is looking closely deciding whether he should stop the fight.
West throws a head kick that misses and slips in the process. He scrambles back to his feet and the fighters circle.
Severn thuds a left hand into West's body.
Severn throws a looping overhand right but West ducks down to avoid it.
Nice body punch from Severn.
Severn lands a nice hook to West's body. West takes it in his stride and looks to land his own strikes.
West looks gassed!
The fans in attendance giving it up for the two fighters, who have really let it all hang out in the last minute or so!
Severn throws a nice looking combination but West bobs and weaves to avoid any damage.
Severn scores a takedown into full mount!
Severn looking to isolate an arm here. West doesn't see it coming and as Severn extends the arm, he's forced to tap out! Nice submission by Severn!
Ladies and gentlemen, after 0:45 of round 1, we have a winner by way of Submission (Armbar). Ken Severn!
|
|
|
|
|
|
|
|
|
|
|
|
|
|
|
|
|
|
|
|
|
|
|
| S |
C
A |
G |
S |
C
B |
G |
|
S |
C |
G |
|
energy
A | B |
|
hype
A | B |
|
pop
A | B |
|
mgr
A | B |
|
FIGHT
RATING
100% |
|
|
|
|
|
|
|
Undercard bout
|
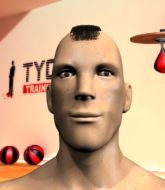
Coming up we have a lightweight MMA rules bout between Yoshi Yamoto (ranked 0 p4p, 0 weight class) and Gaston St Pierre (ranked 0 p4p, 0 weight class). Chooooooooon! I think Yamoto might be my favorite fighter, now he's come out to Blow by Atreyu. Gaston St Pierre has the eye of the tiger tonight.
 |
|
 |
| 175 cm
19
162 lbs
4 - 4 - 0 |
|
178 cm
23
155 lbs
4 - 1 - 0 |
BJJ Purple Belt
Counter striker
Experienced |
|
Powerful takedowns
Excellent MT
Powerful |
|
| |
|
Ladies and gentlemen. This fight is 3 rounds, in the lightweight division.
Introducing the fighter to my left, fighting out of the red corner.
With a record of
4 - 4 - 0, fighting out of Tokyo, Yoshi Yamoto!
And introducing the fighter to my right, fighting out of the blue corner.
With a record of
4 - 1 - 0, fighting out of Tokyo, Gaston St Pierre!
The judges for this bout are Yasuomi Hirokawa, Yukihiro Shimada and Tatsuya Matsuyama.
The bell rings for round one and we are underway!
St Pierre lands a nice hook to Yamoto's body. Yamoto takes it in his stride and looks to land his own strikes.
St Pierre throws a head kick that Yamoto semi-blocks.
St Pierre will need to tighten up his combinations if he doesn't want to gas himself out, swinging at thin air.
Yamoto closes the distance and scores a nice trip takedown into half guard. St Pierre did well to prevent Yamoto getting side control.
St Pierre has one foot on Yamoto's thigh - he pushes off and manages to get back to his feet.
St Pierre tries to close the distance and clinch up but Yamoto swats him away and circles back towards the center.
St Pierre is looking to clinch.
St Pierre tries to clinch but is not successful on this occasion.
Yamoto dodges the punch combination from St Pierre.
St Pierre throws a right and a left that both miss.
St Pierre loads up on a big right hand but Yamoto slips the punch.
Yamoto chopped to the floor by a nice leg kick but he springs right back up before St Pierre can pounce on him.
That's one minute gone in the round.
Nice body kick from St Pierre.
St Pierre keeping a good distance there, avoiding the body shot.
St Pierre is looking to clinch.
Yamoto takes a head kick and shrugs it off.
St Pierre tries to clinch but is not successful on this occasion.
Gaston St Pierre seems to be the more aggressive standup fighter in this bout.
St Pierre works over Yamoto's head and body with a nice combination.
Yamoto slips a jab and a cross from St Pierre.
St Pierre connects with a high kick.
Yamoto swats away the attempt to clinch by St Pierre.
St Pierre looks to score with a combo but nothing lands.
Yamoto lands a jab to St Pierre's midsection.
A left and a right from St Pierre both land. Nice combination.
That's two minutes gone in the round.
St Pierre throws a combination but it was largely blocked by Yamoto.
A head kick misses from St Pierre.
Jab, cross, leg kick. Nice combination by St Pierre!
St Pierre with a body punch. A glancing blow.
St Pierre cracks Yamoto with a nice right hand that draws applause from the crowd.
Yamoto tries to check the leg kick but that clearly hurt him.
St Pierre throws a one two combo.
St Pierre throws a good cross that connects.
St Pierre will need to tighten up his combinations if he doesn't want to gas himself out, swinging at thin air.
Yamoto scores with a nice right hand.
St Pierre misses with a half-hearted attempt at a head kick.
That's three minutes gone in the round.
St Pierre misses with the combination.
St Pierre misses with a few strikes there.
St Pierre closes the distance and lands a one-two.
St Pierre throws a series of strikes that have Yamoto backpedaling.
Yamoto looks to land a combination but St Pierre avoids it well.
St Pierre throws a sloppy head kick and Yamoto moves out of range easily.
St Pierre throws a head kick that misses and slips in the process. He scrambles back to his feet and the fighters circle.
Yamoto lands a powerful looking uppercut that connected with his opponent's jaw.
St Pierre tries to clinch but Yamoto is having none of it.
Yamoto blocks the body kick.
Yamoto misses with a hook. St Pierre ducked under it nicely.
That's four minutes gone in the round.
A few boos can be heard. I'm sure they will multiply if the fighters don't pick up the pace.
St Pierre throws a shot from downtown. Yamoto moves away and avoids it.
Yamoto keeps the fight on the outside.
St Pierre fails with an attempt to clinch.
Yamoto works over St Pierre's head and body with a nice combination.
Yamoto stumbles momentarily as he takes a strong leg kick from St Pierre.
Yamoto throws a jab, cross combination which is slipped
and St Pierre counters with a head kick. That will keep Yamoto thinking before he tries any more sloppy attacks!
Yamoto avoids the body shot from St Pierre.
St Pierre lands with a thumping leg kick.
St Pierre lands a kick to the ribs of his opponent. Nice work there - in and out in a flash.
St Pierre moves in looking to clinch but Yamoto pushes him off.
St Pierre doesn't manage to clinch there - Yamoto circles away.
And that�s the end of the round � the fighters go back to their corners.
Gaston St Pierre dominated that round.
OK. That's time! The bell goes and we're back to the action.
Yamoto connects nicely with a jab. Noted by the judges no doubt.
St Pierre fails in his attempt to clinch.
St Pierre throws a combination that misses
and Yamoto counters with a nice double leg into half guard.
We get told so often about how wrestlers don't like to be on their backs. Let's see if St Pierre can do anything to dispel that myth.
Yamoto prevents St Pierre from standing back up.
Yamoto is pressing down on St Pierre's thigh, looking to free his foot. St Pierre is holding on for now.
Yamoto stops St Pierre from getting back to his feet.
St Pierre is using up a lot of energy trying to get back to his feet. Perhaps he should improve his position first.
St Pierre really doesn't want to stay on the ground with Yamoto. If he can't get it back to his feet, it's only a matter of time before he'll be tapping out.
Neither fighter is doing enough for the referee's liking and he's decided to stand them back up.
St Pierre on the wrong end of a nice jab.
St Pierre misses with the body kick
and Yamoto counters with a right hand to the body.
St Pierre pushing out the jab but it's not landing.
Yamoto shoots in for a takedown and gets it. Let's see what he's got on the mat.
That's one minute gone in the round.
St Pierre is looking to get back to his feet but can't, whilst Yamoto is controlling him.
St Pierre is breathing heavily.
Yamoto pushing down on St Pierre's thigh, trying to pass to half guard. He's managed it... Nice work.
The fighters are pressed up against the cage, both looking to find a bit of space to work.
Yamoto throwing shots but St Pierre is blocking nicely.
Yamoto passes the guard and advances to mount!
Yamoto pausing momentarily but resumes with a couple of decent strikes that do a bit of damage.
Yamoto is going olschool here, as he tries to force St Pierre to tap using a forearm choke. This isn't 1993 though, so St Pierre shrugs it off.
Yamoto lands a heavy elbow.
St Pierre defends a decent attempt at a guillotine from Yamoto.
We've seen a great period of action over the last minute or so - credit to both fighters for going all out!
St Pierre is trying to stand up.
Yamoto is going olschool here, as he tries to force St Pierre to tap using a forearm choke. This isn't 1993 though, so St Pierre shrugs it off.
Yamoto putting on the heat here with some good ground and pound!
That's two minutes gone in the round.
Yamoto lands an elbow that was bordering on illegal but the referee lets it go with a warning.
St Pierre wants to get back to his feet.
Yamoto with good strikes from the mount here!
St Pierre is trying to escape but when you're mounted that's not too easy.
Yamoto has hold of an arm here, looking to extend it. He's committed to the armbar attempt here! Will he get it?! Yes! St Pierre is forced to tap!
Ladies and gentlemen, after 2:44 of round 2, we have a winner by way of Submission (Armbar). Yoshi Yamoto!
|
|
|
|
|
|
|
|
|
|
|
|
|
|
|
|
|
|
|
|
|
|
|
| S |
C
A |
G |
S |
C
B |
G |
|
S |
C |
G |
|
energy
A | B |
|
hype
A | B |
|
pop
A | B |
|
mgr
A | B |
|
FIGHT
RATING
43% |
|
|
|
|
|
|
|
Undercard bout
|
Coming up we have a lightweight MMA rules bout between Hercule Poirot (ranked 0 p4p, 0 weight class) and Ludo Wayland (ranked 0 p4p, 0 weight class). Poirot comes into the arena with Poirot Theme blaring out of the sound system. Hercule Poirot has the better chin. Will he look to stand and bang today?
 |
|
 |
| 167 cm
23
162 lbs
5 - 0 - 0 |
|
175 cm
24
161 lbs
8 - 4 - 0 |
BJJ White Belt
Solid Muay Thai
Very strong |
|
BJJ Brown Belt
Counter striker
Knockout power |
|
| |
|
Ladies and gentlemen. This fight is 3 rounds, in the lightweight division.
Introducing the fighter to my left, fighting out of the red corner.
With a record of
5 - 0 - 0, fighting out of Tokyo, Hercule Poirot!
And introducing the fighter to my right, fighting out of the blue corner.
With a record of
8 - 4 - 0, fighting out of Tokyo, Ludo Wayland!
The judges for this bout are Sosuke Kotani, Hirohito Nitta and Shirou Masuda.
The bell rings for round one and we are underway!
Wayland shoots in but Poirot avoids the takedown attempt easily.
Poirot is looking to take this fight into the clinch.
Wayland shoots in for a takedown. "I don't think so" says Poirot as he avoids it easily.
Wayland shoots in but Poirot avoids the takedown attempt easily.
Hercule Poirot has stuffed three takedown attempts in the round now. That's going to take a lot out of Ludo Wayland.
Wayland looks for a takedown here. Will he get it? Poirot is fending him off so far but Wayland persists. Nope, Poirot circles away and we're back to standing.
We've had a slow start to the round here - hopefully the action picks up.
Poirot scores with a kick to the midsection.
Wayland looks gassed!
Poirot closes the distance and pushes Wayland back into the cage.
Poirot throws a vicious knee straight up the middle but Wayland blocks it with crossed arms.

Poirot manages to break the clinch.
Poirot throws a head kick that misses and slips in the process. He scrambles back to his feet and the fighters circle.
That's one minute gone in the round.
Poirot delivers a nice body kick.
A solid leg kick lands there for Poirot.
Poirot lands a monster head kick that reverborates around the arena! The crowd goes wild as Wayland crumples to the floor! Poirot milks the crowd's applause and if that isn't knockout of the night, I will be very surprised!
Ladies and gentlemen, after 1:23 of round 1, we have a winner by way of KO (Head Kick). Hercule Poirot!
|
|
|
|
|
|
|
|
|
|
|
|
|
|
|
|
|
|
|
|
|
|
|
| S |
C
A |
G |
S |
C
B |
G |
|
S |
C |
G |
|
energy
A | B |
|
hype
A | B |
|
pop
A | B |
|
mgr
A | B |
|
FIGHT
RATING
62% |
|
|
|
|
|
|
|
Undercard bout
|
Coming up we have a light heavyweight MMA rules bout between Jonas Freeman (ranked 0 p4p, 0 weight class) and Paul Hausser (ranked 0 p4p, 0 weight class). Freeman comes into the arena with Men At Work - Land Down Under blaring out of the sound system. Both fighters look fresh as a daisy as they make their way towards the cage.
 |
|
 |
| 190 cm
19
215 lbs
7 - 4 - 0 |
|
187 cm
24
212 lbs
6 - 3 - 0 |
BJJ Blue Belt
Excellent boxer
Good chin |
|
Good takedowns
Counter striker
Granite chin |
|
| |
|
Ladies and gentlemen. This fight is 3 rounds, in the light heavyweight division.
Introducing the fighter to my left, fighting out of the red corner.
With a record of
7 - 4 - 0, fighting out of Tokyo, Jonas Freeman!
And introducing the fighter to my right, fighting out of the blue corner.
With a record of
6 - 3 - 0, fighting out of Tokyo, Paul Hausser!
The judges for this bout are Shirou Masuda, Shigeki Fujiwara and Yasuomi Hirokawa.
The bell rings for round one and we are underway!
Freeman thows a body shot but no joy.
Hausser closes the distance and clinches up with Freeman, looking for a takedown. Hausser pushes Freeman against the cage but Freeman circles to the side and manages to break the clinch.
Freeman thows a body shot but no joy.
Freeman misses with a looping right.
Freeman listening to his corner there, landing a nice uppercut.
Hausser moves out of range as Freeman strikes.
Hausser darts in and clinches Freeman up against the cage.
A frustrated look appears on Freeman's face as he tries to break the clinch.
Hausser is looking for a takedown up against the cage. Freeman gets underhooks though and prevents the takedown attempt.
Hausser prevents Freeman from breaking the clinch.
Freeman wants to strike at distance but he can't break free of the clinch.
That's one minute gone in the round.
Hausser drops down looking for an ankle pick but Freeman pulls his leg out and moves away.
Jonas Freeman has stuffed three takedown attempts in the round now. That's going to take a lot out of Paul Hausser.
Freeman slaps away a takedown attempt from Hausser, before circling back to the center of the mat.
Freeman changes levels and scores with a jab to the body.
Hausser looks gassed!
Freeman jabbing away but nothing is landing.
Freeman throws a right and a left that Hausser avoids nicely.
Freeman lands a jab followed by a vicious hook that sends Hausser sprawling to the canvas. Freeman follows him down, looking for the kill. Can Hausser hang on?
It looks like Paul Hausser has been cut.
That's two minutes gone in the round.
The crowd are loving this. Great action here.
Freeman trying to control the pace.
Freeman is keen to just control but Hausser is a slippery customer.
Freeman not throwing his punches with enough precision this time.
Freeman wants to lay and pray for a moment but Hausser keeps working.
Freeman knows he needs to get back to his feet asap. He's simply no match for Hausser on the ground.
Freeman works his way into full mount!
Freeman looking to control but Hausser is working nicely, looking to advance position himself.
That's three minutes gone in the round.
The referee stands the fighters back up. Jonas Freeman just wasn't active enough from the dominant position.
Hausser fails to land the takedown.
Hausser is trying hard to land a takedown here. Freeman sprawls well and keeps this one on the feet.
That's four minutes gone in the round.
My god... these two guys really need to pick up the pace or everyone will leave to go get a beer.
No luck with that takedown attempt from Hausser.
Freeman lands with a straight right. Hausser didn't see that one coming.
Hausser slips under a jab from Freeman.
Freeman rushes forward with a series of wild hooks but Hausser moves out of range and avoids them all easily.
Freeman drops Hausser with a left and a right! Oh, Hausser is hurt - Freeman dives into side control looking to finish!
Hausser is rocked!
Freeman trying to control the action but Hausser is working from the bottom.
The crowd are going absolutely nuts as the round comes to an end - what a fantastic round of action!
You can see the frustration on Hausser's face, being in this tough position on the bottom.
And that�s the end of the round � the fighters go back to their corners.
Jonas Freeman dominated that round.
The cut man is working on Paul Hausser's cut.
OK. That's time! The bell goes and we're back to the action.
Freeman with a jab.
Hausser blocks a jab.
Freeman tries to land with a swinging hook to the body but Hausser was well out of range. Poor timing from Freeman.
Hausser walks straight into an uppercut. Luckily it didn't land flush.
The fighters circling - Freeman throws out the jab but it was never going to land.
Hausser shoots in looking for a takedown. Freeman tries to sprawl out of it but Hausser keeps driving through. The fighters are pinned against the cage. Freeman manages to get underhooks and after a bit of a struggle, circles away and we're back to standing.
Freeman throws out a token jab with nothing on it.
Hausser is breathing heavily.
That's one minute gone in the round.
Freeman misses the jab.
Freeman waving his hands out infront of him, looking to distract Hausser.
Hausser misses with a takedown attempt. He shot from a bit too far out.
Hausser is trying desperately to land a takedown but Freeman is having absolutely none of it. This is turning into a bit of a nightmare for Hausser.
The fighters circle momentarily. Freeman darts into range and connects with a nice straight punch.
Hausser blocks a jab.
Hausser drops his hands momentarily and Freeman takes advantage with a crisp shot to the head.
Paul Hausser is looking to throw some combinations by the looks of things.
That's two minutes gone in the round.
This is a great period of action - very entertaining stuff!
Hausser will have to do better than that with his takedown attempts.
Jonas Freeman has stuffed three takedown attempts in the round now. That's going to take a lot out of Paul Hausser.
Freeman displays good takedown defense there as he swats away a double leg from Hausser.
A big right from Freeman misses.
Freeman throws a couple of head shots and lands with the final one - a decent hook, which struck Hausser on the side of the head.
Hausser takes an uppercut right on the button but keeps his composure.
Hausser ducks right into an uppercut from Freeman.
Freeman throws a jab but it's blocked by Hausser.
Freeman lands a brutal uppercut that launches Hausser off his feet! Hausser tumbles to the floor, barely conscious - the referee jumps in to save him from a beating! Wow, what an ending!
Ladies and gentlemen, after 3:05 of round 2, we have a winner by way of KO (Punch). Jonas Freeman!
|
|
|
|
|
|
|
|
|
|
|
|
|
|
|
|
|
|
|
|
|
|
|
| S |
C
A |
G |
S |
C
B |
G |
|
S |
C |
G |
|
energy
A | B |
|
hype
A | B |
|
pop
A | B |
|
mgr
A | B |
|
FIGHT
RATING
67% |
|
|
|
|
|
|
|
Undercard bout
|
Coming up we have a middleweight MMA rules bout between Joe Belanger (ranked 0 p4p, 0 weight class) and Mertsi Svart (ranked 0 p4p, 0 weight class). Svart is bobbing his head along to his entrance song: Muistoissani kuljen tiet� mustalaisen. Well, the cameraman is lingering on a pretty young lady for a bit too long there. Keep your eyes on the fighters buddy or you'll miss the fighter intros!
 |
|
 |
| 187 cm
23
193 lbs
4 - 1 - 0 |
|
200 cm
22
200 lbs
3 - 0 - 0 |
BJJ White Belt
Solid Muay Thai
Good chin |
|
BJJ White Belt
Excellent MT
Determined |
|
| |
|
Ladies and gentlemen. This fight is 3 rounds, in the middleweight division.
Introducing the fighter to my left, fighting out of the red corner.
With a record of
4 - 1 - 0, fighting out of Tokyo, Joe Belanger!
And introducing the fighter to my right, fighting out of the blue corner.
With a record of
3 - 0 - 0, fighting out of Tokyo, Mertsi Svart!
The judges for this bout are Shigeki Sano, Shigeki Fujiwara and Yukihiro Shimada.
The bell rings for round one and we are underway!
Svart throws a right high kick that is partially blocked by Belanger.
It looks like Joe Belanger has been cut.
Wow, both these guys are really going for it!
Belanger shoots in for a takedown. He's persisting with it as Svart sprawls well. Svart wins this battle and keeps the fight standing. Belanger gets slowly back to his feet.
A bone on bone clash there as Svart blocks the leg kick.
Belanger throws a series of punches but Svart avoids them all with ease.
Svart lands a head kick!
This has been an exciting period of action!
A thudding body kick lands there by Svart!

Svart connects with a vicious head kick that knocks Belanger to the floor! Svart dives in looking for the finish!
Belanger is rocked!
Svart missing with some ground and pound from the half guard.
Oh Belanger is still in real trouble! Will he be able to recover?!!
Belanger controlling the leg, holding on to half guard.
Belanger seems to have got his legs back now.
Belanger is trying to maintain the position but Svart is very close to passing his half guard.
Svart is looking for an arm triangle, whilst trying to pass to side control. Belanger doesn't seem that keen to cooperate though. No luck this time Svart.
Svart is keen to just control but Belanger is a slippery customer.
That's one minute gone in the round.
Belanger moves into full guard.
Svart trying to pass the guard but can't manage it just yet.
Svart postures up.
Svart wants to control from the top but Belanger keeps moving.
Svart wants to stand but Belanger has a closed guard, so he can't escape.
Belanger might be looking to lock onto one of his opponent's long limbs for a submission, whilst we're on the ground.
The referee decides to stand the fighters back up.
Belanger looks for a takedown. He's got it. We're now in half guard.
Svart is looking to improve his position.
That's two minutes gone in the round.
Belanger wants to control but Svart is keeping him busy.
Svart really doesn't want to stay on the ground with Belanger. If he can't get it back to his feet, it's only a matter of time before he'll be tapping out.
Belanger frees up his trapped foot and advances to mount.
Belanger thuds his fist into the canvas! Oooouch!
Svart blocking the ground and pound.
The fighters are going at a pretty good pace and they're both starting to sweat now.
Belanger controlling his opponent.
Svart is looking to get back to his feet - it's going to be hard from this position.
Belanger controlling his opponent.
That's three minutes gone in the round.
Svart is looking to get to half guard.
Svart is in a horrible position here, under a barrage of strikes, he's managing to avoid any damage.
Belanger trying to control but Svart is having none of it.
Belanger punching from mount but Svart doing a good job of avoiding damage.
Belanger misses with a series of strikes from mount. He'll no doubt be working on his ground and pound when he gets back to the gym.
Belanger controlling the position easily from mount.
Belanger has hold of Svart's left arm, perhaps looking for a submission. The two fighters tussle over control of the isolated limb and Svart manages to get his arm back to his side and away from danger.
That's four minutes gone in the round.
A few boos can be heard. I'm sure they will multiply if the fighters don't pick up the pace.
Belanger working away from the top, dropping strikes.
Belanger wants to control the pace but Svart is squirming around nicely.
Svart tries to lock up and control but Belanger gives him a forearm to the face and pushes him away.
The crowd applaud the fighters efforts here as the round comes to an end.
Svart holding onto his opponent's waist for dear life, as Belanger tries to land some strikes to get him to release his grip.
The ref warns both fighters not to hold the cage as they work up against the meshing.
Svart is looking to improve his position but Belanger isn't that keen on the idea.
And that�s the end of the round � the fighters go back to their corners.
Mertsi Svart dominated that round.
The cut man is working on Joe Belanger's cut.
That's the end of the round. The referee orders the cornermen out of the cage so we can get back down to business.
Belanger misses with a wild body shot.
Svart pulls out of a head kick attempt.
Mertsi Svart seems to be the more aggressive standup fighter in this bout.
Svart misses with a half-hearted attempt at a head kick.
Good work by Belanger as he checks the leg kick.
Svart blocks a jab.
Belanger avoids the head kick by Svart.
Svart misses with a half-hearted attempt at a head kick.
Belanger blocks a head kick by Svart.
Belanger blocks a head kick by Svart.
Belanger digs a good hook to Svart's body.
Belanger shoots for a takedown but Svart saw that one coming a mile off and avoided it easily.
Belanger has a takedown stuffed.
Belanger is looking to slow Svart down with leg kicks.
Belanger swings wildly with a right hand that was never going to find it's target.
A head kick misses from Svart.
Belanger throws an overhand right that lands on Svart's shoulder, as Svart tries to avoid the shot.
Belanger loads up on a big right hand but Svart slips the punch.
Decent striking displayed by Belanger there.
Svart is breathing heavily.
Belanger shoots in for a takedown. He's persisting with it as Svart sprawls well. Svart wins this battle and keeps the fight standing. Belanger gets slowly back to his feet.
That's three failed takedown attempts in the round for Joe Belanger. That's going to take a lot out of him.
Svart tries a switch kick but it misses it's target.
Belanger shoots in with a takedown attempt and he has Svart pinned against the cage. Svart gets the underhooks and manages to circle away.
That's one minute gone in the round.
A punch lands to the side of Svart 's head but he takes it in his stride.
Belanger misses with a takedown attempt. He shot from a bit too far out.
Belanger misses with a jab and misses with a cross straight after too.
Belanger throws a hook to the side of Svart's head but Svart sees it coming and ducks under it beautifully.
Belanger shoots in with a takedown attempt and he has Svart pinned against the cage. Svart gets the underhooks and manages to circle away.
Svart misses with a head kick.
A good leg kick by Belanger.
Svart takes a punch right to his stomach. That took the wind out of him momentarily.
Svart throws a head kick that misses.
Belanger scores with a nice one two combo and darts back out of range to avoid anything coming in the opposite direction.
Belanger dances in quickly and lands a nice inside leg kick on Svart. That did some damage!
Svart moves away from the strike by Belanger.
Svart keeping a good distance there, avoiding the body shot.
Belanger shoots in with a takedown attempt and he has Svart pinned against the cage. Svart gets the underhooks and manages to circle away.
Svart uses some good footwork to avoid the body shot by Belanger.
Joe Belanger is looking to throw some combinations by the looks of things.
That's two minutes gone in the round.
Svart lands with a slapping head kick.
Belanger throws an overhand right that lands on Svart's shoulder, as Svart tries to avoid the shot.
Belanger shoots in with a lovely double leg takedown. Svart manages to land in full guard to minimise the damage.
The crowd are loving this. Great action here.
Belanger advances position into side control!
Belanger is looking to take a break and control but Svart is keeping him honest, looking to work from the bottom.
Svart being controlled for a moment.
Belanger is looking to take a break and control but Svart is keeping him honest, looking to work from the bottom.
That's three minutes gone in the round.
Belanger in side control, throwing shots but Svart defends.
Svart is looking for a sweep.
Belanger wants to control but Svart is keeping him busy.
Svart tries to work a leg under to get back to half guard but Belanger wriggles his own leg back out and remains in side control.
It looks like we're going to have a standup here. Neither fighter is doing enough on the ground.
Belanger shoots in for a takedown - he's clinched up with Svart but Svart pushes him off and we're back to square one.
That's four minutes gone in the round.
There's not a lot going on here and the crowd are letting the fighters know they're not willing to tolerate a lack of action.
Svart throws a sloppy head kick and Belanger moves out of range easily.
Belanger throws a right and a left that both miss.
Belanger fakes high and swings low for a body shot but Svart manages to avoid it.
Svart uses good footwork to avoid the strikes from Belanger.
Belanger shoots in for a takedown but Svart shows good takedown defense there and keeps this one on the feet.
Belanger sizes up Svart with a pawing jab and scores with a straight right down the middle.
A telegraphed takedown attempt from Belanger is defended easily by Svart.
Svart throws a head kick that half lands.
Joe Belanger's cut is getting worse.
Svart connects with a high kick.
Svart tries a switch kick but it misses it's target.
Belanger throws a quick inside leg kick.
Svart misses with a head kick.
No luck for Belanger with that takedown attempt.
The crowd applaud the fighters efforts here as the round comes to an end.
Svart tries a switch kick but it misses it's target.
Belanger throws a right hand that Svart ducks under and follows up with a left that Svart also avoids with ease.
Belanger shoots in with a takedown attempt and he has Svart pinned against the cage. Svart gets the underhooks and manages to circle away.
Belanger sees a low kick coming and goes to check it, but it's actually a body kick and it thuds into his unprotected ribs.
And that�s the end of the round � the fighters go back to their corners.
Joe Belanger dominated that second round.
The cut man is working on Joe Belanger's cut.
The referee calls time. The cornermen exit stage left and we're back to business. So, we enter the final round. Let's see if either fighter can bring us a finish, or whether we're going to the judges scorecards.

Svart tries a switch kick but it misses it's target.
Svart throws a body kick but he wasn't in range.
Belanger misses with a jab, cross combination.
Svart throws a sloppy head kick and Belanger moves out of range easily.
Belanger throws a nice looking combination but Svart bobs and weaves to avoid any damage.
Belanger rushes forward with a series of wild hooks but Svart moves out of range and avoids them all easily.
Belanger misses with a head kick.
Svart misses with a half-hearted attempt at a head kick.
Svart defends well against a solid takedown attempt from Belanger.
Svart takes a body punch but keeps moving.
Belanger tries to land with a swinging hook to the body but Svart was well out of range. Poor timing from Belanger.
Belanger thows a body shot but no joy.
Svart throws a head kick that looked like it stung.
Left hook, right uppercut from Belanger.
Svart scores with a head kick.
Belanger blocks a head kick by Svart.
A really sloppy takedown attempt there from Belanger.
Svart misses with a half-hearted attempt at a head kick.
Both fighters are breathing heavily.
Belanger fakes a jab and then connects with a hook.
Svart throws a head kick that misses and slips in the process. He scrambles back to his feet and the fighters circle.
Belanger throws a wild combination but nothing lands.
That's one minute gone in the round.
Svart pulls out of a head kick attempt.
Belanger throws a right and a left that both miss.
Svart slips a jab from Belanger.
Belanger takes a head kick and keeps coming.
Belanger shoots for a takedown but Svart saw that one coming a mile off and avoided it easily.
That's three failed takedown attempts in the round for Joe Belanger. That's going to take a lot out of him.
Belanger dives in and grabs Svart's left leg, looking for a takedown. Svart pushes down on Belanger's head and hops out.
Svart throws a head kick that misses.
Belanger shoots in for a takedown. "Ole!" shouts Svart as he jumps to the side.
Svart lands with a two punch combination before moving back out of range.
Belanger misses with a jab, cross combination.
Belanger avoids the head kick by Svart.
Svart takes a nice looking leg kick right on the meat of his thigh there.
Belanger ducks under a wild hook from Svart.
A punch combination from Belanger misses.
Belanger lands with an uppercut that bounces Svart off the cage and back into rage.
Svart throws a head kick that misses.
Belanger misses with a looping right.
Belanger shoots in for a takedown but Svart shows good takedown defense.
Belanger avoids the head kick by Svart.
That's two minutes gone in the round.
Belanger shoots in for a double leg but Svart sprawls well. That's going to sap some energy.
Svart throws a front kick that sends Belanger stumbling back into the cage.
Belanger tries to bum rush Svart with a series of wild strikes but Svart uses good footwork to avoid the assault.
Svart delivers a nice body kick.
The fighters circle momentarily. Belanger darts into range and connects with a nice straight punch.
Mertsi Svart seems to be getting the better of the standup.
Svart throws a head kick that misses.
Belanger looks to land a combination but Svart avoids it well.
Svart throws a head kick that half lands.
Belanger fails with the takedown.
Svart scoring well with a low kick there.
Svart takes a punch right to his stomach. That took the wind out of him momentarily.
Svart misses with an attempted mid kick.
Mertsi Svart is looking to keep the fight on the feet at all costs.
Belanger fails miserably with a takedown attempt.
Belanger chopped to the floor by a nice leg kick but he springs right back up before Svart can pounce on him.
Svart tests Belanger's chin there with a solid looking shot.
Belanger throws a hard body shot but it just misses.
Belanger moves into range and throws a lovely three punch combination.
That's three minutes gone in the round.
Belanger changes levels and looks for a double leg takedown. Svart tries to avoid it but Belanger manages to keep hold of a leg and drag Svart to the ground. Svart escapes though and pops straight back up to his feet.
Svart scores with a head kick.
Svart lands a head kick. Belanger smiles back at him and beckons him forward.
Belanger pushing out the jab but it's not landing.
Belanger is moving around nicely and scores here with a single head shot.
Svart throws a head kick that misses and slips in the process. He scrambles back to his feet and the fighters circle.
Svart tries a switch kick but it misses it's target.
A telegraphed takedown attempt from Belanger is defended easily by Svart.
Belanger throws a nice looking combination but Svart bobs and weaves to avoid any damage.
Belanger moves his head to the side to avoid a jab but walks straight into a cross.
Belanger misses with a half-hearted attempt at a head kick.
Svart lands with a nice low kick. That'll leave a bruise.
Svart misses with a head kick.
Belanger throws a hook but Svart avoids it easily.
A head kick misses from Svart.
Belanger swinging wilding here.
Belanger looks to throw the jab but Svart is out of range.
That's four minutes gone in the round.
Svart thows a body kick. Belanger tries to catch it but that hurt him.
Belanger throws a hook to the side of Svart's head but Svart sees it coming and ducks under it beautifully.
Svart moves out of range of the body kick.
Ouch! a nice leg kick from Svart, right into the meat.
Belanger throws the left hand but Svart avoids the punch easily.
Svart misses with a head kick.
Belanger lands an overhand right.
Svart avoids the body shot from Belanger.
Svart pulls out of a head kick attempt.
Svart displays some good footwork, moving neatly out of range as Belanger throws out the jab.
Belanger shoots in looking for a takedown. Svart tries to sprawl out of it but Belanger keeps driving through. The fighters are pinned against the cage. Svart manages to get underhooks and after a bit of a struggle, circles away and we're back to standing.
A head kick misses from Svart.
Svart misses with a head kick.
Belanger connects with a nice looking jab.
Svart shakes his hands off, looking to compose himself, but takes a jab to the jaw whilst he does it.
Belanger shoots in for a takedown. He's persisting with it as Svart sprawls well. Svart wins this battle and keeps the fight standing. Belanger gets slowly back to his feet.
Svart throws a head kick that half lands.
And that's the end of the fight!
Mertsi Svart comfortably won the final round on my scorecard.
I think Svart has won this one but let's see whether the judges agree with me. Over to the ring announcer for the scorecards.
Ladies and gentlemen, after 3 rounds of action, we go to the scorecards for a decision.
Judge Shigeki Sano scores the fight for Mertsi Svart!
Judge Shigeki Fujiwara scores the fight for Mertsi Svart!
Judge Yukihiro Shimada scores the fight for Mertsi Svart!
Mertsi Svart wins by unanimous decision!
|
|
|
|
|
|
|
|
|
|
|
|
|
|
|
|
|
|
|
|
|
|
|
| S |
C
A |
G |
S |
C
B |
G |
|
S |
C |
G |
|
energy
A | B |
|
hype
A | B |
|
pop
A | B |
|
mgr
A | B |
|
FIGHT
RATING
96% |
|
|
|
|
|
|
|
Co-main event
|
Coming up we have a middleweight MMA rules bout between Joe Juronen (ranked 0 p4p, 0 weight class) and Antero Vipunen (ranked 0 p4p, 0 weight class). Vipunen has chosen Onward to Victory as his entrance music. Both fighters will be looking to make this an exciting fight for the fans, I'm sure!
 |
|
 |
| 185 cm
24
199 lbs
9 - 5 - 0 |
|
182 cm
24
195 lbs
8 - 4 - 0 |
BJJ Blue Belt
Solid boxing
Experienced |
|
BJJ Purple Belt
Counter striker
Determined |
|
| |
|
Ladies and gentlemen. This fight is 3 rounds, in the middleweight division.
Introducing the fighter to my left, fighting out of the red corner.
With a record of
9 - 5 - 0, fighting out of Tokyo, Joe Juronen!
And introducing the fighter to my right, fighting out of the blue corner.
With a record of
8 - 4 - 0, fighting out of Tokyo, Antero Vipunen!
The judges for this bout are Ren Mimura, Yukihiro Yamamoto and Yuuki Gou.
The bell rings for round one and we are underway!
Juronen looks to land a body kick but Vipunen moved away.
Vipunen gets a takedown into half guard.
Vipunen scores with a couple of good hammerfists.
The fighters are pressed up against the cage, both looking to find a bit of space to work.
Vipunen is trying to work for a kimura but Juronen is defending well.
Vipunen missing with some ground and pound from the half guard.
Vipunen is looking for an arm triangle, whilst trying to pass to side control. Juronen doesn't seem that keen to cooperate though. No luck this time Vipunen.
Vipunen is working for a kimura but Juronen is defending it quite comfortably.
Juronen wants to improve his position but Vipunen is controlling well.
That's one minute gone in the round.
Vipunen is working for a submission here. He's got hold of the far side arm and he's looking for a kimura. He's cranking on the arm and he's got it! Juronen is tapping out! Ouch, that looked like it hurt!
Ladies and gentlemen, after 1:28 of round 1, we have a winner by way of Submission (Kimura). Antero Vipunen!
|
|
|
|
|
|
|
|
|
|
|
|
|
|
|
|
|
|
|
|
|
|
|
| S |
C
A |
G |
S |
C
B |
G |
|
S |
C |
G |
|
energy
A | B |
|
hype
A | B |
|
pop
A | B |
|
mgr
A | B |
|
FIGHT
RATING
49% |
|
|
|
|
|
|
|
Main event
|
Coming up we have a heavyweight MMA rules bout between Rip James (ranked 0 p4p, 0 weight class) and Frank Lucas (ranked 0 p4p, 0 weight class). Rip James is staring across the cage at his opponent, tweaking his nipples... Tweaking his own nipples that is.
 |
|
 |
| 194 cm
25
266 lbs
10 - 3 - 0 |
|
196 cm
20
272 lbs
10 - 3 - 0 |
Good takedowns
Solid boxing
Experienced |
|
BJJ Purple Belt
Decent boxing
Granite chin |
|
| |
|
Ladies and gentlemen. This fight is 3 rounds, in the heavyweight division.
Introducing the fighter to my left, fighting out of the red corner.
With a record of
10 - 3 - 0, fighting out of Tokyo, Rip James!
And introducing the fighter to my right, fighting out of the blue corner.
With a record of
10 - 3 - 0, fighting out of Tokyo, Frank Lucas!
The judges for this bout are Shigeki Fujiwara, Kenichi Hosakawa and Ren Mimura.
The bell rings for round one and we are underway!
No luck for Lucas with that takedown attempt.
Lucas ducks down and throws a hook to the body but James moves away.
James clinches up against the cage.
James goes for a body shot but it's blocked.
James goes for a body shot but it's blocked.
Lucas letting James take a breather here.
James misses with a body punch.
James has Lucas pressed up against the cage. He's trying to work for a single leg takedown. James pulls back from the cage and twists to the side, sending Lucas tumbling to the mat - James dives into Lucas's guard.
James wants to control from the top but Lucas keeps moving.
James wants to stand but Lucas is controlling his posture from full guard.
Lucas is working actively off his back, looking to secure an arm or perhaps work for a triangle.
James throwing shots from guard but he's hitting more mat than opponent.
That's one minute gone in the round.
James drops back looking for a heel hook - he quickly realises he's not going to get it but Lucas manages to dive on top of him before he can escape and now James has Lucas in his guard.
James lands a beautiful switch and he's in full mount! That could spell trouble for Lucas!
James prevents Lucas from getting the reversal.
James is in the full mount, landing strikes.
James stands up from mount. Strange move.
Lucas looks gassed!
Lucas shoots in for a takedown. "Ole!" shouts James as he jumps to the side.
Lucas gets taken down but at least he's managed to land in guard.
James passes into half guard.
James is working for a kimura but Lucas is defending it quite comfortably.
This has been an exciting period of action!
James throwing shots but they're hitting the canvas more than the man.
That's two minutes gone in the round.
Lucas misses with some strikes from the bottom.
Lucas is looking to sinch up a gullotine here but James pulls his head out easily.
James seems to be looking for submissions.
James is working for submissions here but there's nothing on.
James wants to pass the guard but Lucas is defending well.
James scoring with strikes to the body and head.
Lucas is looking to improve his position.
James scoring with strikes to the body and head.
The fighters are pressed up against the cage, both looking to find a bit of space to work.
James scores with a couple of good hammerfists.
That's three minutes gone in the round.
James is pressing down on Lucas's thigh, looking to free his foot. Lucas is holding on for now.
James moves nicely into side control.
James works to advance to full mount. Lucas defends for a few seconds but eventually he succumbs.
The ref warns both fighters not to hold the cage as they work up against the meshing.
James pushing the pace here, looking to move to his opponents back and work for a finish.
James looking to finish Lucas with some ground and pound. This is bad for Lucas!
James fakes a shot to the body and cracks his opponent in the head. Nice ground and pound there!
James postures up and cracks his opponent a couple of times before moving back into close ground control. Lucas looks a forlorn figure.
James lands a nice shot to the head.
James looking for an armbar but decides to keep the dominant position instead.
James lands with some vicious ground and pound - can Lucas hang on?
Lucas flailing away with punches but nothing is landing.
James punishing his opponent with strikes.
That's four minutes gone in the round.
James can't quite control the action as he would like just now, as Lucas is looking to escape.
Lucas keeping his composure momentarily, calmly looking to get back to half guard.
James working from mount. He moves in close and looks like he might be going for an arm triangle... He's hopped off to the side and he's transitioned into an Anaconda choke. Lucas turning a nasty shade of purple. He's refusing to tap but he's gone! He's out! The ref rips James off and cradles Lucas's limp body as James celebrates with his corner.
Ladies and gentlemen, after 4:35 of round 1, we have a winner by way of Submission (Anaconda Choke). Rip James!
|
|
|
|
|
|
|
|
|
|
|
|
|
|
|
|
|
|
|
|
|
|
|
| S |
C
A |
G |
S |
C
B |
G |
|
S |
C |
G |
|
energy
A | B |
|
hype
A | B |
|
pop
A | B |
|
mgr
A | B |
|
FIGHT
RATING
65% |
|
|
|
|
|
|
|
|
|
|
