 |
COMA PBP Commentary |
Undercard bout
|
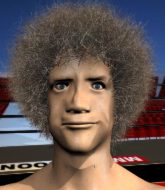
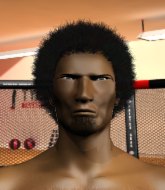
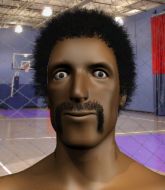
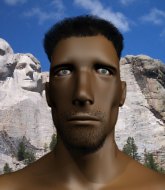
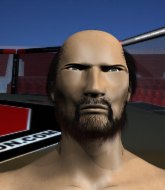
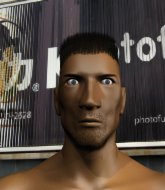
Coming up we have a super heavyweight MMA rules bout between tubby potbelly (ranked 0 p4p, 0 weight class) and Aaran James (ranked 0 p4p, 0 weight class). tubby potbelly has a significant reach advantage - let's see if he can make it count.
 |
|
 |
| 205 cm
20
300 lbs
1 - 1 - 0 |
|
165 cm
21
300 lbs
1 - 1 - 0 |
BJJ Blue Belt
Basic striking
Good chin |
|
BJJ Blue Belt
Counter striker
Intelligent |
|
| |
|
Ladies and gentlemen. This fight is 3 rounds, in the super heavyweight division.
Introducing the fighter to my left, fighting out of the red corner.
With a record of
1 - 1 - 0, fighting out of Tokyo, tubby potbelly!
And introducing the fighter to my right, fighting out of the blue corner.
With a record of
1 - 1 - 0, fighting out of Tokyo, Aaran James!
The judges for this bout are Shigeki Sano, Shigeki Fujiwara and Ren Mimura.

The bell rings for round one and we are underway!
potbelly swings away but doesn't land with a series of punches.
Jeez, both these guys look absolutely knackered already, that's not a good sign!
potbelly pulls out of a head kick attempt.

James scores a takedown into full mount!
potbelly keeping his composure momentarily, calmly looking to get back to half guard.
potbelly is writhing around trying to get back to his feet.
James should think about turning a few of those tyres round his middle into muscle if he wants people to take him seriously as an athlete.
potbelly tries to get back to half guard but can't.
James looking to control and managing it successfully.
potbelly is wriggling around trying to escape.
James avoids the attempt from potbelly to control.
James fails to move to back control.
James throwing shots from mount but they're not landing.
Both fighters really going for it on the ground here!
potbelly tries to hold on but James pushes him away.
James looking to finish with strikes here!

That's one minute gone in the round.
potbelly is trying to get back to his feet but can't.
potbelly is desperately trying to get back to half guard.

James looking to secure an arm triangle but potbelly defends it well.
potbelly is writhing around trying to get back to his feet.
potbelly is squirming around, avoiding James's attempts to control the action.
potbelly gets back to half guard.
potbelly wants to get back to full guard.
Ground and pound from James.
potbelly is doing well to control the position and prevent James from advancing to side control.
potbelly is looking to control James's leg but it's slowly edging free. Can potbelly avoid being mounted?
James is stalling here. potbelly is in no mood to hang around though. He's locked up a kimura from the bottom! James seems to be keeping calm but he's forced to roll out of the hold and potbelly has ended up in side control on the top. Nice work.

That's two minutes gone in the round.
James is not content to let potbelly control the position.
James is trying to escape and get back to his feet.
James tries to buck potbelly off but potbelly is having none of it.
potbelly trying to control the action but James is working from the bottom.

The referee has ruled that neither fighter is active enough on the ground and has stood them back up.
potbelly looking for a takedown here - he's got it.
potbelly wants to control from the top but James keeps moving.
potbelly stopping the sweep attempt from James.

That's three minutes gone in the round.
potbelly passes James's right leg, so he's now in half guard.
potbelly controlling the action here.
James actively working from the bottom here.
potbelly passes the guard and advances to mount!
James is looking to improve his position but potbelly isn't that keen on the idea.
James wants to control but potbelly is having none of it.
potbelly can't quite control the action as he would like just now, as James is looking to escape.

That's four minutes gone in the round.
My god... these two guys really need to pick up the pace or everyone will leave to go get a beer.
James stops potbelly from taking his back. Still, being mounted isn't any better.
James is wriggling around trying to escape.
potbelly looking to control and managing it successfully.
James is desperately trying to get back to half guard.
James is writhing around trying to get back to his feet.
potbelly is working close to his opponent, looking to work a submission by the looks of things. Oh, he's managed to get a guillotine from mount as his opponent reached up! That looks tiiiiight! Will he tap? YES, he's tapped! Impressive submission by potbelly!
Ladies and gentlemen, after 5:03 of round 1, we have a winner by way of Submission (Guillotine). tubby potbelly!
|
|
|
|
|
|
|
|
|
|
|
|
|
|
|
|
|
|
|
|
|
|
|
| S |
C
A |
G |
S |
C
B |
G |
|
S |
C |
G |
|
energy
A | B |
|
hype
A | B |
|
pop
A | B |
|
mgr
A | B |
|
FIGHT
RATING
39% |
|
|
|
|
|
|
|
Undercard bout
|
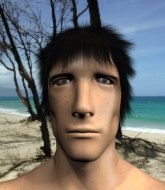
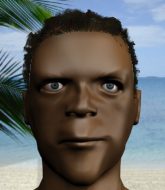
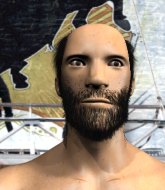
Coming up we have a super heavyweight MMA rules bout between Freddie the fiddler (ranked 0 p4p, 0 weight class) and Konoe Boganzi (ranked 0 p4p, 0 weight class). The crowd seem to be enjoying Boganzi's choice of entrance music: CkY - 96 Quite Bitter Beings. Konoe Boganzi is the more experienced fighter, so let's see if that makes a difference tonight.
 |
|
 |
| 200 cm
18
300 lbs
1 - 1 - 0 |
|
195 cm
22
290 lbs
2 - 0 - 0 |
BJJ Blue Belt
Brawler
KO power |
|
BJJ Blue Belt
Basic striking
Likes ground |
|
| |
|
Ladies and gentlemen. This fight is 3 rounds, in the super heavyweight division.
Introducing the fighter to my left, fighting out of the red corner.
With a record of
1 - 1 - 0, fighting out of Tokyo, Freddie the fiddler!
And introducing the fighter to my right, fighting out of the blue corner.
With a record of
2 - 0 - 0, fighting out of Tokyo, Konoe Boganzi!
The judges for this bout are Sosuke Kotani, Yukihiro Shimada and Shigeki Sano.
The bell rings for round one and we are underway!
Some wild striking there from the fiddler.
Boganzi avoids the clinch attempt nicely.
the fiddler misses with a double jab.
Boganzi tries to clinch up but the fiddler circles away and keeps his distance.
Boganzi is looking to clinch but the fiddler is avoiding it.

Boganzi fakes with an overhand right and moves in to clinch with the fiddler, pushing him back against the cage.
the fiddler gets underhooks to prevent Boganzi's takedown attempt.
A head punch on the inside from the fiddler fails to land.
Boganzi wants a takedown.
the fiddler throws a blind hook that connects with the side of Boganzis head.
Boganzi drops to a knee looking for a takedown but the fiddler gets the underhooks and prevents it.
Freddie the fiddler has stuffed three takedown attempts in the round now. That's going to take a lot out of Konoe Boganzi.
the fiddler lands a nice looking hook to the body, against the cage.
the fiddler working aggressively here.
Boganzi drops down looking for an ankle pick but the fiddler pulls his leg out and moves away.
Boganzi looks gassed!
the fiddler throws a right hand that Boganzi ducks under and follows up with a left that Boganzi also avoids with ease.
Boganzi wants to clinch up but the fiddler keeps it at a distance.
Boganzi throws a series of punches but the fiddler avoids them all with ease.
the fiddler tries to clinch but Boganzi moves out of range.
the fiddler swings away but doesn't land with a series of punches.
the fiddler tries to clinch up but Boganzi circles away and keeps his distance.
Freddie the fiddler seems to be the more aggressive standup fighter in this bout.
Boganzi uses decent footwork to sidestep a right hand from the fiddler.
the fiddler fails with an attempt to clinch.
the fiddler closes the distance and clinches.
the fiddler lands a body punch.
A nice left hand lands by the fiddler.
Boganzi fails to pull the fight into his guard.
Boganzi tries to take the fight to the ground by pulling guard but can't manage it.
That's one minute gone in the round.
the fiddler tries a shoulder strike but it doesn't do any damage.
Boganzi blocks an uppercut.
Boganzi gets the body lock takedown. After a quick scramble, the fiddler regains guard.
the fiddler keeping moving, preventing Boganzi from controlling successfully.
the fiddler is doing well to control the posture of his opponent and prevent any damage.
the fiddler keeping moving, preventing Boganzi from controlling successfully.
the fiddler keeping full guard, as Boganzi tries to pass.
Boganzi throws and elbow that misses. the fiddler uses the momentum to reverse the position. He's now in Boganzi's guard. Nice move by the fiddler!
Boganzi wants to sweep here but the fiddler controlling him for the moment.
That's two minutes gone in the round.
Boganzi looking to sweep using the butterfly guard but the fiddler puts pay to that idea as he passes nicely into half guard.
Boganzi tries to roll over but the fiddler keeps him under control.
The ref warns both fighters not to hold the cage as they work up against the meshing.
Boganzi has no desire to be mounted, so is trying to control. the fiddler is working away from the top position though.
the fiddler passes into side control, despite Boganzi's attempt to control the position.

the fiddler decides to stand back up. the fiddler steps back and let's Boganzi get back to his feet.
the fiddler cracks Boganzi with a big right hand that sends him crashing to the floor. the fiddler has the opportunity to follow him to the ground but instead he's beckoning Boganzi to stand back up!

Boganzi is rocked!
the fiddler misses with a looping left.
Boganzi is still on wobbly legs! Can the fiddler finish him?
Boganzi shoots in for a takedown! He's got it and he's managed to land in full mount! That's better than Boganzi was expecting from the takedown attempt, I'm sure!
The fans in attendance giving it up for the two fighters, who have really let it all hang out in the last minute or so!
the fiddler is trying to get back to his feet but can't.
That's three minutes gone in the round.
the fiddler tries to lock up and control but Boganzi gives him a forearm to the face and pushes him away.
the fiddler has worked his way to half guard, taking advantage of Boganzi's lack of action.
the fiddler trying to control from the bottom.
Boganzi seems to have recovered his senses.
the fiddler gets back to full guard.
Boganzi stopping the sweep attempt from the fiddler.
Boganzi stops the fiddler from standing up.
Boganzi tries to free his leg and advance position but the fiddler is retaining full guard.
Boganzi wants to stand and escape but instead the fiddler has hit a sweep and he's now on top in guard.
That's four minutes gone in the round.
Well. There's a bit of a lull in the action here and the crowd are starting to get restless.
the fiddler stays in close to Boganzi's body and controls the position.
Boganzi looking for a guillotine here but the fiddler defends easily.
Boganzi trying to strike off his back.
the fiddler avoids a guillotine attempt easily.
the fiddler stopping the sweep attempt from Boganzi.

That's five minutes gone in the round.
the fiddler prevents Boganzi from getting back to his feet.
Boganzi wants to improve his position but instead the fiddler has moved into half guard.
Boganzi tries to kick the fiddler off but the fiddler keeps his base steady and stays in half guard.
the fiddler is tying to control. Boganzi wants to improve his position but can't escape this time.
Well, the referee has seen enough. Neither fighter is active enough on the ground so he's stood them back up.
the fiddler has managed to clinch.
Boganzi wants to get back to striking at distance but the fiddler won't allow it.
the fiddler scores with a shot to the side of Boganzi's head.
A left hand lands to the body for the fiddler.
the fiddler lands a body shot in the clinch.
the fiddler misses with a punch on the inside.
Boganzi drops down looking for an ankle pick but the fiddler pulls his leg out and moves away.
Boganzi avoids a punch combination nicely.
The fight stays on the outside here - the fiddler looks like he's thinking about clinching though.

That's six minutes gone in the round.
Boganzi misses with a few strikes there.
Boganzi throws a one two combo.

It looks like Freddie the fiddler has been cut.
the fiddler throws a combination but it was largely blocked by Boganzi.
the fiddler wants to clinch up but Boganzi keeps it at a distance.
the fiddler misses with a body shot. Nice footwork from Boganzi.
Boganzi fails with an attempt to clinch.
the fiddler misses with a wild combination.
the fiddler misses with a combination
so Boganzi counters with a double leg into guard. Good agility.
Boganzi pushes down on the fiddler's leg and manages to get into half guard.
We've seen a great period of action over the last minute or so - credit to both fighters for leaving it all in the cage!
the fiddler kicks off Boganzi and gets to his feet.
Boganzi drops his hands and takes a jab to the jaw for his troubles.
the fiddler throws a jab but it's blocked by Boganzi.
Boganzi leaves his chin hanging out and the fiddler seizes the opportunity with an uppercut! Boganzi crumbles to the floor in a heap, and the referee steps in and tends to the downed fighter! What a knockout!
Ladies and gentlemen, after 6:49 of round 1, we have a winner by way of KO (Punch). Freddie the fiddler!
|
|
|
|
|
|
|
|
|
|
|
|
|
|
|
|
|
|
|
|
|
|
|
| S |
C
A |
G |
S |
C
B |
G |
|
S |
C |
G |
|
energy
A | B |
|
hype
A | B |
|
pop
A | B |
|
mgr
A | B |
|
FIGHT
RATING
59% |
|
|
|
|
|
|
|
Undercard bout
|
|
|
|
Undercard bout
|
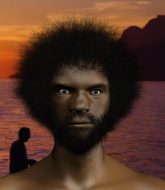
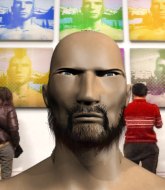
Coming up we have a super heavyweight MMA rules bout between Nasir Jones (ranked 0 p4p, 0 weight class) and Loco Base (ranked 0 p4p, 0 weight class). We have two fighters making their debuts here, so let's see who comes out of this one with their first professional victory.
 |
|
 |
| 200 cm
22
300 lbs
0 - 0 - 0 |
|
160 cm
20
270 lbs
0 - 0 - 0 |
BJJ Blue Belt
Counter striker
Big heart |
|
BJJ White Belt
Brawler
Very confident |
|
| |
|
Ladies and gentlemen. This fight is 3 rounds, in the super heavyweight division.
Introducing the fighter to my left, fighting out of the red corner.
With a record of
0 - 0 - 0, fighting out of Tokyo, Nasir Jones!
And introducing the fighter to my right, fighting out of the blue corner.
With a record of
0 - 0 - 0, fighting out of Tokyo, Loco Base!
The judges for this bout are Taro Takaoka, Shirou Masuda and Yuuki Gou.
The bell rings for round one and we are underway!
Jones avoids the clinch attempt nicely.
Jones dodges the punch combination from Base.
Base throws a right and a left that Jones avoids nicely.
Jones fails miserably with a takedown attempt.
Base misses with a jab, cross combination.
Jones bobs and weaves into range and then changes levels and scores with a nice takedown into side control.
Jones could do with loosing a few pounds - he looks very soft around the mid section, to put it politely.
Jones wants to control but Base is keeping him busy.
Base is pushing Jones's head away, looking to escape. Jones manages to hold on to the position though.
Jones wants to work for a kimura but he's foiled early by Base, who protects the arm well.
Jones tries to cartwheel into mount but he doesn't manage it.
You can see the frustration on Base's face, being in this tough position on the bottom.
That's one minute gone in the round.
Jones tries for a kimura. Not really close to a finish though.
Jones controls the position.
Jones lands a knee to the body and a forearm to the face.
The fighters are pressed up against the cage, both looking to find a bit of space to work.
Jones controls the position.
That's two minutes gone in the round.
Jones tries for a kimura. Not really close to a finish though.
Jones tries to advance to mount but can't.
Base tries to slip a leg under to move to half guard but Jones presses down on the leg and jumps into full mount!
Base is trying to get to the cage to help him get back to his feet.
Jones tries to control but Base wriggling away.
That's three minutes gone in the round.
Jones swings around for an armbar but it's a sloppy attempt and Base is now in Jones's guard. A big mistake from Jones there, giving up the dominant position!
Jones tries to land a sweep but no joy.
Jones trying to punch from his back but it's not doing any damage.
Base won't allow Jones to sweep him here.
Base is sitting in close to Jones's body. Jones has gone for a guillotine from the bottom. Oh damn, that looks pretty tight! Base is panicking - it looks like this one could be all over! Yes, Base is tapping! That was a very nice submission by Jones.
Ladies and gentlemen, after 4:03 of round 1, we have a winner by way of Submission (Guillotine). Nasir Jones!
|
|
|
|
|
|
|
|
|
|
|
|
|
|
|
|
|
|
|
|
|
|
|
| S |
C
A |
G |
S |
C
B |
G |
|
S |
C |
G |
|
energy
A | B |
|
hype
A | B |
|
pop
A | B |
|
mgr
A | B |
|
FIGHT
RATING
35% |
|
|
|
|
|
|
|
Undercard bout
|
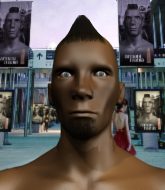
Coming up we have a super heavyweight MMA rules bout between Tommy The Poodle (ranked 0 p4p, 0 weight class) and King Dong (ranked 0 p4p, 0 weight class). We have two fighters making their debuts here, so let's see who comes out of this one with their first professional victory.
 |
|
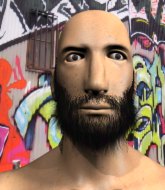 |
| 220 cm
20
300 lbs
0 - 0 - 0 |
|
208 cm
19
300 lbs
0 - 0 - 0 |
BJJ White Belt
Brawler
Granite chin |
|
BJJ Blue Belt
Solid Muay Thai
Very confident |
|
| |
|
Ladies and gentlemen. This fight is 3 rounds, in the super heavyweight division.
Introducing the fighter to my left, fighting out of the red corner.
With a record of
0 - 0 - 0, fighting out of Tokyo, Tommy The Poodle!
And introducing the fighter to my right, fighting out of the blue corner.
With a record of
0 - 0 - 0, fighting out of Tokyo, King Dong!
The judges for this bout are Shigeki Fujiwara, Shigeki Sano and Sosuke Kotani.
The bell rings for round one and we are underway!
The Poodle tries a head kick but it misses.
The Poodle tries to clinch but is not successful on this occasion.
A combination from Dong does no damage.
The Poodle will need to tighten up his combinations if he doesn't want to gas himself out, swinging at thin air.
The Poodle drops down and drives through with a powerful takedown into guard.
The Poodle has to be careful here, sitting in the guard of a superior BJJ player.
Dong kicks The Poodle off and gets to his feet.
Dong looks to land a body kick but The Poodle moved away.
The Poodle steps into range and cracks Dong with a monster punch that buckles his knees! Dong flops backwards and The Poodle dives into his guard looking to finish!
Dong is rocked!
It looks like King Dong has been cut.
Wooooo! Give it up for these two warriors! They are putting on a show!
The Poodle gets to his feet. Dong looking to butt scoot but the ref puts an end to that. On your feet son!
Dong is still on wobbly legs! Can The Poodle finish him?
The Poodle swings wildly with a couple of big hooks
and Dong counters with a straight punch to the midsection.
Dong seems to have recovered his senses.
The Poodle takes a kick to the body and keeps moving.
The Poodle misses with a few strikes there.
The Poodle misses with a jab and misses with a cross straight after too.
The Poodle is breathing heavily.
The Poodle has his hands up protecting his head but a hook from Dong finds it's way round the side to connect with The Poodle's head.
The Poodle misses with a two punch combination.
The Poodle takes a jab right on the kisser.
Dong throws a combination but comes up with nothing but fresh air.
The Poodle throws a series of punches but Dong moves out of range.
The Poodle takes a thudding leg kick, right into the meat of the thigh.
Dong scores with a sloppy right hand. The Poodle should have avoided that one.
A nice combination there by Dong.
That's one minute gone in the round.
Dong lands a nice looking body shot.
Dong throws a combination. The Poodle tries to block but a couple of punches get through.
The Poodle misses with a body kick.
Dong buckles his opponent's knee momentarily with a nice leg kick.
Dong throws a hook but The Poodle avoids it easily.
Dong fails to land with the punch combination there - jab, cross, hook, miss, miss, miss.
The Poodle misses with a jab, cross combination.
The Poodle tries a head kick but it misses.
The Poodle throws a good cross that connects.
Dong misses with an attempted mid kick.
Dong throws a looping left and ducks down for a takedown. He's got his arms around The Poodle's waist but The Poodle gets an underhook and avoids the takedown by throwing Dong off to one side.
The Poodle throws a sloppy head kick and Dong moves out of range easily.
The Poodle falls off balance throwing a combination
letting Dong counter with a right hand.
The Poodle feints and as Dong raises his hands in defense, The Poodle changes levels and drives through with a takedown into guard.
The Poodle knows he needs to get back to his feet asap. He's simply no match for Dong on the ground.
The Poodle trying to pass the guard but can't manage it just yet.
The Poodle wants to control from the top but Dong keeps moving.
The Poodle stops Dong from standing up.
The Poodle won't allow Dong to sweep him here.
That's two minutes gone in the round.
The Poodle landing some decent shots from guard.
The Poodle trying to control but Dong is working from the bottom.
Dong uses the cage to get back to his feet.
The Poodle dodges the punch combination from Dong.
Dong connects with a jab.
The crowd cheering loudly, showing their appreciation for the quality fight we're seeing here.
Dong throws a right and a left that The Poodle avoids nicely.
The Poodle misses with a body kick.
Dong closes the distance looking to clinch
and The Poodle counters by clinching up.
Dong wants to break the clinch but can't.
Dong tries to break the clinch but The Poodle is controlling the position.
Come on The Poodle - let's have some action - none of this stalling nonsense.
Dong can't break the clinch.
The Poodle keeps control of Dong as he tries to wriggle out of the double underhooks.
That's three minutes gone in the round.
Dong can't break the clinch.
The Poodle lands a body shot.
Dong can't break the clinch.
The Poodle has picked Dong up - he's going for a ride! The Poodle dumps his opponent to the mat with a thud and settles into half guard.
The Poodle tries to stand but his arm is trapped.
Dong makes some distance and scrambles quickly back to his feet. Nice work!
Dong changes levels and scores with a jab to the body.
The Poodle misses with a series of wild punches.
The Poodle darts in and clinches Dong up against the cage.
Dong is fighting off a takedown attempt but The Poodle is just too persistent for him and manages to trip Dong to the mat. Dong regains guard as soon as the fighters hit the mat.
The Poodle is in close to Dong's body, working some short punches and elbows.
We've seen a great period of action over the last minute or so - credit to both fighters for leaving it all in the cage!
The Poodle landing some decent shots from guard.
The Poodle wants to control from the top but Dong keeps moving.
There's a bit of a scramble here and now Dong is on top in guard.
The Poodle has a closed guard, preventing Dong from standing up.
That's four minutes gone in the round.
The Poodle is looking to stand up but Dong isn't so interested in that idea.
The ref warns both fighters not to hold the cage as they work up against the meshing.
Dong thows a big elbow that misses.
Dong gets to his feet - The Poodle follows without any prompting.
Dong changes levels and drives through with a really nice takedown into side control. The Poodle looks really pissed at himself for not defending that better.
Dong has knee on belly and moves into mount.
Dong blocks The Poodle's feeble attempts to strike from the bottom.
The Poodle is working to get back to half guard.
The Poodle on his back here. We all know that wrestlers don't like being on their back so let's see if The Poodle tries to get out of the position.
The Poodle is trying to get to the cage to help him get back to his feet.
Dong working The Poodle over with strikes here.
Dong landing shots from mount.
The Poodle tries to reverse the position but Dong maintains control.
Dong has his opponent pinned against the cage, landing some nasty ground and pound that is really making a bit of a mess out of The Poodle's face.
That's five minutes gone in the round.
Dong pausing momentarily but resumes with a couple of decent strikes that do a bit of damage.
The Poodle is looking to improve his position but Dong isn't that keen on the idea.
Dong lands with some strikes.
The Poodle tries to lock up and control but Dong gives him a forearm to the face and pushes him away.
The Poodle working to try and regain half guard.
The Poodle tries to hold on but Dong postures up.
Dong prevents The Poodle from getting the reversal.
The Poodle gets back to half guard.
The Poodle wants to improve his position but Dong is controlling well.
The fighters are pressed up against the cage, both looking to find a bit of space to work.
That's six minutes gone in the round.
My god... these two guys really need to pick up the pace or everyone will leave to go get a beer.
Dong is looking for a kimura here.
The Poodle tries to strike from the bottom but it doesn't land.
The Poodle looks like he's trying to stand up.
Dong looks towards his corner to check for any instructions. The corner give him nothing to work with, so he cracks The Poodle with a short hammerfist. I guess that's as good as any advice he could get in this position.
Dong lands with a punch from half guard.
Dong escapes and gets back to his feet.
The Poodle steps to his left, right into the path of a big body kick from Dong. That one must have hurt.
Dong connects with a jab.
The Poodle fakes with an overhand right and moves in to clinch with Dong, pushing him back against the cage.

The Poodle breaks the clinch.
The Poodle chopped to the floor by a nice leg kick but he springs right back up before Dong can pounce on him.

That's seven minutes gone in the round.
The Poodle closes the distance and lands a one-two.
Dong has used his reach advantage pretty well so far tonight.
Dong takes one on the chin but keeps coming.
The Poodle tries a head kick but it misses.
The Poodle ducks down and throws a hook to the body.
The Poodle moves into the clinch successfully.
This is a great period of action - very entertaining stuff!
The Poodle escapes the clinch and we're back to striking.
The Poodle misses with a combination
and The Poodle takes a counter punch right on the button for his troubles.
The Poodle drives through and clinches with Dong against the cage.
The Poodle breaks the clinch and we're back to striking at distance.
The Poodle shoots in for a takedown! He's got it and he's managed to land in full mount! That's better than The Poodle was expecting from the takedown attempt, I'm sure!
The Poodle scoring with some good ground and pound from mount here. Will he manage to finish Dong?
Dong tries to reverse the position but The Poodle maintains control.
The Poodle is still in mount, landing shots to his trapped opponent. Dong can't stay in a position like this for much longer.
Dong is trying to get back to his feet but can't.
Dong is in all sorts of trouble here.

That's eight minutes gone in the round.
Dong bucks up and manages to get a nice reversal! He's in guard on the top - nicely done!
Dong gets to his feet. The Poodle looking to butt scoot but the ref puts an end to that. On your feet son!
The Poodle throws a head kick that misses
and Dong counters with a two punch combo.
Dong avoids the head kick by The Poodle.
Dong closes this distance looking for a takedown but The Poodle circles away.
The Poodle scores with a big left there. The judges will like that one.
The Poodle ducks under a wild hook from Dong.
The Poodle fails to land with a series of punches.
Like a baseball bat into the meat of his leg there - nice leg kick by Dong.
The Poodle swats away the attempt to clinch by Dong.
Dong lands a nice hook to The Poodle's body. The Poodle takes it in his stride and looks to land his own strikes.
Dong misses with a double jab
so The Poodle counters with a double leg into guard. Good agility.
Dong wants to stand but The Poodle is controlling the position.
Dong throws some sloppy strikes off his back.
The Poodle prevents Dong from getting back to his feet.
Dong has the superior BJJ but he's also working some ground strikes into his gameplan.
Dong keeping moving, preventing The Poodle from controlling successfully.

That's nine minutes gone in the round.
Dong is looking to stand up but The Poodle isn't so interested in that idea.
Dong is using up a lot of energy trying to get back to his feet. Perhaps he should improve his position first.
The Poodle stands up from guard. Let's bang!
The Poodle throws a two punch combo that lands nicely.
The Poodle wants to clinch.
The Poodle circles away from the clinch attempt
and The Poodle moves into the clinch.
The Poodle tries to pull guard but Dong won't allow it.
The Poodle breaks from the clinch.
This fight brought to you by 5M nutrition - it's mmmmm tasty. Nice jab by The Poodle.
Dong goes to the watering hole and comes back with a big thumbs up from the judges as he scores a three punch combo.
Nice sprawl there from Dong as The Poodle shoots in.
The crowd are going absolutely nuts as the round comes to an end - what a fantastic round of action!
The Poodle swinging wilding here.
The Poodle throws a wild combination but nothing lands.
A nice combination there by Dong.
The Poodle fails with a rather predictable takedown attempt.
That's three failed takedown attempts in the round for Tommy The Poodle. That's going to take a lot out of him.
The Poodle lands three nice shots there - that looked like it hurt!
And that�s the end of the round � the fighters go back to their corners.
Tommy The Poodle dominated that round.
The cut man is working on King Dong's cut.
That's the end of the interval. I'm sure that seemed a lot quicker than a minute for our two fighters! Back to the action.

The Poodle throws a right and a left that both miss.
The Poodle closes the distance and clinches.
The Poodle turns his hips and lands a very nice judo throw into side control!
The Poodle is putting a hurting on Dong here, landing some big shots from side control.
Dong wants to get back to his feet.
The Poodle stands up and beckons Dong to his feet.
The Poodle shoots in with a takedown attempt and he has Dong pinned against the cage. Dong gets the underhooks and manages to circle away.
Dong lands a jab-cross combination.
Wow, both these guys are really going for it!
The Poodle throws a monster overhand right that drops Dong! The Poodle follows up with more strikes from mount and the fight is all over!
Ladies and gentlemen, after 0:41 of round 2, we have a winner by way of TKO (Strikes). Tommy The Poodle!
|
|
|
|
|
|
|
|
|
|
|
|
|
|
|
|
|
|
|
|
|
|
|
| S |
C
A |
G |
S |
C
B |
G |
|
S |
C |
G |
|
energy
A | B |
|
hype
A | B |
|
pop
A | B |
|
mgr
A | B |
|
FIGHT
RATING
100% |
|
|
|
|
|
|
|
Undercard bout
|
Coming up we have a super heavyweight MMA rules bout between Bob Forest (ranked 0 p4p, 0 weight class) and Kenny Lang (ranked 0 p4p, 0 weight class). We have two fighters making their debuts here, so let's see who comes out of this one with their first professional victory.
 |
|
 |
| 195 cm
19
300 lbs
0 - 0 - 0 |
|
185 cm
22
290 lbs
0 - 0 - 0 |
BJJ White Belt
Good knees
Prefers standup |
|
BJJ Purple Belt
Solid Muay Thai
Determined |
|
| |
|
Ladies and gentlemen. This fight is 3 rounds, in the super heavyweight division.
Introducing the fighter to my left, fighting out of the red corner.
With a record of
0 - 0 - 0, fighting out of Tokyo, Bob Forest!
And introducing the fighter to my right, fighting out of the blue corner.
With a record of
0 - 0 - 0, fighting out of Tokyo, Kenny Lang!
The judges for this bout are Shigeki Fujiwara, Yasuomi Hirokawa and Yukihiro Shimada.
The bell rings for round one and we are underway!
Lang has closed the distance and engaged Forest in a clinch.
Forest wants to break the clinch but can't.
We're hearing some news coming in from back stage. It's official - Lang has eaten all the pies!
Forest wants to break free but Lang has control.
Forest throws a knee to the head but misses.
Forest wants to get back to striking at distance but Lang won't allow it.
Forest tries to break the clinch but Lang is controlling the position.
Lang pulls Forest into guard.
Lang is working actively from the bottom, looking for submissions. He's escaped his hips to the side and he's going for an armbar! Forest has his hands clasped together but Lang extends an breaks Forest's desperate grasp, forcing a tap out due to armbar! Nice BJJ displayed there by Lang.
Ladies and gentlemen, after 0:32 of round 1, we have a winner by way of Submission (Armbar). Kenny Lang!
|
|
|
|
|
|
|
|
|
|
|
|
|
|
|
|
|
|
|
|
|
|
|
| S |
C
A |
G |
S |
C
B |
G |
|
S |
C |
G |
|
energy
A | B |
|
hype
A | B |
|
pop
A | B |
|
mgr
A | B |
|
FIGHT
RATING
44% |
|
|
|
|
|
|
|
Undercard bout
|
Coming up we have a super heavyweight MMA rules bout between Ty Tyson (ranked 0 p4p, 0 weight class) and Kenta Kobashi (ranked 0 p4p, 0 weight class). Over to our ring announcer for the fighter introductions!
 |
|
 |
| 200 cm
18
285 lbs
0 - 0 - 0 |
|
186 cm
22
282 lbs
1 - 0 - 0 |
BJJ White Belt
Excellent MT
Granite chin |
|
BJJ White Belt
Brawler
Solid chin |
|
| |
|
Ladies and gentlemen. This fight is 3 rounds, in the super heavyweight division.
Introducing the fighter to my left, fighting out of the red corner.
With a record of
0 - 0 - 0, fighting out of Tokyo, Ty Tyson!
And introducing the fighter to my right, fighting out of the blue corner.
With a record of
1 - 0 - 0, fighting out of Tokyo, Kenta Kobashi!
The judges for this bout are Hirohito Nitta, Tatsuya Matsuyama and Taro Takaoka.
The bell rings for round one and we are underway!
Kobashi thuds his right hand into Tyson's forehead from close range. That could be painful for both fighters.
It looks like Ty Tyson has been cut.
We're hearing some news coming in from back stage. It's official - Kobashi has eaten all the pies!
Tyson tries to clinch up.
Kobashi swings away but doesn't land with a series of punches.
Tyson forces Kobashi back against the cage and clinches.
Tyson with an attempt at a knee that misses.
Kobashi tries to score a body lock takedown but Tyson shows good agility there to stay on his feet.
Tyson keeps control of Kobashi as he tries to wriggle out of the double underhooks.
Tyson lands an elbow inside.
It looks like Kenta Kobashi has been cut.
Kobashi wants to break free. God knows he wants to breaaaak freeee.
Tyson with the Thai clinch. He's looking to land a big knee but he's not managed it this time.
Kobashi wants to push off and get back to the center of the mat but Tyson has him pressed against the cage.
Tyson gets an overhook and lands an elbow to the side of the head.
Tyson lands an elbow just above Kobashi 's eye.
Kobashi wants to break free but Tyson has control.
Kobashi tries to pull guard but Tyson won't allow it.
Tyson tries a knee to the head but Kobashi blocks it.
Tyson with the Thai clinch. He's looking to land a big knee but he's not managed it this time.
Tyson looks to throw an elbow but misses.
Kobashi tries for a takedown but Tyson manages to get underhooks.
Ty Tyson has stuffed three takedown attempts in the round now. That's going to take a lot out of Kenta Kobashi.
Tyson lands an elbow that stopped Kobashi in his tracks for a moment.
Kobashi wants to push off and get back to the center of the mat but Tyson has him pressed against the cage.
Kobashi looking for a takedown.
Kobashi wants to get back to striking at distance but Tyson won't allow it.
Kobashi wants to break free. God knows he wants to breaaaak freeee.
Kobashi wants to break free but Tyson has control.
Kobashi wants to break free but Tyson has control.
Tyson keeps control of Kobashi as he tries to wriggle out of the double underhooks.
Kobashi wants to stall.
Kobashi looks gassed!
Tyson keeps control of Kobashi as he tries to wriggle out of the double underhooks.
Tyson tries to land a knee to the head but Kobashi blocks with his arms.
Kobashi takes a knee right on the jaw!
Kobashi escapes the clinch and we're back to striking.
Kobashi swats away the attempt to clinch by Tyson.
Kobashi misses with a double jab.
A head kick lands from Tyson that sends Kobashi to the canvas. Kobashi tries to scramble back to his feet but Tyson brings him back down into side control.
That has opened up Kenta Kobashi's cut even more.
The fans in attendance giving it up for the two fighters, who have really let it all hang out in the last minute or so!
Kobashi is looking for a sweep.
That's one minute gone in the round.
Tyson stands up and beckons Kobashi to his feet.
Tyson walks into a straight right hand from Kobashi.
A combination from Kobashi does no damage.
Kobashi feints and then dives in with a takedown. That was a long way out but the feint bought him enough time to close the distance and complete the takedown. Now we'll play guard for a bit and see who can get the better of that position.
Kobashi with a couple of shots to the head there. Not particularly brutal.
Kobashi gets to his feet and steps away from his opponent.
Kobashi shoots in for a takedown and gets it. Let's see what he's got on the mat.
Wooooo! Give it up for these two warriors! They are putting on a show!
Kobashi advances to half guard.
Kobashi stands up out of the half guard.
A shot to de liver by Tyson. Beautiful body shot.
Kobashi keeps the fight on the outside.
A combination from Kobashi does no damage.
Tyson tries to clinch but Kobashi is having none of it.
That's two minutes gone in the round.
Boom, another hit is landed. "You're gunna get knocked out" taunts Kobashi, as that shot connected.
Kobashi misses with a looping left.
Tyson wants to clinch.
Kobashi throws a nice looking combination but Tyson bobs and weaves to avoid any damage.
Tyson fails in his attempt to clinch.
Wow, both these guys are really going for it!
Tyson tries to clinch up.
Kobashi throws a right and a left that Tyson avoids nicely.
Tyson tries to clinch up but Kobashi circles away and keeps his distance.
Kobashi wants to clinch up but Tyson keeps it at a distance.
Kobashi swats away the attempt to clinch by Tyson.
Kobashi shoots in and bounces Tyson off the cage to secure the takedown into guard.
Tyson avoiding any damage from the ground and pound.
Kobashi stands up and looks to throw the legs aside to pass to side control. Tyson swivels though and keeps the full guard.
The fighters are pressed up against the cage, both looking to find a bit of space to work.
Tyson working the defensive guard well to avoid strikes from Kobashi.
That's three minutes gone in the round.
Kobashi throwing strikes but missing.
Kobashi throwing shots from guard but he's hitting more mat than opponent.
Kobashi forces his way into half guard.
Kobashi throwing shots but Tyson is blocking nicely.
Tyson keeping his head moving to avoid the ground and pound.
Well, the referee has seen enough. Neither fighter is active enough on the ground so he's stood them back up.
Kobashi throws a series of punches but Tyson moves out of range.
Tyson fails with an attempt to clinch.
Tyson tries to clinch but Kobashi moves out of range.
Tyson wants to clinch.
Kobashi tries to clinch but Tyson is having none of it.
Tyson wants to clinch up but Kobashi keeps it at a distance.
Kobashi doesn't manage to clinch there - Tyson circles away.
Kobashi attempts a leg kick but it's missed by a good margin.
That's four minutes gone in the round.
Neither fighter has done anything of merit for a good minute or two here and the crowd are not happy about it.
Tyson lands with a slapping head kick.
Tyson doesn't manage to clinch there - Kobashi circles away.
Tyson doesn't manage to clinch there - Kobashi circles away.
Kobashi circles away from the clinch attempt.
Tyson slips a jab and a cross from Kobashi.
The fight stays on the outside here - Tyson looks like he's thinking about clinching though.
Kobashi throws a series of punches but Tyson avoids them all with ease.
Tyson connects with a leg kick. He turned his hip over nicely there.
Tyson tries to clinch up.
Tyson keeps the fight standing with a nice sprawl.
Kobashi is throwing a storm of strikes! Right hook, left hook and follows it up with a spinning back fist! Tyson hits the canvas like a rag doll! And just like that, this one is over!
Ladies and gentlemen, after 4:29 of round 1, we have a winner by way of KO (Strikes). Kenta Kobashi!
|
|
|
|
|
|
|
|
|
|
|
|
|
|
|
|
|
|
|
|
|
|
|
| S |
C
A |
G |
S |
C
B |
G |
|
S |
C |
G |
|
energy
A | B |
|
hype
A | B |
|
pop
A | B |
|
mgr
A | B |
|
FIGHT
RATING
0% |
|
|
|
|
|
|
|
Undercard bout
|
Coming up we have a super heavyweight MMA rules bout between Cool McCold (ranked 0 p4p, 0 weight class) and Masaaki Shikuk (ranked 0 p4p, 0 weight class). Shikuk has chosen O Saya - A.R. Rahman as his entrance music. Rumors backstage are that the fighters have been paid to keep it standing but we know that would never happen in MMA!
 |
|
 |
| 200 cm
18
270 lbs
2 - 1 - 0 |
|
190 cm
22
295 lbs
2 - 1 - 0 |
BJJ White Belt
Excellent boxer
Good chin |
|
BJJ Blue Belt
Brawler
Determined |
|
| |
|
Ladies and gentlemen. This fight is 3 rounds, in the super heavyweight division.
Introducing the fighter to my left, fighting out of the red corner.
With a record of
2 - 1 - 0, fighting out of Tokyo, Cool McCold!
And introducing the fighter to my right, fighting out of the blue corner.
With a record of
2 - 1 - 0, fighting out of Tokyo, Masaaki Shikuk!
The judges for this bout are Shigeki Fujiwara, Taro Takaoka and Yasuomi Hirokawa.
The bell rings for round one and we are underway!
Shikuk shoots in but McCold avoids the takedown attempt easily.
McCold lands with a precision combination! Left, right, uppercut and Shikuk falls flat on his face, eyes wide open but he's out!
Ladies and gentlemen, after 0:05 of round 1, we have a winner by way of KO (Punches). Cool McCold!
|
|
|
|
|
|
|
|
|
|
|
|
|
|
|
|
|
|
|
|
|
|
|
| S |
C
A |
G |
S |
C
B |
G |
|
S |
C |
G |
|
energy
A | B |
|
hype
A | B |
|
pop
A | B |
|
mgr
A | B |
|
FIGHT
RATING
20% |
|
|
|
|
|
|
|
Co-main event
|
Coming up we have a super heavyweight MMA rules bout between Julius Ceasar (ranked 0 p4p, 0 weight class) and Victor Sagat (ranked 0 p4p, 0 weight class). Sagat is bobbing his head along to his entrance song: Indestructible by Exile. Over to our ring announcer for the fighter introductions!
 |
|
 |
| 192 cm
18
295 lbs
1 - 1 - 0 |
|
225 cm
20
283 lbs
1 - 0 - 0 |
BJJ White Belt
Basic striking
Self confident |
|
BJJ Blue Belt
Solid Muay Thai
Granite chin |
|
| |
|
Ladies and gentlemen. This fight is 3 rounds, in the super heavyweight division.
Introducing the fighter to my left, fighting out of the red corner.
With a record of
1 - 1 - 0, fighting out of Tokyo, Julius Ceasar!
And introducing the fighter to my right, fighting out of the blue corner.
With a record of
1 - 0 - 0, fighting out of Tokyo, Victor Sagat!
The judges for this bout are Yukihiro Shimada, Kenichi Hosakawa and Yuuki Gou.
The bell rings for round one and we are underway!
A big left from Ceasar misses.
Ceasar keeps the fight on the outside.
Ceasar fakes high and swings low for a body shot but Sagat manages to avoid it.
Sagat moves in looking to clinch but Ceasar pushes him off.
Sagat tries to clinch up but Ceasar circles away and keeps his distance.
Sagat moves in looking to clinch but Ceasar pushes him off.
Sagat closes the distance and clinches.
Sagat misses with a knee to the head.
Ceasar could do with loosing a few pounds - he looks very soft around the mid section, to put it politely.
Ceasar on the defensive, avoiding the knees to the body.
Sagat throws a knee to the head but misses.
Sagat tries to land a knee to the head but Ceasar blocks with his arms.
Sagat with an attempt at a knee that misses.
Ceasar wants to push off and get back to the center of the mat but Sagat has him pressed against the cage.
Sagat with a knee to the head.
Sagat lands a knee to the head.
Ceasar wants to strike at distance but he can't break free of the clinch.
Sagat lands a glancing elbow in the clinch.
Ceasar breaks the clinch.
Sagat tries to clinch up.
Sagat fails with an attempt to clinch.
Sagat is looking to take this fight into the clinch.
Victor Sagat seems to be the more aggressive standup fighter in this bout.
Ceasar waving his hands out infront of him, looking to distract Sagat.
Ceasar looks to score with a combo but nothing lands.
Sagat is looking to take this fight into the clinch.
Ceasar throws out a loose jab but Sagat uses good head movement to avoid it.
Ceasar slow jab from Sagat misses its intended target.
That's one minute gone in the round.
Ceasar throws a nice looking combination but Sagat bobs and weaves to avoid any damage.
A nice combination there by Ceasar.
Sagat is looking to clinch.
Sagat takes a punch right to his stomach. That took the wind out of him momentarily.
Sagat looks gassed!
Ceasar throws a big shot that misses.
Sagat is a painfully thin specimen of a man. You do wonder whether a good body kick would snap him clean in two.
Sagat keeping a good distance there, avoiding the body shot.
Sagat avoids the body shot from Ceasar.
Ceasar throws a body punch but Sagat moves out of range.
Sagat tries to clinch but Ceasar moves out of range.
The sound of bone on bone echoes around the arena as Sagat checks a leg kick.
Ceasar lands a right hook to the body.
Ceasar wants to land a leg kick but Sagat is out of range.
Ceasar fakes with a right hand and throws a good leg kick, right into the thigh. That had to hurt Sagat.
The fight stays on the outside here - Sagat looks like he's thinking about clinching though.
Sagat is looking to take this fight into the clinch.
Ceasar slow jab from Sagat misses its intended target.
Sagat bobs and weaves well there to avoid the strikes.
Ceasar lands with a nice combination. Sagat backs away looking to recover.
Ceasar wings a very wild body shot but it does the job and lands to the midsection.
Ceasar loads up on a big right hand but Sagat slips the punch.
That's two minutes gone in the round.
Ceasar avoids the clinch attempt nicely.
Sagat doesn't manage to clinch there - Ceasar circles away.
Sagat uses decent footwork to sidestep a right hand from Ceasar.
Sagat tries to clinch but Ceasar is having none of it.
Ceasar is the aggressor but that punch slipped nicely by Sagat.
Ceasar swats away the attempt to clinch by Sagat.
Sagat slips a straight right by Ceasar.
Ceasar keeps the fight on the outside.
Ceasar misses with a looping right.
Ceasar lands an overhand right.
Ceasar looks to score with a combo but nothing lands.
Ceasar throws a nice looking combination but Sagat bobs and weaves to avoid any damage.
Ceasar keeps the fight on the outside.
Ceasar misses with a two punch combination.
Ceasar looks to land a combination but Sagat avoids it well.
Some wild striking there from Ceasar.
Ceasar scores with a leg kick.
Ceasar throws a looping overhand right but Sagat ducks down to avoid it.
Sagat wants to clinch.
Ceasar tests Sagat's chin there with a solid looking shot.
That's three minutes gone in the round.
Ceasar connects with a solid leg kick.
Sagat avoids the body shot from Ceasar.
Sagat fails with an attempt to clinch.
The fighters circling - Ceasar throws out the jab but it was never going to land.
Ceasar is really struggling to find his range with his punches. Ceasar's reach advantage is clearly causing him problems.
Ceasar throws a one two combo.
Ceasar goes for a spinning back kick but it misses.
A left lands for Ceasar.
Sagat staying out of range there.
Ceasar avoids the clinch attempt nicely.
Ceasar pulls out of a head kick attempt.
Ceasar paws at his opponent with the jab and then lunges in with a straight, right on the button.
Sagat checks a leg kick.
Sagat clinches up with Ceasar and pushes him back against the cage.
Sagat looks to throw an elbow but misses.
Sagat misses with a knee to the head.
Sagat misses with an elbow strike.
Ceasar breaks the clinch and we return to the middle of the mat.
Donk. Ceasar catches Sagat right on the button with a cross.
Ceasar waving his hands out infront of him, looking to distract Sagat.
Ceasar lands a nice hook to Sagat's body. Sagat takes it in his stride and looks to land his own strikes.
Sagat moves in looking to clinch but Ceasar pushes him off.
Sagat takes an uppercut right on the button but keeps his composure.
That's four minutes gone in the round.
A jab from Ceasar misses.
Ceasar throws a series of punches but Sagat avoids them all with ease.
Ceasar throws a combination but it was largely blocked by Sagat.
Ceasar lands a head shot.
Sagat tries to clinch but Ceasar is having none of it.
Sagat wants to clinch up but Ceasar keeps it at a distance.
A combination from Ceasar does no damage.
Ceasar misses with a double jab.
Sagat tries to clinch up but Ceasar circles away and keeps his distance.
The fight stays on the outside here - Sagat looks like he's thinking about clinching though.
Sagat staying out of range there.
Ceasar swings and misses with a hook to the body.
Sagat wants to clinch.
Ceasar swats away the attempt to clinch by Sagat.
Sagat tries to clinch there but Ceasar circles away.
Ceasar loads up on a big right hand but Sagat slips the punch.
Ceasar throws an overhand right that lands on Sagat's shoulder, as Sagat tries to avoid the shot.
The fight stays on the outside here - Sagat looks like he's thinking about clinching though.
Sagat tries to clinch up.
That's five minutes gone in the round.
Ceasar tries a low kick but Sagat avoids it.
Sagat fails in his attempt to clinch.
Ceasar misses with a double jab.
Ceasar is the aggressor but that punch slipped nicely by Sagat.
Ceasar misses with a hook.
Sagat wants to clinch up but Ceasar keeps it at a distance.
Sagat slips a jab and a cross from Ceasar.
Sagat tries to clinch but Ceasar is having none of it.
Ceasar circles away from the clinch attempt.
Ceasar throws a right and a left that Sagat avoids nicely.
Sagat moves in looking to clinch but Ceasar pushes him off.
Sagat moves forwards but Ceasar connects with a nice, crisp jab.
Ceasar avoids the clinch attempt nicely.
Sagat tries to clinch up.
Sagat tries to clinch but Ceasar moves out of range.
Ceasar keeps the fight on the outside.
Ceasar throws a combination but comes up with nothing but fresh air.
Ceasar misses with a looping right.
Ceasar swings away but doesn't land with a series of punches.
Sagat tries to clinch but Ceasar moves out of range.
Ceasar misses with the combination.
That's six minutes gone in the round.
There's not a lot going on here and the crowd are letting the fighters know they're not willing to tolerate a lack of action.
Ceasar misses with the combination.
No joy there for Ceasar, who threw a few shots but didn't land.
Sagat is looking to clinch but Ceasar is avoiding it.
Sagat keeping a good distance there, avoiding the body shot.
Sagat tries to clinch but is not successful on this occasion.
Ceasar scores with a crisp jab that stopped Sagat in his tracks.
Ceasar throws a series of punches but Sagat avoids them all with ease.
Sagat is looking to clinch.
Sagat moves in looking to clinch but Ceasar pushes him off.
Ceasar avoids the clinch attempt nicely.
Sagat tries to clinch there but Ceasar circles away.
Ceasar fails to land with a series of punches.
Ceasar keeps the fight on the outside.
Sagat fails in his attempt to clinch.
Ceasar pulls out of a head kick attempt.
Sagat moves in looking to clinch but Ceasar pushes him off.
Sagat tries to clinch but Ceasar moves out of range.
Sagat closes the distance and clinches.
Ceasar has had enough of the clinch but Sagat keeps him there for the moment.
Sagat misses with a knee to the head.
Ceasar tries to break the clinch but Sagat is controlling the position.
Sagat connects with a nasty looking knee right to Ceasar's face.
That's seven minutes gone in the round.
Sagat lands a glancing elbow in the clinch.
Sagat tries a knee to the head but he's missed.
Sagat throws a knee to the head but misses.
Ceasar managing to block the knees to the body from Sagat.
Ceasar throws a nice elbow but it doesn't land.
Ceasar breaks the clinch and we return to the middle of the mat.
Ceasar swinging wilding here.
Sagat tries to clinch but is not successful on this occasion.
Ceasar throws a nice looking combination but Sagat bobs and weaves to avoid any damage.
Ceasar misses the shot to the body.
Sagat slips a jab from Ceasar.
An inside leg kick from Ceasar misses.
Sagat wants to clinch up but Ceasar keeps it at a distance.
Sagat tries to clinch but Ceasar moves out of range.
Ceasar throws a right and a left that both miss.
Ceasar fails to land with a series of punches.
Sagat is looking to clinch but Ceasar is avoiding it.
Ceasar takes a swing at Sagat's ribcage but misses.
Sagat tries to clinch but Ceasar moves out of range.
Ceasar pivots, looking for a leg kick but Sagat is out of range and Ceasar settles back down.
Sagat forces Ceasar back against the cage and clinches.
Ceasar escapes the clinch and we're back to striking.
Ceasar is the aggressor but that punch slipped nicely by Sagat.
Ceasar looking to take his opponent's legs away with the low kicks.
That's eight minutes gone in the round.
Well. There's a bit of a lull in the action here and the crowd are starting to get restless.
Sagat takes a really solid shot there but just smiles back and shrugs his shoulders.
Sagat moves out of range of the strikes.
Sagat steps to his left, right into the path of a big body kick from Ceasar. That one must have hurt.
Ceasar misses with a straight right.
Sagat tries to clinch up.
Ceasar swats away the attempt to clinch by Sagat.
Ceasar swings away with a leg kick that misses.
Sagat is looking to clinch but Ceasar is avoiding it.
Ceasar throws a jab when Sagat was well out of range.
Ceasar throws a head kick that misses and slips in the process. He scrambles back to his feet and the fighters circle.
Sagat fails with an attempt to clinch.
Sagat fails with an attempt to clinch.
Ceasar missing with a left hand there. Sagat was out of range so wasted energy throwing that one.
Sagat tries to clinch but is not successful on this occasion.
Ceasar misses with a leg kick.
Ceasar misses with a jab and misses with a cross straight after too.
Ceasar takes a swing at Sagat's ribcage but misses.
Ceasar is the aggressor but that punch slipped nicely by Sagat.
Sagat is looking to clinch.
Ceasar lands a jab to the head.
Ceasar rushes forward with a series of wild hooks but Sagat moves out of range and avoids them all easily.
Sagat keeping a good distance there, avoiding the body shot.
That's nine minutes gone in the round.
Sagat moves out of range as Ceasar strikes.
The fight stays on the outside here - Sagat looks like he's thinking about clinching though.
Sagat fakes with an overhand right and moves in to clinch with Ceasar, pushing him back against the cage.
Sagat connects with a nasty looking knee right to Ceasar's face.
Ceasar avoids the elbow strike from Sagat, against the cage.
Sagat lands a knee to the head.
Ceasar is trying to break free.
Sagat looking to throw knees to the head but Ceasar is blocking nicely.
Ceasar manages to break the clinch.
Sagat tries to clinch but is not successful on this occasion.
Ceasar throws a big shot that misses.
Ceasar connects with the punch.
Ceasar with a jab.
Ceasar thows a body shot but no joy.
Ceasar misses the jab.
Nice body kick there by Ceasar.
Ceasar misses the jab.
Sagat tries to clinch but is not successful on this occasion.
Sagat wants to clinch.
Sagat avoids the body shot from Ceasar.
Ceasar thows a left - swing and a miss!
Ceasar lands with a thumping leg kick.
And that�s the end of the round � the fighters go back to their corners.
Julius Ceasar dominated that round.
That's the end of the interval. I'm sure that seemed a lot quicker than a minute for our two fighters! Back to the action.
Ceasar circles away from the clinch attempt.
Sagat is looking to take this fight into the clinch.
Sagat moves in looking to clinch but Ceasar pushes him off.
Ceasar misses with a series of wild punches.
Sagat tries to clinch up but Ceasar circles away and keeps his distance.
Sagat is looking to clinch but Ceasar is avoiding it.
Ceasar with a hook.
Nice defenses there by Sagat.
The fight stays on the outside here - Sagat looks like he's thinking about clinching though.
Sagat takes a head kick and shrugs it off.
Julius Ceasar is looking to throw some combinations by the looks of things.
Sagat slips under a jab from Ceasar.
Ceasar lands with a thumping leg kick.
Sagat takes one to the chin there.
We've had a slow start to the round here - hopefully the action picks up.
The fight stays on the outside here - Sagat looks like he's thinking about clinching though.
Sagat wants to clinch up but Ceasar keeps it at a distance.
Ceasar misses with a body shot. Nice footwork from Sagat.
Sagat moves in looking to clinch but Ceasar pushes him off.
Both fighters are absolutely exhausted here.
Ceasar throws a right and a left that Sagat avoids nicely.
Sagat tries to clinch but Ceasar is having none of it.
That's one minute gone in the round.
Ceasar throws a head kick that misses.
Sagat uses some good footwork to avoid the body shot by Ceasar.
Sagat tries to clinch there but Ceasar circles away.
Sagat tries to clinch but Ceasar moves out of range.
Sagat is looking to clinch.
Ceasar circles away from the clinch attempt.
Ceasar thows a left - swing and a miss!
Ceasar misses with a jab and misses with a cross straight after too.
Ceasar lands a straight punch to the body, keeping Sagat at a distance.
Ceasar misses with a hook.
Ceasar moving in and out of range nicely, whilst landing the scoring shot.
Ceasar looks to land a right hand but Sagat moved out of range.
Sagat tries to clinch up.
Ceasar slow jab from Sagat misses its intended target.
Ceasar swats away the attempt to clinch by Sagat.
Julius Ceasar is winning the standup battle so far.
Ceasar rushes forward with a series of wild hooks but Sagat moves out of range and avoids them all easily.
Sagat tries to clinch but Ceasar is having none of it.
Ceasar throws a hard body shot but it just misses.
Ceasar swings wildly with a right hand that was never going to find it's target.
Ceasar misses the jab.
Ceasar swinging wilding here.
Ceasar throws a right and a left that both miss.
That's two minutes gone in the round.
Neither fighter has done anything of merit for a good minute or two here and the crowd are not happy about it.
Sagat fails with an attempt to clinch.
Ceasar throws a big shot that misses.
Ceasar fails to land with the punch combination there - jab, cross, hook, miss, miss, miss.
Sagat tries to clinch up.
Sagat darts in and clinches Ceasar up against the cage.
Sagat landing knees to the head.
Ceasar breaks from the clinch.
Ceasar keeps the fight on the outside.
Ceasar throws an overhand right that lands on Sagat's shoulder, as Sagat tries to avoid the shot.
Ceasar connects with a looping left hand that seems like it dazed Sagat momentarily.
Ceasar works Sagat's body with a nice hook.
Sagat takes a jab on the nose. He smiles like he loves it and keeps coming.
Ceasar throws an overhand right that lands on Sagat's shoulder, as Sagat tries to avoid the shot.
Ceasar keeps the fight on the outside.
Sagat keeping a good distance there, avoiding the body shot.
Sagat is looking to clinch.
Sagat moves in looking to clinch but Ceasar pushes him off.
Ceasar lands the left hand.
Ceasar missing with a left hand there. Sagat was out of range so wasted energy throwing that one.
Sagat closes the distance and clinches.
Sagat misses with a knee strike.
Sagat has a pretty nasty looking mouse under his right eye.
Ceasar breaks the clinch.
Ceasar circles away from the clinch attempt.
That's three minutes gone in the round.
Sagat tries to clinch but Ceasar is having none of it.
Ceasar scores with a slapping inside leg kick.
Sagat is looking to clinch but Ceasar is avoiding it.
Ceasar throws a hook but Sagat blocks it.
Ceasar throws a head kick that misses and slips in the process. He scrambles back to his feet and the fighters circle.
Ceasar looks to land a right hand but Sagat moved out of range.
Ceasar just misses with a punch to the body.
Ceasar swats away the attempt to clinch by Sagat.
Ceasar circles away from the clinch attempt.
Ceasar misses with a straight left.
The fight stays on the outside here - Sagat looks like he's thinking about clinching though.
The fight stays on the outside here - Sagat looks like he's thinking about clinching though.
Ceasar avoids the clinch attempt nicely.
Ceasar throws a head kick that misses and slips in the process. He scrambles back to his feet and the fighters circle.
Ceasar tries to keep at a distance but Sagat has taken the fight into the clinch.
Ceasar throws a punch but it's blocked by Sagat.
Sagat prevents Ceasar from breaking the clinch.
Ceasar tries a knee to the head but he's missed.
Ceasar breaks the clinch and we return to the middle of the mat.
Sagat is looking to clinch but Ceasar is avoiding it.
That's four minutes gone in the round.
A few boos can be heard. I'm sure they will multiply if the fighters don't pick up the pace.
Ceasar swats away the attempt to clinch by Sagat.
Ceasar keeps the fight on the outside.
Ceasar swats away the attempt to clinch by Sagat.
Ceasar lands a jab to the nose.
Ceasar misses the jab.
Ceasar throws a looping overhand right but Sagat ducks down to avoid it.
Sagat tries to clinch but is not successful on this occasion.
Sagat wants to clinch up but Ceasar keeps it at a distance.
A choreographed right hand from Ceasar misses the target.
Ceasar circles away from the clinch attempt.
A cross from Ceasar lands.
Ceasar throws a wild combination but nothing lands.
Ceasar avoids the clinch attempt nicely.
Ceasar keeps the fight on the outside.
Ceasar avoids the clinch attempt nicely.
Sagat fails with an attempt to clinch.
Ceasar tries to bum rush Sagat with a series of wild strikes but Sagat uses good footwork to avoid the assault.
Some wild striking there from Ceasar.
Ceasar throws a big shot that misses.
Ceasar throws a body punch but Sagat moves out of range.
That's five minutes gone in the round.
Ceasar keeps Sagat at a distance using the push kick.
Ceasar misses with a wild body shot.
Sagat keeping his hands up high there, blocking the jab from Ceasar.
Sagat checks a low kick from Ceasar.
Sagat is looking to clinch but Ceasar is avoiding it.
Sagat fails in his attempt to clinch.
Ceasar looks to land a combination but Sagat avoids it well.
Sagat is looking to take this fight into the clinch.
Ceasar swats away the attempt to clinch by Sagat.
Ceasar misses the jab.
Ceasar misses with a two punch combination.
Ceasar misses with a body shot. Nice footwork from Sagat.
Sagat instigates a clinch.
Ceasar blocks the elbow strike.
Ceasar wants to break free. God knows he wants to breaaaak freeee.
With the fighters up against the cage, Sagat throws an elbow but misses.
Sagat misses with an elbow strike.
Sagat using the Thai plumb to throw knees but Ceasar has his back arched nicely, preventing the strike.
Ceasar manages to break the clinch.
Sagat tries to clinch but Ceasar is having none of it.
Sagat fails with an attempt to clinch.
Sagat has closed the distance and engaged Ceasar in a clinch.
That's six minutes gone in the round.
Sagat lands an elbow that stopped Ceasar in his tracks for a moment.
Sagat looking to throw knees to the head but Ceasar is blocking nicely.
With the fighters up against the cage, Sagat throws an elbow but misses.
Sagat tries to land a knee to the head but Ceasar blocks with his arms.
A knee to the head by Sagat.
Sagat with a knee to the head.
Sagat misses with a knee to the head.
Ceasar escapes the clinch and we're back to striking.
Sagat avoids the head kick by Ceasar.
Sagat walks straight into an uppercut. Luckily it didn't land flush.
Ceasar misses with a body shot. Nice footwork from Sagat.
Ceasar wants to land a leg kick but Sagat is out of range.
Ceasar throws an uppercut from half a mile away. Sagat sees it coming and avoids it easily.
Ceasar lands a jab to the head.
Ceasar misses with an uppercut.
Sagat on the receiving end of a decent leg kick there by Ceasar. Ceasar obviously looking to wear him down.
No joy there for Ceasar, who threw a few shots but didn't land.
Ceasar misses with a wild body shot.
Ceasar looks to score with a jab to the body but Sagat is just out of range.
Sagat dodges the punch combination from Ceasar.
Sagat avoids a punch combination nicely.
Sagat keeping a good distance there, avoiding the body shot.
Sagat is looking to clinch.
A swing and a miss from Ceasar.
That's seven minutes gone in the round.
Ceasar is the aggressor but that punch slipped nicely by Sagat.
A leg kick checked by Sagat.
Ceasar fakes with a right hand and throws a good leg kick, right into the thigh. That had to hurt Sagat.
Ceasar scores with a crisp jab that stopped Sagat in his tracks.
Sagat uses some good footwork to avoid the body shot by Ceasar.
Sagat wants to clinch up but Ceasar keeps it at a distance.
Sagat staying out of range there.
Sagat fails with an attempt to clinch.
Ceasar misses with a hook.
Sagat on the wrong end of an overhand right that came out of nowhere.
Ceasar misses with a jab and misses with a cross straight after too.
Ceasar tries a head kick but it misses.
Sagat avoids a kick to the body.
The fight stays on the outside here - Sagat looks like he's thinking about clinching though.
Ceasar throws a wild combination but nothing lands.
Sagat wants to clinch up but Ceasar keeps it at a distance.
Sagat keeping a good distance there, avoiding the body shot.
Sagat tries to clinch but is not successful on this occasion.
Ceasar throws a monster uppercut resembling something out of street fighter but it doesn't land.
Ceasar throws a combination but comes up with nothing but fresh air.
Ceasar throws a combination but comes up with nothing but fresh air.
That's eight minutes gone in the round.
A lull in the action here being met with boos from the crowd.
Sagat doesn't manage to clinch there - Ceasar circles away.
Ceasar misses with a looping left.
Ceasar connects with a nice looking jab.
Ceasar misses with a wild combination.
Sagat gets his head snapped back by a nice shot there.
Ceasar throws a hook to the body but it doesn't connect.
Sagat moves in looking to clinch but Ceasar pushes him off.
Sagat staying out of range there.
Ceasar swings away but doesn't land with a series of punches.
Ceasar motions for Sagat to come forward. Ceasar throws a leg kick but it misses it's target.
Ceasar misses with a looping left.
Ceasar misses with a few strikes there.
Sagat avoids the body shot from Ceasar.
Ceasar throws a hook but Sagat avoids it easily.
Ceasar throws a big shot that misses.
Sagat wants to clinch.
A combination from Ceasar does no damage.
The fight stays on the outside here - Sagat looks like he's thinking about clinching though.
Ceasar jabbing away but nothing is landing.
That's nine minutes gone in the round.
Ceasar swings away but doesn't land with a series of punches.
Ceasar swings and misses with a hook to the body.
Some wild striking there from Ceasar.
Ceasar misses with a straight right.
Ceasar misses the jab.
Ceasar throws a right hand that Sagat ducks under and follows up with a left that Sagat also avoids with ease.
Sagat moves in looking to clinch but Ceasar pushes him off.
Sagat doesn't manage to clinch there - Ceasar circles away.
Sagat doesn't manage to clinch there - Ceasar circles away.
Ceasar looks to score with a combo but nothing lands.
Ceasar throws a looping overhand right but Sagat ducks down to avoid it.
Sagat gets a clinch.
Sagat throws a knee to the head but misses.
Sagat throws a vicious knee straight up the middle but Ceasar blocks it with crossed arms.
Ceasar wants to break free. God knows he wants to breaaaak freeee.
Sagat with a knee to the head.
Ceasar is rocked!
Sagat lands a damaging elbow.
Oh Ceasar is still all over the place! His legs are completely gone! Will he be able to recover?!!
Sagat lands an elbow inside.
Ceasar is pressed against the cage. Sagat pushes back and unleashes a big elbow that really hurts Ceasar! Two more big strikes from Sagat and Ceasar crumples to the mat and taps out furiously due to the strikes!
Ladies and gentlemen, after 9:57 of round 2, we have a winner by way of Submission (Strikes). Victor Sagat!
|
|
|
|
|
|
|
|
|
|
|
|
|
|
|
|
|
|
|
|
|
|
|
| S |
C
A |
G |
S |
C
B |
G |
|
S |
C |
G |
|
energy
A | B |
|
hype
A | B |
|
pop
A | B |
|
mgr
A | B |
|
FIGHT
RATING
41% |
|
|
|
|
|
|
|
Main event
|
Coming up we have a super heavyweight MMA rules bout between Harry Hill (ranked 0 p4p, 0 weight class) and Nano Wei (ranked 0 p4p, 0 weight class). Nano Wei has the better chin. Will he look to stand and bang today?
 |
|
 |
| 195 cm
22
300 lbs
2 - 0 - 0 |
|
194 cm
20
300 lbs
2 - 0 - 0 |
BJJ White Belt
Brawler
KO power |
|
BJJ Purple Belt
Counter striker
Granite chin |
|
| |
|
Ladies and gentlemen. This fight is 3 rounds, in the super heavyweight division.
Introducing the fighter to my left, fighting out of the red corner.
With a record of
2 - 0 - 0, fighting out of Tokyo, Harry Hill!
And introducing the fighter to my right, fighting out of the blue corner.
With a record of
2 - 0 - 0, fighting out of Tokyo, Nano Wei!
The judges for this bout are Sosuke Kotani, Shigeki Sano and Shigeki Fujiwara.
The bell rings for round one and we are underway!
Hill throws an uppercut from half a mile away. Wei sees it coming and avoids it easily.
Hill misses with an attempted mid kick.
Wei blocks a jab.
A leg kick checked by Wei.
Hill fails to land with a series of punches.
Hill looks to land a left hand but Wei moved out of range nicely.
Hill throws a series of punches but Wei moves out of range.
Wei takes one to the side of the head.
Wei moves out of range of the leg kick from Hill.
Hill misses with the combination.
Wei dodges the punch combination from Hill.
This fight brought to you by 5M nutrition - it's mmmmm tasty. Nice jab by Wei.
Hill walks into a jab.
Hill swings away but doesn't land with a series of punches.
That's one minute gone in the round.
Hill misses with a two punch combination.
Wei throws a hook but Hill blocks it.
Wei connects with a nice looking jab.
Hill rushes in with a sloppy looking punch
and Hill takes a counter punch right on the button for his troubles.
A big right from Wei misses.
Hill misses with a left hand
and Wei counters with a crisp hook to the side of the head.
Hill throws an ugly left hook that misses
and Wei counters with a stiff right hand.
Hill misses with a double jab
and Wei counters with a good right hand that lands right on the jaw.
Hill misses with a combination
enabling Wei to counter with a crisp jab.
Hill misses with a body punch
and Hill takes a counter punch right on the button for his troubles.
Some bone on bone action there as Wei checks a low kick. Luckily it wasn't a particularly hard one.
Hill finds nothing but air with that leg kick attempt.
Wei with a hook.
That's two minutes gone in the round.
Wei listening to his corner there, landing a nice uppercut.
Hill throws a jab, cross combination which is slipped
and Wei connects with a straight left hand counter down the middle.
Wei misses with a straight left.
Hill displays some good footwork, moving neatly out of range as Wei throws out the jab.
Hill throws a right hand that misses
and Wei connects with a straight left hand counter down the middle.
Hill drops his hands and takes a jab to the jaw for his troubles.
Hill misses with a shot to the body
and Wei counters with a good right hand that lands right on the jaw.
Hill moves forwards but Wei connects with a nice, crisp jab.
Hill misses with a double jab
and Wei counters with a straight right hand.
Hill misses with a left hand
letting Wei counter with a right hand.
Hill swings wildly with a couple of big hooks
and Wei counters with a nice uppercut.
Hill is breathing heavily.
Hill throws a poor cross that misses
and Wei counters with a stiff right hand.
Wei throws the left hand but Hill avoids the punch easily.
Wei throws a monster uppercut resembling something out of street fighter but it doesn't land.
That's three minutes gone in the round.
Wei slow jab from Hill misses its intended target.
Hill falls off balance throwing a combination
and Wei counters with a nice uppercut.
A big right from Wei misses.
Wei throws a big shot that misses.
Hill tries to work over Wei's front leg with a kick but Wei checks it.
Wei throws a shot from downtown. Hill moves away and avoids it.
Wei misses the jab.
Harry Hill seems to be the more aggressive standup fighter in this bout.
Hill misses with a double jab
and Wei counters with a crisp hook to the side of the head.
Hill takes an uppercut right on the jaw but it doesn't phase him.
Hill misses with a left hand
and Wei counters with a crisp hook to the side of the head.
Hill swings widly with a right hand
enabling Wei to counter with a crisp jab.
Wei swings wildly with a right hand that was never going to find it's target.
Hill misses with a hook
and Wei cracks him with a counter punch right on the button.
That's four minutes gone in the round.
Wei slips in close and lands a nice hook before moving back out of range.
Hill throws an ugly left hook that misses
and Wei cracks him with a counter punch right on the button.
Hill misses with a double jab
and Wei counters with a crisp hook to the side of the head.
Hill misses with a double jab
letting Wei counter with a right hand.
Hill misses with a left hand
letting Wei counter with a right hand.
Hill misses with a hook
and Wei cracks him with a counter punch right on the button.
Wei thuds his right hand into Hill's forehead from close range. That could be painful for both fighters.
Hill walks straight into a jab right on the nose. That one stung - he's blinking and trying to clear his head.
The fighters circling - Wei throws out the jab but it was never going to land.
Hill scores with a punch to the gut of his opponent.
Hill swings away with a body shot that misses
and Hill takes a counter punch right on the button for his troubles.
Wei lands with an uppercut that bounces Hill off the cage and back into rage.
Hill misses with a low kick.
That's five minutes gone in the round.
Hill swings wildly with a couple of big hooks
letting Wei counter with a right hand.
Wei misses with a hook.
Hill throws an off balance right hand
enabling Wei to counter with a crisp jab.
Hill throws a leg kick but Wei sees it coming and moves out of range.
Hill lands a jab. Then a cross. Then finally a nice hook to the body. Good work there by Hill.
Wei is the aggressor but that punch slipped nicely by Hill.
Hill gets his head snapped back by a nice shot there.
Hill uses decent footwork to sidestep a right hand from Wei.
A cross from Wei lands.
Hill cracks Wei with a big right hand that sends him to the floor! Wei looks wobbly but he's sprung back up to his feet straight away� can Hill finish him?
Wei is rocked!
It looks like Nano Wei has been cut.
The fans in attendance giving it up for the two fighters, who have really let it all hang out in the last minute or so!
Hill looks to land a combination but Wei avoids it well.
Wei might want to mix his strikes up a bit more. He's just going for head shots at the moment and that can become a bit predictable.
A combination from Hill does no damage.
Hill connects nicely with a jab. Noted by the judges no doubt.
That's six minutes gone in the round.
Hill throws a predictable looking body shot
and Wei counters with a quick right hand to the jaw.
Hill throws a poor cross that misses
and Wei counters with a crisp hook to the side of the head.
Hill misses with a leg kick
and Wei counters with a quick right hand to the jaw.
Hill sends Wei crashing to the mat with a devastating uppercut! Hill is motioning to the referee to let Wei up. He wants to try and finish this one on the feet!
Wei is still on wobbly legs! Can Hill finish him?
Hill lands a brutal uppercut that launches Wei off his feet! Wei tumbles to the floor, barely conscious - the referee jumps in to save him from a beating! Wow, what an ending!
Ladies and gentlemen, after 6:25 of round 1, we have a winner by way of KO (Punch). Harry Hill!
|
|
|
|
|
|
|
|
|
|
|
|
|
|
|
|
|
|
|
|
|
|
|
| S |
C
A |
G |
S |
C
B |
G |
|
S |
C |
G |
|
energy
A | B |
|
hype
A | B |
|
pop
A | B |
|
mgr
A | B |
|
FIGHT
RATING
58% |
|
|
|
|
|
|
|
|
|
|
