 |
XFC:Out for Blood by DBA MMA PBP Commentary |
Undercard bout
|
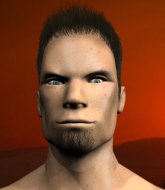
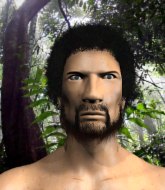
Coming up we have a welterweight MMA rules bout between Earnie Dingo (ranked 0 p4p, 0 weight class) and Bu Laia (ranked 0 p4p, 0 weight class). Rumors backstage are that the fighters have been paid to keep it standing but we know that would never happen in MMA!
 |
|
 |
| 170 cm
22
170 lbs
1 - 0 - 0 |
|
172 cm
20
165 lbs
0 - 1 - 0 |
BJJ Blue Belt
Brawler
Granite chin |
|
BJJ Blue Belt
Brawler
Determined |
|
| |
|
Ladies and gentlemen. This fight is 3 rounds, in the welterweight division.
Introducing the fighter to my left, fighting out of the red corner.
With a record of
1 - 0 - 0, fighting out of Sydney, Earnie Dingo!
And introducing the fighter to my right, fighting out of the blue corner.
With a record of
0 - 1 - 0, fighting out of Sydney, Bu Laia!
The judges for this bout are , and .

The bell rings for round one and we are underway!
Laia moves in looking to clinch but Dingo pushes him off.
Laia wants to clinch up but Dingo keeps it at a distance.
Dingo avoids the clinch attempt nicely.
Dingo shoots in but no luck this time.
Earnie Dingo seems to be the more aggressive standup fighter in this bout.

The fight moves into the clinch position.
Dingo can't break the clinch.

Dingo turns his hips and lands a very nice judo throw into side control!
Dingo controls the position.
Laia tries to wriggle free to get back to his feet but he's given up his back! Oops.
Laia manages to reverse the position and now he's in Dingo's guard. Nice work there by Laia.
Laia missing there with some ground and pound from the guard.

Laia stands up from Dingo's guard - Laia perhaps looking for a knockout.
Laia fails in his attempt to clinch.
Laia tries to clinch but Dingo moves out of range.
Laia wants to clinch.
Dingo closes this distance looking for a takedown but Laia circles away.

That's one minute gone in the round.
Laia throws a head kick that misses.
Dingo bobs and weaves into range and then changes levels and scores with a nice takedown into side control.
The fighters are pressed up against the cage, both looking to find a bit of space to work.
Laia prevents Dingo from improving position.
Dingo prevents Laia from escaping the position.
Laia looks gassed!
Dingo stands up and we're back to a striking position.
Dingo looks frusrated there after his takedown attempt is stuffed easily.
That's three failed takedown attempts in the round for Earnie Dingo. That's going to take a lot out of him.
Dingo changes levels and drives through with a really nice takedown into side control. Laia looks really pissed at himself for not defending that better.

Dingo thinks about going for a far side armbar but bails out and retains the dominant position instead.
Laia is trying to get back to his feet.
Dingo is trying to land an Americana. He has the arm isolated but Laia is keeping cool and he's avoided the danger for now.
Laia looks to move to half guard but instead Dingo has passed into mount! Damn!

That's two minutes gone in the round.
Dingo wants to control the pace but Laia is squirming around nicely.
Dingo wants to take Laia's back but he can't do it this time.
Dingo sitting in mount, just looking to control for the moment.
Laia looking to escape from mount but he's given up his back!
Dingo tries to keep control of the position but Laia is staying busy.
Dingo is staying calm and holding on to the back position, whilst working on a rear naked choke. Laia is defending well though. Dingo let's go of the attempt for now.
We've seen a great period of action over the last minute or so - credit to both fighters for leaving it all in the cage!
Laia rolls, trying to escape but Dingo keeps control of the position.
Dingo is staying calm and holding on to the back position, whilst working on a rear naked choke. Laia is defending well though. Dingo let's go of the attempt for now.

That's three minutes gone in the round.
Dingo looking for the RNC.
Laia can't escape the position.
Dingo has his opponent's back and is working for the choke.
Laia breaks Dingo's hooks off and manages to turn into his guard.
Laia postures up.
Laia pushes down on Dingo's leg and manages to get into half guard.
Laia thows a huge punch but Dingo dodges it nicely.
Dingo avoiding damage under a succession of punches from Laia.
Laia is looking for a kimura but Dingo is holding onto that half guard position, so it's hard for Laia to get the leverage.
Laia wants to lay and pray for a moment but Dingo keeps working.

That's four minutes gone in the round.
The crowd are hurling abuse towards the fighters... You can hardly blame them though because there isn't a lot going on in the fight.
Dingo wants to control but Laia is keeping busy and won't allow it.
Dingo flails away from the bottom but he's not doing any damage.

Neither fighter is doing enough for the referee's liking and he's decided to stand them back up.
Dingo is looking to clinch but Laia is avoiding it.
Dingo fails miserably with a takedown attempt.
Dingo looks for a takedown here. Will he get it? Laia is fending him off so far but Dingo persists. Nope, Laia circles away and we're back to standing.
Dingo closes this distance looking for a takedown but Laia circles away.
Laia is looking to take this fight into the clinch.
Excellent takedown into side control there by Dingo.
Both fighters really going for it on the ground here!
Dingo wants to lay and pray for a moment but Laia keeps working.
Dingo works to advance to full mount. Laia defends for a few seconds but eventually he succumbs.
The crowd applaud the fighters efforts here as the round comes to an end.
Laia avoids a series of strikes thrown by Dingo.
Dingo misses with a series of strikes from mount. He'll no doubt be working on his ground and pound when he gets back to the gym.
Dingo tries to control but Laia wriggling away.
Dingo thuds his fist into the canvas! Oooouch!
And that�s the end of the round � the fighters go back to their corners.
Earnie Dingo dominated that round.
That's the end of the interval. I'm sure that seemed a lot quicker than a minute for our two fighters! Back to the action.

Dingo lands a glancing blow to the side of Laia's head.
Dingo fails with a takedown attempt.
Dingo closes the distance and looks for a trip takedown... aaaand he's got it - Dingo lands in his opponent's guard.
Earnie Dingo overall seems to be getting the better of the ground position in the fight so far.
Laia working the defensive guard well to avoid strikes from Dingo.
Laia wants to stand up but Dingo is controlling him.
Laia working the defensive guard well to avoid strikes from Dingo.
Dingo won't allow Laia to get back to his feet.
Laia looking to sweep here. No luck so far.
Both fighters are absolutely exhausted here.
Laia kicks Dingo off and gets to his feet.
Dingo will have to do better than that with his takedown attempts.
Laia clinches but Dingo breaks the clinch
and Dingo counters with a nice double leg into half guard.
The ref warns both fighters not to hold the cage as they work up against the meshing.
That's one minute gone in the round.
Laia is not content to let Dingo control the position.
Laia wants to improve his position but Dingo is controlling well.
Dingo is working for submissions here but there's nothing on.
Dingo decides he's had enough of the ground and stands up.
Laia moves in looking to clinch but Dingo pushes him off.
Dingo shoots in for a takedown but Laia shows good takedown defense.
That's three failed takedown attempts in the round for Earnie Dingo. That's going to take a lot out of him.
Dingo looks for a takedown but Laia sprawls well.
Dingo shoots in for a takedown. "Ole!" shouts Laia as he jumps to the side.
Laia misses with a head kick.
Laia is looking to clinch.
Dingo shoots in for a takedown but doesn't get it.
Bu Laia is looking to keep the fight on the feet at all costs.
Laia instigates a clinch.
A short body shot lands from Dingo as the two fighters clinch.
Dingo drops to a knee looking for a takedown but Laia gets the underhooks and prevents it.
Dingo tries to score a body lock takedown but Laia shows good agility there to stay on his feet.
That's two minutes gone in the round.
Laia lands a right hand.
Dingo wants a takedown.
Dingo is looking for a takedown up against the cage. Laia gets underhooks though and prevents the takedown attempt.
Laia prevents the takedown attempt.
Dingo managing to block the knees to the body from Laia.
Dingo drags the fight down to the ground.
Laia won't allow Dingo to get back to his feet.
Dingo working for a triangle but Laia defends it easily.
Laia gets to his feet and steps away from his opponent.
Laia shakes his hands off, looking to compose himself, but takes a jab to the jaw whilst he does it.
Laia clinches up against the cage.
Dingo is trying to work for a single leg takedown but Laia pulls him back up using the underhooks.
A short body shot lands from Laia as the two fighters clinch.
Wooooo! Give it up for these two warriors! They are putting on a show!
The referee calls for Laia to work.
Dingo tries a body shot but Laia blocks it.
Laia tries to stall but Dingo uses the opportunity to gain a better position.
A shot in the inside from Laia.
That's three minutes gone in the round.
Dingo is looking for a takedown up against the cage. Laia gets underhooks though and prevents the takedown attempt.
Laia lands a shoulder strike that jolts his opponent's head backwards.
Dingo drops down for a takedown but doesn't get it.
Dingo tries to pull guard but can't drag his opponent to the mat. Laia just stands there and leans against the cage.
Dingo can't get the takedown.
Dingo wants a takedown but no success here.
Laia stalling against the cage.
A nice right hand lands inside from Laia.
Laia lands a hook that snaps the head of Dingo backwards.

Laia breaks the clinch and we return to the middle of the mat.
Dingo moves into range and throws a lovely three punch combination.
Dingo shoots in but no luck this time.
Dingo tries for a takedown but Laia sees it coming a mile off and avoids it easily.
Dingo has a takedown stuffed.
Dingo takes one to the chin there.
Laia keeps the fight standing with a nice sprawl.
Dingo shoots in for a takedown but Laia shows good takedown defense.
That's four minutes gone in the round.
Dingo shoots in for a takedown. "Ole!" shouts Laia as he jumps to the side.
Dingo closes the distance, clinches up and gets a nice trip takedown into side control. Very smooth.
Dingo moving around in side mount but really he's just happy to control for now.
Dingo looking for an arm triangle but it's way too loose to do anything.
Laia bucks up and manages to escape back to his feet!
We've seen a great period of action over the last minute or so - credit to both fighters for leaving it all in the cage!
Dingo keeps the fight on the outside.
Laia fakes with an overhand right and moves in to clinch with Dingo, pushing him back against the cage.
Dingo tries to pull guard but Laia won't allow it.
As the round comes to an end the crowd are showing their appreciation for a great round of action.
Dingo fails to pull the fight into his guard.
Dingo tries to score a body lock takedown but Laia shows good agility there to stay on his feet.
Laia breaks the clinch.
Decent striking displayed by Dingo there.
Dingo looks for a takedown here. Will he get it? Laia is fending him off so far but Dingo persists. Nope, Laia circles away and we're back to standing.
Dingo closes this distance looking for a takedown but Laia circles away.
Nice sprawl there from Laia as Dingo shoots in.
And that�s the end of the round � the fighters go back to their corners.
That was a close second round but I would say that Earnie Dingo will probably get the nod.
The fighters' corners scream their final instructions, as the referee calls time. Here we go, back to the action! Ladies and gentlemen, this is the final round!

Dingo moves into range and throws a combination. A nice jab followed by a hook to the body.
Dingo fails to land the takedown.
Dingo changes levels and drives through with a really nice takedown into side control. Laia looks really pissed at himself for not defending that better.
Dingo trying to control the action but Laia is working from the bottom.
Dingo has had enough of the ground for now and decides to stand.
Dingo looks frusrated there after his takedown attempt is stuffed easily.
Laia tries to clinch but Dingo moves out of range.
Bu Laia is looking to throw some combinations by the looks of things.
Dingo shoots in from a long way out. He's driving through with the takedown attempt and he eventually gets it, landing in Laia's guard.
Dingo advances to half guard.
Dingo wants to free his trapped foot but Laia is holding on for dear life with his legs.
Dingo seems very keen to just sit and control from half guard but Laia does not like that idea so much and is remaining active off his back.
Dingo scores with a couple of good hammerfists.
Dingo tries to pass the half guard into mount. Laia knows what he's doing though and prevents the attempt.
That's one minute gone in the round.
Dingo is looking to stall here but Laia recovers full guard.
Both fighters are breathing heavily.
Laia working from the bottom, still in full guard. He's managed to get a loose triangle. Dingo doesn't seem to be doing much to defend here, obviously he feels comfortable in the position. Dingo manages to throw the legs off his shoulder and he's back into guard - no problem.
Dingo thinks about going for a leg but decides against it, in order to maintain the position.
Dingo stops Laia from standing up.
Dingo chips away with some ground and pound.
Well, the referee has seen enough. Neither fighter is active enough on the ground so he's stood them back up.
Dingo looks for a takedown here. Will he get it? Laia is fending him off so far but Dingo persists. Nope, Laia circles away and we're back to standing.
That's three failed takedown attempts in the round for Earnie Dingo. That's going to take a lot out of him.
A really sloppy takedown attempt there from Dingo.
Laia tries to clinch but is not successful on this occasion.
Laia tries to clinch up.
Dingo closes the distance and looks for a trip takedown... aaaand he's got it - Dingo lands in his opponent's guard.
That's two minutes gone in the round.
Dingo trying to control but Laia is working from the bottom.
Dingo prevents Laia from getting back to his feet.
Dingo trying to pass the guard but can't manage it just yet.
Laia avoiding any damage from the ground and pound.
Laia keeping full guard, as Dingo tries to pass.
Dingo stops Laia from standing up.
Dingo stands up and looks to throw the legs aside to pass to side control. Laia swivels though and keeps the full guard.
Laia is looking to stand back up but Dingo counters by passing into half guard. Oops... bit sloppy there by Laia.
Laia taking a bit of punishment here - Dingo scoring with strikes.
The referee decides to stand the fighters back up.
Dingo swats away the attempt to clinch by Laia.
Laia moves into the clinch successfully.
That's three minutes gone in the round.
Dingo tries to take the fight to the ground by pulling guard but can't manage it.
Laia is trying to stall.
Laia taking a break, stalling in the clinch.
Dingo tries to pull guard but can't drag his opponent to the mat. Laia just stands there and leans against the cage.
Dingo fails to pull the fight into his guard.
Dingo can't get the takedown.
Dingo drops to a knee looking for a takedown but Laia gets the underhooks and prevents it.
Laia stalling here - the referee won't stand for too much of that.
Dingo can't get the takedown.
Dingo drops to a knee looking for a takedown but Laia gets the underhooks and prevents it.
Dingo can't get the takedown.
Come on Laia - let's have some action - none of this stalling nonsense.
Laia gets double underhooks to prevent a takedown attempt from Dingo.
Laia wants to break free. God knows he wants to breaaaak freeee.
Laia missing with knees to the body.
Laia is pressed up against the cage. Dingo has hold of a leg and is looking to drag Laia down to the mat. Laia avoids the attempt though and has circled away. We're back to striking at a distance.
Laia clinches up with Dingo and pushes him back against the cage.
A hook to the body from Laia.
That's four minutes gone in the round.
Come on Laia - let's have some action - none of this stalling nonsense.
Laia connects with a knee to the head.
Dingo is working for takedown but Laia is calmly controlling the position for now.
Laia landing knees to the body.
Dingo looking to stall.
Laia prevents a takedown attempt there.
Laia lands a shoulder strike.
Dingo drops down looking for an ankle pick but Laia pulls his leg out and moves away.
Laia throws a head kick but Dingo moves out of range.
Dingo closes this distance looking for a takedown but Laia circles away.
Laia thuds a mid kick into his opponent's body. That will wear on Dingo if he has to take too many more of those.
The crowd applaud the fighters efforts here as the round comes to an end.
Laia tries to clinch up but Dingo circles away and keeps his distance.
Dingo shoots in from a long way out. He's driving through with the takedown attempt and he eventually gets it, landing in Laia's guard.
We've seen a great period of action over the last minute or so - credit to both fighters for leaving it all in the cage!
Laia can't do much from the bottom at the moment, as Dingo controls the pace.
Laia is trying to stand up but he's not managed so far.
And that's the end of the fight!
That was a close round. You could make an argument for either fighter but I would give it to Earnie Dingo.
Well I reckon that's a shut out for Dingo, winning every round. Will the judges agree? They are the ones who matter, even if they are often depressingly incompetent. Over to the ring announcer for the scorecards.
Ladies and gentlemen, after 3 rounds of action, we go to the scorecards for a decision.
Judge Andi Peters scores the fight for Earnie Dingo!
Judge Gordon Ramsey scores the fight for Earnie Dingo!
Judge Frank Skinner scores the fight for Earnie Dingo!
Earnie Dingo wins by unanimous decision!
|
|
|
|
|
|
|
|
|
|
|
|
|
|
|
|
|
|
|
|
|
|
|
| S |
C
A |
G |
S |
C
B |
G |
|
S |
C |
G |
|
energy
A | B |
|
hype
A | B |
|
pop
A | B |
|
mgr
A | B |
|
FIGHT
RATING
82% |
|
|
|
|
|
|
|
Undercard bout
|
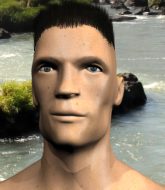
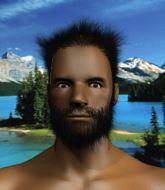
Coming up we have a middleweight MMA rules bout between Austin McFightsalot (ranked 0 p4p, 0 weight class) and Han Solo (ranked 0 p4p, 0 weight class). Both these guys have really solid chins. Will we see a standup war or will they both decide that a knockout is unlikely and try to win the fight elsewhere?
 |
|
 |
| 200 cm
19
198 lbs
0 - 1 - 0 |
|
185 cm
20
180 lbs
0 - 0 - 0 |
BJJ Blue Belt
Brawler
Granite chin |
|
BJJ Blue Belt
Basic striking
Granite chin |
|
| |
|
Ladies and gentlemen. This fight is 3 rounds, in the middleweight division.
Introducing the fighter to my left, fighting out of the red corner.
With a record of
0 - 1 - 0, fighting out of Sydney, Austin McFightsalot!
And introducing the fighter to my right, fighting out of the blue corner.
With a record of
0 - 0 - 0, fighting out of Sydney, Han Solo!
The judges for this bout are , and .
The bell rings for round one and we are underway!
McFightsalot moves into the clinch successfully.
McFightsalot can't get the takedown.
Solo tries to break the clinch but McFightsalot is controlling the position.
McFightsalot breaks from the clinch.
McFightsalot moves out of range as Solo throws a body kick.
McFightsalot shoots in from a long way out. He's driving through with the takedown attempt and he eventually gets it, landing in Solo's guard.
McFightsalot really does look like a pencil wearing a pair of gloves. Let's hope he has a gameplan to suit that ridiculous body shape.
McFightsalot trying to pass the guard but can't manage it just yet.
Solo being controlled here, momentarily.
McFightsalot looking to sit in guard and control but Solo gets the butterfly guard and sweeps. He's now in the guard on the top.
Solo passes into half guard.
The fighters are pressed up against the cage, both looking to find a bit of space to work.
McFightsalot makes his way to full guard. A much better position for McFightsalot.
Solo postures up to throw the ground and pound strikes but they don't connect.
That's one minute gone in the round.
Solo pushes down on McFightsalot's leg and manages to get into half guard.
McFightsalot is trying to get back to full guard.
Solo takes advantage of the dominant position to land a couple of big hammer fists.
Solo not landing any meaningful shots this time.
McFightsalot is trying to stand up here but Solo is controlling him well.
Solo throwing shots but they're hitting the canvas more than the man.
McFightsalot on the receiving end of some nice ground and pound.
Solo scoring with strikes to the body and head.
McFightsalot makes some distance and scrambles quickly back to his feet. Nice work!
McFightsalot is breathing heavily.
Solo throws a leg kick which misses McFightsalot's front leg but catches the back leg as McFightsalot tries to avoid it.
McFightsalot gets taken down but at least he's managed to land in guard.
Solo stands up over McFightsalot, holding his feet. He dives back in and lands a decent shot to the head.
That's two minutes gone in the round.
Solo won't allow McFightsalot to sweep him here.
Solo trying to control but McFightsalot is working from the bottom.
Solo scoring with some ground and pound.
McFightsalot keeping moving, preventing Solo from controlling successfully.
Solo won't allow McFightsalot to sweep him here.
Solo slips nicely into half guard.
Solo seems to be taking a bit of a break to think of his next move. He lands a short punch in the meantime.
We've seen a great period of action over the last minute or so - credit to both fighters for leaving it all in the cage!
The fighters are starting to perspire pretty heavily.
Solo moves nicely into side control.
Solo lands an elbow.
That's three minutes gone in the round.
McFightsalot struggling a bit here.
Solo in side control lands a decent elbow.
McFightsalot is looking to regain half guard here but Solo keeps moving and retains side control.
Solo has the superior BJJ but he's also working some ground strikes into his gameplan.
Solo misses with the ground and pound.
McFightsalot is trying to control Solo's posture but Solo avoids it.
McFightsalot is in a bad position, trying to hold on for dear life but he is really struggling to maintain any sort of control.
McFightsalot tries to escape but Solo is in control.
Neither fighter is doing enough for the referee's liking and he's decided to stand them back up.
McFightsalot tries to clinch up.
That's four minutes gone in the round.
Well. There's a bit of a lull in the action here and the crowd are starting to get restless.
McFightsalot lands with a kick to the temple. Solo shrugs as if to say "is that all you've got?"

It looks like Han Solo has been cut.
McFightsalot takes the fight into the clinch.
McFightsalot tries for a takedown. No joy.
McFightsalot breaks from the clinch.
McFightsalot tries to clinch there but Solo circles away.
Solo circles away from the clinch attempt.
McFightsalot shoots in and drives through. Solo sprawls well.
That's three failed takedown attempts in the round for Austin McFightsalot. That's going to take a lot out of him.
A combination from McFightsalot does no damage.
Solo lands with a kick to the temple. McFightsalot shrugs as if to say "is that all you've got?"
A punch combination from Solo misses.
McFightsalot will have to do better than that with his takedown attempts.
Nice takedown defense from McFightsalot. No joy for Solo on that attempt.
McFightsalot shoots in for a takedown but doesn't get it.
The crowd applaud the fighters efforts here as the round comes to an end.
McFightsalot takes a kick to the body and keeps moving.
McFightsalot fails with a rather predictable takedown attempt.
Solo throws a one two combo.
Solo on the receiving end of a decent leg kick there by McFightsalot. McFightsalot obviously looking to wear him down.
And that�s the end of the round � the fighters go back to their corners.
A close round but Han Solo will probably get the nod.
The cut man is working on Han Solo's cut.
The fighters get back to their feet, the hooter sounds and we're back to the action!
McFightsalot shoots in for a takedown. "I don't think so" says Solo as he avoids it easily.
McFightsalot avoids the clinch attempt nicely.
Solo is looking to take this fight into the clinch.
McFightsalot closes this distance looking for a takedown but Solo circles away.
Good shot there by Solo.
McFightsalot throws a head kick that misses and slips in the process. He scrambles back to his feet and the fighters circle.
McFightsalot tries to clinch but Solo moves away
and Solo counters with a nice double leg into half guard.
Solo is nestled in close to McFightsalot, controlling him well. He's worked in a nice elbow to the side of the head as well, for good measure.
McFightsalot is trying to stand.
McFightsalot wants to improve his position but Solo is controlling well.
Solo working the head and body with strikes.
McFightsalot taking some punishment here, with Solo in his half guard.
Solo thows a wild elbow that connects with the canvas.
Both fighters are absolutely exhausted here.
That's one minute gone in the round.
Solo trying to control the action but McFightsalot is working from the bottom.
Solo working the head and body with strikes.
McFightsalot taking some punishment here, with Solo in his half guard.
Solo seems very keen to just sit and control from half guard but McFightsalot does not like that idea so much and is remaining active off his back.
The ref warns both fighters not to hold the cage as they work up against the meshing.
Solo seems to be taking a bit of a break to think of his next move. He lands a short punch in the meantime.
It looks like Austin McFightsalot has been cut.
Neither fighter is being very active at the moment, with Solo in particular looking to stall.
McFightsalot controlling the position well.
Solo looks towards his corner to check for any instructions. The corner give him nothing to work with, so he cracks McFightsalot with a short hammerfist. I guess that's as good as any advice he could get in this position.
That's two minutes gone in the round.
Solo seems to be taking a bit of a break to think of his next move. He lands a short punch in the meantime.
McFightsalot flails away from the bottom but he's not doing any damage.
Solo is tying to control. McFightsalot wants to improve his position but can't escape this time.
Solo scores with a couple of good hammerfists.
McFightsalot is in trouble now - Solo has advanced to mount!
Solo landing shots from mount.
McFightsalot is trying to stand.
A nice elbow there by Solo.
Austin McFightsalot's cut is getting worse.
Solo looking to control but McFightsalot is working nicely, looking to advance position himself.
McFightsalot tries to hold on but Solo pushes him away.
That's three minutes gone in the round.
McFightsalot is trying to escape the mount.
McFightsalot is writhing around trying to get back to his feet.
McFightsalot tries to reverse the position but Solo maintains control.
Solo avoids the attempt from McFightsalot to control.
Solo lands a heavy elbow.
Solo avoids the attempt from McFightsalot to control.
Solo landing strikes from the mount.
Solo is in the full mount, landing strikes.
McFightsalot working to try and regain half guard.
That's four minutes gone in the round.
A nice elbow there by Solo.
McFightsalot tries to hold on but Solo pushes him away.
McFightsalot manages to regain half guard. Good work.
McFightsalot manages to get to full guard.
Solo trying to control but McFightsalot is working from the bottom.
McFightsalot isolates an arm and boxes in a triangle. Solo stacks McFightsalot on his neck as he steps over and passes to the side. He's now in a much more dominant position where he can look to do some serious damage. Nice move by Solo!
The crowd applaud the fighters efforts here as the round comes to an end.
Solo trying to control the position but McFightsalot is working away.
And that�s the end of the round � the fighters go back to their corners.
Han Solo showed his class in that round. I'd imagine he'll take it on all the scorecards.
Both fighters have cut men working on them during the interval.
The minute break is over - no more time for sponges and pep talks - back to the action! So, we enter the final round. Let's see if either fighter can bring us a finish, or whether we're going to the judges scorecards.
McFightsalot dodges the punch combination from Solo.
Solo misses with a hook.
McFightsalot's corner calls for a 1,2 combination and McFightsalot duly obliges.
McFightsalot throws a nice looking combination but Solo bobs and weaves to avoid any damage.
McFightsalot tries to clinch but fails miserably
and Solo counters with a nice double leg into half guard.
McFightsalot wants to improve his position but Solo is controlling well.
Nice strikes from Solo there.
McFightsalot wants to improve his position but Solo is controlling well.
Solo takes a big intake of breath there - he's definitely tired.
Solo is scoring with some nice ground and pound from the dominant position.
That's one minute gone in the round.
McFightsalot has no desire to be mounted, so is trying to control. Solo is working away from the top position though.
Solo tries to pass to full mount but McFightsalot defends it.
Solo throws a strike but McFightsalot avoids it easily and moves to full guard.
McFightsalot is trying to control the position but Solo postures up.
It looks like we're going to have a standup here. Neither fight is doing enough on the ground.
McFightsalot tries for a takedown but Solo circles away easily
and Solo counters with a left to the body.
Solo stuffs the takedown attempt from McFightsalot. McFightsalot gets slowly back to his feet.
Han Solo seems to be the more aggressive standup fighter in this bout.
McFightsalot fails with a takedown attempt.
That's three failed takedown attempts in the round for Austin McFightsalot. That's going to take a lot out of him.
McFightsalot looks for a takedown but Solo sprawls well.
That's two minutes gone in the round.
The crowd are getting on the fighters' backs, as the pace has dropped off in the last minute or so.
McFightsalot misses with a takedown attempt. He shot from a bit too far out.
Solo lands with a right hand.
Solo is looking to clinch.
Solo moves in looking to clinch but McFightsalot pushes him off.
Solo shoots in for a takedown but doesn't get it.
Nice body kick there by McFightsalot.
McFightsalot shoots in but doesn't get the takedown
and Solo counters with a left and a right that stings McFightsalot.
Solo throws a series of punches but McFightsalot moves out of range.
McFightsalot fails to land with a series of punches.
McFightsalot has taken the fight to the clinch.
McFightsalot breaks the clinch and we're back to striking at distance.
A slapping leg kick lands for McFightsalot.
McFightsalot shoots in but doesn't get the takedown
and Solo counters with a takedown into full mount! That could mean trouble for McFightsalot!
Solo working the ground and pound effectively.
McFightsalot tries to lock up and control but Solo gives him a forearm to the face and pushes him away.
That's three minutes gone in the round.
McFightsalot tries to get back to half guard but can't.
Solo swings around for an armbar but it's a sloppy attempt and McFightsalot is now in Solo's guard. A big mistake from Solo there, giving up the dominant position!
Solo lands a beautiful switch and he's in full mount! That could spell trouble for McFightsalot!
Solo lands a shot to the body, followed up by a shot to the exposed head of his trapped opponent.
McFightsalot tries to hold on but Solo postures up.
McFightsalot is in all sorts of trouble here.
Solo lands a big elbow.
Austin McFightsalot's cut is bleeding quite badly. He's got to try and protect it.
That's four minutes gone in the round.
Solo landing strikes, looking to finish!
McFightsalot wants to control but Solo is having none of it.
McFightsalot is trying desperately to improve position.
Solo is working on an americana here. Ooh, that looks pretty nasty! Nope, McFightsalot has managed to escape the submission attempt.
McFightsalot working to try and regain half guard.
Solo avoids the attempt from McFightsalot to control.
The crowd applaud the fighters efforts here as the round comes to an end.
McFightsalot is going to have to think about doing something other than just controlling because McFightsalot is managing to avoid having the position dictated to him.
Austin McFightsalot has stepped it up - he knows he needs a finish here!
McFightsalot is looking to improve his position but Solo isn't that keen on the idea.
And that's the end of the fight!
Han Solo comfortably won the final round on my scorecard.
I've got Solo winning every round here. Surely the decision will go his way and he'll pick up a well deserved decision victory. Over to the ring announcer for the scorecards.
Ladies and gentlemen, after 3 rounds of action, we go to the scorecards for a decision.
Judge Andi Peters scores the fight for Han Solo!
Judge Gordon Ramsey scores the fight for Han Solo!
Judge Frank Skinner scores the fight for Han Solo!
Han Solo wins by unanimous decision!
|
|
|
|
|
|
|
|
|
|
|
|
|
|
|
|
|
|
|
|
|
|
|
| S |
C
A |
G |
S |
C
B |
G |
|
S |
C |
G |
|
energy
A | B |
|
hype
A | B |
|
pop
A | B |
|
mgr
A | B |
|
FIGHT
RATING
90% |
|
|
|
|
|
|
|
Co-main event
|
Coming up we have a heavyweight MMA rules bout between Alonzo Cataan (ranked 0 p4p, 0 weight class) and Jim Beam (ranked 0 p4p, 0 weight class). We have two fighters making their debuts here, so let's see who comes out of this one with their first professional victory.
 |
|
 |
| 196 cm
21
248 lbs
0 - 0 - 0 |
|
194 cm
22
245 lbs
0 - 0 - 0 |
BJJ Blue Belt
Brawler
Granite chin |
|
BJJ Blue Belt
Counter striker
Tends to cut |
|
| |
|
Ladies and gentlemen. This fight is 3 rounds, in the heavyweight division.
Introducing the fighter to my left, fighting out of the red corner.
With a record of
0 - 0 - 0, fighting out of Sydney, Alonzo Cataan!
And introducing the fighter to my right, fighting out of the blue corner.
With a record of
0 - 0 - 0, fighting out of Sydney, Jim Beam!
The judges for this bout are , and .
The bell rings for round one and we are underway!
Cataan tries to clinch up but Beam circles away and keeps his distance.
Cataan doesn't manage to clinch there - Beam circles away.
Cataan wants to clinch.
Cataan throws a head kick that misses and slips in the process. He scrambles back to his feet and the fighters circle.
Cataan tries to clinch but Beam moves out of range.
Beam circles away from the clinch attempt.
Cataan moves in looking to clinch but Beam pushes him off.
Cataan fails with an attempt to clinch.
Cataan throws a head kick but Beam moves out of range.
We've had a slow start to the round here - hopefully the action picks up.
Beam circles away from the clinch attempt.
Cataan tries a switch kick but it misses it's target.
Cataan tries to clinch there but Beam circles away.
Beam looks frusrated there after his takedown attempt is stuffed easily.
Cataan fails with an attempt to clinch.
That's one minute gone in the round.
Cataan swings for the body but Beam moves out of range.
Cataan tries to clinch there but Beam circles away.
Beam scores a trip takedown into side control. Nice.
Cataan is looking to regain half guard here but Beam keeps moving and retains side control.
Cataan is pushing Beam's head away, looking to escape. Beam manages to hold on to the position though.
You can see the frustration on Cataan's face, being in this tough position on the bottom.
Beam wants to work for a kimura but he's foiled early by Cataan, who protects the arm well.
Cataan tries to improve position but can't.
Beam tries for an arm triangle. That looks pretty tight to me. Is this one over!?! Possibly, maybe, no Beam has let go of the choke. Obviously it wasn't as tight as we thought!
Beam looking for an arm triangle but it's way too loose to do anything.
That's two minutes gone in the round.
Cataan manages to get one leg in to regain half guard.
Cataan wants to improve his position but Beam is controlling well.
Beam is looking for a kimura. It's going to be difficult to finish that from half guard though and Cataan defends it well.
Beam looks gassed!
Cataan is looking to control Beam's leg but it's slowly edging free. Can Cataan avoid being mounted?
Cataan is looking to regain full guard. Not this time though.
Cataan is looking to control Beam's leg but it's slowly edging free. Can Cataan avoid being mounted?
Cataan actively working from the bottom here.
Beam looking to pass the half guard. Not this time.
The referee has ruled that neither fighter is active enough on the ground and has stood them back up.
Cataan is looking to clinch.
That's three minutes gone in the round.
Cataan tries to clinch there but Beam circles away.
Beam drives through with a really nice takedown into side control.
Beam looking for an arm triangle but it's way too loose to do anything.
Beam prevents Cataan from escaping the position.
Cataan regains half guard.
Beam stops Cataan from getting back to his feet.
Beam wants to work for an arm triangle but Cataan is really keeping half guard well and defending the submission attempt.
Cataan wants to improve his position but Beam is controlling well.
Beam is working for submissions here but there's nothing on.
Beam uses his free foot to push down on Cataan's thigh. Eventually he works his other foot free and he's advanced to mount - this is trouble for Cataan.
Beam working to secure an arm triangle but it's not happening for him just yet.
Beam is working for a guillotine from mount but Cataan frees his head quite easily.
That's four minutes gone in the round.
Beam looking to secure an arm triangle but Cataan defends it well.
Cataan tries to hold on but Beam pushes him away.
Cataan tries to get back to half guard but can't.
Beam looking to secure an arm triangle but Cataan defends it well.
Cataan is wriggling around trying to escape.
Beam has control of Cataan's right arm, working for a kimura. It's a bit of a token attempt though and Cataan regains control of the situation pretty easily.
Cataan is controlling an arm, preventing Beam from taking his back. Although keeping him in mount is no better to be honest.
Beam swings around for an armbar but it's a sloppy attempt and Cataan is now in Beam's guard. A big mistake from Beam there, giving up the dominant position!
Beam looking for a triangle here. Cataan is fighting it but it looks tight! Beam pulls the arm across and this one won't last much longer! Nope, Cataan is tapping out - this one is all over!
Ladies and gentlemen, after 4:56 of round 1, we have a winner by way of Submission (Triangle Choke). Jim Beam!
|
|
|
|
|
|
|
|
|
|
|
|
|
|
|
|
|
|
|
|
|
|
|
| S |
C
A |
G |
S |
C
B |
G |
|
S |
C |
G |
|
energy
A | B |
|
hype
A | B |
|
pop
A | B |
|
mgr
A | B |
|
FIGHT
RATING
48% |
|
|
|
|
|
|
|
Main event
|
|
|
|
|
|
|
