 |
NFCC 24 PBP Commentary |
Undercard bout
|
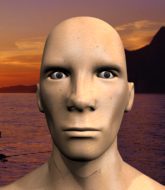
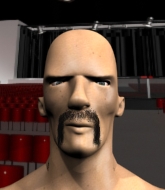
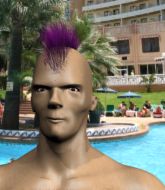
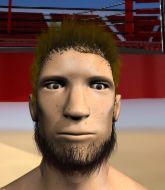
Coming up we have a light heavyweight MMA rules bout between Denis Burlaka (ranked 0 p4p, 0 weight class) and Carlos Bonaza (ranked 0 p4p, 0 weight class). Burlaka comes to the cage accompanied by Metallica - Enter Sandman. Denis Burlaka has the better chin. Will he look to stand and bang today?
 |
|
 |
| 189 cm
23
205 lbs
4 - 2 - 0 |
|
192 cm
20
216 lbs
3 - 2 - 0 |
BJJ Blue Belt
Counter striker
Experienced |
|
BJJ Blue Belt
Excellent MT
Intelligent |
|
| |
|
Ladies and gentlemen. This fight is 3 rounds, in the light heavyweight division.
Introducing the fighter to my left, fighting out of the red corner.
With a record of
4 - 2 - 0, fighting out of Las Vegas, Denis Burlaka!
And introducing the fighter to my right, fighting out of the blue corner.
With a record of
3 - 2 - 0, fighting out of Las Vegas, Carlos Bonaza!
The judges for this bout are Robert Twigg, Chris Downing and Wesley Smith.

The bell rings for round one and we are underway!
Bonaza scores with a reasonable looking shot to the body. Burlaka doesn't seem bothered though.
Burlaka just misses with a punch to the body.
Carlos Bonaza seems to be the more aggressive standup fighter in this bout.
Burlaka blocks a head kick by Bonaza.
The fighters circle momentarily. Bonaza darts into range and connects with a nice straight punch.
Bonaza goes for a high kick. It partially lands.
A nice inside leg kick there by Bonaza. That's going to slow Burlaka down.
Bonaza throws a nice looking combination but Burlaka bobs and weaves to avoid any damage.
Burlaka misses with a shot to the body
and Bonaza counters with a left to the body.
Bonaza lands a high kick!
Burlaka misses with a hook to the body
and Bonaza counters with a nice jab to the body that keeps Burlaka thinking.
The crowd are loving this. Great action here.
Bonaza lands with a two punch combination before moving back out of range.
Bonaza dips to his left and cracks Burlaka with an uppercut!
Bonaza pushes Burlaka away with a front kick.
Bonaza with a hook.

Burlaka throws the overhand right but ducks down into a quick takedown attempt. Bonaza was covering up waiting for the punch and Burlaka finishes the takedown easily into guard.
Burlaka won't allow Bonaza to sweep him here.

That's one minute gone in the round.
Bonaza is persisting with the attempt to improve his position.
Bonaza is looking to stand up but Burlaka isn't so interested in that idea.
Burlaka trying to control but Bonaza is working from the bottom.
Bonaza looking to hit a scissor sweep but Burlaka is one step ahead there.
Bonaza keeping moving, preventing Burlaka from controlling successfully.

That's two minutes gone in the round.
Neither fighter has done anything of merit for a good minute or two here and the crowd are not happy about it.
Bonaza has momentary wrist control but Burlaka slips an elbow through the middle.
We get told so often about how wrestlers don't like to be on their backs. Let's see if Bonaza can do anything to dispel that myth.
Bonaza is looking to stand up but Burlaka isn't so interested in that idea.
Burlaka lands a nice shot whilst sitting in his opponent's guard.
Burlaka cracks Bonaza with a solid left hand.
Bonaza trying to keep a closed guard but Burlaka is proving a slippery customer.
Burlaka throwing strikes but missing.

That's three minutes gone in the round.

Bonaza pushes Burlaka off for just long enough to get back to his feet. Very athletic spring there.
Carlos Bonaza is looking to keep the fight on the feet at all costs.
Bonaza fails to land with a series of punches.
Some bone on bone action there as Bonaza checks a low kick. Luckily it wasn't a particularly hard one.
Burlaka with a poor takedown
and Bonaza counters with a straight right hand.
Bonaza keeping a good distance there, avoiding the body shot.
Burlaka misses with a shot to the body
and Bonaza makes him pay by landing a thudding low kick.
A nice leg kick lands there from Bonaza.
Burlaka takes a head kick and shrugs it off.
Burlaka on the receiving end of a decent leg kick there by Bonaza. Bonaza obviously looking to wear him down.
Bonaza on the wrong end of a vicious looking body shot.
Bonaza moves into range and throws a lovely three punch combination.

That's four minutes gone in the round.
Fantastic stuff here - a very entertaining period of action, which has drawn cheers from the crowd.
Bonaza misses with a two punch combination.
Burlaka misses with a left hand
and he gets countered with a snapping leg kick.
Bonaza feints a jab promting Burlaka to slip. Bonaza then demonstrates his capabilities by jabbing again. Burlaka slips again and ducks right into an uppercut.
Bonaza connects with a body shot.
Burlaka misses with a leg kick
and Bonaza counters with a kick to the head that grazes his opponent. Burlaka is lucky that one didn't land flush.
Good standup being displayed there by Bonaza as he connects with a hook.
Bonaza connects with a high kick.
Bonaza works over Burlaka's head and body with a nice combination.
The crowd are going absolutely nuts as the round comes to an end - what a fantastic round of action!
Bonaza connects with a body shot.
Bonaza throws a quick inside leg kick.
A low kick from Burlaka misses
and Bonaza counters with a one-two to the body.
And that�s the end of the round � the fighters go back to their corners.
Carlos Bonaza dominated that round.
The fighters get back to their feet, the hooter sounds and we're back to the action!

This fight brought to you by 5M nutrition - it's mmmmm tasty. Nice jab by Bonaza.
Bonaza slips under a jab.
Carlos Bonaza seems to be getting the better of the standup.
Burlaka misses with a telegraphed body shot
and Bonaza counters with a flying knee. Nice.
Nice uppercut there from Bonaza.

Burlaka is rocked!
Bonaza with a nice cross.
Oh Burlaka is still all over the place! His legs are completely gone! Will he be able to recover?!!
Bonaza throws a head kick that misses.
Burlaka seems to have got his legs back now.
Burlaka swings away with a body shot that misses

and Bonaza counters with a head kick that drops Burlaka to the mat! Burlaka scrambles across the canvas and gets back to his feet, still wobbly!
Carlos Bonaza is looking to throw some combinations by the looks of things.
Bonaza misses with a combination
and Bonaza takes a counter punch right on the button for his troubles.
The crowd are loving this. Great action here.
Bonaza lands a brutal head kick. Burlaka looks out on his feet and Bonaza throws more strikes until the ref is forced to stop the fight!
Ladies and gentlemen, after 0:46 of round 2, we have a winner by way of TKO (Kick and Punches). Carlos Bonaza!
|
|
|
|
|
|
|
|
|
|
|
|
|
|
|
|
|
|
|
|
|
|
|
| S |
C
A |
G |
S |
C
B |
G |
|
S |
C |
G |
|
energy
A | B |
|
hype
A | B |
|
pop
A | B |
|
mgr
A | B |
|
FIGHT
RATING
100% |
|
|
|
|
|
|
|
Undercard bout
|
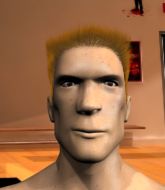
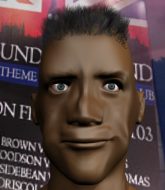
Coming up we have a middleweight MMA rules bout between Reggie Bush (ranked 0 p4p, 0 weight class) and Pizza Parlor (ranked 0 p4p, 0 weight class). Both fighters look pumped up here. Let's hope this is a good fight!
 |
|
 |
| 180 cm
26
188 lbs
2 - 3 - 0 |
|
225 cm
26
185 lbs
3 - 2 - 0 |
Good wrestling
Brawler
KO power |
|
Powerful takedowns
Excellent boxer
Powerful |
|
| |
|
Ladies and gentlemen. This fight is 3 rounds, in the middleweight division.
Introducing the fighter to my left, fighting out of the red corner.
With a record of
2 - 3 - 0, fighting out of Las Vegas, Reggie Bush!
And introducing the fighter to my right, fighting out of the blue corner.
With a record of
3 - 2 - 0, fighting out of Las Vegas, Pizza Parlor!
The judges for this bout are Robert Twigg, Cecil Peabody and Alan Glass.
The bell rings for round one and we are underway!
Bush displays some good footwork, moving neatly out of range as Parlor throws out the jab.
Bush slips under a jab.
Parlor misses with a lunging right hand
and Bush counters with a good right hand that lands right on the jaw.
Bush moves out of range of the strikes.
Bush feints and as Parlor raises his hands in defense, Bush changes levels and drives through with a takedown into guard.
Bush is frustrating his opponent with some stalling tactics from top position.
That's one minute gone in the round.

The ref stands the fighters back up because Reggie Bush just wasn't active enough.
Bush shoots in with a lovely double leg takedown. Parlor manages to land in full guard to minimise the damage.
Bush stands up from guard. Let's bang!
Parlor lands with a right hand.

Bush pushes Parlor up against the cage in a clinch.
Bush trying to land knees to the body.
A head punch blocked on the inside by Bush.
That's two minutes gone in the round.
Parlor has a body lock and is looking for a takedown. Bush is bouncing around trying to prevent the takedown and somehow he has indeed managed to stay on his feet.
Some stalling of biblical proportions here from Bush.
Bush decides to pull guard.
Bush tries to land a sweep but no joy.
Parlor really doesn't want to stay on the ground with Bush. If he can't get it back to his feet, it's only a matter of time before he'll be tapping out.
Bush manages to land a sweep and now he's in mount on top!
Bush breaks from Parlor's wrist control and lands an elbow.
Bush misses with a series of strikes from mount. He'll no doubt be working on his ground and pound when he gets back to the gym.
We get told so often about how wrestlers don't like to be on their backs. Let's see if Parlor can do anything to dispel that myth.
Bush looking to control and managing it successfully.
That's three minutes gone in the round.
Bush throwing sloppy strikes here. Perhaps if he tightened up his striking from such a dominant position, he'd be able to finish easier.
Bush controlling from the full mount.
The fighters are pressed up against the cage, both looking to find a bit of space to work.

Bush throws some shoulder strikes here and then postures up. Oh, he's gone for an armbar! Parlor has his hands clasped together but Bush breaks the hold and Parlor is forced to tap! This one is aaaaaaaaaaall over! That was lightning fast by Bush!
Ladies and gentlemen, after 3:59 of round 1, we have a winner by way of Submission (Armbar). Reggie Bush!
|
|
|
|
|
|
|
|
|
|
|
|
|
|
|
|
|
|
|
|
|
|
|
| S |
C
A |
G |
S |
C
B |
G |
|
S |
C |
G |
|
energy
A | B |
|
hype
A | B |
|
pop
A | B |
|
mgr
A | B |
|
FIGHT
RATING
34% |
|
|
|
|
|
|
|
Undercard bout
|
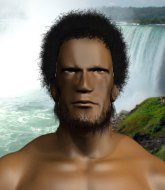
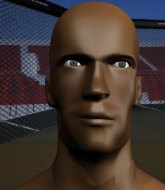
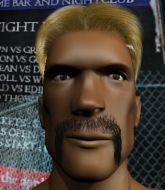
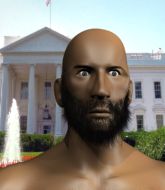
Coming up we have a lightweight MMA rules bout between Frank Dux (ranked 0 p4p, 0 weight class) and Eul Anthony (ranked 0 p4p, 0 weight class). Frank Dux is staring across the cage at his opponent, tweaking his nipples... Tweaking his own nipples that is.
 |
|
 |
| 180 cm
24
160 lbs
2 - 3 - 0 |
|
178 cm
18
160 lbs
1 - 1 - 0 |
BJJ Blue Belt
Solid boxing
Prefers standup |
|
BJJ Blue Belt
Brawler
Determined |
|
| |
|
Ladies and gentlemen. This fight is 3 rounds, in the lightweight division.
Introducing the fighter to my left, fighting out of the red corner.
With a record of
2 - 3 - 0, fighting out of Las Vegas, Frank Dux!
And introducing the fighter to my right, fighting out of the blue corner.
With a record of
1 - 1 - 0, fighting out of Las Vegas, Eul Anthony!
The judges for this bout are Frank Dennis, Tiny Johnson and Alan Glass.
The bell rings for round one and we are underway!
Horrible takedown by Anthony or perhaps it was just good defense by Dux which made him look bad.
Anthony takes one on the chin but seems OK.
Anthony shoots in looking for a takedown but Dux manages to keep the fight standing, pushing Anthony's face into the canvas for good measure before circling away.
Dux with a hook.
Anthony is rocked!
Dux scores with a punch to the gut of his opponent.
Dux cracks Anthony with a big right hand and Anthony goes down!
Anthony is still in real trouble! Can Dux finish him?
The fighters are pressed up against the cage, both looking to find a bit of space to work.
Fantastic stuff here - a very entertaining period of action, which has drawn cheers from the crowd.
Dux scoring with some ground and pound.
Dux has been looking to land a fair amount of strikes on the ground. He might be looking to soften his opponent up in order to work for a submission.
Dux is working the ground and pound from guard. He might want to try advancing position though to get more of an impact.
Anthony preventing the ground and pound from doing any damage.
Dux is looking to work some ground and pound but Anthony has wrist control.
Anthony working the defensive guard well to avoid strikes from Dux.
Anthony seems to have recovered his senses.
Anthony looks gassed!
Anthony avoiding any damage from the ground and pound.
Dux decides he's had enough of playing guard and decides to stand. Come on Anthony, up you get!
Dux tries to bum rush Anthony with a series of wild strikes but Anthony uses good footwork to avoid the assault.
Dux connects with a lovely right hand, straight down the pipe.
Dux closes the distance and lands a brutal uppercut that knocks Anthony out! We're looking at the replay now - he was out before he hit the floor!
Ladies and gentlemen, after 0:57 of round 1, we have a winner by way of KO (Punch). Frank Dux!
|
|
|
|
|
|
|
|
|
|
|
|
|
|
|
|
|
|
|
|
|
|
|
| S |
C
A |
G |
S |
C
B |
G |
|
S |
C |
G |
|
energy
A | B |
|
hype
A | B |
|
pop
A | B |
|
mgr
A | B |
|
FIGHT
RATING
100% |
|
|
|
|
|
|
|
Undercard bout
|
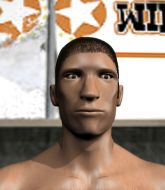
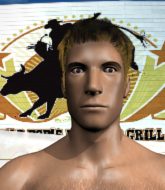
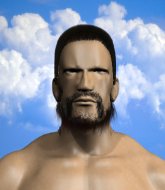
Coming up we have a lightweight MMA rules bout between Aaron Law (ranked 0 p4p, 0 weight class) and Mike Belanger (ranked 0 p4p, 0 weight class). Aaron Law could well score a knockout today. He has the power to get to Mike Belanger's chin.
 |
|
 |
| 184 cm
19
160 lbs
2 - 0 - 0 |
|
185 cm
20
145 lbs
4 - 0 - 0 |
BJJ White Belt
Counter striker
Granite chin |
|
BJJ White Belt
Decent boxing
Good gas tank |
|
| |
|
Ladies and gentlemen. This fight is 3 rounds, in the lightweight division.
Introducing the fighter to my left, fighting out of the red corner.
With a record of
2 - 0 - 0, fighting out of Las Vegas, Aaron Law!
And introducing the fighter to my right, fighting out of the blue corner.
With a record of
4 - 0 - 0, fighting out of Las Vegas, Mike Belanger!
The judges for this bout are Tiny Johnson, Stewart Dunkirk and Cecil Peabody.
The bell rings for round one and we are underway!
Belanger displaying good standup as he scores with a three punch combination.
Law tries to clinch but is not successful on this occasion.
Law slips a jab and a cross from Belanger.
Belanger lunges in with swinging rights and lefts but Law circles away quickly and effectively.
Belanger throws a combination but comes up with nothing but fresh air.
Belanger tries to bum rush Law with a series of wild strikes but Law uses good footwork to avoid the assault.
Law darts in trying to clinch
and Belanger counters with a series of strikes. Law will be more careful next time no doubt.
We've had a slow start to the round here - hopefully the action picks up.
Belanger misses with a two punch combination.
Law moves to clinch but Belanger breaks away
and Belanger counters with a lovely shot to the body.
That's one minute gone in the round.
Belanger tries to bum rush Law with a series of wild strikes but Law uses good footwork to avoid the assault.
Law shoots in for a takedown but Belanger shows good takedown defense there and keeps this one on the feet.
Belanger swinging wildly here.
Law gets to the clinch - let's see what his plan is here.
Law using the Thai plumb to throw knees but Belanger has his back arched nicely, preventing the strike.
Belanger tries a knee to the head but he's missed.
Belanger is a painfully thin specimen of a man. You do wonder whether a good body kick would snap him clean in two.
Belanger throws a vicious knee straight up the middle but Law blocks it with crossed arms.
Law pulls Belanger into guard.
Belanger stops Law from standing up.
The fighters are pressed up against the cage, both looking to find a bit of space to work.
Belanger stands up and looks to throw the legs aside to pass to side control. Law swivels though and keeps the full guard.
That's two minutes gone in the round.
Well. There's a bit of a lull in the action here and the crowd are starting to get restless.
Law not looking particularly offensive just at the moment.
The ref stands the fighters back up because Aaron Law just wasn't active enough.
The fight stays on the outside here - Law looks like he's thinking about clinching though.
Law closes the distance looking to clinch
and Belanger counters with a two punch combo.
Belanger looks to score with a combo but nothing lands.
Belanger lands a nice shot that snaps Law's head back.
That's three minutes gone in the round.
Law is looking to clinch but Belanger is avoiding it.
Belanger closes the distance and lands a one-two.
Mike Belanger is looking to keep the fight on the feet at all costs.
Law has a takedown stuffed.
Law throws a left and a right that both miss
and Belanger connects with a straight left hand counter down the middle.
Belanger tries to bum rush Law with a series of wild strikes but Law uses good footwork to avoid the assault.
Belanger swats away the attempt to clinch by Law.
Law tries to close the distance and clinch up against the cage but Belanger paws at him with a jab and circles away.
Law takes an uppercut right on the jaw but it doesn't phase him.
Belanger swings away but doesn't land with a series of punches.
That's four minutes gone in the round.
A shot to the liver by Law. Beautiful body shot.
Law wants to clinch up but Belanger keeps it at a distance.
Both fighters are looking to counter, which isn't making for the most exciting fight in the world.
Belanger ducks down and throws a hook to the body.
Belanger moves into range and throws a lovely three punch combination.
Belanger scores with a nice looking left hook and follows it up with an uppercut!
Law tries to shoot in for a takedown. He's got hold of a leg but Belanger swivels and escapes.
That's three failed takedown attempts in the round for Aaron Law. That's going to take a lot out of him.
Belanger throws a nice looking combination but Law bobs and weaves to avoid any damage.
Law tries to clinch but Belanger is having none of it.
And that�s the end of the round � the fighters go back to their corners.
Mike Belanger dominated that round.
The fighters' corners scream their final instructions, as the referee calls time. Here we go, back to the action!
Belanger lands a jab to the head.
Law wants to clinch.
Law tries to clinch up but Belanger circles away and keeps his distance.
Belanger throws a right and a left that both miss.
Belanger cracks Law with a good jab.
We've had a slow start to the round here - hopefully the action picks up.
Law tries to close the distance and clinch up against the cage but Belanger paws at him with a jab and circles away.
Law is looking to take this fight into the clinch.
Belanger throws a jab, cross combination which is slipped
and Law counters by moving into the clinch.
That's one minute gone in the round.
Belanger tries a knee to the head but he's missed.
Belanger pushes off and fires off an elbow that misses, before clinching up again, against the cage.
Law blocks a knee to the body. He'll have a nicely bruised forearm in the morning.
The step up in weight doesn't seem to be a problem for Belanger. He's performing admirably here against the bigger man.
Belanger is looking to score with knees to the body. Maybe he'll change it up and go body then head. Law is defending well for now.
Law is trying to stall.
Law on the defensive, avoiding the knees to the body.

Law pushes off and circles away, back to the middle of the mat.
Law tries to clinch up but Belanger circles away and keeps his distance.
Law doesn't manage to clinch there - Belanger circles away.
Law tries to clinch up but Belanger circles away and keeps his distance.
Jab, cross, leg kick. Nice combination by Belanger!
Belanger throws a combination that misses
and Law counters by moving into the clinch.
Belanger misses the knee to the body. Nice hip positioning from Law.
Belanger missing with knees to the body.
Law lands an elbow inside that Belanger shrugs off.

It looks like Mike Belanger has been cut.
Law taking a break, stalling in the clinch.
That's two minutes gone in the round.
Both guys are working to get underhooks.
Belanger tries a knee to the head but he's missed.
Law avoiding damage as Belanger throws knees to the body.
Law manages to pull guard. Let's see whether he can land a sub off his back.
Law is looking to stand up but Belanger isn't so interested in that idea.
Belanger stands and steps away. Law gets to his feet too and we're back to the striking game.
Belanger misses with the combination.
The fight stays on the outside here - Law looks like he's thinking about clinching though.
That's three minutes gone in the round.
Law throws a combination that misses
and Belanger counters with a right hand to the body.
Belanger swings wildly with a couple of big hooks
and Law moves into the clinch.
Belanger with an attempt at a knee that misses.
Belanger missing with knees to the body.
Belanger with the Thai clinch. He's looking to land a big knee but he's not managed it this time.
Law tries to pull guard but Belanger won't allow it.
Law crunches a lovely knee into Belanger's ribcage.
Belanger looking to throw knees to the head but Law is blocking nicely.
Law blocks a knee to the body. He'll have a nicely bruised forearm in the morning.
Belanger takes a knee right on the jaw!
Belanger throws a knee to the head but misses.
Belanger tries a knee to the head but he's missed.
Law drags the fight down to the ground.
We could do with one of the fighters taking the initiative a bit more on the ground - they're both waiting to capitalize on a mistake.
Law is trying to keep Belanger in close.
Law wants to control here, rather than go for any submissions from the bottom. At least for now.
That's four minutes gone in the round.
We're going to have a standup here because Aaron Law wasn't active enough for the referee's liking.
Law is looking to clinch.
Law throws a jab, cross combination which is slipped
and Belanger counters with a lovely straight right hand!
Law closes the distance but Belanger moves to the side
and Belanger counters with a crisp hook to the side of the head.
Belanger misses with a combination
and Law counters into the clinch. Nicely done.
And that�s the end of the round � the fighters go back to their corners.
That was a close second round but I would say that Aaron Law will probably get the nod.
The cut man is working on Mike Belanger's cut.
That's the end of the round. The referee orders the cornermen out of the cage so we can get back down to business. This is the final round!

Left hook, right uppercut from Belanger.
Belanger avoids the clinch attempt nicely.
Law tries to close the distance and clinch up against the cage but Belanger paws at him with a jab and circles away.
Law tries to clinch up but Belanger circles away and keeps his distance.
Belanger misses with a wild combination.
Belanger throws a jab, cross combination which is slipped
and Law holds on and brings the fighters into a clinch.
Belanger with the Thai clinch. He's looking to land a big knee but he's not managed it this time.
Belanger misses with a knee to the head.
Law lands a shoulder strike.
Belanger tries a knee to the head but he's missed.
Law breaks the clinch.
The fight stays on the outside here - Law looks like he's thinking about clinching though.
Law falls off balance throwing a combination
and Belanger counters with a quick right hand to the jaw.
That's one minute gone in the round.
Belanger keeps his opponent at a distance with a nice jab.
Belanger swings wildly with a couple of big hooks
and Law counters with a kick to the head that grazes his opponent. Belanger is lucky that one didn't land flush.
Law moves into range and clinches up with Belanger.
Law throws a knee to the head but misses.
Law pushes off and circles away, back to the middle of the mat.
Belanger misses with a jab, cross combination.
Belanger throws a left and a right that both miss
and Law moves into the clinch.
Law escapes the clinch and we're back to striking.
Belanger misses with a double jab.
Law fails in his attempt to clinch.
That's two minutes gone in the round.
Belanger lands a two punch combo.
Aaron Law is looking to throw some combinations by the looks of things.
Belanger lands a nice hook to Law's body. Law takes it in his stride and looks to land his own strikes.
Law is looking to take this fight into the clinch.
Belanger throws a combination but it was largely blocked by Law.
Belanger circles away from the clinch attempt
and Belanger counters with a straight punch to the midsection.
Belanger tries to bum rush Law with a series of wild strikes but Law uses good footwork to avoid the assault.
That's three minutes gone in the round.
Belanger fails to land with a series of punches.
Law shakes his hands off, looking to compose himself, but takes a jab to the jaw whilst he does it.
Law tries to clinch up.
Belanger avoids the clinch attempt nicely.
Belanger misses with a double jab
and Law cracks him with a counter punch right on the button.
Law takes one on the chin but keeps coming.
Law misses with a left hand
and Law takes a counter punch right on the button for his troubles.
Law misses with a double jab
and Belanger connects with a straight left hand counter down the middle.
That's four minutes gone in the round.
Law fails miserably with a takedown attempt.
Belanger swats away the attempt to clinch by Law.
Belanger throws a combination but it was largely blocked by Law.
Law slips a jab and a cross from Belanger.
Belanger misses with a double jab.
Law shakes his hands off, looking to compose himself, but takes a jab to the jaw whilst he does it.
Law tries to close the distance and clinch but Belanger swats him to one side with an open hand palm strike and circles away.
And that's the end of the fight!
I would just about give that final round to Mike Belanger.
I think Belanger has won this one but let's see whether the judges agree with me. Over to the ring announcer for the scorecards.
Ladies and gentlemen, after 3 rounds of action, we go to the scorecards for a decision.
Judge Tiny Johnson scores the fight 28:29
Judge Stewart Dunkirk scores the fight 27:30
Judge Cecil Peabody scores the fight 29:28
In favor of your winner, by split decision... Mike Belanger!
|
|
|
|
|
|
|
|
|
|
|
|
|
|
|
|
|
|
|
|
|
|
|
| S |
C
A |
G |
S |
C
B |
G |
|
S |
C |
G |
|
energy
A | B |
|
hype
A | B |
|
pop
A | B |
|
mgr
A | B |
|
FIGHT
RATING
28% |
|
|
|
|
|
|
|
Undercard bout
|
Coming up we have a heavyweight MMA rules bout between Marcus McFly (ranked 0 p4p, 0 weight class) and David Frye (ranked 0 p4p, 0 weight class). Marcus McFly has a significant reach advantage - let's see if he can make it count.
 |
|
 |
| 191 cm
25
235 lbs
3 - 2 - 0 |
|
176 cm
26
272 lbs
3 - 1 - 0 |
Good wrestling
Counter striker
Good chin |
|
Good wrestler
Great elbows
Experienced |
|
| |
|
Ladies and gentlemen. This fight is 3 rounds, in the heavyweight division.
Introducing the fighter to my left, fighting out of the red corner.
With a record of
3 - 2 - 0, fighting out of Las Vegas, Marcus McFly!
And introducing the fighter to my right, fighting out of the blue corner.
With a record of
3 - 1 - 0, fighting out of Las Vegas, David Frye!
The judges for this bout are George Francis, Stewart Dunkirk and Gwen Towbar.
The bell rings for round one and we are underway!
Frye lands with an overhand left.
Frye pushing out the jab but it's not landing.
Frye wants to clinch.
McFly fails with a rather predictable takedown attempt.
Frye closes the distance and clinches.
We're hearing some news coming in from back stage. It's official - Frye has eaten all the pies!
Frye comes over the top with an elbow. That landed flush.
An uppercut to the body lands inside from Frye.
Frye working McFly over with knees to the body.
Frye lands a damaging elbow.
Frye lands an elbow inside.
It looks like Marcus McFly has been cut.
Frye lands an elbow inside that McFly shrugs off.
Frye comes over the top with an elbow. That landed flush.
That's one minute gone in the round.
Frye manages to get underhooks and slows down the pace for a moment.
Frye misses the knee to the body. Nice hip positioning from McFly.
Frye is struggling to control the position.
McFly is looking to break free of the clinch but Frye has double underhooks.
McFly avoiding damage as Frye throws knees to the body.
Frye lands a nice uppercut.
Frye missing with knees to the body.
Frye lands a nice elbow.
McFly takes an elbow to the forehead.
Frye lands an elbow that stopped McFly in his tracks for a moment.
Frye misses the knee to the body. Nice hip positioning from McFly.
McFly tries to break free but Frye pushes him back against the cage.
Frye creates a bit of space for himself and sneaks an elbow through McFly's defenses.
Nice elbow from Frye.
That's two minutes gone in the round.
Frye lands a glancing elbow in the clinch.
A bit of stalling here from Frye.
Frye lands an elbow inside that McFly shrugs off.
Frye lands an elbow inside.
Frye digs a right hand into McFly's ribs. Those have got to be taking their toll on McFly's gas tank.
Frye lands an elbow that stopped McFly in his tracks for a moment.
Frye lands an elbow that stopped McFly in his tracks for a moment.
Nice elbow from Frye.
McFly managing to block the knees to the body from Frye.
Frye lands an elbow that stopped McFly in his tracks for a moment.
Marcus McFly's cut is getting worse.
McFly takes an elbow to the forehead.
McFly managing to block the knees to the body from Frye.
Frye is looking to score with knees to the body. Maybe he'll change it up and go body then head. McFly is defending well for now.
Frye is working McFly over against the cage.
Frye stays in close to his opponent and throws a right hand to the body.
McFly is breathing heavily.
The crowd cheering loudly, showing their appreciation for the quality fight we're seeing here.
Frye gets an overhook and lands an elbow to the side of the head.
A hook to the body from Frye.
Frye lands an elbow that stopped McFly in his tracks for a moment.
Frye lands a nice elbow from the clinch.
McFly takes an elbow to the forehead.
That's three minutes gone in the round.
Frye lands a glancing elbow in the clinch.
Nice body punch from Frye.
Frye lands a body shot in the clinch.
Frye stalling here - the referee won't stand for too much of that.
A short right from Frye.
Nice elbow from Frye.
Frye lands a damaging elbow.
Marcus McFly's cut is bleeding quite badly. He's got to try and protect it.
Frye creates a bit of space for himself and sneaks an elbow through McFly's defenses.
Frye landing some nice looking knees to the body.
Frye comes over the top with an elbow. That landed flush.
Frye lands a right hand.
Frye lands a nice elbow.
Frye with an attempt at a knee that misses.
Knees in the clinch landing for Frye.
The crowd are loving this. Great action here.
Frye gets an overhook and lands an elbow to the side of the head.
Frye is working McFly over against the cage.
Frye gets an overhook and lands an elbow to the side of the head.
Frye working McFly over with knees to the body.
That's four minutes gone in the round.
Frye tries to land a knee to the head but McFly blocks with his arms.
Knees in the clinch landing for Frye.
Frye lands an elbow just above McFly 's eye.
Frye comes over the top with an elbow. That landed flush.
Frye lands a good knee to the midsection. McFly won't want to take too many of those.
Frye lands a right hand that snaps the head of McFly backwards.
Frye lands a body shot in the clinch.
With the fighters clinched against the cage, Frye creates a bit of distance for himself and scores with a nice uppercut.
Frye stalling in the clinch.
Frye missing with knees to the body.
Frye lands a nice elbow.
A right hook to the body lands for Frye.
Frye displaying some good clinch control by pressing McFly up against the cage.
McFly takes an elbow to the forehead.
The crowd are going absolutely nuts as the round comes to an end - what a fantastic round of action!
Frye trying to land knees to the body.
Frye lands an elbow just above McFly 's eye.
A frustrated look appears on McFly's face as he tries to break the clinch.
And that�s the end of the round � the fighters go back to their corners.
David Frye dominated that round.
The cut man is working on Marcus McFly's cut.
Well, the break between rounds is over. Let's get back to the scrappin!
A jab from Frye finds it's way through McFly's defenses.
McFly throws a lazy uppercut
and McFly takes a counter punch right on the button for his troubles.
McFly keeps the fight on the outside.
Frye closes the distance and clinches.
Frye lands a right hand that snaps the head of McFly backwards.
Frye manages to get underhooks and slows down the pace for a moment.
Frye tries to land a knee to the body but he is off balance and McFly avoids it.
McFly avoiding damage as Frye throws knees to the body.
Frye tries to land knees in the clinch but McFly avoids the damage to the body.
McFly wants to get back to striking at distance but Frye won't allow it.
Frye lands a nice elbow.
McFly is trying to push Frye away but Frye has him pressed against the cage, so he's going nowhere.
Frye tries a knee to the head but McFly blocks it.
That's one minute gone in the round.
McFly letting Frye take a breather here.
Frye lands an elbow inside that McFly shrugs off.
The pace slowing considerably in the clinch, as Frye takes a break from that fighting nonsense to think about the finer things in life.
McFly is trying to work out of this bad position, with his back against the cage.
Frye lands an elbow just above McFly 's eye.
Frye tries to land a knee to the head but McFly blocks with his arms.
Frye lands a nice elbow.
Jeez, Marcus McFly's cut is really nasty now. The referee must be thinking about getting that checked.
Frye missing with knees to the body.
A frustrated look appears on McFly's face as he tries to break the clinch.
David Frye seems to be working more effectively in the clinch in the fight so far.
McFly has Frye pressed up against the cage and is working for takedown. Frye manages to improve position though and keeps the fight standing.
McFly is trying to force a seperation but Frye has the dominant position.
Frye lands a glancing elbow in the clinch.
A quick uppercut on the inside from Frye.
Frye is working McFly over against the cage.
Frye avoiding damage.
Frye prevents McFly from breaking the clinch.
That's two minutes gone in the round.
McFly working hard to break the clinch.
Frye taking a break, stalling in the clinch.
Frye cracks McFly with a nice body shot.
Frye has been the more effective fighter overall so far.
Both fighters are absolutely exhausted here.
McFly takes an elbow to the temple.
Nice elbow from Frye.
The referee calls the doctor in to look at Marcus McFly's cut. Oh no, the doctor has called an end to the bout!
Ladies and gentlemen, after 2:27 of round 2, we have a winner by way of TKO (Cut). David Frye!
|
|
|
|
|
|
|
|
|
|
|
|
|
|
|
|
|
|
|
|
|
|
|
| S |
C
A |
G |
S |
C
B |
G |
|
S |
C |
G |
|
energy
A | B |
|
hype
A | B |
|
pop
A | B |
|
mgr
A | B |
|
FIGHT
RATING
100% |
|
|
|
|
|
|
|
Undercard bout
|
|
|
|
Undercard bout
|
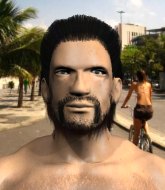
Coming up we have a welterweight MMA rules bout between Antero Siren (ranked 0 p4p, 0 weight class) and Melvin Guillard (ranked 0 p4p, 0 weight class). Melvin Guillard acknowledges the crowd's support as he enters the cage.
 |
|
 |
| 180 cm
19
172 lbs
3 - 1 - 0 |
|
180 cm
22
170 lbs
3 - 1 - 0 |
BJJ White Belt
Excellent boxer
Very strong |
|
BJJ White Belt
Decent boxing
Heavy handed |
|
| |
|
Ladies and gentlemen. This fight is 3 rounds, in the welterweight division.
Introducing the fighter to my left, fighting out of the red corner.
With a record of
3 - 1 - 0, fighting out of Las Vegas, Antero Siren!
And introducing the fighter to my right, fighting out of the blue corner.
With a record of
3 - 1 - 0, fighting out of Las Vegas, Melvin Guillard!
The judges for this bout are George Francis, Alan Glass and Robert Twigg.
The bell rings for round one and we are underway!
Guillard swings for the body but Siren moves out of range.
Guillard swings wildly with a couple of big hooks
and Siren counters with a good right hand that lands right on the jaw.
Siren throws an off balance right hand
and Siren takes a counter punch right on the button for his troubles.
A punch lands to the side of Guillard 's head but he takes it in his stride.
Siren throws a lazy uppercut
and Guillard counters with a three punch combination, finished off with a leg kick. Nice work.
Siren punishes Guillard's body with a nice straight punch.
Guillard looks gassed!
Guillard lands a nice looking body shot.
Fantastic stuff here - a very entertaining period of action, which has drawn cheers from the crowd.
Siren scores with a sloppy punch to the body. Not much technique there but it did the business.
Antero Siren seems to be the more aggressive standup fighter in this bout.
Guillard avoids a lazy jab quite easily.
Siren lands a lovely overhand right.
Siren swinging wildly here.
Siren cracks Guillard with a big right hand that sends him crashing to the floor. Siren has the opportunity to follow him to the ground but instead he's beckoning Guillard to stand back up!
Guillard is rocked!
Siren throws a pinpoint strike between Guillard's hands that connects right on the jaw and sends Guillard crashing to the floor! He's out before he even hits the mat and Siren scores a great knockout victory!
Ladies and gentlemen, after 0:46 of round 1, we have a winner by way of KO (Punch). Antero Siren!
|
|
|
|
|
|
|
|
|
|
|
|
|
|
|
|
|
|
|
|
|
|
|
| S |
C
A |
G |
S |
C
B |
G |
|
S |
C |
G |
|
energy
A | B |
|
hype
A | B |
|
pop
A | B |
|
mgr
A | B |
|
FIGHT
RATING
100% |
|
|
|
|
|
|
|
Co-main event
|
Coming up we have a welterweight MMA rules bout between Brad Havey (ranked 0 p4p, 0 weight class) and Peter Piper (ranked 0 p4p, 0 weight class). I can't wait for this one - let's get the fighter introductions out of the way and get this one started!
 |
|
 |
| 175 cm
26
175 lbs
3 - 0 - 0 |
|
160 cm
26
170 lbs
3 - 2 - 0 |
Powerful takedowns
Counter striker
Cardio machine |
|
BJJ White Belt
Excellent boxer
Good gas tank |
|
| |
|
Ladies and gentlemen. This fight is 3 rounds, in the welterweight division.
Introducing the fighter to my left, fighting out of the red corner.
With a record of
3 - 0 - 0, fighting out of Las Vegas, Brad Havey!
And introducing the fighter to my right, fighting out of the blue corner.
With a record of
3 - 2 - 0, fighting out of Las Vegas, Peter Piper!
The judges for this bout are George Francis, Wesley Smith and Frank Dennis.
The bell rings for round one and we are underway!
Piper is looking to clinch but Havey is avoiding it.
Havey dodges the punch combination from Piper.
Piper rushes forward with a series of wild hooks but Havey moves out of range and avoids them all easily.
Piper misses with a wild body shot.
Havey takes a body punch but keeps moving.
Piper connects with a body shot that sends Havey's belly button to the back.
Piper throws a hard body shot but it just misses.
Piper misses with a hook.
Peter Piper seems to be the more aggressive standup fighter in this bout.
Piper lands with a shot to the body.
Havey avoids the body shot from Piper.
Piper tries to clinch there but Havey circles away.
Piper lands an overhand left. A wild punch that just about connected.
Piper's corner calls for a 1-2. Piper obliges with the 1 part as he scores the single shot and moves back out of range.
The crowd are loving this. Great action here.
Piper throws a lazy right hand but Havey sees it coming a mile off and sidesteps it easily.
Piper tries to clinch but Havey is having none of it.
Piper is throwing a lot of body shots here, looking to wear down Havey rather than just go for the knockout.
That's one minute gone in the round.
Piper scores with a nice head shot.
Peter Piper is looking to keep the fight on the feet at all costs.
Piper fails to land with the punch combination there - jab, cross, hook, miss, miss, miss.
Havey bobs and weaves into range and then changes levels and scores with a nice takedown into side control.
Havey controls the position from side control.
Piper struggling a bit here.
That's two minutes gone in the round.
Havey is staying tight to Piper's torso, preventing him from escaping.
It looks like the ref is thinking about a standup.
The ref stands the fighters back up because Brad Havey just wasn't active enough.
Havey closes the distance and gets a trip takedown into side control. Piper quickly recovers to half guard.
Havey keeping composed on the top, looking to control the action.
Havey works his way into side control.
That's three minutes gone in the round.
Piper tries to contro but end up mounted... ooooh, that's bad.
Havey controlling the pace for now.
We could do with one of the fighters taking the initiative a bit more on the ground - they're both waiting to capitalize on a mistake.
That's four minutes gone in the round.
Well. There's a bit of a lull in the action here and the crowd are starting to get restless.
And that�s the end of the round � the fighters go back to their corners.
Peter Piper dominated that round.
That's the end of the round. The referee orders the cornermen out of the cage so we can get back down to business.
Piper ducks down and throws a hook to the body but Havey moves away.
Havey has a takedown stuffed.
Piper takes a swing at Havey's ribcage but misses.
Havey avoids a lazy jab quite easily.
Piper doesn't manage to clinch there - Havey circles away.
Havey has his hands up protecting his head but a hook from Piper finds it's way round the side to connect with Havey's head.
Havey feints and as Piper raises his hands in defense, Havey changes levels and drives through with a takedown into guard.
Havey controls the pace of the fight for a moment.
That's one minute gone in the round.
We're going to have a standup here because Brad Havey wasn't active enough for the referee's liking.
Piper misses with a body shot.
Piper tries to close the distance and clinch up but Havey swats him away and circles back towards the center.
A slow jab from Piper misses its intended target.
Havey takes one to the side of the head.
Piper lands with a cross to side of his opponent's head.
Havey looking to shoot here. He's gone for it and he's landed a takedown into mount! Oh, that's bad for Piper!
Havey sitting in mount, just looking to control for the moment.
Havey has hold of an arm here, looking to extend it. He's committed to the armbar attempt here! Will he get it?! Yes! Piper is forced to tap!
Ladies and gentlemen, after 2:01 of round 2, we have a winner by way of Submission (Armbar). Brad Havey!
|
|
|
|
|
|
|
|
|
|
|
|
|
|
|
|
|
|
|
|
|
|
|
| S |
C
A |
G |
S |
C
B |
G |
|
S |
C |
G |
|
energy
A | B |
|
hype
A | B |
|
pop
A | B |
|
mgr
A | B |
|
FIGHT
RATING
41% |
|
|
|
|
|
|
|
Main event
|
Coming up we have a welterweight MMA rules bout between James Grady (ranked 0 p4p, 0 weight class) and Brawl Leer (ranked 0 p4p, 0 weight class). Grady comes to the cage accompanied by Hollow Points At Ya Face . I'm sure you'll be fascinated to know that I was talking to some pointless Z list celebrity before the fight and he thought that Brawl Leer was going to win. Let's see if he was right.
 |
|
 |
| 184 cm
22
168 lbs
4 - 1 - 0 |
|
180 cm
26
170 lbs
4 - 1 - 0 |
BJJ Blue Belt
Counter striker
Experienced |
|
BJJ White Belt
Excellent boxer
Granite chin |
|
| |
|
Ladies and gentlemen. This fight is 3 rounds, in the welterweight division.
Introducing the fighter to my left, fighting out of the red corner.
With a record of
4 - 1 - 0, fighting out of Las Vegas, James Grady!
And introducing the fighter to my right, fighting out of the blue corner.
With a record of
4 - 1 - 0, fighting out of Las Vegas, Brawl Leer!
The judges for this bout are George Francis, Wesley Smith and Stewart Dunkirk.
The bell rings for round one and we are underway!
Grady is looking to clinch.
Grady rushes Leer and pushes him back against the cage in a clinch.
Leer tries to circle away but Grady has him pinned against the cage.
Leer misses with a shot to the kidneys.
Grady ties up his opponent against the cage and manages to drag the fight down to the ground. Grady no doubt will be looking to work submissions from his guard.
Grady working from the bottom, still in full guard. He's managed to get a loose triangle. Leer doesn't seem to be doing much to defend here, obviously he feels comfortable in the position. Leer manages to throw the legs off his shoulder and he's back into guard - no problem.
Grady not looking particularly offensive just at the moment.
Grady is controlling Leer's posture.
Grady throws a couple of shots from the bottom but they don't land.
Grady trying to control the position.
Leer avoids a guillotine attempt easily.
That's one minute gone in the round.
Grady has his foot on Leer's thigh. He's trying to push off and get in position for a triangle, I think. Leer works his way back into a safe position though.
Grady keeping moving, preventing Leer from controlling successfully.
Grady looking for a sweep. Not yet Grady, not yet.
Leer is intent on slowing down the pace of the fight, simply looking to control.
Grady working for a triangle but Leer defends it easily.
That's two minutes gone in the round.
Well. There's a bit of a lull in the action here and the crowd are starting to get restless.
Grady working a defensive guard here.
Grady looking to sweep here. No luck so far.
Grady is trying to control the position from the bottom.
Grady is working actively off his back, looking to secure an arm or perhaps work for a triangle.
That's three minutes gone in the round.
Leer trying to control the position from guard on top but Grady is wriggling around, looking for whatever he can.
Leer got a little sloppy there for a moment and Grady has worked his way into a loose triangle - can he finish it?! No, Leer has managed to get both his arms back between Grady's legs - danger averted.
Grady escapes his hips to the side and looks to be working for an armbar. Leer gives him a little smile and shakes his head. No chance.
Leer got a little sloppy there for a moment and Grady has worked his way into a loose triangle - can he finish it?! No, Leer has managed to get both his arms back between Grady's legs - danger averted.
That's four minutes gone in the round.
There's not a lot going on here and the crowd are letting the fighters know they're not willing to tolerate a lack of action.
Grady is active off his back here, looking for submissions.
Grady is looking to get back to his feet but can't, whilst Leer is controlling him.
Grady throwing strikes off his back to little effect.
The crowd thankful this round is nearly over.
Leer tries to free his leg and advance position but Grady is retaining full guard.
And that�s the end of the round � the fighters go back to their corners.
James Grady dominated that round.
The referee calls time. The cornermen exit stage left and we're back to business.
Leer cracks a nice hook into Grady's ribs.
Brawl Leer seems to be the more aggressive standup fighter in this bout.
Leer lands with a hook. Grady tried to avoid it but it clipped the top of his head.
Grady is looking to clinch.
Grady takes one on the chin but seems OK.
Grady shoots and misses
and Leer counters with a good right hand that lands right on the jaw.
Leer lands a jab.
Grady looking for a takedown here - he's got it.
Fantastic stuff here - a very entertaining period of action, which has drawn cheers from the crowd.
Grady is looking to work some ground and pound but Leer has wrist control.
Leer keeping moving, preventing Grady from controlling successfully.
The fighters are pressed up against the cage, both looking to find a bit of space to work.
Grady missing there with some ground and pound from the guard.
That's one minute gone in the round.
Grady wants to get up but he can't break Leer's closed guard. He needs to be careful trying to break the legs open, as he's open to submissions here.
Grady missing there with some ground and pound from the guard.
Leer keeping moving, preventing Grady from controlling successfully.
The ref stands the fighters back up. James Grady wasn't doing enough on the ground.
Grady fails with the takedown
and Leer counters with a straight punch to the midsection.
Both fighters are absolutely exhausted here.
Leer throws a nice hook to the body that draws an oooh from the crowd.
Leer scores with a sloppy punch to the body. Not much technique there but it did the business.
The crowd cheering loudly, showing their appreciation for the quality fight we're seeing here.
Leer stuns Grady with a nice body shot, before stepping back out of range.
Leer throws a two punch combo that lands nicely.
That's two minutes gone in the round.
Leer feints a kick and comes over the top with a right hand, followed by a left hook - both land, sending Grady crashing to the mat! This one is all over!
Ladies and gentlemen, after 2:08 of round 2, we have a winner by way of KO (Punches). Brawl Leer!
|
|
|
|
|
|
|
|
|
|
|
|
|
|
|
|
|
|
|
|
|
|
|
| S |
C
A |
G |
S |
C
B |
G |
|
S |
C |
G |
|
energy
A | B |
|
hype
A | B |
|
pop
A | B |
|
mgr
A | B |
|
FIGHT
RATING
25% |
|
|
|
|
|
|
|
|
|
|
