 |
LFNC Presents - Fight Night 10 PBP Commentary |
Undercard bout
|
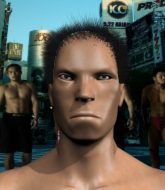
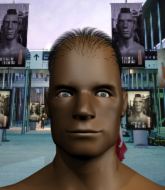
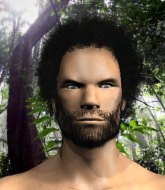
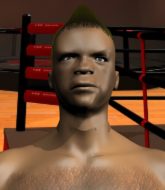
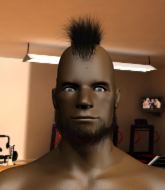
Coming up we have a light heavyweight MMA rules bout between Ronald Barlog (ranked 0 p4p, 0 weight class) and Borat Obama (ranked 0 p4p, 0 weight class). Borat Obama will no doubt be trying to keep this one on the feet, where he has a distinct advantage.
 |
|
 |
| 187 cm
22
215 lbs
2 - 1 - 0 |
|
195 cm
21
203 lbs
7 - 7 - 0 |
BJJ Purple Belt
Counter striker
Very strong |
|
BJJ Purple Belt
Decent boxing
Granite chin |
|
| |
|
Ladies and gentlemen. This fight is 1 rounds, in the light heavyweight division.
Introducing the fighter to my left, fighting out of the red corner.
With a record of
2 - 1 - 0, fighting out of London, Ronald Barlog!
And introducing the fighter to my right, fighting out of the blue corner.
With a record of
7 - 7 - 0, fighting out of London, Borat Obama!
The judges for this bout are Colin Fotheringham, Paul Tew and Daniel Bishop.

The bell rings for round one and we are underway!
Obama throws a right hand that Barlog ducks under and follows up with a left that Barlog also avoids with ease.

Barlog looking to shoot here. He's gone for it and he's landed a takedown into mount! Oh, that's bad for Obama!
Barlog lands a big elbow.
Barlog has his opponent pinned against the cage, landing some nasty ground and pound that is really making a bit of a mess out of Obama's face.
Barlog lands a couple of nice shots there from mount.
This is a great period of action - very entertaining stuff!
Barlog cracks Obama with a big head shot that has him covering up instantly! He's rolled onto his side and the referee has seen enough - this one is aaaaaaaaaaall over!
Ladies and gentlemen, after 0:36 of round 1, we have a winner by way of TKO (Strikes). Ronald Barlog!
|
|
|
|
|
|
|
|
|
|
|
|
|
|
|
|
|
|
|
|
|
|
|
| S |
C
A |
G |
S |
C
B |
G |
|
S |
C |
G |
|
energy
A | B |
|
hype
A | B |
|
pop
A | B |
|
mgr
A | B |
|
FIGHT
RATING
100% |
|
|
|
|
|
|
|
Undercard bout
|
|
|
|
Undercard bout
|
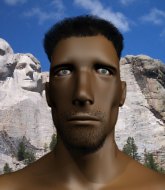
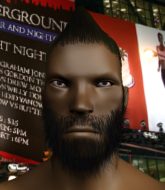
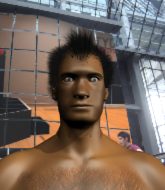
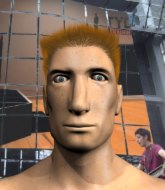
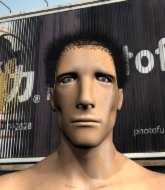
Coming up we have a welterweight MMA rules bout between Malcolm Hopkins (ranked 0 p4p, 0 weight class) and King Leonidas (ranked 0 p4p, 0 weight class). King Leonidas will no doubt be looking to use his reach advantage to good effect.
 |
|
 |
| 180 cm
20
183 lbs
1 - 2 - 0 |
|
195 cm
22
175 lbs
1 - 2 - 0 |
BJJ Purple Belt
Counter striker
Big heart |
|
BJJ White Belt
Excellent boxer
Heavy handed |
|
| |
|
Ladies and gentlemen. This fight is 1 rounds, in the welterweight division.
Introducing the fighter to my left, fighting out of the red corner.
With a record of
1 - 2 - 0, fighting out of London, Malcolm Hopkins!
And introducing the fighter to my right, fighting out of the blue corner.
With a record of
1 - 2 - 0, fighting out of London, King Leonidas!
The judges for this bout are Sam Margolis, Donald Grub and Colin Fotheringham.
The bell rings for round one and we are underway!
Leonidas misses with a jab and misses with a cross straight after too.
Leonidas looks to land a combination but Hopkins avoids it well.

Hopkins clinches up against the cage.
Leonidas tries to break the clinch but Hopkins is controlling the position.
Leonidas stops a takedown attempt from Hopkins.
Leonidas is a painfully thin specimen of a man. You do wonder whether a good body kick would snap him clean in two.
Hopkins tries for a takedown. No joy.
Leonidas is trying to break free.
Hopkins wants a takedown but no success here.
That's three failed takedown attempts in the round for Malcolm Hopkins. That's going to take a lot out of him.
Leonidas swings away with an uppercut that misses.
Leonidas lands a short shot on the inside that snaps the head of Hopkins backwards.
Hopkins tries for a takedown. No joy.
Leonidas wants to strike at distance but he can't break free of the clinch.
Hopkins changes levels and goes for a takedown here. Leonidas fights it off and pushes away nicely.
Hopkins slips under a jab.
Leonidas looks to score with a combo but nothing lands.
Hopkins slips a jab and a cross from Leonidas.

Leonidas lands a left and a right that send Hopkins crashing to the mat, dazed. Leonidas thinks about following him to the mat but decides to wave him back up to his feet!
King Leonidas seems to be the more aggressive standup fighter in this bout.

That's one minute gone in the round.
Hopkins avoids a lazy jab quite easily.
Leonidas throws a right and a left that both miss.
Leonidas misses with a jab and misses with a cross straight after too.
Leonidas swinging wildly here.
Leonidas throws a right hand that Hopkins ducks under and follows up with a left that Hopkins also avoids with ease.
Leonidas throws a right and a left that both miss.
Leonidas looks gassed!
Hopkins tries to close the distance and clinch up against the cage but Leonidas paws at him with a jab and circles away.
Leonidas fails to land with the punch combination there - jab, cross, hook, miss, miss, miss.
A decent looking cross lands there for Leonidas.
A big left from Leonidas misses.

That's two minutes gone in the round.
Neither fighter has done anything of merit for a good minute or two here and the crowd are not happy about it.
Leonidas throws a right and a left that both miss.
The fight stays on the outside here - Hopkins looks like he's thinking about clinching though.
A combination from Leonidas does no damage.
Hopkins instigates a clinch.

Hopkins's corner calls for him to break the clinch, which he does.
Leonidas misses with a two punch combination.
A combination from Leonidas does no damage.
Hopkins closes the distance and clinches.
Hopkins goes for a takedown attempt but Leonidas pushes him away and we're back to fighting at a distance.
Leonidas keeps the fight on the outside.

That's three minutes gone in the round.
Hopkins tries to close the distance and clinch up against the cage but Leonidas paws at him with a jab and circles away.
Leonidas misses with a wild combination.
Hopkins clinches up with Leonidas and pushes him back against the cage.
A short right from Hopkins on the inside.
Hopkins has Leonidas pressed up against the cage. He's trying to work for a single leg takedown. Hopkins pulls back from the cage and twists to the side, sending Leonidas tumbling to the mat - Hopkins dives into Leonidas's guard.
Hopkins passes into half guard.
Leonidas is looking to escape.

Hopkins is working for submissions here but there's nothing on.
Hopkins seems to be working for a kimura but Leonidas defends the submission attempt.

That's four minutes gone in the round.
Hopkins stops Leonidas from getting back to his feet.
We get told so often about how wrestlers don't like to be on their backs. Let's see if Leonidas can do anything to dispel that myth.
Leonidas is kicking away at Hopkins from the bottom - trying to push off and stand up. Hopkins grabs hold of a leg and drops back for a hell hook! The two fighters roll across the mat, with Leonidas trying to push Hopkins off... Leonidas taps! He's tapped! This one is all over! A throwback to the old Pancrase there with an infrequently seen submission hold! Nice work.
Ladies and gentlemen, after 4:36 of round 1, we have a winner by way of Submission (Heel Hook). Malcolm Hopkins!
|
|
|
|
|
|
|
|
|
|
|
|
|
|
|
|
|
|
|
|
|
|
|
| S |
C
A |
G |
S |
C
B |
G |
|
S |
C |
G |
|
energy
A | B |
|
hype
A | B |
|
pop
A | B |
|
mgr
A | B |
|
FIGHT
RATING
50% |
|
|
|
|
|
|
|
Undercard bout
|
|
|
|
Undercard bout
|
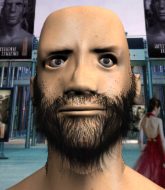
Coming up we have a light heavyweight MMA rules bout between John Mayhem (ranked 0 p4p, 0 weight class) and Bobby Olsen (ranked 0 p4p, 0 weight class). The key to victory for John Mayhem has got to be keeping the fight on the feet.
 |
|
 |
| 193 cm
18
215 lbs
1 - 2 - 0 |
|
190 cm
19
205 lbs
1 - 2 - 0 |
BJJ Blue Belt
Solid Muay Thai
Big heart |
|
BJJ Brown Belt
Counter striker
Determined |
|
| |
|
Ladies and gentlemen. This fight is 1 rounds, in the light heavyweight division.
Introducing the fighter to my left, fighting out of the red corner.
With a record of
1 - 2 - 0, fighting out of London, John Mayhem!
And introducing the fighter to my right, fighting out of the blue corner.
With a record of
1 - 2 - 0, fighting out of London, Bobby Olsen!
The judges for this bout are Daniel Bishop, Sam Margolis and Paul Tew.
The bell rings for round one and we are underway!
Olsen fails with a takedown attempt.
Mayhem will need to tighten up his combinations if he doesn't want to gas himself out, swinging at thin air.
Mayhem rushes forward with a series of wild hooks but Olsen moves out of range and avoids them all easily.
Mayhem cracks a nice hook into Olsen's ribs.
Mayhem pushes Olsen up against the cage in a clinch.
Mayhem is pressed up against the cage. Olsen has hold of a leg and is looking to drag Mayhem down to the mat. Mayhem avoids the attempt though and has circled away. We're back to striking at a distance.
Mayhem doesn't manage to clinch there - Olsen circles away.
The fight moves into the clinch position.
Olsen has Mayhem pressed against the cage, preventing Mayhem from circling away and getting back to striking at range.
Mayhem has had enough of the clinch and is looking to separate.
Mayhem manages to break the clinch.
Mayhem tries a switch kick but it misses it's target.
Mayhem tries a switch kick but it misses it's target.
Olsen checks a low kick from Mayhem.
Olsen closes the distance and clinches up, looking for a takedown. He shifts his weight and gets a nice trip into half guard.
Olsen is looking for an arm triangle, whilst trying to pass to side control. Mayhem doesn't seem that keen to cooperate though. No luck this time Olsen.
Mayhem is pressing down on Olsen's left leg trying to get back to full guard. He's managed it.
That's one minute gone in the round.

Olsen gets to his feet. Mayhem looking to butt scoot but the ref puts an end to that. On your feet son!
Mayhem lands a high kick!
Olsen looks shocked there as he takes a right hand to the temple.
Mayhem tries to clinch up but Olsen circles away and keeps his distance.
Olsen closes the distance, clinches up and gets a nice trip takedown into side control. Very smooth.
Olsen tries for a kimura. Not really close to a finish though.
Olsen looks gassed!
Olsen is looking to finish here, going for an Americana. Mayhem knows the correct defense though, so he's OK.
That's two minutes gone in the round.
Mayhem is trying to get back to half guard. He's pushing on Olsen's leg. He's managed it. Nice work.
Olsen prevents Mayhem from standing back up.
Olsen is working hard to pass the guard. He's done it - he's now in full mount! Trouble for Mayhem!
Olsen avoids the attempt from Mayhem to control.
That's three minutes gone in the round.
Olsen is going oldschool here, as he tries to force Mayhem to tap using a forearm choke. This isn't 1993 though, so Mayhem shrugs it off.
Olsen won't let Mayhem get back to his feet... He wants to keep the fight where it is for now.
Olsen goes for an armbar but he's fallen flat on his backside there and now Mayhem is on top in guard.
Mayhem wants to get up but he can't break Olsen's closed guard. He needs to be careful trying to break the legs open, as he's open to submissions here.
Olsen has a loose triangle. He'll be looking to tighten that up but Mayhem can see exactly what he's planning and manages to posture up and free himself.
Mayhem trying to stand up but can't free himself from Olsen's guard.
That's four minutes gone in the round.
The crowd are showing their displeasure at the lack of action as loud boos ring out around the arena.
The fighters are pressed up against the cage, both looking to find a bit of space to work.
Mayhem trying desperately to get back to his feet here but he's not having any joy at all. He's going to tire himself out if he's not careful.
Mayhem wants to stand and escape but instead Olsen has hit a sweep and he's now on top in guard.
Olsen is looking to work some ground and pound but Mayhem has wrist control.

Well, the referee has seen enough. Neither fighter is active enough on the ground so he's stood them back up.
Olsen shoots in looking for a single leg takedown. Mayhem is trying to defend but Olsen finishes it well and ends up in half guard. Let's see if he can advance position further.
Olsen is looking for a kimura. It's going to be difficult to finish that from half guard though and Mayhem defends it well.

That's five minutes gone in the round.
Olsen is looking for a kimura. It's going to be difficult to finish that from half guard though and Mayhem defends it well.
Mayhem is looking to escape.
Mayhem wants to control but Olsen is keeping busy.
Mayhem wants to get back to full guard but Olsen has passed into side control.

That's six minutes gone in the round.
The crowd are hurling abuse towards the fighters... You can hardly blame them though because there isn't a lot going on in the fight.
Olsen looking to control and managing it successfully.
Olsen goes for an armbar but he's fallen flat on his backside there and now Mayhem is on top in guard.
Mayhem gets to his feet and steps away from his opponent.
Mayhem throws a two punch combo that lands nicely.
Mayhem is looking to take this fight into the clinch.
Mayhem tries to clinch there but Olsen circles away.

That's seven minutes gone in the round.
Mayhem tries to close the distance and clinch up but Olsen swats him away and circles back towards the center.
Mayhem throws a combination but comes up with nothing but fresh air.
Mayhem tries to clinch but Olsen is having none of it.
Olsen uses some good footwork to avoid the body shot by Mayhem.
John Mayhem seems to be the more aggressive standup fighter in this bout.
Olsen takes a kick to the side of the head.
Mayhem is looking to clinch.
Mayhem moves into the clinch.
Mayhem tries to circle away but Olsen has him pinned against the cage.
Mayhem has had enough of the clinch and is looking to separate.
Mayhem using the Thai plumb to throw knees but Olsen has his back arched nicely, preventing the strike.
Mayhem throws a vicious knee straight up the middle but Olsen blocks it with crossed arms.
Mayhem tries a knee to the head but Olsen blocks it.
Olsen can't get the takedown.
John Mayhem has stuffed three takedown attempts in the round now. That's going to take a lot out of Bobby Olsen.
Mayhem tries a knee to the head but Olsen blocks it.
Olsen is looking for a takedown up against the cage. Mayhem gets underhooks though and prevents the takedown attempt.

That's eight minutes gone in the round.
The crowd are hurling abuse towards the fighters... You can hardly blame them though because there isn't a lot going on in the fight.
Mayhem tries to break the clinch but Olsen is controlling the position.
Mayhem wants to strike at distance but he can't break free of the clinch.
Olsen has hold of a leg and is looking for a trip takedown. Mayhem avoids it nicely though and we remain in the clinch.
Mayhem is working hard here but doesn't seem to be able to control effectively, up against the cage.
Olsen can't get the takedown.
Mayhem looking to throw knees to the head but Olsen is blocking nicely.
Olsen wants a takedown but no success here.
Mayhem looking to throw knees to the head but Olsen is blocking nicely.
Mayhem misses with a knee strike.
Mayhem tries to stall but Olsen uses the opportunity to gain a better position.
Olsen gets a nice trip takedown into half guard.
Olsen is trying a forearm choke� I don't think that's going to do much at this level of the game.
Mayhem is looking to regain full guard. Not this time though.

That's nine minutes gone in the round.
Olsen is working for a kimura but Mayhem is defending it quite comfortably.
Mayhem wants to control but Olsen is keeping busy.
Olsen passes the half guard and he's now in mount! Big trouble for Mayhem!
And that's the end of the fight!
That was a close round. You could make an argument for either fighter but I would give it to John Mayhem.
I think Mayhem has won this one but let's see what the judges have to say. Over to the ring announcer for the scorecards.
Ladies and gentlemen, after 1 rounds of action, we go to the scorecards for a decision.
Judge Daniel Bishop scores the fight for John Mayhem!
Judge Sam Margolis scores the fight for John Mayhem!
Judge Paul Tew scores the fight as a draw!
John Mayhem wins by majority decision!
|
|
|
|
|
|
|
|
|
|
|
|
|
|
|
|
|
|
|
|
|
|
|
| S |
C
A |
G |
S |
C
B |
G |
|
S |
C |
G |
|
energy
A | B |
|
hype
A | B |
|
pop
A | B |
|
mgr
A | B |
|
FIGHT
RATING
19% |
|
|
|
|
|
|
|
Undercard bout
|
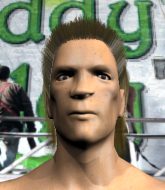
Coming up we have a heavyweight MMA rules bout between Ronny Huss (ranked 0 p4p, 0 weight class) and David Quake (ranked 0 p4p, 0 weight class). Over to our ring announcer for the fighter introductions!
 |
|
 |
| 183 cm
22
244 lbs
1 - 1 - 0 |
|
190 cm
23
255 lbs
1 - 3 - 0 |
BJJ Purple Belt
Basic striking
Granite chin |
|
BJJ Purple Belt
Brawler
Solid chin |
|
| |
|
Ladies and gentlemen. This fight is 1 rounds, in the heavyweight division.
Introducing the fighter to my left, fighting out of the red corner.
With a record of
1 - 1 - 0, fighting out of London, Ronny Huss!
And introducing the fighter to my right, fighting out of the blue corner.
With a record of
1 - 3 - 0, fighting out of London, David Quake!
The judges for this bout are Andrew Berry, William Gold and Paul Tew.
The bell rings for round one and we are underway!
Huss tries to score with a leg kick but it misses it's target.
Huss closes the distance and clinches.
Huss blocks a punch to the side of the head.
Quake throws a vicious knee straight up the middle but Huss blocks it with crossed arms.
Huss looks like he'd prefer to be striking at range right now.
Quake pushes off an throws an elbow but Huss leans to the side and avoids it. We're back to clinching against the cage.
Quake can't get the takedown.
Huss breaks from the clinch.
Huss moves into the clinch.
Quake fails to pull the fight into his guard.
Huss is trying to slow down the pace of the fight but Quake is keeping busy.
We've had a slow start to the round here - hopefully the action picks up.
Quake has Huss pressed against the cage, preventing Huss from circling away and getting back to striking at range.
Huss is trying to break the clinch but Quake is controlling him.
Quake doesn't land with the attempted body shot.
That's one minute gone in the round.
Huss tries to pull guard but Quake holds him up against the cage and eventually Huss drops back down to his feet.
Huss is trying to break free.
Quake prevents Huss from breaking the clinch.
Huss breaks from the clinch.
Huss swats away the attempt to clinch by Quake.
Quake drives through with a takedown into guard.
Huss is active off his back here, looking for submissions.
Quake wants to control from the top but Huss keeps moving.
Huss looking for submissions from the bottom here. Moving his hips around, possibly looking for an armbar.
Quake gets to his feet. Huss looking to butt scoot but the ref puts an end to that. On your feet son!
That's two minutes gone in the round.
Quake tries to clinch but Huss moves away
and Huss counters with a good low kick that Quake was not able to check.
Quake closes the distance and clinches.
Quake lands a nice looking hook to the body, against the cage.
Quake jumps guard.
Huss is looking to stand up but Quake won't let him.
Huss stands up and looks to throw the legs aside to pass to side control. Quake swivels though and keeps the full guard.
Huss is breathing heavily.
Quake trying to control the position here.
That's three minutes gone in the round.
The ref warns both fighters not to hold the cage as they work up against the meshing.
Huss drops back for a leg! It's a sloppy attempt though and Huss jumps back into guard quickly, to retain the dominant position.
Huss could do with loosing a few pounds - he looks very soft around the mid section, to put it politely.
Huss wanted to stand there but Quake had control of the position.
Huss stands up and waves to Quake to follow him.
That's four minutes gone in the round.
A few boos can be heard. I'm sure they will multiply if the fighters don't pick up the pace.
Quake tries to clinch there but Huss circles away.
Quake misses with a looping left.
Quake tries to close the distance and clinch but Huss swats him to one side with an open hand palm strike and circles away.
Quake closes the distance but Huss moves to the side
so Huss counters with a double leg into guard. Good agility.
Quake has a closed guard, preventing Huss from standing up.
Huss throwing strikes but missing.
Huss trying to stand up but can't free himself from Quake's guard.
Quake is pulling down on Huss's head to control his posture.
That's five minutes gone in the round.
Huss has decided he wants to stand but the closed guard of Quake is proving hard to escape from.
Quake uses the cage to get back to his feet.
Quake tries to close the distance and clinch but Huss swats him to one side with an open hand palm strike and circles away.
Quake wants to clinch but Huss slips to the side
and Huss counters with a nice low kick that buckles Quake's knee momentarily.
Quake shoots in for a takedown! He's got it and he's managed to land in full mount! That's better than Quake was expecting from the takedown attempt, I'm sure!
Quake controlling the position easily from mount.
Huss is desperately trying to get back to half guard.
That's six minutes gone in the round.
Quake get's back to his feet.
Quake tries to close the distance and clinch up against the cage but Huss paws at him with a jab and circles away.
Quake missing with a left hand there. Huss was out of range so wasted energy throwing that one.
Huss throws a right and a left that Quake avoids nicely.
Quake tries to clinch but Huss moves out of range.
Quake tries to clinch up.
Huss tries to clinch but is not successful on this occasion.
Huss lands with an uppercut that bounces Quake off the cage and back into rage.
Horrible takedown by Huss or perhaps it was just good defense by Quake which made him look bad.
Wow, both these guys are really going for it!
A combination from Huss does no damage.
Quake tries to clinch but is not successful on this occasion.
Quake tries to clinch up.
Quake drives through and clinches with Huss against the cage.
Huss tries to break free but Quake pushes him back against the cage.
That's seven minutes gone in the round.
An uppercut on the inside fails to land for Quake.
Quake jumps into guard, dragging Huss to the mat.
Huss wants to get up but he can't break Quake's closed guard. He needs to be careful trying to break the legs open, as he's open to submissions here.
Quake pushes Huss off and scrambles back to his feet.
Quake wants to clinch.
Quake gets a takedown into half guard.
Huss looks like he's trying to stand up.
Huss is looking to sinch up a guillotine here but Quake pulls his head out easily.
That's eight minutes gone in the round.
Quake tries to pass the half guard into mount. Huss knows what he's doing though and prevents the attempt.
Huss actively working from the bottom here.
Quake postures up and decides to stand up, from the half guard. The ref calls for Huss to stand up.
Huss tries a head kick but it misses.
Huss misses with a few strikes there.
Quake darts in trying to clinch
and Huss counters with a takedown into side control.
Huss thinks about going for a far side armbar but bails out and retains the dominant position instead.
Quake defending against the ground and pound.
That's nine minutes gone in the round.
Quake wants to escape from the position here - easier said than done!
Huss tries for a kimura. Not really close to a finish though.
Quake tries to escape but Huss is in control.
Huss stands up and beckons Quake to his feet.
And that's the end of the fight!
I would just about give that final round to David Quake.
I think Quake has won this one but let's see whether the judges agree with me. Over to the ring announcer for the scorecards.
Ladies and gentlemen, after 1 rounds of action, we go to the scorecards for a decision.
Judge Andrew Berry scores the fight for David Quake!
Judge William Gold scores the fight for David Quake!
Judge Paul Tew scores the fight as a draw!
David Quake wins by majority decision!
|
|
|
|
|
|
|
|
|
|
|
|
|
|
|
|
|
|
|
|
|
|
|
| S |
C
A |
G |
S |
C
B |
G |
|
S |
C |
G |
|
energy
A | B |
|
hype
A | B |
|
pop
A | B |
|
mgr
A | B |
|
FIGHT
RATING
23% |
|
|
|
|
|
|
|
Undercard bout
|
Coming up we have a welterweight MMA rules bout between Daz Rawlinson (ranked 0 p4p, 0 weight class) and Paul Hardy (ranked 0 p4p, 0 weight class). Hardy has chosen Rock the Casbah as his entrance music. Over to our ring announcer for the fighter introductions!
 |
|
 |
| 186 cm
22
177 lbs
2 - 1 - 0 |
|
180 cm
21
170 lbs
2 - 0 - 0 |
BJJ Blue Belt
Basic striking
Self confident |
|
BJJ Blue Belt
Decent boxing
Determined |
|
| |
|
Ladies and gentlemen. This fight is 1 rounds, in the welterweight division.
Introducing the fighter to my left, fighting out of the red corner.
With a record of
2 - 1 - 0, fighting out of London, Daz Rawlinson!
And introducing the fighter to my right, fighting out of the blue corner.
With a record of
2 - 0 - 0, fighting out of London, Paul Hardy!
The judges for this bout are Donald Grub, James Glass and William Gold.
The bell rings for round one and we are underway!
Hardy with poor footwork there. He got himself in a bit of a tangle, enabling Rawlinson to score with a decent uppercut.
Rawlinson catches Hardy with a nice straight right. He seems pissed - ooooh, it's on now! On like donkey kong!
Hardy wants to clinch up but Rawlinson keeps it at a distance.
Hardy looks to score with a combo but nothing lands.
Rawlinson blocks a head kick by Hardy.
Hardy fails to land with a series of punches.
Rawlinson throws a head kick that misses and slips in the process. He scrambles back to his feet and the fighters circle.
Hardy lets the fists fly and connects with a left straight followed by a right hook.
Rawlinson throws a sloppy head kick and Hardy moves out of range easily.
Hardy shoots in for a takedown. "I don't think so" says Rawlinson as he avoids it easily.
Hardy thuds a left hand into Rawlinson's body.
Nice defenses there by Rawlinson.
A slapping leg kick lands for Rawlinson.
Hardy scores with a nice one two combo and darts back out of range to avoid anything coming in the opposite direction.
The fighters circling - Rawlinson throws out the jab but it was never going to land.
Rawlinson throws a head kick but Hardy moves out of range.
Rawlinson walks into a left hand.
This is a great period of action - very entertaining stuff!
Rawlinson has managed to clinch.
Come on Hardy - let's have some action - none of this stalling nonsense.
Rawlinson manages to break the clinch.
Hardy throws a head kick but Rawlinson moves out of range.
Rawlinson wings a very wild body shot but it does the job and lands to the midsection.
Hardy shoots in with a lovely double leg takedown. Rawlinson manages to land in full guard to minimise the damage.
That's one minute gone in the round.
Hardy stands up from Rawlinson's guard - Hardy perhaps looking for a knockout.
Hardy looks gassed!
Rawlinson scores with a head kick.
Rawlinson slips under a jab from Hardy.
Hardy fails miserably with a takedown attempt.
Rawlinson takes a shot to the body in his stride.
Rawlinson throws a two punch combo that lands nicely.
Rawlinson throws a quick head kick that skims the top of Hardy's head.
Rawlinson throws a series of strikes that have Hardy backpedaling.

Hardy is rocked!
Hardy throws a right and a left that Rawlinson avoids nicely.
Rawlinson throws a right high kick that is partially blocked by Hardy.
Hardy is still on wobbly legs! Can Rawlinson finish him?
The fans in attendance giving it up for the two fighters, who have really let it all hang out in the last minute or so!
Hardy has his head slapped from side to side by a 3 punch combination. That must have hurt him.
Rawlinson cracks Hardy with a big right hand and Hardy goes down!
Rawlinson arches his back and unloads with a massive left and a right! Hardy's eyes roll back into his head, he's out cold! The ref dives in to stop the fight - wow, they were hard shots!
Ladies and gentlemen, after 2:03 of round 1, we have a winner by way of KO (Strikes). Daz Rawlinson!
|
|
|
|
|
|
|
|
|
|
|
|
|
|
|
|
|
|
|
|
|
|
|
| S |
C
A |
G |
S |
C
B |
G |
|
S |
C |
G |
|
energy
A | B |
|
hype
A | B |
|
pop
A | B |
|
mgr
A | B |
|
FIGHT
RATING
100% |
|
|
|
|
|
|
|
Undercard bout
|
Coming up we have a featherweight MMA rules bout between Duncan Higgins (ranked 0 p4p, 0 weight class) and Frank Powers (ranked 0 p4p, 0 weight class). Both fighters look fresh as a daisy as they make their way towards the cage.
 |
|
 |
| 180 cm
23
150 lbs
3 - 1 - 0 |
|
178 cm
20
155 lbs
4 - 4 - 0 |
BJJ White Belt
Decent elbows
Good chin |
|
Decent wrestler
Counter striker
Granite chin |
|
| |
|
Ladies and gentlemen. This fight is 1 rounds, in the featherweight division.
Introducing the fighter to my left, fighting out of the red corner.
With a record of
3 - 1 - 0, fighting out of London, Duncan Higgins!
And introducing the fighter to my right, fighting out of the blue corner.
With a record of
4 - 4 - 0, fighting out of London, Frank Powers!
The judges for this bout are Daniel Bishop, Chris Edwards and Steven Brown.
The bell rings for round one and we are underway!
Powers defending well as Higgins loads up on a big left hand.
Higgins pushes Powers up against the cage in a clinch.
Higgins crunches a lovely knee into Powers's ribcage.
Kneeeeees! The crowd are calling for knees to the body. Higgins obliges.
Higgins using the Thai clinch to land knees to the body.
Higgins lands an elbow that stopped Powers in his tracks for a moment.

It looks like Frank Powers has been cut.
Higgins utilising his Muay Thai to score with a knee to the body.
Higgins stalling in the clinch.
Higgins putting his Muay Thai to good use. He has Powers in a tight clinch and is doing some damage with knees to the body.
Higgins landing knees to the body. They look like they could hurt.
Powers looks gassed!
Higgins stalls.
The fans in attendance giving it up for the two fighters, who have really let it all hang out in the last minute or so!
Higgins lands a knee to the head.
Higgins landing knees to the body. They look like they could hurt.
Powers tries to circle away but Higgins has him pinned against the cage.
Powers goes for a takedown attempt but Higgins pushes him away and we're back to fighting at a distance.
Powers circles away from the clinch attempt.
Higgins moves in looking to clinch but Powers pushes him off.
That's one minute gone in the round.
Higgins clinches with his opponent.
Higgins working Powers over with knees to the body.
Higgins working Powers over with knees to the body.
Higgins landing some nice looking knees to the body.
Higgins unloads a knee to the mid-section.
Higgins lands an elbow that stopped Powers in his tracks for a moment.
Higgins landing knees to the body. They look like they could hurt.
Higgins stalling.
Higgins landing knees to the body.
Higgins is stalling here.
Higgins using the Thai clinch to land knees to the body.
Higgins landing knees to the body.
Higgins putting his Muay Thai to good use. He has Powers in a tight clinch and is doing some damage with knees to the body.
This is a great period of action - very entertaining stuff!
Higgins scores a nice knee to the body.
The fighters are pressed against the cage, as the pace of the fight slows.
Higgins lands a knee to the head there! That was nasty!
Higgins's corner are urging him to control the action in the clinch for a moment, rather than mount any serious offense. I'm sure the crowd appreciate those instructions... not.
That's two minutes gone in the round.
Higgins unloads a knee to the mid-section.
Knees in the clinch landing for Higgins.
Powers is trying to work for a single leg takedown but Higgins pulls him back up using the underhooks.
Powers takes a knee to the side of the body.
Higgins pressing his opponent against the cage.
Knees to the body from Higgins.
Higgins landing some nice looking knees to the body.
Higgins lands a nice knee to the body.
Higgins lands a knee to the head there! That was nasty!
Powers has hold of a leg and is looking for a trip takedown. Higgins avoids it nicely though and we remain in the clinch.
Duncan Higgins has stuffed three takedown attempts in the round now. That's going to take a lot out of Frank Powers.
Higgins lands a nice knee to the body.
A bit of stalling here from Higgins.
Higgins lands a nice knee to the body.
Higgins tries to land knees in the clinch but Powers avoids the damage to the body.
Powers goes for a takedown attempt but Higgins pushes him away and we're back to fighting at a distance.
Powers fails to land with the punch combination there - jab, cross, hook, miss, miss, miss.
That's three minutes gone in the round.
Powers circles away from the clinch attempt.
Powers swats away the attempt to clinch by Higgins.
Powers shoots in and drives through. Higgins sprawls well.
Powers avoids the clinch attempt nicely.
Powers keeps the fight on the outside.
Higgins wants to clinch.
Powers tries to keep at a distance but Higgins has taken the fight into the clinch.
Stalling in the clinch from Higgins.
Higgins gets a warning from the ref for wasting time.
That's four minutes gone in the round.
There's not a lot going on here and the crowd are letting the fighters know they're not willing to tolerate a lack of action.
Higgins crunches a lovely knee into Powers's ribcage.
Higgins is pressed up against the cage. Powers has hold of a leg and is looking to drag Higgins down to the mat. Higgins avoids the attempt though and has circled away. We're back to striking at a distance.
Powers keeps the fight on the outside.
Higgins tries to clinch up.
Powers circles away from the clinch attempt.
Powers shoots in and gets a takedown into half guard. Powers showed some decent athleticism there.
Higgins regains full guard, whilst avoiding punches from Powers.
Powers in full guard, throwing the ground and pound. No damage this time.
Higgins not looking particularly offensive just at the moment.
Powers stopping the sweep attempt from Higgins.
That's five minutes gone in the round.
Powers throwing strikes from guard but Higgins blocks nicely.
Higgins working the defensive guard well to avoid strikes from Powers.
Powers postures up and lands a big shot to Higgins's brow.
Powers trying to land body shots but he keeps hitting the mat.
The referee decides to stand the fighters back up.
Higgins tries to clinch up but Powers circles away and keeps his distance.
Higgins moves in looking to clinch but Powers pushes him off.
Higgins tries to close the distance and clinch up but Powers swats him away and circles back towards the center.
Higgins tries to close the distance and clinch up against the cage but Powers paws at him with a jab and circles away.
Powers throws a shot to the body.
Higgins blocks a jab.
That's six minutes gone in the round.
There's not a lot going on here and the crowd are letting the fighters know they're not willing to tolerate a lack of action.
Higgins tries a head kick but it misses.
Powers shoots in for a takedown - he's clinched up with Higgins but Higgins pushes him off and we're back to square one.
Higgins tries to close the distance and clinch but Powers swats him to one side with an open hand palm strike and circles away.
Powers avoids the clinch attempt nicely.
Powers keeps the fight on the outside.
Duncan Higgins seems to be the more aggressive standup fighter in this bout.
Nice takedown defense from Higgins. No joy for Powers on that attempt.
Higgins moves in looking to clinch but Powers pushes him off.
Higgins wants to clinch.
A swing and a miss from Higgins.
That's seven minutes gone in the round.
Higgins tries to close the distance and clinch up against the cage but Powers paws at him with a jab and circles away.
Higgins leaves Powers with his face pressed against the mat as he sprawls beautifully, defending against a solid takedown attempt.
Higgins doesn't manage to clinch there - Powers circles away.
Powers circles away from the clinch attempt.
Powers avoids the clinch attempt nicely.
The fight stays on the outside here - Higgins looks like he's thinking about clinching though.
Higgins darts in and clinches Powers up against the cage.
Higgins controlling the action here for a moment.
Powers can't get the takedown.
The two fighters are working to gain dominance in the clinch.
Powers is working for a takedown up against the cage. He can't get it on this occasion though.
Higgins lands an elbow that stopped Powers in his tracks for a moment.
That's eight minutes gone in the round.
Well. There's a bit of a lull in the action here and the crowd are starting to get restless.
Higgins will no doubt start fighting again in a minute but for now he's just having a little rest, leaning Powers up against the cage.
Higgins lands a nice knee to the body.
Powers goes for a takedown in the clinch but Higgins prevents it.
Higgins stalling.
Higgins scores a nice knee to the body.
Higgins landing knees to the head.
The pace really dropping off here, momentarily.
Higgins unloads a knee to the mid-section.
Higgins lands a damaging elbow.
Higgins stalls.
Higgins connects with a knee to the head.
Knees in the clinch landing for Higgins.
Powers is working for a takedown up against the cage. He can't get it on this occasion though.
Higgins landing knees to the body.
Higgins utilising his Muay Thai to score with a knee to the body.
A knee to the head by Higgins.
That's nine minutes gone in the round.
Higgins gets an overhook and lands an elbow to the side of the head.
Higgins is trying to wear down his opponent with knees to the body.
Powers tries for a takedown. No joy.
Higgins utilising his Muay Thai to score with a knee to the body.
Higgins landing knees to the body.
Higgins lands an elbow inside that Powers shrugs off.
Powers managing to block the knees to the body from Higgins.
Higgins stalling in the clinch but Powers improves position.
Higgins gets double underhooks to prevent a takedown attempt from Powers.
Knees to the body from Higgins.
Duncan Higgins is fighting for a decision here - he's started to take the cautious approach.
Powers takes a knee right on the jaw!
Powers tries for a takedown. No joy.
Higgins lands a nice knee to the body.
Higgins gets double underhooks to prevent a takedown attempt from Powers.
Powers wants a takedown.
And that's the end of the fight!
Duncan Higgins showed his dominance in that final round.
I think Higgins has won this one but let's see what the judges have to say. Over to the ring announcer for the scorecards.
Ladies and gentlemen, after 1 rounds of action, we go to the scorecards for a decision.
Judge Daniel Bishop scores the fight for Duncan Higgins!
Judge Chris Edwards scores the fight for Duncan Higgins!
Judge Steven Brown scores the fight for Duncan Higgins!
Duncan Higgins wins by unanimous decision!
|
|
|
|
|
|
|
|
|
|
|
|
|
|
|
|
|
|
|
|
|
|
|
| S |
C
A |
G |
S |
C
B |
G |
|
S |
C |
G |
|
energy
A | B |
|
hype
A | B |
|
pop
A | B |
|
mgr
A | B |
|
FIGHT
RATING
14% |
|
|
|
|
|
|
|
Co-main event
|
Coming up we have a featherweight MMA rules bout between Andre Berto (ranked 0 p4p, 0 weight class) and Frank Castle (ranked 0 p4p, 0 weight class). The fight MMA fans around the world have waited their entire lives for!
 |
|
 |
| 175 cm
22
150 lbs
3 - 3 - 0 |
|
170 cm
24
135 lbs
6 - 2 - 0 |
BJJ White Belt
Excellent MT
Good chin |
|
BJJ Purple Belt
Counter striker
Granite chin |
|
| |
|
Ladies and gentlemen. This fight is 1 rounds, in the featherweight division.
Introducing the fighter to my left, fighting out of the red corner.
With a record of
3 - 3 - 0, fighting out of London, Andre Berto!
And introducing the fighter to my right, fighting out of the blue corner.
With a record of
6 - 2 - 0, fighting out of London, Frank Castle!
The judges for this bout are Richard Clark, James Ackerman and Steven Brown.
The bell rings for round one and we are underway!
Castle misses with a low kick as Berto jumps back.
A solid body kick from Berto.
Castle shoots in for a takedown. "Ole!" shouts Berto as he jumps to the side.
Berto scores with a kick to the midsection.
Berto throws a head kick that misses.
Berto looking to shoot here. He's gone for it and he's landed a takedown into mount! Oh, that's bad for Castle!
Castle keeping his composure momentarily, calmly looking to get back to half guard.
Berto is trying to control here but Castle has managed to regain half guard.
It looks like Berto is going to stand back up.
Castle is pressing down on Berto's left leg trying to get back to full guard. He's managed it.
That's one minute gone in the round.
Berto trying to control the position from guard on top but Castle is wriggling around, looking for whatever he can.
Berto wanted to stand there but Castle had control of the position.
Berto stopping the sweep attempt from Castle.
Berto sitting in guard, not really doing much.
The fighters are pressed up against the cage, both looking to find a bit of space to work.
Castle throws some sloppy strikes off his back.
There's a bit of a scramble here and now Castle is on top in guard.
That's two minutes gone in the round.
There's not a lot going on here and the crowd are letting the fighters know they're not willing to tolerate a lack of action.
Castle throws a big right hand that misses.
Berto wants to get back to his feet but Castle is in a dominant position and won't allow it.
Berto trying desperately to get back to his feet here but he's not having any joy at all. He's going to tire himself out if he's not careful.
Berto preventing the ground and pound from doing any damage.
Castle trying to control the position from guard on top but Berto is wriggling around, looking for whatever he can.
Castle passes into half guard.
Castle scoring with strikes to the body and head.
Berto is trying to stand back up but Castle is controlling him
That's three minutes gone in the round.
Berto pushes Castle off and gets back to his feet.
Berto misses with a half-hearted attempt at a head kick.
Berto tries a head kick but it misses.
The sound of bone on bone echoes around the arena as Berto checks a leg kick.
Castle changes levels and looks for a double leg takedown. Berto tries to avoid it but Castle manages to keep hold of a leg and drag Berto to the ground. Berto escapes though and pops straight back up to his feet.
Castle feints and as Berto raises his hands in defense, Castle changes levels and drives through with a takedown into guard.
Castle has the superior BJJ but he's also working some ground strikes into his gameplan.
Castle throwing strikes but missing.
Berto keeping full guard, as Castle tries to pass.
Castle throwing elbows and punches but not connecting, as Berto works some decent striking defense from the bottom.
That's four minutes gone in the round.
Castle stops Berto from standing up.
Berto is looking to stand back up but Castle counters by passing into half guard. Oops... bit sloppy there by Berto.
Berto is breathing heavily.
Castle thumps the canvas. Not on purpose obviously - he just missed Berto's head.
Castle not throwing his punches with enough precision this time.
Castle prevents Berto from standing back up.
Well, the referee has seen enough. Neither fighter is active enough on the ground so he's stood them back up.
Castle shapes like he's going to throw a leg kick but settles back down.
Castle blocks a head kick by Berto.
Berto tries a head kick but it misses.
Castle lands with a right hand.
Berto avoids the head kick by Castle.
Berto tries to close the distance and clinch but Castle swats him to one side with an open hand palm strike and circles away.
That's five minutes gone in the round.
Berto shoots in looking for a single leg takedown. Castle is trying to defend but Berto finishes it well and ends up in half guard. Let's see if he can advance position further.
Castle is working for an escape here. He's hooked one of Berto's legs and he's managed to sneak out and take Berto's back!
Berto wants to get back to his feet.
Castle lands with a nice looking elbow that stuns Berto.
Berto wants to get back to his feet.
Even with his hooks in, Castle manages to miss with strikes from the back.
Castle has got one arm under Berto's chin. This could be trouble... Berto trying to control the other hand but Castle gets it free and sqeezes tight - just a matter of time now! Yep, Berto has tapped out! The fight is over!
Ladies and gentlemen, after 6:18 of round 1, we have a winner by way of Submission (RNC). Frank Castle!
|
|
|
|
|
|
|
|
|
|
|
|
|
|
|
|
|
|
|
|
|
|
|
| S |
C
A |
G |
S |
C
B |
G |
|
S |
C |
G |
|
energy
A | B |
|
hype
A | B |
|
pop
A | B |
|
mgr
A | B |
|
FIGHT
RATING
38% |
|
|
|
|
|
|
|
Main event
|
Coming up we have a welterweight MMA rules bout between Alphonse Roux (ranked 0 p4p, 0 weight class) and Robbin Skoglund (ranked 0 p4p, 0 weight class). Over to our ring announcer for the fighter introductions!
 |
|
 |
| 173 cm
22
184 lbs
2 - 1 - 0 |
|
177 cm
20
169 lbs
3 - 1 - 0 |
Powerful takedowns
Basic striking
KO power |
|
BJJ Purple Belt
Counter striker
Enjoys gardening |
|
| |
|
Ladies and gentlemen. This fight is 1 rounds, in the welterweight division.
Introducing the fighter to my left, fighting out of the red corner.
With a record of
2 - 1 - 0, fighting out of London, Alphonse Roux!
And introducing the fighter to my right, fighting out of the blue corner.
With a record of
3 - 1 - 0, fighting out of London, Robbin Skoglund!
The judges for this bout are Richard Clark, James Glass and James Atkins.
The bell rings for round one and we are underway!
Roux gets taken down but at least he's managed to land in guard.
Roux looking to sweep here. No luck so far.
Roux keeping moving, preventing Skoglund from controlling successfully.
Skoglund preventing the sweep.
Skoglund throwing strikes from guard but Roux blocks nicely.
Skoglund wants to control from the top but Roux keeps moving.
Roux manages to sweep nicely, so he's now on top. Skoglund manages to get himself to full guard.
Roux's corner is telling him to maintain position.
Skoglund keeping moving, preventing Roux from controlling successfully.
That's one minute gone in the round.
Roux stands up and looks to throw the legs aside to pass to side control. Skoglund swivels though and keeps the full guard.
Skoglund is working the butterfly guard. He manages to land a nice scissor sweep and is now in half guard on the top. Nice move.
Skoglund is looking to stall here but Roux recovers full guard.
Skoglund must be cautious of submissions here, given that his opponent has the superior Jiu Jitsu.
Skoglund looking to pass the guard.
Roux manages to sweep nicely, so he's now on top. Skoglund manages to get himself to full guard.
Skoglund working from the bottom, still in full guard. He's managed to get a loose triangle. Roux doesn't seem to be doing much to defend here, obviously he feels comfortable in the position. Roux manages to throw the legs off his shoulder and he's back into guard - no problem.
That's two minutes gone in the round.
Skoglund being controlled here, momentarily.
Skoglund is working from a closed guard but he's struggling to control his opponent.
Roux is frustrating his opponent with some stalling tactics from top position.
Skoglund wants to stand up but Roux is controlling him.
Skoglund keeping moving, preventing Roux from controlling successfully.
That's three minutes gone in the round.
Skoglund is trying to control the position but Roux postures up.
Roux drops back for a leg but he's not going to get it - he lets go and Skoglund dives on top into guard.
Skoglund stands up and waves to Roux to follow him.
Skoglund tries to shoot in for a takedown. He's got hold of a leg but Roux swivels and escapes.
Skoglund looks gassed!
Roux shoots in with a lovely double leg takedown. Skoglund manages to land in full guard to minimise the damage.
Roux won't allow Skoglund to sweep him here.
That's four minutes gone in the round.
Roux is just sitting in guard, looking to avoid any submissions.
Rouxis looking to pass into half guard but Skoglund pushes him away with his feet and jumps on top - now Skoglund is in guard.
Skoglund pushes down on Roux's leg and manages to get into half guard.
Roux trying to control from the bottom.
Roux tries to roll over but Skoglund keeps him under control.
The ref warns both fighters not to hold the cage as they work up against the meshing.
Roux moves into full guard.
Skoglund won't allow Roux to sweep him here.
That's five minutes gone in the round.
Skoglund trying to control the position from guard on top but Roux is wriggling around, looking for whatever he can.
Skoglund wants to pass the guard but Roux is keeping the position.
Skoglund trying to control the position from guard on top but Roux is wriggling around, looking for whatever he can.
Roux is avoiding any damage by keeping wrist control.
Skoglund trying to control but Roux is working from the bottom.
That's six minutes gone in the round.
The crowd are showing their displeasure at the lack of action as loud boos ring out around the arena.
Skoglund throws a big right hand that misses.
The referee decides to stand the fighters back up.
Roux closes the distance, clinches up and gets a nice trip takedown into side control. Very smooth.
Skoglund gives up the full mount - oops, sloppy defensive grappling there!
Roux content just to control the position here.
Skoglund wants to control but Roux is having none of it.
That's seven minutes gone in the round.
Roux is working to isolate an arm here. It's a telegraphed submission attempt but he's gone for it anyway - and he's got it! Roux extends the arm and Skoglund is forced to tap!
Ladies and gentlemen, after 7:21 of round 1, we have a winner by way of Submission (Armbar). Alphonse Roux!
|
|
|
|
|
|
|
|
|
|
|
|
|
|
|
|
|
|
|
|
|
|
|
| S |
C
A |
G |
S |
C
B |
G |
|
S |
C |
G |
|
energy
A | B |
|
hype
A | B |
|
pop
A | B |
|
mgr
A | B |
|
FIGHT
RATING
37% |
|
|
|
|
|
|
|
|
|
|
